Daz 3D is part of 
Connect
DAZ Productions, Inc.
7533 S Center View Ct #4664
West Jordan, UT 84084
Licensing Agreement | Terms of Service | Privacy Policy | EULA
© 2026 Daz Productions Inc. All Rights Reserved.
Comments
lol Says who? If someone likes the look of it being on, who is anyone to tell them they can't render with it on? It's actually not really anyone else's concern if someone enjoys the look of a certain setting and renders with that setting.
That's fine for your personal renders, but since you are now a PA, you should probably do all product promo renders without the headlamp because most people have it off and it gives a very different look. Notice how the skin in those renders are a bluish grey color rather than tan? It changes the whole look... If you personally like that, great, but be aware most people have the headlamp off when you're doing promos.
When I switch on and off the headlamp but use the same render settings in the scene I'm not seeing a big difference in the skin tone, so no, I don't see why it's an issue. And other things make a MUCH bigger difference in skin tone than a headlamp being on or off - if this is your stance then I guess we must make all the PAs use the exact same render settings, the same tone map settings, the same HDRs, etc etc. All those things make WAY bigger difference in how skin looks then whether or not a headlamp is on or not.
Been playing around with these shaders a bit and in general I think they're great, and I like the many options. With some hairs you can get a very natural look, like here:
As a customer I can understand why you might want some consistancy in the promos, but I don't think there should be hard and fast rules as to what settings the PA should use. The primary purpose of the promos is to sell the product by making it look good. Different products may use different settings to acheive this and the customer is also able to select whatever settings give them the best results,; whether it is with the headlamp on or with the headlamp off.
Sorry, did not mean for this to be an argument, just trying to help. Look at the skin on the renders you posted. The ones with the headlamp on, have a bluish grey tint to it, which maybe you did on purpose, with special settings, not sure. I know if I see skin a bluish grey color, I'm less likely to buy it but if the skin is fine and it's just the lighting that is affecting it, it could reduce sales for a PA or the reverse, someone might love the way a product looks in the promos but not see it in their results after purchase because they don't have the headlamp turned on.
Some PAs render with several lights and mention which lights they use. Maybe if you do promos with the headlamp on, mention it on the promo so people can recreate that look if they want. I just brought it up because I know most don't use the headlamp and it does affect things, as you've now noticed...
And if PAs do use unusual lighting or render settings in their promos they should mention it, because people can get frustrated if they don't get the results in the promo and return the product. Slosh showed the hair under many lighting conditions, which is great! I love it when PAs show their products with several lighting conditions! Even better when they show specific lights you can buy in the store. Some PAs even include lights! Lighting is very important!
I think the headlamp shouldn’t tint or alter anything? I thought it was just a white frontal light, giving a photo taken with flash look.
I prefer not to use it, but (especially with an adjusted intensity) it can help in some cases.
Whilst I understand that a lot of people do not like the headlamp being on, I personally think it is not that bad, and I have used it at times. I realise that a professional photographer would very rarely use the camera flash, however a huge number of the photos out on the net, in facebook etc, are taken by amateurs, who will use their flash. How many people here have used their camera indoors and not used the built in flash? So it depends what type of "photo real" you are looking for, as the majority of photos out there, photo real (particularly for indoors) means the use of a camera flash.
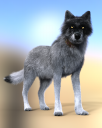
So bought the set and tried it on one of my LAMH figures;
 Colorwerks
 UTT2
UTT2
Is there a good method to use colorwerks with LAMH generated textures?
So I bought it but am finding it hit or miss depending what hair you use. So far I have not had any luck with older transmapped hair but I'm wondering if I'm doing something wrong. It seems like the product may be removing the original transmaps or at least that's what the render looks like, I'll have to check in the surfaces tab next time. I got frustrated with the older hairs so tried a newer one, Lana Hair, and I love the result except the weird thing happening at the part. I applied a base color to the whole hair, then a transmap, which leaves thin strands white, then the third over color which looks fine as a blonde but tends to be really light when I tried darker colors and I feel like I'm doing something wrong, getting such drastically different results on different hair and the highlights coming out way too light... Maybe there should be instructions?
But I love the way it looks here except for the part and I'm not sure what happened there....
@Wonderland "So far I have not had any luck with older transmapped hair"
Some older hairs are mapped differently. Slosh had some warnings and cautions about older hairs in the UHT and UHT2 products. It's probably a hair problem and not a Wonderland problem.
Wonderland... after you put the base color on the scalp, go to the utilities folder and hit the first icon, "Scalp Color" It will take the base texture you used and average the colors in it to tint the scalp. This effect won't be seen in the viewport unless you use iray preview or do a render.
@wonderland, the Lara hair set does the same thing with other hair shaders. I had this problem yesterday with another hair shader set. There was a wide paler band down the hair parting. I messed around with the subD and smoothing levels, plus tried to adjust the scaling of the hair. In the end I had to change the angle of my pose to hide it a little more.
I have the UHT2 set, plus the fantasy add on set, ... and many other hair shader sets. (I'm addicted, lol) but I'm also planning on picking up Colorwerks with my 'Daz Pocket Money' this month. If Slosh's process described above works on the Lara hair I'll be jumping with glee
I don't think anything will help because even if I change the hair on the scalp, the upper layer of the main hair seems to go invisible by the part. It's not a difficult Photosop fix, but still...
Does ColorWerks replace the hair's transmaps as Wonderland wondered? If so, that would be great for OOT's hairs, imo, because I personally dislike the fading dissolve on the hair ends as well as the straight thinness of OOT's transmaps (though the hairs themselves and the blow morphs are great). I've been looking for a quick fix for that.
That IS a very natural look, Taoz, and it's what I've been hoping to achieve in Daz Studio.
Thanks for weighing in, amigo, because your promo renders set a fabulous standard.
OK thanks, I will try that but in this case there may be an issue with this specific hair (Lana) using any shader according to MollyTabby above. It's the top hair that goes transparent as it gets close to the part. I guess having a blending scalp color will look better, but still doesn't get rid of the weird gap at the part that only seems to appear using non-native shaders.
But I'm still having problems with all hair with this: I apply the base color to the whole hair, I click on a transmap and those sections turn WHITE so when I apply the over color, it's going over white and when I use a darker shade for highlighting like a medium brown, the highlights look blonde, they are too light. And I'm in the middle of a render so I can't check but it seems like the original transmap disappear because older hair gets really thick and clumpy, appearing more like the original sculpted model than a transmapped hair product...
Also, I have a small suggestion... There are soooo many icons and colors (which is great!) but a lot to scroll through. It would be great if there were separate folders for base/over/utilities or even more specific like blondes/brunettes/redheads/fantasy... When it's all in one folder, it's harder to scroll through everything and I keep feeling like I'm missing something, screwing something up, because I haven't really been able to get the results from the promos. The Lara hair looks pretty good except for the scalp, but very stringy, almost like painted individual strands which is cool but still like to find out what's causing the sparseness by the scalp...
Doesn't ColorWerks come with replacement diffuse, bump, & those other mas needed for older hair? And new hair for that matter if one is changing to artificial colors like pink or shades of colors the originals didn't come with.
Well seeing as the headlamp light is at a particular temperature then using it will change the color and tint but even if the headlamp was at the same temperature as other light in the scene more light equals changed tints. It's like saying the colors on an object are the same at night as in the day when that isn't the case. The materials are the same, but not the light(s) and so not the colors.
In Smart Content the cute stuffed animal has three folders but the actual hair product is all in one! In the regular content library, all 1162 items are in one folder! And the pieces of the stuffed animal are mixed in.
Yeah, Smart Content is not ideal for using this product (nor many others where more than one step is required). Just right-click on one of the shader options and select "show asset in" then "content library > virtual folder", which will take you to your content library (surprising, I know), where you will see the product organized in subfolders and organized with the numbered steps to properly apply it. Regarding the problem with the white masks, that is the second step, and after adjusting said mask you just need to apply the highlight color. As I pointed out in a previous message, dark colors over light colors get a bit washed out, but not because the mask is white (it needs to be white, as the black-white values are what tell Daz Studio whether to show the base color or the highlight); to fix this problem, just go to the backscattering color, which should be white with a mapped color, and darken it without removing the image (make it a middle gray and adjust from there). It really sounds harder than it actually is.
I don't think that is Slosh's fault, but it certainly makes the product difficult to navigate with Smart Content. I think Daz makes the metadata, and it is often not optimum. This is what I did to make Colorwerks usable in Smart Content.
Now you can go to Smart Content/Shader Sets/Colorwerks and find all the subcategories for Base Colors, Masks, Overlay Colors, and Utilities.
The colors are divided up as you are hoping... not sure how you use Smart Content, but I always go to the Products tab in Smart Content and open ColorWerks from there. In the left side, there is a section called "Shader Sets", and that is where you will see them categorized. Might be the same in the Files tab, but I haven't checked.
As for the "fade" at the roots, especially on older hairs, try clicking the gear icon on "Cutout Opacity" and change the maximum amount to 2. This will then let you adjust the cutout opacity which sometimes fixes those issues. If you have UHT or UHT2, there are presets that do that for you.
Regarding the headlight issue... When I first started ColorWerks, I experimented with the shaders using the Perspective Camera, which has a perpetual headlamp. I got settings I liked, then when I used a different camera with the headlight turned off, it was very blown out and light, as DivaMakeup says... Knowing that the majority of users will not use a headlamp, I reconfigured it "without". There is no way to compensate to make both "pro and con headlight" happy. ColorWerks gets its shine mainly from reflecting the light in the scene, as real hair would. So, if you have a ridiculously bright light (the headlight), it will react accordingly.
I am toying with a Opacity Map replacement/supplement idea, but it will take further experimentation to see if it will work, and I am currently working on a new project. If I should be able to figure something universal (or at least for most hairs) it will be included as an update to UHT, UHT2, and ColorWerks (free)
Thanks @Uthgard, @barbult and @Slosh. All those tips are very helpful!
I'd really love to see this come reality one day, and I really really really hope that Daz enforces this one day. I don't mean that every promo image has to be made with those settings, but couple first ones should all use some "default" settings that Daz and PAs can agree on, and that customers can easily replicate. At least for characters, hair etc. products, where render settings make a big difference. I've bought characters that looked scandinavians during wintertime in the promo images, but when I import those on the default Daz scene, they look super tanned southern californians. I think some sort of default environment would only be a good thing. Sorry for derailing this thread...
OMG! Thanks! This is great! When I went to the product alphabetically (which is usually how I use the regular content library because I find it too cluttered) everything is in one folder, but searching for it that way it has folders and I never knew it was so easy to add something to Smart Content!
Smart Content actually sucks for products like this - everything gets lumped in together instead of separated out as the vendor intended. Any shader set, or really big product with lots of options, or anything where you have to apply in steps, I ALWAYS right click and go to Virtual Folder as Uthgard mentions above. Drives me nuts - if I can create metadata for a non-daz product that groups everything as it should be intended, I can't see why that can't be done in qa.
I've used this twice since I got it, and I'm really happy with it. The first time, I just used a base colour and really liked what I got. The second time, I actually read the description on teh store page and realized it had SO MUCH MORE. LOL. It was like, wait what? shine? overlays? masks? hooley dooley! Thanks to Smart Content I had no idea it had all that other stuff. LOL. The second time I played around with shine and stuff on a second hair and REALLY liked the result. I too, have the OOT shaders and the UHT first set, and also NEVER buy hair add on textures. Colourworks is brilliant and I'm really happy with it!
@Wonderland this is going to be a rather long post, but I didn't want you to think your issues were not important to me. I just needed time to investigate them. I really don't like talking about a specific hair like this, but I think it is necessary in this case. I will break this down in segments:
1. The first big problem is turning on smoothing. Subd is fine, but when you turn on smoothing, any hairs that penetrate the scalp will be forced outside the scalp, exposing it. This is the Lana Hair with original textures. Not ColorWerks. You can see below the hairpart is already very thin:
2. If you add subd AND smoothing, it thins out even more because of the forementioned "forced out of scalp" problem:
3. To get the scalp colored the right way, first apply a base color (as you did), then go to Utilities folder and click "Scalp Color Preset". It is the first one. You won't see difference in the viewport, but will see it in render or if you do Iray Preview. The following two pics show the base color applied, then the base color after using the scalp preset:
4. The UVs for this hair has two problems: First of all, they are upside down. ColorWerks works based on the idea that hair strips are uv'ed with the roots at the top and the "ends" at the bottom. That is not the case with Lana Hair. I included a "Test UV Direction" preset in the Utilities folder. When applied, the roots should be black and the ends should be blue, which is opposite of what we get here, as shown below:
Next, the uvs are too wide for the size of the hair strips, and they overlap one another:
The overlap might not be a huge problem, but when they are wider than the actual hair strips, ColorWerks textures can look compressed, or if they are thinner than the hair strips, ColorWerks can look stretched. This is why I have included tiling options. If the hairs on ColorWerks look like spaghetti, then the UVs are compressed and you must choose a higher tiling amount. The default is 25, there are several higher ones provided. By the way, this tiling is NOT the same as changing the tiling at the bottom of the Surfaces tab. If the hairs on ColorWerks look indistinguishable, like a solid mass of one color, then the UVs are stretched and you must choose a lower tiling amount. This is the case with Lana Hair and also with most fibermesh hairstyles. I ended up using a tile of 5 to get a properly scaled hair width. Here she is with blonde hair and the scalp preset used:
5. Lastly, because the UVs are upside down, you were seeing blond where you wanted to see brown. To overcome this, after checking the UVs with the "Test UV Direction" preset, you may have to put the brown down first, then overlay the blonde and use the Mask Offset Vertical presets opposite of what they appear. In other words, to move the overlay down, click a preset that looks like it should move it "up", and vice versa. Unfortunately, the only way to flip ColorWerks masks (the textures themselves don't have to be flipped) is by using LIE, which you could certainly do. After applying the Mask, click on the little picture in the Diffuse Overlay Strength channel and choose Layered Image Editor. There is a checkbox that lets you invert the texture on the Y axis. I wanted to make ColorWerks free of LIE, so I did not include a preset to do this. Here is Lana Hair subdivided without smoothing, with the scalp colored and the preset used (I went with blonde because of the upside down UVs) and blonde roots, which is what it sounded like you were trying to do):
I am truly sorry that your experience with ColorWerks had to start with one of the situations I alluded to in the product description (that it works with nearly all hairs, though some will not work without some ingenuity). Fortunately, the vast majority of hair sold at Daz or elsewhere is UV'ed root to tip and this workaround can be avoided.
As for your experience with older hairs, one important thing to look at (not just with old hairs, but really anything that has a black-and-white map, such as transparency or bump) is make sure the Cutout Opacity has Gamma set to 1. This makes a huge difference. In fact, that might be the problem with the scalp on Lana Hair. But it can make the transparency look thinner, too. Best to try it both ways. To check/change the gamma, again click on the little picture in the Cutout Opacity channel and choose Image Editor. The gamma is at the top. Sometimes it goes to "0", but should be "1. It is a known glitch with iray. I will see if I can add a preset that sets the gamma on all the maps, but not sure if that can be done with a shader preset. But, I will try. The following pic is Armesada Hair for V4, from 2006. You can see it looks pretty darned good, and I didn't let any of these renders finish.
I really hope this helps you (and others) who are experiencing problems. I worked months on this and made nearly 2000 textures (whittled down for final product) and made about a dozen or more different shaders trying to hit every problem I could think of. I am only human, after all, LOL. But, I want you to be glad you bought ColorWerks, not frustrated looking all over the place for help thinking you are doing it wrong. In this case, the hair you chose just happened to be an example of an unconventional setup.
Best of luck!
Brian (Slosh)
Edited: In my sleepiness, I got the facts about the gamma settings mixed up... it should be set to 1, but sometimes gets glitched to 0 (zero). If it is set to zero, your opacity maps are going to be too dark, thereby making the hair look thinner. In some cases, you might want this, so it is still a good option to try if you think the hair looks too "solid". Sorry if I caused any confusion there, but I have had 8 hours sleep now, lol.
And with that, it is 9 a.m. here, and I have not been to bed yet. So, if anyone has further comments or questions, I'm afraid they will have to wait.
Great response Slosh. Hopefully the details can help other vendors with hair products since hair/scalp issues seem to occur frequently for users.