Wrecked Cars Tutorial. Applying Rust Shaders to Awkward Models (complete series)
 Sci Fi Funk
Posts: 1,198
Sci Fi Funk
Posts: 1,198
PART 1 - http://www.youtube.com/watch?v=kyO53Smu6JE (Finding Car models and bringing into Carrara)
PART 2 - http://www.youtube.com/watch?v=8I9HT0-u1c4 (Organising your car models for shader work)
PART 3 - http://www.youtube.com/watch?v=KyoNAGYJKgE (Shader overview)
PART 4 - http://www.youtube.com/watch?v=rw7_jNxb4CU (Detailed explanations of the shaders)
How to make rusty wrecked cars Tutorial. Using cheap models how to amend shading domains and apply rust shaders to your 3d models.
I start the tutorial by looking for cheap (low poly) wrecked cars. The only ones I could find that were reasonable priced were (inevitably) in max format. So they need converting to something usable by Poser or Carrara.
I briefly explain how to install 3ds max (for poser people).
The only way I could export successfully was via obj format, but the shading domains are all over the place and I couldn't get materials out. Even if I had they would need editing to rusted shaders.
I explain how to model cars to make them look wrecked (move doors, bend plains etc).
I now go through the processes I took in stages. First up reduce and rename the shading domains (there were tons of them when only a few are needed).
http://www.facebook.com/scififunk
http://www.scififunk.com
Thanks for watching. :)
Daz 3D is part of 
Connect
DAZ Productions, Inc.
7533 S Center View Ct #4664
West Jordan, UT 84084
Licensing Agreement | Terms of Service | Privacy Policy | EULA
© 2026 Daz Productions Inc. All Rights Reserved.
Comments
I haven't looked at your tutorial yet, but have you considered for distance shots using some of the mesh cars in Carrara's object browser? They're not great for closeups, but they are low poly and they do usually have simple shading domains.
It's a good idea, worth mentioning and for some maybe ok - however when you see the results (part 4, and sneak peek at end of part 1) I think you'll agree these are better models.
I used to have 60 ordinary cars made for Poser (.pp2 format, which works in Carrara). Unfortunately, I lost them. I have been searching for them without success ever since, because I always use ordinary cars in my scenes. However, I could retrieve 10 of them in one of my work projects. They all have their own individual meshes with their own simple shading domains.
They are not for sale anywhere. If anybody's interested, you can download them from:
https://dl.dropboxusercontent.com/u/11970483/Cars.zip
Just add a folder called, maybe, "Ordinary cars" to your Runtime/Libaries/Props folder..
P.S.: By the way, interesting tutorial, Scififunk, as always.
argus - Brilliant!
Thanks man - downloaded and added to the "collective".
Part 2 - Organizing shaders and shader domains.
http://www.youtube.com/watch?v=8I9HT0-u1c4
Killer!
Can't wait 'til later this evening so I can watch these!
As I always try, I've added these to your tutorials list in the manual.
If you get some extra time (funny, right?), could you look at that and see if I'm missing any?
For those of you who may be relatively new to the forums, the above link has a great list of tutorial videos to enjoy.
Thanks again for your immense generosity, Steve!
Thanks Dartan!
It's a 4 part series. Part 3 out tomorrow, and part 4 out the next day.
You'll be glad to know I've got a few tutorials queued up now. Each time I get stuck on a problem for a while I do a tutorial. I'm on a big scene right now so lots of issues to solve!
I'll take a look at the list tomorrow. I'm shattered now. (3D from 07:30am to 20:45 - a pleasant day).
So cool!
I'm getting closer to full time 3d as well
Love it!
We both have to take care not to let the overtime boogey woogies get us into a slump of despising what we love so much, though - so the Head Wax Sayeth!
Well, I should join you in making products, but for me that's a way off as there is a movie to do first!
In the meantime it's tutorials all the way!
Part 3 added - Basic shaders for a rusted and partially rusted model.
http://www.youtube.com/watch?v=KyoNAGYJKgE
Keep on a makin' tutorials, Man! We need that!
Dartan - Is any of you movie available to show yet? Or is it to be released in one go?
Got a Link to it?
Not even a single frame of it has been shown to the public. The only renders that have been made for it so far are not official. I have loads done - mostly optimizations and scene creation - with all necessary filming cameras, lighting, shaders, and system optimization. But I'm still in the creation process. I really wanted to find an overall "Look" to the whole thing - which is mostly what I've been up to.
Edit:
I have also been working on the script some more - adding, changing, tweaking... and writing the score melodies for much of the series. A lot of the actual performance won't occur until after I have the clips edited into the final movie. But some, like the theme song for the series title, which will be heard in most of the advertisements, are nearly complete already except for the final recording.
The biggest thing that's held me back from actual production renders, is that I was going to try and perform all effects within Carrara. It's amazing how far I've come in that effort - as Carrara can do a lot. You can set your camera in motion through a complete scene. Remove everything in the foreground and render. Carrara renders distant objects really fast. Well keeping the scene intact, you now reverse what you've done and remove everything but the foreground elements you've remove earlier, and composite render that over what you've just rendered in the Scene Backdrop. So you can layer render over render over render...
I keep saying that "Production will officially begin soon" and then I find that I need more assets.
I love Stonemason's Enchanted Forest set. But I was having problems using it as I wanted to. It's too busy and hilly. So that's where "Carrara EnvironKit - Woodlands" came from. (I should really update that thread one of these days! lol) And that is now finished testing and will be released to the store very soon. That product includes some of my very favorite scene rendering techniques optimized for wilderness areas - which is that I want (need) my renders to be fast because I have multitudes of clips to make. Multitudes. Of course, in creating the product and making it as best as I can... I end up learning a lot more. Now I have other areas that I need to be better looking and that render faster - so more EnvironKits will be coming soon.
Forgive the plug! lol
Was just trying to answer your question - and to me, that's not an easy "Yes or No" answerable question - as I truly am 'constantly' working on the movie project - which I intend to be a series of shows either around 30 or 60 minute long each. But that might change depending upon certain decisions made about how I finally pull it off.
Now, as for my own, personal workflow, I would tend to 'Not' do the 30 day trial thing. I know that plain cars can be hard to come by, but rather than buy that kit of cars for sixty, I've already invested in that Advanced Carrara Techniques from Infinite Skills (here at DAZ), hosted by our own Carrara Master, Mr. Phil Wilkes. The techniques he teaches in there about modeling and UV Mapping in Carrara would have a lot filled with beaten cars in less time, and far less headache, I think. But you do mention that as an alternative method right from the start - so...
But that's what I find so cool about this whole thing. First you show us where we can get what you're working with and how to make it available in Carrara. From that point forward, everything else you teach us will work in multitudes of ways - and possibly on things that some of us already have in our collections. Going through and optimizing like you do... this is excellent stuff!
Thanks as always!
You R O C K ! ! !
Dartan,
Thanks man. Can you show the link to the Phil Wilkes advanced techniques you talk about? Was there a quicker / better way to do what I've done?
I'm always up to improve. I just share my conclusions in the hope I can help others get there quicker and, sometimes, some kind person like yourself gives me an alternative.
re: your film. Wow - that's patience. I thought I was patient, painstakingly building up the sets month on month (now year on year its 3.5 years in now).
However not to have shown a single frame!!! That's incredible patience!!
Would you mind elaborating on the layer on layer idea. I am about to do something similar (tutorial coming too!) but if you render a layer and add the next layer behind it don't you run into "bleed" problems now and again?
After all the composite program will use some colour mask to blank out the non-rendered bits and any colour near that might look artificial. I know you can blur it to help, but even so it's tricky yes?
Thanks man.
Scififunk, I wonder if you've tried the "Anything goos" plugin from Digital Carvers Guild. It does prodedural rust.
Her's one car rusted out with this plugin by Carrara guru Mark Bremmer himself:
Thanks man. I never really understood the plug-in. Now I do!
Very useful for those edges and corners.
When the pennies allow it's on the shopping list.
Cheers!
After all the composite program will use some colour mask to blank out the non-rendered bits and any colour near that might look artificial. I know you can blur it to help, but even so it's tricky yes?
Thanks man.Asking ME to elaborate? Oh my... well... you asked for it!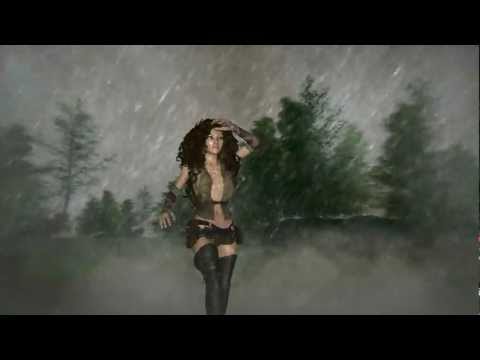 in the Storm, where it took many layers to achieve that shot, which is a perfect tale to tell for explaining what I meant.
You've already seen, and commented on my example of doing this: [url=
Another shameless plug: This whole process was inspired by Phil Staigerman of Project Dogwaffle in his killer tutorial on how to animate a lightning storm while I was working on my Woodlands product. Since my kit has an included lesson plan towards production from starting with a base scene with a realistic sky and sun light, filling it up with easy preset nature blocks, which is all native Carrara, so it loads almost instantaneously, which can end up resulting in creating a 360 degree panoramic background - which takes you to the next bunch of presets, which utilize spherical maps made from the kit instead of the realistic sky and sunlight - so the base in this folder is set up differently. So this is all to show different ways to animate an entire woodlands scenes now matter what sort of shot you need. I am an animator - so I set it up for animation even though that, alone, will also be invaluable to the still artist. So it was only fitting that I finish it off with an animated backdrop that was created using the process thus far in the kit!
So I began by applying automatic animation to the trees, courtesy of the awesomeness of Carrara. Wanting a nasty storm I turned it up pretty good. You do this in the plant editor for each plant. Since I use duplicates and replicated instances, it only needed to be done to a few trees and the rest Carrara took care of for me.
I added an M4 basic character and put a walk cycle on him to make it for the three seconds that the clip will be and had the film camera change with the motion of the character from A to B. I put a target helper object in and had it follow the path of M4 before getting rid of him.
So now we have a camera watching a target helper backing up a little in what should turn out being a very windy scene animation. Which is exactly what I got - but with a problem. A problem I've seen before. One of the main trees in the scene was blowing so much - it looked like it was going to fall! lol But during that much bending, just like when you dial a 'bad' bend in the plant editor, the trunk completely disappears. But in the animation, it only blinked out a couple frames here and there throughout the clip. But it would normally cause me to trash the render, right? It would. Except that I just watched another video about rotoscoping in Dogwaffle. So I used that technique to fix the whole clip in about an hour - including the learning process. This was shortly after finally owning Dogwaffle - and it just paid for itself tenfold and more that day.
But that doesn't count - lets just say that the render came out perfectly. I load that into Dogwaffle (must be Howler) and used the gradient tool to making my lightning. And then I applied the scene brightening effect - just like he shows in the tutorial. Added some rain... just so.
Now after saving that clip, I loaded that scene that I used to make it, and saved it as a new file - then deleted everything but the lighting, effects, and camera, etc., and got rid of the realistic sky in place of that avi clip added to the Backdrop scene setting.
On that I added the volumetric cloud-made fog. This was five scaled down clouds with the animation settings in place and I rotated them along the z axis and moved them each slightly to get a more nasty storm effect - was my hope - and it worked!
I brought that back into Dogwaffle and added a little more rain with less of an alpha selection in Howler. That is the backdrop clip used to make the "Walkin in the Storm video above. For that I put a walk cycle on Rosie and had her drudge through that downpour. What a guy, eh? I should be slapped for that! lol It was then when I realized that it would be cool if the scene lighting reacted to the lightning at the same time as in the backdrop clip. The clip shows up in the scene settings window, so I was able to watch as I worked. So the bonus scene that comes with Woodlands is like the one I used here. But after rendering, I took it back into Dogwaffle for a final rain. But I believe that I also added a very faint version of that rain, following gravity along Rosie as she walks too...
But all of these steps where I'm going to Dogwaffle, it wouldn't have to be so. I like it because it has animation postwork tools that work the way the experts already set them up - so I just click! lol
But if your, say, facing a street that is perpendicular or so, you don't have to put the traffic in right away. Just have the background scene and a few pedestrians on the far side of traffic and render - zip - done. Then load that into your backdrop and use the same camera - or really similar. Now add in traffic - render - zip - done. Now put in your focus material, adjust the lights just right... bam.
Movie software that you already use can handle digital grading for color, blur and other effects that you can use to enhance the clips before use as a backdrop. I tried making an animated spherical map. That would still be rendering frame six by now. lol
Dartan,
That's very kind of you to give me such a lengthy reply to get my teeth into. Thanks I appreciate it.
re: advanced techniques. That's awesome thanks man! There's a whole load of dynamic stuff I haven't even gone near yet (hair, clothes, smoke etc). I have subbed on Vimeo (btw I'm putting up my best stuff on vimeo now in HD https://vimeo.com/scififunk/videos)
I looked at the thread with the frame from the movie on it. I'm not sure which one is from the movie, but those woodland scenes are looking just great! Just great! I'm sure you'll do well with your product there.
Thanks for sharing your workflow. I'm unlikely to use dogwaffle, as I've got After effects for post and Sony Vegas for compositing, but I'll give it a try with those tools and post in a new thread. The layering moment is not far off now, just a few more models on the Eastgate scene and we are ready to experiment.
btw I find myself using the Atangeo Balancer almost everyday I model now. I recommend for any large scene. http://www.atangeo.com/products, just today for example I converted 3 high poly Satellite dishes from approx 930K to 230K with only a slight decrease in quality.
Final part to this series out tomorrow.
thanks Sci Fi Funk, looking forward to digesting this!
It's a pleasure!
Part 4 - Detailed explanations of the shaders and more shaders.
http://www.youtube.com/watch?v=rw7_jNxb4CU
off topic but this is wow steve http://vimeo.com/69072705
Steve,
Yeah, sorry for getting so involved - helps me explain easier.
I'm using DW, but if you have AE, you can certainly help your clips along for reuse within Carrara. And with Vegas you can even render stuff blue or green screen and composite. Set up two cameras next to each other to represent right and left eye views, render everything twice, and Vegas can convert the two clips to stereoscopic 3d! Wow.... double the work plus add some more!
Can't wait to get home and watch this last one.
Are there advantages to Vimeo over YouTube?
Head Wax,
That really is some amazing Cyberpunk footage, isn't it?
If you get some time, you really should watch his "Episodes" from 1 through 7. Really cool show he's got going.
Oh...and it's the bottom image is a single frame from what will later become part of the opening sequence. That's me just reach the top of the plateau and you can see part of the dragon to the right in the sky. The top image was just a test render on some new adjustments to Rosie's hair. Batch Queue is loaded and churning as we speak. The clips where the Dragon lands and lets out a roar turned out really cool! Let production commence, eh?
It's still going to take forever to get the first episode together. Lots of clips. Lots of recording.
Many thanks headwax.
It's nice to share it in HD.
btw I'm contemplating moving up to 1920x1080. Render times are a killer but given the detail in the scene it really helps feel like you are in there!
Thanks for that - two cameras next to each other for stereoscopic 3d - that sounds like fun.
Vimeo has the advantage in that it renders your work in better quality. It's harder to get paid there though. volumes are less (vs youtube), and they want you to pay for features. It's not worth it imho. However they allow freebie users to upload one HD video per week - so that is what I am doing.
Yep it's a major pain. I do hope I'll be able to see it when it's done. Best of luck and keep going my friend!
You will, I'm sure.
It's a pain that I truly enjoy, though!
Posted a news piece here:
http://carraracafe.com/tutorial-wrecked-cars-tutorial-applying-rust-shaders-to-awkward-models/
http://carraracafe.com/
Thanks for the tutorial!
Hey thanks for that. Feel free to post any of my tutorials on Carrara Cafe. :)