BOSS Lights ~ Sharing Preset Settings
 Novica
Posts: 23,925
Novica
Posts: 23,925
BOSS Pro Light Set for Portraits & Promos
There is interest for the BOSS Pro Light Set, and I'm sharing the tweaks I'm doing to create my own custom presets, and thought it would be best to put them all in one thread. (Instead of scattering them throughout my Art Studio thread.) This will give you easy access to "the look" you like. Keep in mind your character's materials will influence your Film ISO and Exposure Value (or Environment Intensity, or all three) and also your Crush Blacks and Burn Highlights, but I provide those for the characters used here for a starting point.
Poses will drastically change the lighting. Even if you do the exact settings, the pose may or may not catch the lighting.
If you would like to contribute your settings, please include the following:
Put the figure at World Center. If the figure is rotated, put the Y Rotation.
In Tone Mapping: Exposure Value Film ISO Burn Highlights Crush Blacks
Environment: Environment Intensity (IF you changed that)
Which preset (from Step 2) you are using (IF you used a preset)
Primary and Secondary Lights:
1. Which light(s) you are using
2. Intensity for each if changed from the default
3. Lumens.
4. Any color changes, provide the color codes.
First, where to find the lights.
Using Content Library, it's Daz Studio Formats>Daz>Light Presets>Boss Portrait Light Set.
What if you already have a figure in your scene? You can right click on the icon (image) and select "Merge Into Scene."
Next, click on that, then Step 1 Load Default Light Set and the icon will show up with the red label "Scene." When you load the default light set, that will load the red mannequin and all the lights. (That's the way I did it, then I just hid the mannequin and color card.)
At this point, in Scene, you will have:
Boss Light Set Props which are the color card, mannequin and backdrop
The cameras, instructions and tips, the Phantom Light.
The Primary and Secondary Lights.
If you are wanting to use the vendor's presets, you'd continue on to Step 2. (If I ever use one of his presets from Step 2 and then change it, I will tell you exactly what I did.)
However, for the first ones, I merely loaded the Default, then I started changing the lights in Surfaces or, if the light was a spotlight, in Parameters>Light.
Once you set up the light presets, you can save them. I did mine in Presets>Lights>and named it !!!My BOSS. The ! keeps it at the top of the lists. Before I start saving it, I select ONLY the ones I used in the Scene pane, that way when the popup shows, I do the "only selected" option.
I will be adding/tweaking presets, so I will tell you what I named my preset, and it may be wise to name them the same thing when you make them. (Mine will begin with NOV and have a number system, any additions or changes will then be A, B, C, etc. So you'll have NOV1A if the second preset uses NOV1 settings then changes anything. Makes it easy for you to load up that preset then only tweak what was changed.
Let's have some fun! I would suggest subscribing to the thread as I won't be doing these everyday and the thread could get buried, but I will put it in my signature and you know where to find me LOL. Hope you can contribute too, there's so many options we can do!
Cathie
New Presets will be updated here, for easy reference.
Novica's Presets NOV1 NOV2
Your Presets (links)
etc.
Daz 3D is part of 
Connect
DAZ Productions, Inc.
7533 S Center View Ct #4664
West Jordan, UT 84084
Licensing Agreement | Terms of Service | Privacy Policy | EULA
© 2026 Daz Productions Inc. All Rights Reserved.
Comments
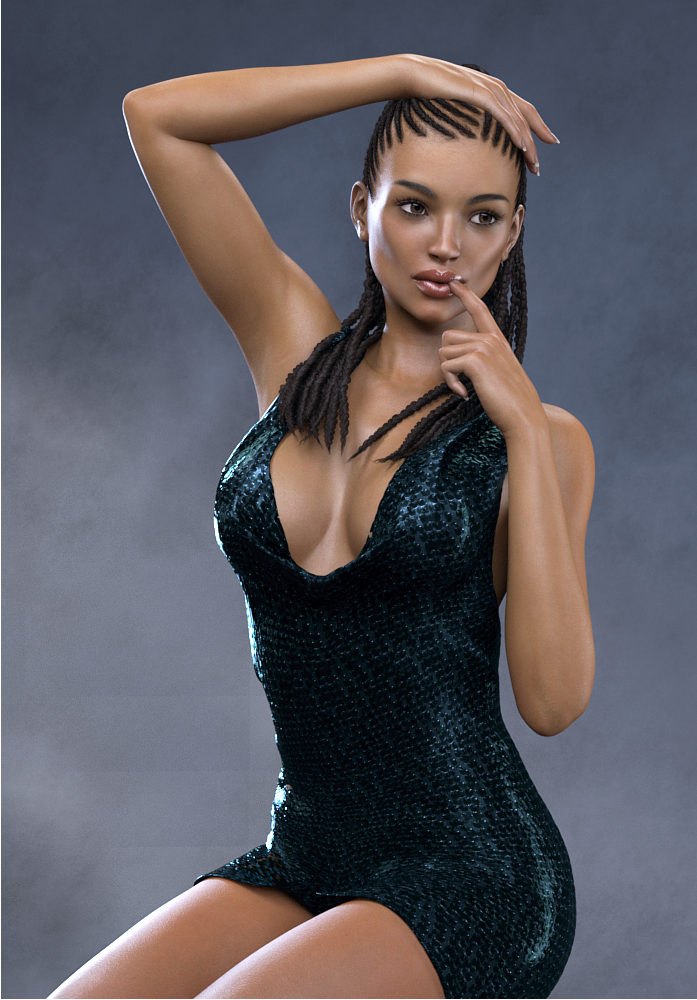
The Primary Lights
ALL OF THE LEFT AND RIGHT IS AS YOU ARE LOOKING AT HER. This figure has a rotation and is NOT directly forward- most of my figures aren't perfectly forward in scenes. She is -41.64 (Y rotation)
Lights 1, 2, 3
THESE DO NOT ENLARGE.
Lights 4, 5, 6
Light 6b and 7.
Secondary Lights
Lights 8, 9, 10
Lights 11, 12, 13 (below)
Lights 14, 14b, 15
Lights 16, 17
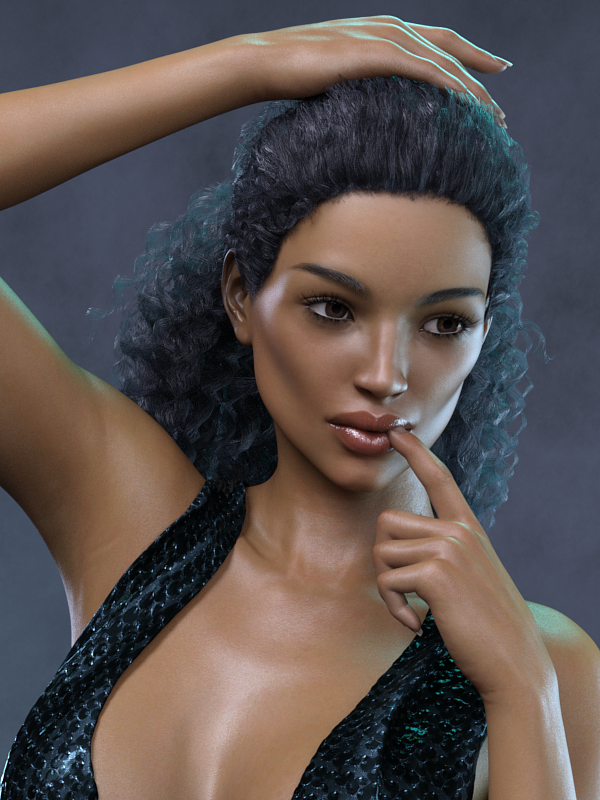
Settings: NOV1 Lights 1, 2, 4, 5, 6, 6b
This figure has a rotation and is NOT directly forward. She is -41.64 (Y rotation)
Character Rotation: Y Rotation -41.64
Tone Mapping: Remember to set your Film ISO FIRST, because it changes the Exposure Value slider!
Film ISO 157
Exposure Value 12.83
Burn Highlights .28
Crush Blacks .25
Presets Used: NONE. Load up the Default, then change individual lights. Remember, spotlights will be in Parameters, the mesh are in Surfaces pane. Here are the Light Numbers and the Lumens. If the light is not listed, it is not used.
1. 575
2. 110
4. 512 Emission Color 0 / 255 / 255
5. 350 Emission Color 0 / 255 / 255
6. 10,000
6b. 50,000
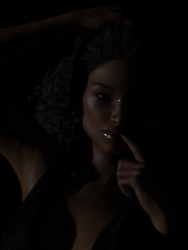
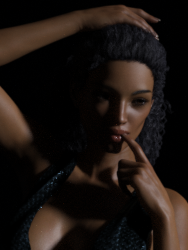
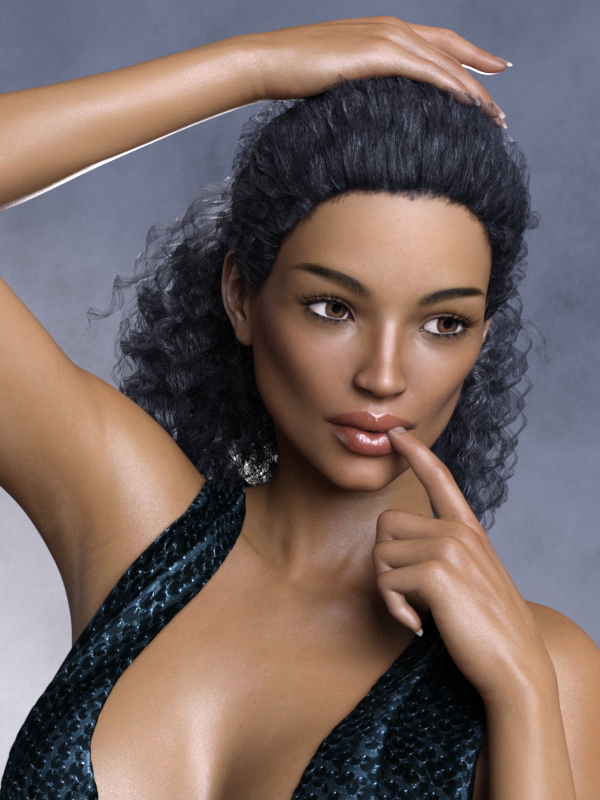
Settings: NOV2BL Lights: 1, 2, 3, 4, 6, 6b, 7
Note: I then saved another preset as NOV2W and changed all the lights that were blue (BL) to white (W)
This figure has a rotation and is NOT directly forward. She is -41.64 (Y rotation)
Refer back to NOV1.
What we're doing- adding light to the right cheek (as we look at it) with two lights (3,7), and taking out light from our left (5) (neck, shoulder, underarm, chest, raised arm) So with this one, the right draws more attention when compared to NOV1. Part of the glow is also removed from the fingers by the chest, and the chest.
To see the differences, it's fun to open both images and click back and forth.
Leave everything the same except for the following:
Turn off Light 5. (That impacts the left side, as you look at it.)
Turn on Light 3. In Surfaces for Light 3, select Back (Light Source) 2000 Color: 196 / 245 / 255 (Light blue)
Light 3 is going to be your right side (as you look at it) and gets the cheek, shoulder, raised finger to the mouth.
Turn on Light 7. 20,000 (much dimmer than default. This gives the sharp rim on the face and neck, our right, so it's more tame here. It works well with Light 5. ) Color for Light 7 is not quite as vibrant 152 / 200 / 211
Settings: NOV3 Lights: 1-7, including 6b
This figure has a rotation and is NOT directly forward. She is -41.64 (Y rotation)
This will be too light for typical caucasian skin- remember, Ana-Sofia is dark skinned. However, you can just lower Exposure Value and get the darker values. This increased the fill and softened a few rims, and also softened the light by the eye on our left.
These were all white lights.
1. 250
2. 315
3. 800
4. 512
5. 750
6. 5000
6b. 8000
7. 10,000
Hi Novica. I finally got the scripts to work by uninstalling and reinstalling. LOL.
Here is one just using the soft light preset. Also made a new camera that was in-between dictance. I had to move a couple of lights just a tiny bit so they wouldn't show.
This is G8M with some M8 and face morphs, Raoul texture.
NOV4
This figure has a rotation and is NOT directly forward. She is -41.64 (Y rotation)
Again, darken your exposure value (increase the number, to 14.25 or more) for typical caucasian skin. This is using only Light 2 for fill, with the secondary lights of 10, 13, and 14b. Refer back to the post on lights to see what is doing what.
Light 2: 518
Light 10: 120,000
Light 13: 10,000
Light 14b: 100,000
NOV5
This figure has a rotation and is NOT directly forward. She is -41.64 (Y rotation)
Refer back to the post on lights to see what is doing what. There is a subtle enhancement- an extra spot of glare on her lips, and her left ear (our left) is lightly illuminated. There is more illumination (different lights, not just an increase in lumens from the last set) on the pointed finger hand, and the shadows make the pointed finger hand stand out. There is more rim light on the upraised arm too. There is also a light on the lower left, shining on the backdrop. These are just a few of the differences, the main one is the left cheek being very pronounced.
Light 2: 450 (dropped the front flood so the other lights are more accentuated)
Light 9: 75 (the underarm and the palm rim)
Light 13: 15,000 (up from 10,000)
Light 14b: 200,000 (up from 100,000)
Click back and forth between this one and NOV 4 to see the new lights.
Here are three protraits done with the BOSS lights. I think they were all done with the 1FF CRT setting, but honestly, I wasn't recording the settings when I made the images. I know that in all cases I turned off or significantly reduced the sceondary behind ear light, because it shows white halos and bad effects on hair. I believe I pulled the camera back in all images also. On the woman with pale skin, I reduced all the lights to 90% lumens, using V3Digitimes Iray Light Manger Pro. That tool is indespensible for adjusting a large group of lights like this.
Drako in HIghlander Outfit
Michael 8
Benita for Victoria 8 with Lilith 7 skin
Those renders look Great Novica and Barbult. I did pick up the product, but I don't have anything yet to contribute.
Here is one full length view I rendered with one of the BOSS full length light sets. This is Michael 8 again.
LOL, this dude looks like he should be in my contest, "I'd rather be on the forums." Did he lose the match?
Nice renders!
I'm happy that you're discussing the BOSS lights. I had bought them and was really pleased with how they work, However, I sent them back because of that white halo behind the head and the red strip on the floor that I couldn't figure out how to get rid of. I think I'll buy them again now that I have an answer to the white halo, now I just have to figure out how to get rid of the red line.
Thanks fgor the tips.
I recently bought them too because they were on sale. The red strip on the floor took a while for me to find out where to click on the eye in the scene tab & hide it too.
I like the ease of setting up different studio portrait style lights but many of the DAZ 3D model's hair and Surfaces settings for the skin and clothing is not quite there on render only although I really can't fault the light setup.
BOSS Lights and Painter's Lights are my favorite light sets. I have the Ultra Light Sets for iRay.
One thing I need to do is learn how to use the iRay Light Manager Pro product I bought in conjuction to with these other light products.
He looks great! Clearly he lost! Man the lack of shoelaces is beginning to feel pretty weird though
The red line is the visual aid to tell you the best camera angle. You can find that under the Primary BOSS Lights group in the scene pane and turn if off by clicking the eye icon next to it.
I think the lights should have been delivered with that set to "Visible in Render" "OFF" in the parameters pane. You really only want to see it when you are setting up the scene in the viewport, not when you render your scene.
I think he is just bored waiting for someone to show up to play with. Or.... maybe he can't play because his shoes would fall off, because they are un-tie-able.
Missing shoe laces irk me every time I get a product like that. I equate it with laziness on the part of the creator. It must be hard to make those, so they don't take the time.
One thing that I dislike about the BOSS lights is that the included Render Settings preset changes things like the dimensions and aspect ratio of my scene. I loaded that preset then saved a new preset for myself which did not include those changes. (Just uncheck the things you don't want changed when you save the Render Settings preset.)
I found seams in the "seamless" backdrop today. It is not caused by the texture map image, but by the low resolution of the backdrop prop itself. I resolved this problem by selecting the backdrop and adding subdivision. I set the render subD to 2.
I used the BOSS PLS 3-FLF-S lights and the 6-Full Length - Front camera. The Character is Jolina with Jolina Dress and Jolina Hair.
Backdrop shows seams at Base Resolution
Backdrop Render Subdivision 2
Preset: PLS-4-FL-RT-C Full Length RT Complex
Camera 7 Full Length Half RT (X:-74.83 Y:155.33 Z:177.73) Rotation(X:-6.09 Y:-24.52)
Lights: 1,2,4,5,6,7,13,14b,15,17
Light 2 luminance changed to 600
Light 6 color changed to light blue rgb 173 216 230
Light 14b color changed to light orange 244 200 117
Backdrop Purple Deep
Mitchell filter 1.00
FW Galan HD for G3M (Y = 12.51, Y rotate = 13.12)
I let samples reach 5,000 overnight. Feel free to recommend light changes, etc.
Thanks so much! I don't recall seeing that in the Scene pane, but then I had no idea what I was looking for. Will know what to do when I repurchase the lights.
@dawnblade Very, very nice! Really like the rim on our right, noticeable but subtle too.
Thank you @Novica, and many thanks for this helpful thread for these lights.
After a lot of patient (for me) tweaking of lights, I got something OK with this set. This is Dylan and I think the model is awesome - great skin, eyes, lashes, and morphs!
These are the things I changed from the default loaded set:
1-Softbox Rt 500 (Default 750)
6-Rim Behind RT 128000 (Default OFF)
8-Softbox 3000 (Default OFF)
13-Behind Head - I unlocked and moved a little to right to hide it behind him
14b-back Wall 99000 (Default 222000)
Background
Textured backdrop - used Gold Foil and changed colors
Base Color .041 .016 .016
Diffuse Overlay Color .24 .14 .14
metal Flakes Color .12 .30 .40
Used Face Front Camera - moved it up and back a little
That is awesome, @luci45! Can you share specifics about which light settings you used, what you changed them to etc.?
Thanks. I will be glad to. I saved the scene and will look it up this afternoon and post here.
That would be great! Thank you @luci45!

OK, I edited the original post so the settings are with the render. I didn't change very much even thaough I fiddled with it a lot.
Awesome! Thanks for doing that!
Luci, that's a very nice portrait of Dylan. I like it much better than the promo images.
@luci45 Thanks for including the settings, he looks amazing!