FG Bottom Floor
 digitell
Posts: 598
digitell
Posts: 598
FG Bottom Floor-https://www.daz3d.com/fg-bottom-floor
This is a beatiful setting. Thank you for creating this, it will be perfect for what I am creating which is an image
for the back cover of a murder mystery. The issue I am having is not your product but it is my lighting. When I render this, preload straight out of the box, the render has a yellow tint to it and I would like for it to look like it does in the promo images, which is white.
Does anyone know what lighting the vendor used to get the lighting on the promo images? Any help would be greatly appreciated!
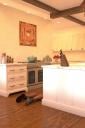
I have attached the render I get when rendering straight out of the box.

Daz 3D is part of 
Connect
DAZ Productions, Inc.
7533 S Center View Ct #4664
West Jordan, UT 84084
Licensing Agreement | Terms of Service | Privacy Policy | EULA
© 2026 Daz Productions Inc. All Rights Reserved.
Comments
The outdoors HDRI is key. What are you using and do you have the light coming in the window.
(Straight out of the box there's a body on the floor? :lol: )
Sorry about the "Straight out of the box" comment, what I meant was no shaders or lighting was added. I did add the body and the knife block, but that should not have changed the lighting to look yellow. It rendered yellow before I added the body and knife block too. I added no lighting.
Delete the HDRI that is in the Environment Dome and see if that makes a diferenc.
The first image in the product page is definitely yellowish (4000K -ish lighting). Are you trying to add the yellow back or remove it?
Thank you Fishtales, I will give that a try! :)
jmucchiello, Yes there is a hint of yellow in the promo image, but the one I rendered was very yellow. I want it to just be like the promo image...more white than yellow.
Have a look at the ceiling downlights emission colour in the surfaces tab.
BTW, I don't know if you've noticed, but in your image above you can see that there are some downlights clipping the wall.
all that storage space
it's like an Ikea drawer organisers fetish dream
do they all open?
yes, I noticed about the lights too. The emission color for them is black.
the storage space! Amazing. Dont know if they all open or not, have not tried them. I did try removing the celing and that took away the yellow! So I will work with that. No idea why the celing gives it a yellow ting..emissions are black. Mystery...........
Can you manipulate the luminosity value of the lights? I can't imagine that the emission colour is actually black, it's normally a creamy-white. I can't check for myself at the moment as I'm at work, but I suspect you're looking at the ceiling surfaces. If the downlights are an integral part of the ceiling and not a separate prop, they will have their own child tier in the surface tab, under the main ceiling one. I think you may be looking at the parent group surfaces.
Okay, if they are a separate prop, there will be separate child tabs for the frame and the lamp itself. FG usually calls this LED for downlights. You should find the necessary sliders under the LED tab.
@digitell
Select the ceiling lights in your scene and then look for the Ceiling Light Glass material in the Surfaces panel. I can almost guarantee that the emission temperature will be set to a value below 3000. FG uses emissions values that are technically correct for soft interior lighting but, in practice, make everything a somewhat unrealistic hue.
Set it to 5000 (natural daytime sunlight) and work from there if it's too white.
FG's sets are good value and a great place to start from but there's always an element of DIY with them in my experience, especially if you need any of the elements to be interactive.
If you're going to be doing this sort of thing regularly perhaps the Iray Light Manager from the store would be useful - it saves messing about with finding all the different lights and material zones for every light in the scene and allows you to edit them en-masse: https://www.daz3d.com/iray-light-manager-pro
Yeah, the color is technically accurate, but we're not used to seeing it that way as our eye/brain combination automatically adjusts the "white balance.": Those of us old'uns who grew up using photographic film used to have to deal with this constantly, as photofilm either recorded "true" color, aka "daylight", which looked very red indoors under incandescent bulbs or greenish under flourecent lights, or were chemically balanced to be more sensitive to the cooler ends of the spectrum, thereby making indoor lights look more "normal." As a result, you either had to use a filter in front of your lens when using a film that didn't match your lighting to balance it out, or in the cameras that used cartridges, like super 8 cameras, most of the film was either indoor balanced "Type A" or General Purpose "Type G", which the camera could read by plastic cutouts on the cartridge, and when shooting outdoors you had to switch on the daylight or sun switch which dropped a indoor film to daylight filter between the back of the lens and the film gate. Now you can just push a button and your digital camera just reads the color temperature of the light and sets everything else automatically... Damn kids are so spoiled these days. Next thing you know, they'll stop making them have to learn how to write in cursive. Oh wait, they're not doing THAT anymore either, I guess they put a dang smilie face down now instead of writing a signature on legal documents. Grrr...
@Cybersox, "Next thing you know, they'll stop making them have to learn how to write in cursive. Oh wait, they're not doing THAT anymore either, I guess they put a dang smilie face down now instead of writing a signature on legal documents. Grrr... "
Actually many schools are bringing back cursive as it has been found kids don't know how to sign their legal signatures, amongst other things. And I think I saw something about when you take notes 'by hand' instead of by tape or typing, you retain the information better. I am not sure about that. I have been a continuity editor and outlining a draft drills the details of the story into my brain; as well as when I did complaint reports and even ten years later I was able to recall details of one case, the lawsuit and the timing and saved my company a second lawsuit from the same person for the same issue.
10 years ago, my son's 4th grade teacher taught cursive to the class. My son was not one who grokked it. He has issues with spacial relations so all that swooping and gliding were lost on him. He prints his name. And his letters are rather distinctive.
@digitell
IIRC, Fugazi1968 sometimes renders his promo scenes in Blender rather than in DS. Check his channel on youtube or PM him for an advice: https://www.youtube.com/@3dmegaverseJohn
So, even if you loaded the scene of Ready to Render from the product, you wouldn't get the ligthing result like the promos. But if you want to have a whiter scene, one of the quick tricks is to change White Point to a yellowish or medium yellow color ~
Thanks for the tip about using the White Point to make a scene look whiter! Hopefully the OP finds it useful as well.
Okay I found the angle for the shot the OP was using and without any modifications of the "ready to render" Scene file, I got a similar picture.
The Environment is the default Ruins image with all defaults and Dome And Scene is selected. (Exposure = 13).
This is what V3D Light Mgr Pro reports. All the color temps are 2900K. That will give a very yellowish hue to everything. I did the second render with temp at 5500K. (I didn't let the renders run to completion. Convergence was around 25% when I aborted the renders.)
Oh, and someone asked about the "cut off lights on the ceiling". The wall behind the stove doesn't reach the ceiling. Those light are "behind the wall" in the next room.
And the additional info about the cut-off lights, That's very strange.
Regards,
Richard
They aren't cut off. It's just the camera angle.
Yes, I did read your post about the wall not reaching the ceiling, which is why I thought it very strange.
Regards,
Richard
It's a common interior design when ceiling beams are visible. It's an interior wall that has no load bearing so it can be decorative.
don't forget since it's a Fugazi product
Code66 flatmap optimizer https://www.daz3d.com/code-66-toolbox--volume-5
you will take off at least a gigabyte of VRAM on most of their sets
(I don't own this one but there hasn't been an exception for me yet)
I'm not sure what's going on there, but there's something funky. In this image the two overhead beams across the ceiling appear to cut off in mid air, so instead of supporting the ceiling it's hanging from it. The thing is, that's NOT how it looks in the grey model render in the promos, where those beams connct to the floating wall. That makes it look like that centerwall was originally in a different place, closer to the kitchen island, and was then moved back to make enough rooom to walk freely between the two with the cabinets and appliances, and the PA forgot that beams should have been extended as the only purpose they seemed to have served was to frame the floating section. Brings a whole new meaning to the carpenter's rule of measure twice, cut once"...
I didn't really explorer the room. I might own it but that doesn't mean I've used it for anything serious. :)
I had a brief play with this one yesterday but didn't render it. Out of the box it is a bit too warm. I changed all the lights to 5000k temperature and reduced the ceiling light lumens to about 130,000. Made the scene a lot more realistic. I also deleted the incomplete beams on the ceiling. Although I suppose they could have been "fixed" by duplicating the node and repositioning the new one to blend through.