Making an object
 jmucchiello
Posts: 2,521
jmucchiello
Posts: 2,521
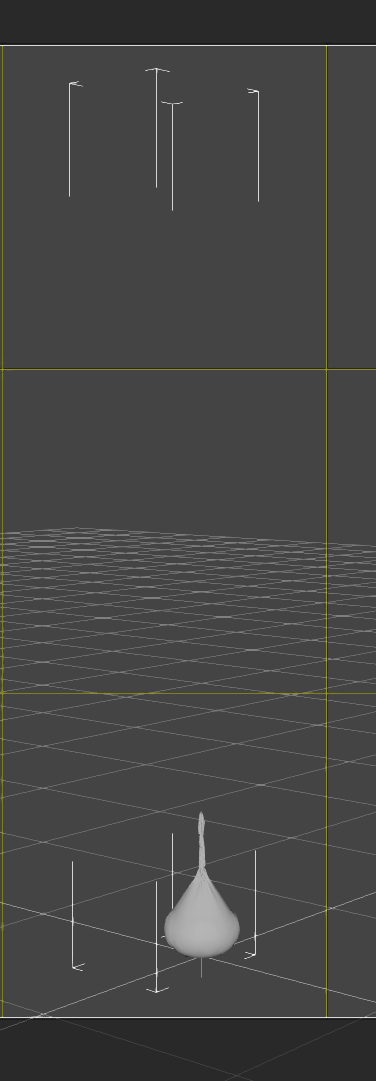
I ran a simulation on a plane to turn it into what you see in the image. I froze it and then exported it as OBJ and imported it. How do I get rid of all that dead area that Daz thinks the object occupies? It's just a bag. There shouldn't be anything towering over it And it should just be the width of the bag. Is there some setting in export that I missed?
Untitled4.png
376 x 1081 - 31K
Post edited by jmucchiello on

Daz 3D is part of 
Connect
DAZ Productions, Inc.
7533 S Center View Ct #4664
West Jordan, UT 84084
Licensing Agreement | Terms of Service | Privacy Policy | EULA
© 2026 Daz Productions Inc. All Rights Reserved.
Comments
The bounding box in DS covers the whole geometry of an object... i.e. vertex positions of the geometry. For instance, even if there's only one vertex on the top but cannot be seen, the bounding box will cover it ~
You may try: with Geometry Editor, Vertex Selection mode, Marquee selection, then frame select the top area, see if there's any vertex can be selected ... Also check in Tool Settings > Vertext Selection tab > Details
also even if you hide vertices, the points still export
I see them all on hidden figures in Carrara's vertex room for example exporting fitted draped clothing to create morphs, doesn't seem to prevent morphloader from accepting them though as it only reads faces (ie don't get the vertex order doesn't match dialogue)
but DAZ will set the bounding box to include the invisible dotty figure if it's reimported as an obj
Yea, even if the vertices (converted polygons) are hidden, they'll be exported so as to preserve the vertex count as well as UV. Then you still can import the exported object with Morph Load Pro.
No clue what Morph Load Pro is.
Geometry Editor did reveal one tiny polygon at the top of the box. Lassoed it and deleted it. And the box now only encompasses the bag itself.
And FYI, when building that I never hid any polygon. I was just deleting them as my simulation created frayed ends. :)
it's a way to load morphs you create for stuff after modifying an exported obj of the figure or prop
something worth learning about if you want to make stuff
different dforce drapes can be loaded as morphs for example
Are there any good tutorials because loading the dialog tells me nothing about the purpose of Morph Loader Pro? When is it needed? I don't have anything dynamic going on here.
I've attached a piece of the final render using the bags. If I get bored, I'll create a decal with a big gold colored dollar sign and slap it on the bags. :)
probably Jay Versluis (WP Guru) would have some, I would need to Google
cloudflare not being kind to me
will just link his channel
https://youtube.com/@wpguru?si=GbPDRpcsjm9SWZVv
Google will also help but not me today posting here!
OK, back after an hour, hope the badgateway has shut itself
You did well with your money bags
I am only pointing out there are things like morphloader because once the modelling bug bites, tools are handy to know
any primitive subdivided and bits cut out with the geometry editor can be an outfit with some clever posing, draping, exporting and teimporting as you already realise
many are daunted by actual modeling softwares so it's a good start and tools that are in D|S can go a long way so worth learning about
its a shame there isn't a manual
This took a lot of expermentation. The final run was three primatives:
The timeline ran for 200 frames. Starting at 60, the torus starts spinning and shrnking until the major radius is 3cm (3% scale)
The geometry editor was used to trim the "handle". Then it was exported to OBJ and reimported.
A dFormer was used to give the handle a curved top and that was exported and imported.
A burlap texture was put on the surface.