Any Advanced Magnet Deformer Tutorials?
 3DIO
Posts: 625
3DIO
Posts: 625
I've been reading that thread on here about dForce, and it got me wondering about Magnet Deformers, wondering if there are any such threads that go deep into them, like working with Magnet Maps and stuff like that. Also, how to create morphs from them and mirror them between limbs directly in Daz Studio.
I'm only after the free stuff, but unfortunately the search on here is as good as uselss to me most times, and so I've not found anything. PDF or video, it doesn't really matter as long as it covers from the basics to the more advanced stuff I just mentioned.
Any info on this stuff much appreciated.

Daz 3D is part of 
Connect
DAZ Productions, Inc.
7533 S Center View Ct #4664
West Jordan, UT 84084
Licensing Agreement | Terms of Service | Privacy Policy | EULA
© 2026 Daz Productions Inc. All Rights Reserved.
Comments
Weightmapping a dForm is fairly simple. It will inherit the effect of any field, so if that is unhelpful move it out of the way. With the Node Weightmap Brush active and the dForm selected, in Tool Settings you will see Influence Weights in the list of available maps - just click the Add button. Now you can use the standard weight editing features to add or remove influence - do this with the dForm having soem effect, rather than painting blind.
Spawn Morph is a button in the dForm pane, just have the object selected and then pick the dForm(s) you want to include from the dialogue that opens.
This tutorial is focused on a cave but uses weight maps on a push modifer to deform shapes. Not a dForm but the sue of the weight maps is similar.
https://www.daz3d.com/forums/discussion/179601/how-to-use-a-push-modifer-making-a-cave
As for : How to create morphs from them and mirror them between limbs directly in Daz Studio:
0) Firstly, dform the target mesh by using dFormer(s) as others said. Then open dFormer plugin via: Window > Panes > DForm. (screenshot 1)
1) Check the options : Delete Applied D-Former(s), Apply Spawned Morph, click Spawn Morph... button. Name the morph (e.g. dForm Left Shin). Accept. (screenshot 2)
(* Be noted that you can keep the dFormers by unchecking Delete Applied D-Former(s)... but you need to zero the DForm dial on the figure after creating the morph...)
2) Set the figure's Resolution Level to Base, export the figure to OBJ file via File > Export... Name it for the other side, e.g. dForm Right Shin... (screenshot 3)
3) Import the OBJ file via: Edit > Figure > Shape > Morph Loader Pro... by using the settings in (screenshot 4)
4) Dial the imported morph to check the symmetrical mesh on both sides... (screenshot 5)
Many thanks for everything posted, it's very much appreciated :-)
I'm working my way through it all, back and forth and getting the hang of it fairly well, but I'm a bit stuck with weight-mapping a D-Former using that other mode. I've followed what Richard said, and it does work, but there's another option as well.
The version Richard describes is the "Apply Default Settings" option, but there's another option called "Weight Map Mode". And if I choose that option, it creates a map, but if I then follow the same selection and editing techniques as with "Apply Default Settings" mode, it does nothing. Sculpting does change the colour of the weight points, but doesn't effect the geometry. It feels as if I'm missing a step, but I can't think what.
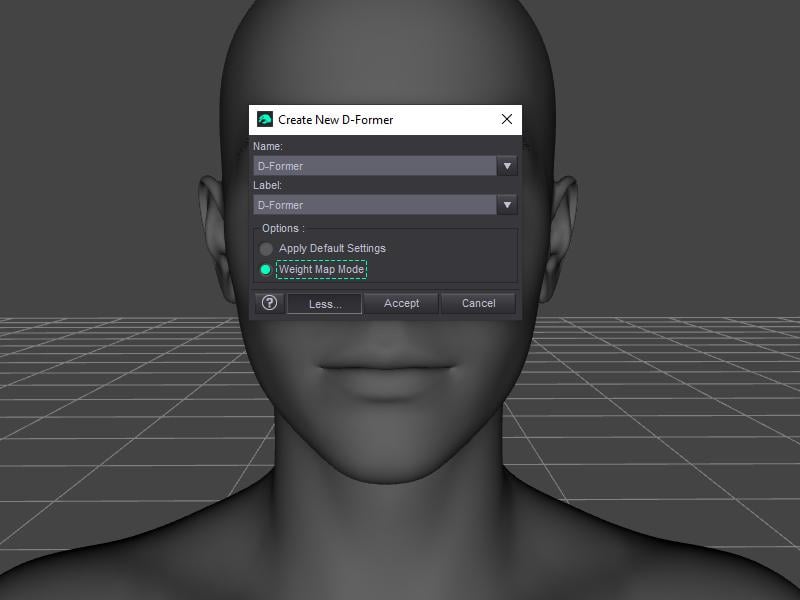
This Weight Map Mode works with no influence field and as default, it fills 100% weight on the figure that the DFormer is attached, so the easiest way is to:
1) With Node Weight Brush tool, remove Influence Weights firstly, i.e. right-click on Influence Weights in Tool Settings pane > Remove Selected. Then click Add Map button to add it back.
2) Paint weight or fill + smooth weight on the target mesh, then deform.
Have you done anything to the dForm node, so that there is something to see? With the weightmap mode (which I had forgotten about, sorry) the map is pre-filled at 100% so the dForm will hav a uniform effect - you will need to erase or attenuate it in places to see any change in relative shape (e.g. paint on the surface with the Node Weightmap Brush tool while holding alt/opt down, or select some vertices and right-click>Weight Editing>Fill Selected)
@Richard
Ah righ, got it. Without it having a base, I thought it worked different and I'd forgotten to change Scale on D-Former node. It's working now, although sadly it's not what I was hoping it would be. I was hoping it would work much like the Push Modifier and be based on the normal direction. Unfortunately, it uses a centralised point of influence.
@crosswind
Thanks for the mirroring stuff etc, will check that out later today, cheers!
@RGcincy
Thanks for the heads-up on the Push Modifier. That is actually more like what I was hoping the Weight Mode D-Former would be, so it's great in that respect, although sadly still not a doable solution (for me) since any areas angled inwards towards each other crash into each other. It would work as a fixer on occassion but not for what I was hoping, which was basically an alternative to Geometry Sculptor.
I really wish Daz would release Geometry Sculptor as a paid plugin that doesn't require internet access. It's (honestly) one of the reasons I'm thinking of calling it a day with this 3D lark. It seems you cannot win. Poser has sculpting built in but requires an internet connection, so that's out. Daz is even worse by requiring an internet connection and putting it behind a subscription (I don't rent software, so that's out on both counts). So that leaves the new Open Source product, Pose Studio. SInce it's Open Source perhaps we'll finally see a figure-centric software product that has all the feaures that such a product should have to make it enjoyable to use, and be productive:
- Hardware accelerated Hair and Cloth (without favouring any hardware brand)
- Live Rendered PBR in Viewport (without favouring any hardware brand)
- Live combable hair in Viewport (without favouring any hardware brand)
- Procedurally driven walk, movement and animation tools (without favouring any hardware brand)
- Sculpting (without favouring any hardware brand)
- No internet or activation required
How hard can it be?
The only salvation of course, is Blender. But even with the amazing conversion prducts out there to go from Daz to Blender, it's still too much messing around and is why I never get anything done. This would not be the case if figure-centric products like Daz Studio and Poser actually featured the sort of features they should all have by now, by default!
The problem is we live in a world where developers have completely forgotten the tried and tested method of releasing a product, charging for it, fixing the bugs that people report, and then changing again for the next version.
So for me, this hobby has become a chore. Hobbies are meant to be enjoyable, but this hobby is nothing more than a catastrophic train crash that I'm currently losing interest in at an exponential rate. This thread was, I suppose, a last attempt to try and salvage a workable solution in order to hold my interest enough to contiue with it. Who knows, perhaps Pose Studio will deliver the goods. If it does than that will put an end to software subscription and internet connection requirements of Daz Studio and Poser for sure, and I'll be moving right on over to it!
Life is finite and way too short for this nonsense.