2025 - New Freebies from CEF
 Catherine3678ab
Posts: 8,556
Catherine3678ab
Posts: 8,556
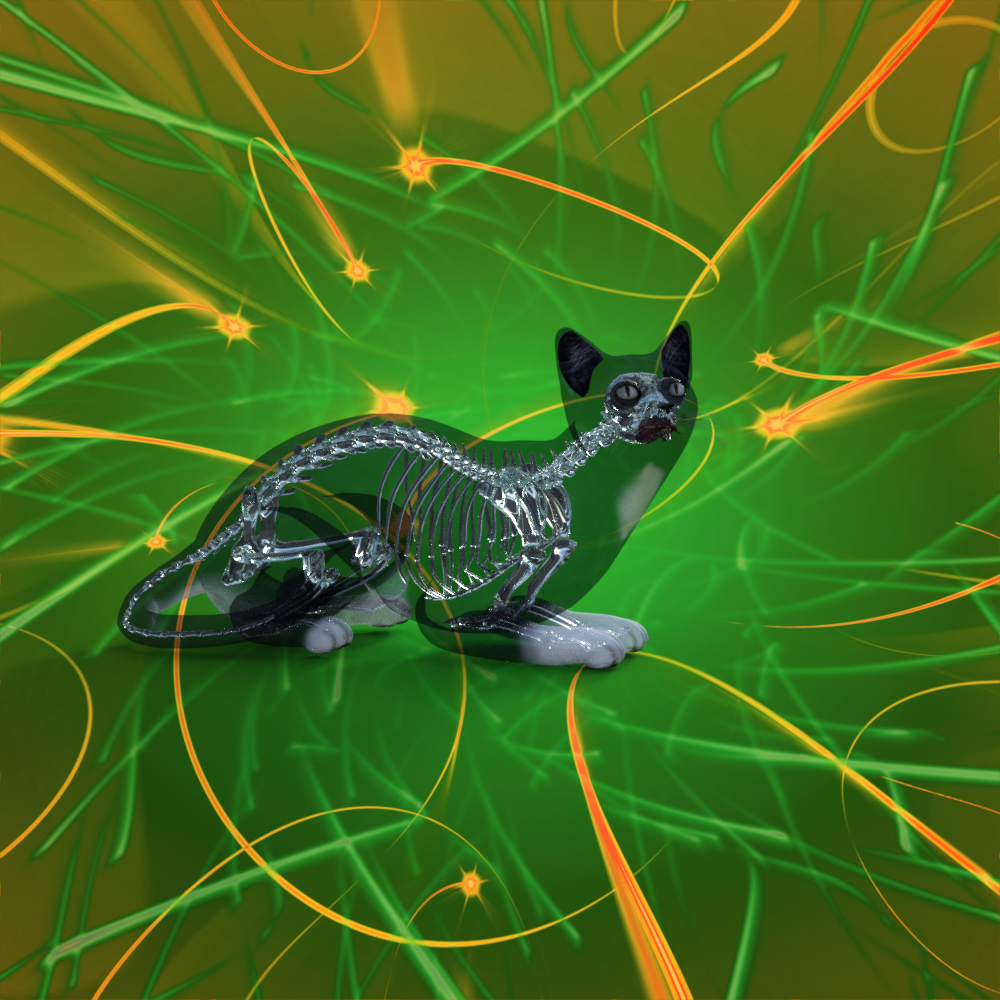
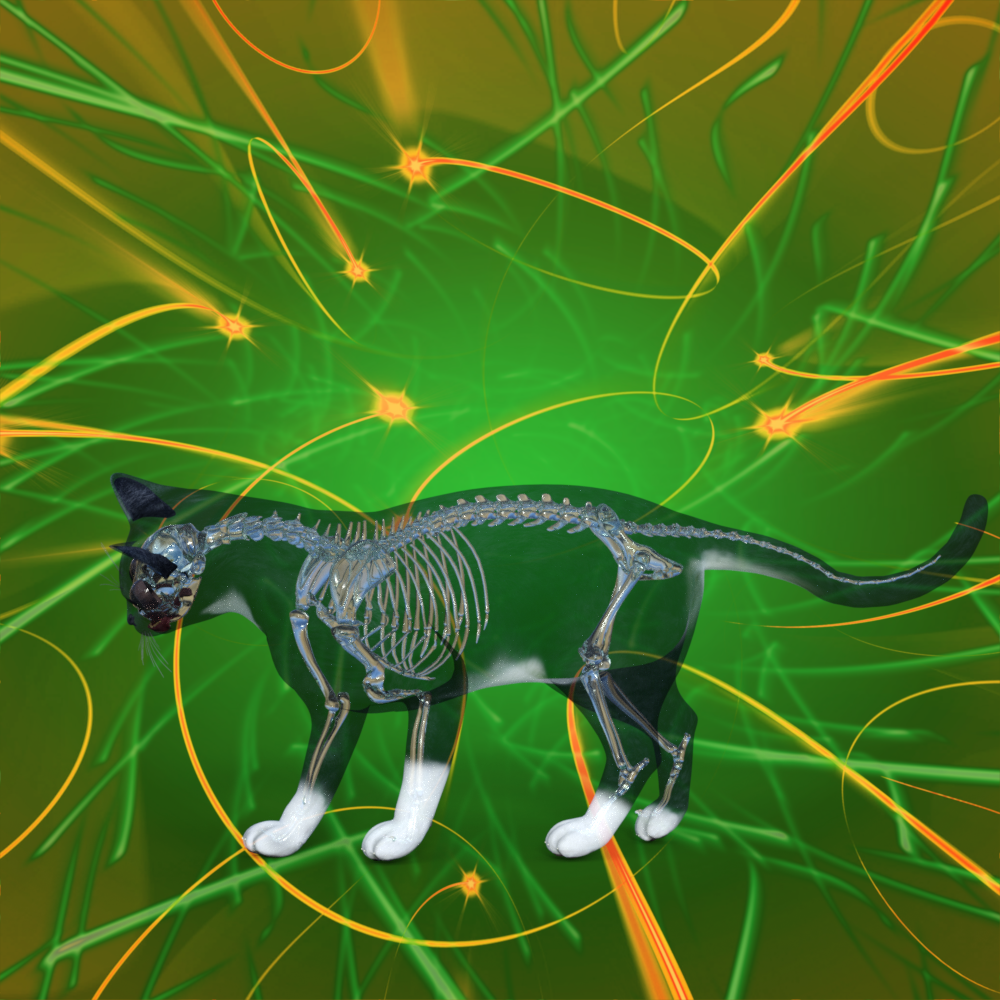
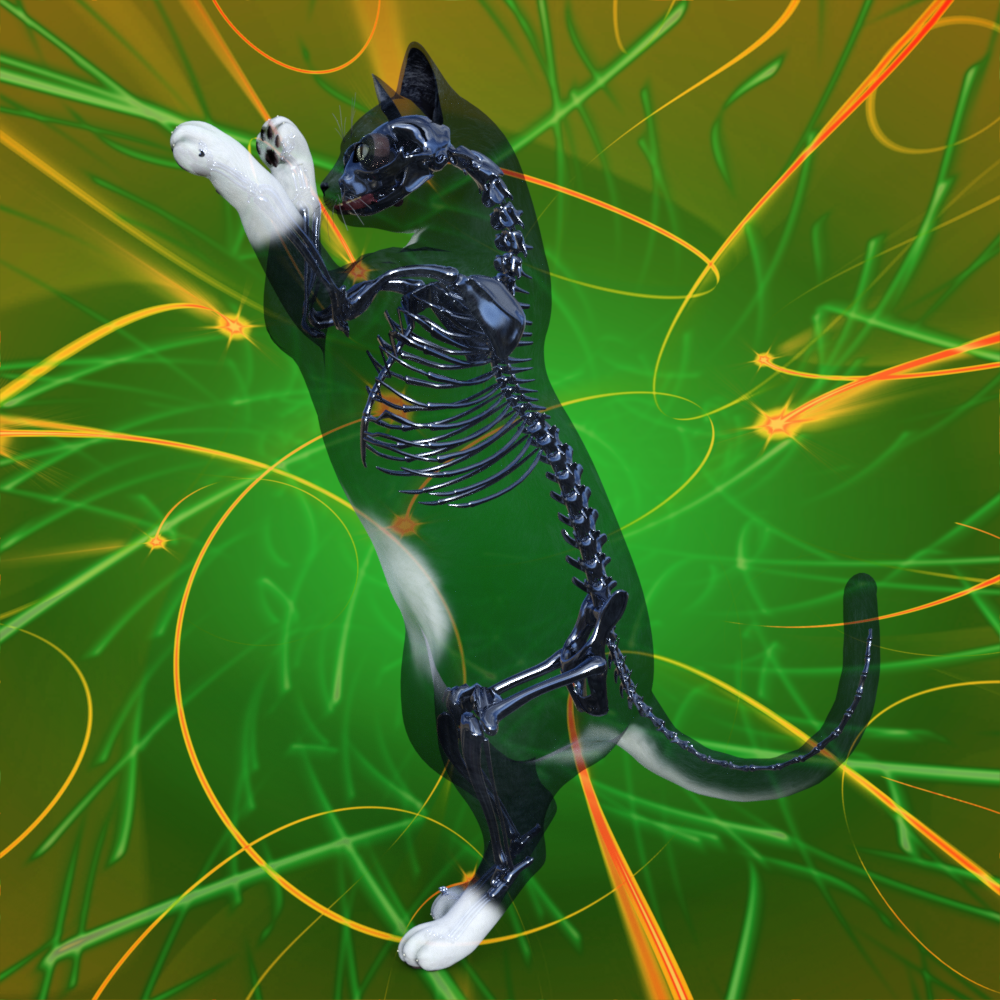
To start off this year's new treasures whatever they all might be, here is a very basic pose for the beautiful cat skeleton. I used it to test out the concept of making it into a skeleton to fit inside the Daz House Cat, turning the skeleton into a clothing piece and thusly enabling it to pose along with the Daz House Cat. The transparency of the house cat was turned down to enable seeing the skeleton inside the cat.
Required products:
https://www.daz3d.com/cat-skeleton-mr-rattlepaws
https://www.daz3d.com/daz-house-cat-with-dforce-hair
Required program: Daz Studio
Some knowledge to get an .obj file out of and back into D/S. I use Hexagon.
Step1: Apply Pose to Skeleton, somehow get the .obj out of D/S.
Delete skeleton from scene.
Somehow get .obj back into D/S.
Load into the scene the Daz House Cat.
Unselect everything. Use the Transfer Utility to turn the skeleton obj into a clothing figure. For bones I tried the Actor:Follower which seems to work just fine. Use whichever option you find works for you.
Yes to "remove the prop" IF your edition of D/S has that.
When done, BEFORE messing around with the cat, select the skeleton clothing and save it to your own 'private' folders. {one cannot share such derivative products}
Providing that one has not renamed the surfaces etc, the original mats can be used on your skeleton clothing.
The pose attached to this post is very basic. You can tweak it as desired BEFORE exporting out the .obj file.
n.b. The importance of deleting the skeleton from the scene after export, is to prevent the incoming .obj file having "(2)" added to the name and surface areas ;-)


Daz 3D is part of 
Connect
DAZ Productions, Inc.
7533 S Center View Ct #4664
West Jordan, UT 84084
Licensing Agreement | Terms of Service | Privacy Policy | EULA
© 2026 Daz Productions Inc. All Rights Reserved.
Comments
Just a brief tutorial, running a basic drape using the timeline to deal with poke through.
Tyou Catherine3678ab, your tutorial are really Helpful!:)
Thanks all :-)
Okay now, some were wanting shaping presets for G9, basic feminine and basic male, so I made 3. The third one is a removal of base f/m however I left the belly button one on. IF you want to use it with no belly button, change the "1" to a "0" and save again the file. [do that kind of thing with D/S closed] You can put these where you please, I would suggest in the Contents folder in with the loading icon for G9.
While I'm not American I have been watching some of the um, show. As the Presidental set of morphs in here have yet to come down in price to my hobbyist's budget I have yet to acquire them all. There are some hilarious skits on the video channels with regards to one of the new American um, orders. So for those who have the concerned characters who may have some use for making their own skins, I have made one palette .png image here [based on a base colour promoted online]. If the browser tries to webize the image, save as: file type any & add ".png" to the end of the name of the image [call it whatever you want to].
eta: me el swifto, was looking in wrong basket! THANK YOU Daz3D for putting the 2 bundles on sale at such a great price :-) Had to purchase something new of course so also got the new lady with 29 jCMs!
In this tutorial I cover [briefly] making a clothing morph [also with dForce simulation] and a pJCM [those pesky underarms] for Genesis 9. The clothing model is a freebie available at sharecg.
I use Hexagon, one can of course use any modeler they want to for reshaping products. Hexagon is available at Daz3d ;-)
The recommended pose collection for making clothing pJCMs for Genesis 9 is this one: [on sale today too]
https://www.daz3d.com/ffs-content-creation-poses-for-genesis-9
This is a great way to illustrate Schrödinger's cat, being both alive & dead at the same time!
A few months back I acquired Pegasus 4.1 which, if all goes well will be shown in my next tutorial, topic: making clothing. The tutorial is very much a "work in progress" {WIP} but 'just in case' Pegasus 4.1 goes on sale {esp for a price that's too good to pass up} thought I would provide notice. Pegasus has some really nifty features I'm surprized that it hasn't been covered in the forums. It comes with starter suits even!
For making figures or clothing for figures, the store also has this cute little fella, Puppet.
Interesting. I look forward to your tutorial.
Regards,
Richard
For FYI, it has been on sale really cheap previously (I had bought it at that time, just never got around to using it). It's bound to happen again.
Yes, both products have -- that's why I have Pegasus ;-) All such programs have a learning curve. Now, it comes with some ancient video file types which can be converted to a form W11 can read using the free Microsoft Clipchamp. {ignore the pay things in the program, it's now free and export works just fine.} When asking for the export type, it will also download said conversion to the computer. {so there is no absolute need to tell it to park the files in the clouds, etc.} Before downloading it though, check the computer, I think it may have been donated during an update way back when.
There are also some video tutorials on YouTube by the creator.
I have not discovered all its secrets yet BUT it has the wonderful ability to actually make new mesh the follows along on the figure, yes!
Heads Up! Pegasus is on sale today [13 April] :-)
Me too lol ... thinking something of why it's not a well discussed program I am coming to realize lol ...
So far my conclusion for today is that just maybe all features do not work and/or I'm doing something/not doing something and have a long list of crashes!
It is still precious IMHO for one can make mesh following along the target figure's body.
The issue I'm having atm is to get the mesh to subdivide and make new mesh along with the symmetry command [all in a one-click option]. It could be the mesh is too simple, could be it's on the wrong side - maybe it's all supposed to starting on the side that the bodysuits are on. maybe it doesn't like Windows11, maybe ... to be continued.
Symmetry in Hexagon is real easy so one could create in Pegasus and throw it over the fence to Hexagon.
Occurs to me that there's a compatibility Mode in Windows, maybe adjusting that would help.
IF I can figure out this step and somehow get it through to the set, and get that one working too -- it appears to be able [at one time anyhow] to make beautiful uvmaps.
Hope nobody is in a super rush for this.
Some success! Okay ... IF I had just purchased at full price Pegasus, I would be seeking a refund. However for the price I paid [under $5] I'm quite happy with it because it can make new mesh over the figure. If you have ever spent hours trying for a close fitting in Hexagon, you may appreciate that factor too.
As some steps are not covered in the videos, I was paying close attention to the visuals provided and well, I don't think that was always set up quite as accurately at least as far as what appears to be working and how over here. Now Pegasus was apparently made for W8 [according to the compatibility gadget] and apparently the number one issue I gather from all the crashes, is "memory."
So Pegasus can indeed be a handy additional tool in the 3D modeling toolbox, however if one has experience in any of the other available modelers I expect that one may want to do some work in those as well. As I'm most familiar with Hexagon, that is where I will be welding etc. Not done with my experiments in Pegasus but do need to tend to some RL matters too.
In the meantime, to work in Pegasus, one does require an .obj for the target figure [i.e. Genesis 3 or 8] Before exporting out the .obj put it into Base mesh resolution with no textures. These .obj files can be stored anywhere you want to find them with when loading from Pegasus. Remember to use the default loading position, no additional shapes applied.
Other tidbits of info.:
-- whether or not red dots appear for those 'center vertices' does not appear to matter
-- to make the subdivided symmetrical mesh - be in the 'face' selection mode [not the vertices]
-- how Pegasus welds the new mesh at the centre is one area that will need fixing [likely in another program] before one makes any uvmaps.
Hmm. Does sound as if a range of tools might be useful.
In 2004 I got fed up with the finite element stress modeller I was using & wrote a better one. Since then I have added a few features designed to make it more useful for .obj files. Some of the additional functions include a feature to give a range of shell elements (aka facets) a thickness by offsetting the selected shells by a thickness and then filling in around the edges. Also made an offset copy, where the offset could be specified so the new surface would be like a DS geoshell, offset from the surface. It has all the usual Finite Element things like 'Merge Nodes' or, in DAZ parlance, 'Weld Vertices'. Can create material groups and facet groups, and do basic planar or box texture mapping. The de-triangulate method works adequately, though can occasionally convert 2 trianglular facets at 90 degrees to one another into a single quad with the consequential catastrophic result to the edge shape.
A couple of screenshots with a V4 character & Armseda hair showing some of the menu options. It works by the 'Select entities to do something to, then choose the operation to do to them' method, which can take a bit to get used to:
Then the menu for Nodes (Vertices):
The big problem for using with DS is that the Z direction is up, not Y direction. Oh, and it's slow, and occasionally crashes - but it creates a session file as it goes that can be edited to delete the command that caused the crash.
Sounds as if this could be useful to add to the range of features from Pegasus4. I wish I could offer a link to the download, but my web host is currently having a fit because I overpaid one invoice and didn't pay another, and even though I should have credit, the cash is in the wrong pot and they insist I pay even more. Net result - no web site and a small dispute. Pfft.
Eta: There are 401 pages of PDF help files to describe absolutely every function.
Regards,
Richard
Looks interesting. Hope the website issue gets resolved to your satisfaction.
Pegasus comes with a .pdf [in the help menu] but alas most of any tutorial stuff is either 404 or "private" ...
I tend to learn the 3D stuff by trying first, see what I can do, then read the manual lol ... then hopefully get a decent workflow figured out. It is frustrating though when a series of commands works sporatically.
eta: uhha! On the display options [right-click on obj] there's an option to select to show vertices! NOW I can see the red dots. Why one would not want to see them, I don't think I want to know. Anyhow progress.
Hope everybody is having a good day, our local noise makers are back busy as beavers day AND night ...
YES!!!! The PEBKAC has been solvEd :-) {eta: nope, problem isn't what I was selected, this program will not make the uvmaps for its own starter suit even.}
One really can make clothing and get a decent UV map with Pegasus 4.1 :-) {eta; maybe, sometimes}
Images are in the testing basket ... I will retrace the steps just to be certain the workflow is followable ... and just maybe have this tutorial ready in a few days. {eta: dream on, now I know why nobody else has been providing tutorials for this, I have followed the videos closely and tried unsuccessfully to work out the workflow to provide some .pdf tutorials for those who can't access videos or simply prefer .pdfs.}
This is not an exhaustive tutorial on how to use Pegasus. It has some basic steps on how to make something successfully.
Dispute resolved, so website now available. My little modeller is here: http://www.chestnutpens.co.uk/misc/modeller.html
Note, it isn't finished - never will be - and it's not bug free. Latest bug I discovered shouldn't affect you, I ended up with the wrong node (vertex) order when the element (facet) normal of an 6 or 8 noded (vertex) shell element (facet) is reversed. Only affects Finite element parabolic formulation shell elements. The 3 & 4 noded (vertex) triangular & quad elements (facets) are correct when the normal is reversed.
It may be a useful tool to weld vertices (merge Nodes).
Regards,
Richard
Thank you Richard :-)
Sorry, although it's not me, I can't make heads nor tails out of why Pegasus is not working as the video tutorials suggest it will. I thought I had forgotten to switch from UV Groups to the mesh, but no that wasn't it. Working from the UV Groups as done in the videos, simply does not make for a flattened uv map and I REALLY REALLY REALLY wanted this to work. Because if/when it works, it's beautiful. So if it's a bug and there's a work around to make it work, I have yet to find that consistent work around however should I discover it before doomsday or whatever, I will then put out a tutorial for anybody who wanted one.
I am now going to throw out some DVDs.
Cheers,
C.
eta: Just in case anybody else wants to know 'why' would I try to make tutorials when the program came with tutorials: See Attached.
Pegusus is not Hexagon. Pegusus is not Hexagon. Pegusus is not Hexagon. Pegusus is not Hexagon. Pegusus is not Hexagon. Pegusus is not Hexagon. Pegusus is not Hexagon. Pegusus is not Hexagon. Pegusus is not Hexagon. Pegusus is not Hexagon. Pegusus is not Hexagon. Pegusus is not Hexagon. Pegusus is not Hexagon. Pegusus is not Hexagon. Pegusus is not Hexagon. Pegusus is not Hexagon. Pegusus is not Hexagon. Pegusus is not Hexagon. Pegusus is not Hexagon. Pegusus is not Hexagon. Pegusus is not Hexagon. Pegusus is not Hexagon. Pegusus is not Hexagon. Pegusus is not Hexagon. Pegusus is not Hexagon. Pegusus is not Hexagon. Pegusus is not Hexagon. Pegusus is not Hexagon. Pegusus is not Hexagon. Pegusus is not Hexagon. Pegusus is not Hexagon. ....
Silly me ...
Pegusus is not Hexagon. Pegusus is not Hexagon. Pegusus is not Hexagon. Pegusus is not Hexagon. Pegusus is not Hexagon. Pegusus is not Hexagon. Pegusus is not Hexagon. Pegusus is not Hexagon. Pegusus is not Hexagon. Pegusus is not Hexagon. Pegusus is not Hexagon. Pegusus is not Hexagon. Pegusus is not Hexagon. Pegusus is not Hexagon. Pegusus is not Hexagon. Pegusus is not Hexagon. Pegusus is not Hexagon. Pegusus is not Hexagon. Pegusus is not Hexagon. ...
In Hexagon, the main screen is the Perspective View. Asking for a second screen one gets the UV view.
In Pegusus, the main screen is the Perspective View. Asking for a second screen, gets 2 views of the same model. In order to get the UV View, one has to scroll through the long list of options in the right-hand panel ... and lo and behold there it is! UV View
I think you might be suggesting that Pegasus & Hexagon are different. Will keep this in mind.
Regards,
Richard
Yes ;-)
The tutorial for the clothing info is back on the front burners.
In the meantime we have now a brief overview for how to use Type3D [a request]. It is not necessary to use Hexagon in order to apply textures to the existing props created by Type3D.
So here goes: n.b. the "prop" is one unit. IF one wants every letter a different colour, then each letter needs to be made one at a time.
.............................
800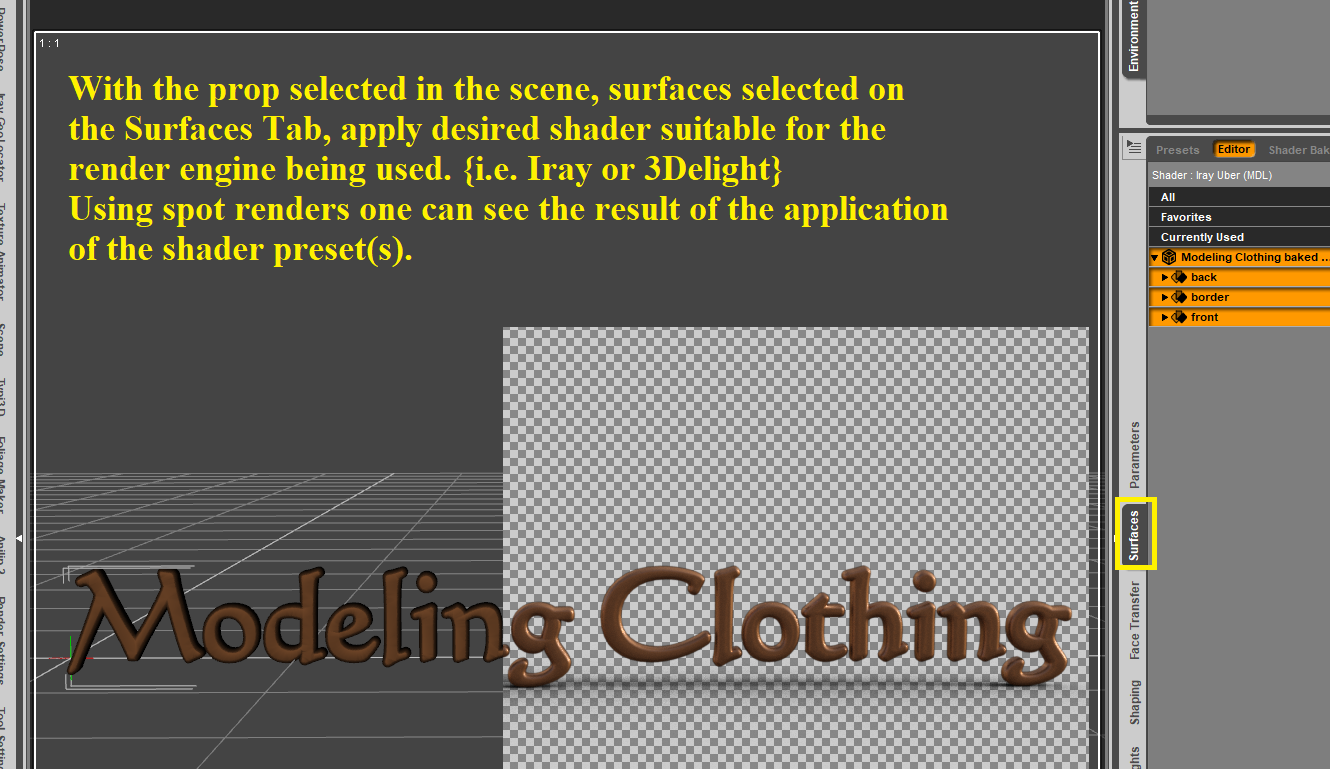
And here it is, "as is" - IF one finds any boo-boos that need fixing, send me a PM, thanks.
This is not an extremely exhaustive tutorial, more like a basic introduction to Pegasus 4.1. The tutorial does not cover making mat zones.
Pegasus makes UV MAPS :-)
Click here for the .pdf tutorial link Sorry, this one was deleted by accident. Will find again and repost.
New Link to download .pdf tutorial
You're welcome, hope it helps. I have yet to work out the materials part [I know how to do that in Heagon so it's not a super high priority atm.] Had to euthanize my Service Animal which is rather devastating -- however as one path in life closed, another opened, and I lucked into a "WOOKIE" [aka Shihpoo], calling him James.
Sorry to hear about your Service Animal. Never easy to do.
Hmm. James? Hmm. 'Wookie' I can see, but 'James'? Almost looks like a 'Hubert' to me when behaving and 'Bert' when being a normal bundle of mischief. But who am I to think of dog names? I called a cat 'Squeaky' (because he squeaked rather than miaowed) so I'm definitely not a reliable namer of animals.
I'm happy setting material zones using my own modeller. In my modeller, you select the facets (elements), select View| Layers| Layer controls and add or select the current layer. Then select View| Layers| Add to Current Layer. That moves the selected facets into the current layer - which is then exported as a surface material in the obj file. (Didn't want to get mixed up with Finite Element Materials, though it wouldn't have been too bad to do.)
Regards,
Richard
Well, I had to come up with a "name" for the licensing and vet, so figured that was as good as any. He's more likely going to be known around here as Wookie ;-)
Haven't had him long enough to know what his personality is going to be like, atm everything is new to him and he's like velcro.
.............
about the materials, exactly, we can use what we're used to and that'll be faster [for me anyways] for now. But I LOVE that it really can make decent uvmaps. That is the one area that other people's instructions for how to use Hexagon, say go to another program. I figured no, I bought Hexagon [when it wasn't free] and wanted to use it so I figured out how and then told everybody. It can be done but as Sickleyield once said, it's an exercise in patience ;-)
..................
and thank you 'cause yeah, it's never easy.
11 years and 2 months.