Making Bump, Spec and Normal Maps in Materialize (mini-tut?)
 Jonstark
Posts: 2,738
Jonstark
Posts: 2,738
I've been playing with the free texture generator program 'Materialize' for all of 2 days now, so I'm not expert, but I'm really impressed with what it churns out so far. I would even go so far as to say that the Spec and Bump maps that it produces are superior to what the DAZ published artists put in their products in the store. I'm currently in process of re-doing my entire shader library to use Materialize maps.
So I wanted to put up a quick tutorial of how to use Materialize.
First, you'll need to download and install Materialize, which you can get here: https://boundingboxsoftware.com/materialize/getkey.php
There are youtube tutorials on how to use it; those are very helpful. I'm just sharing my current method and settings.
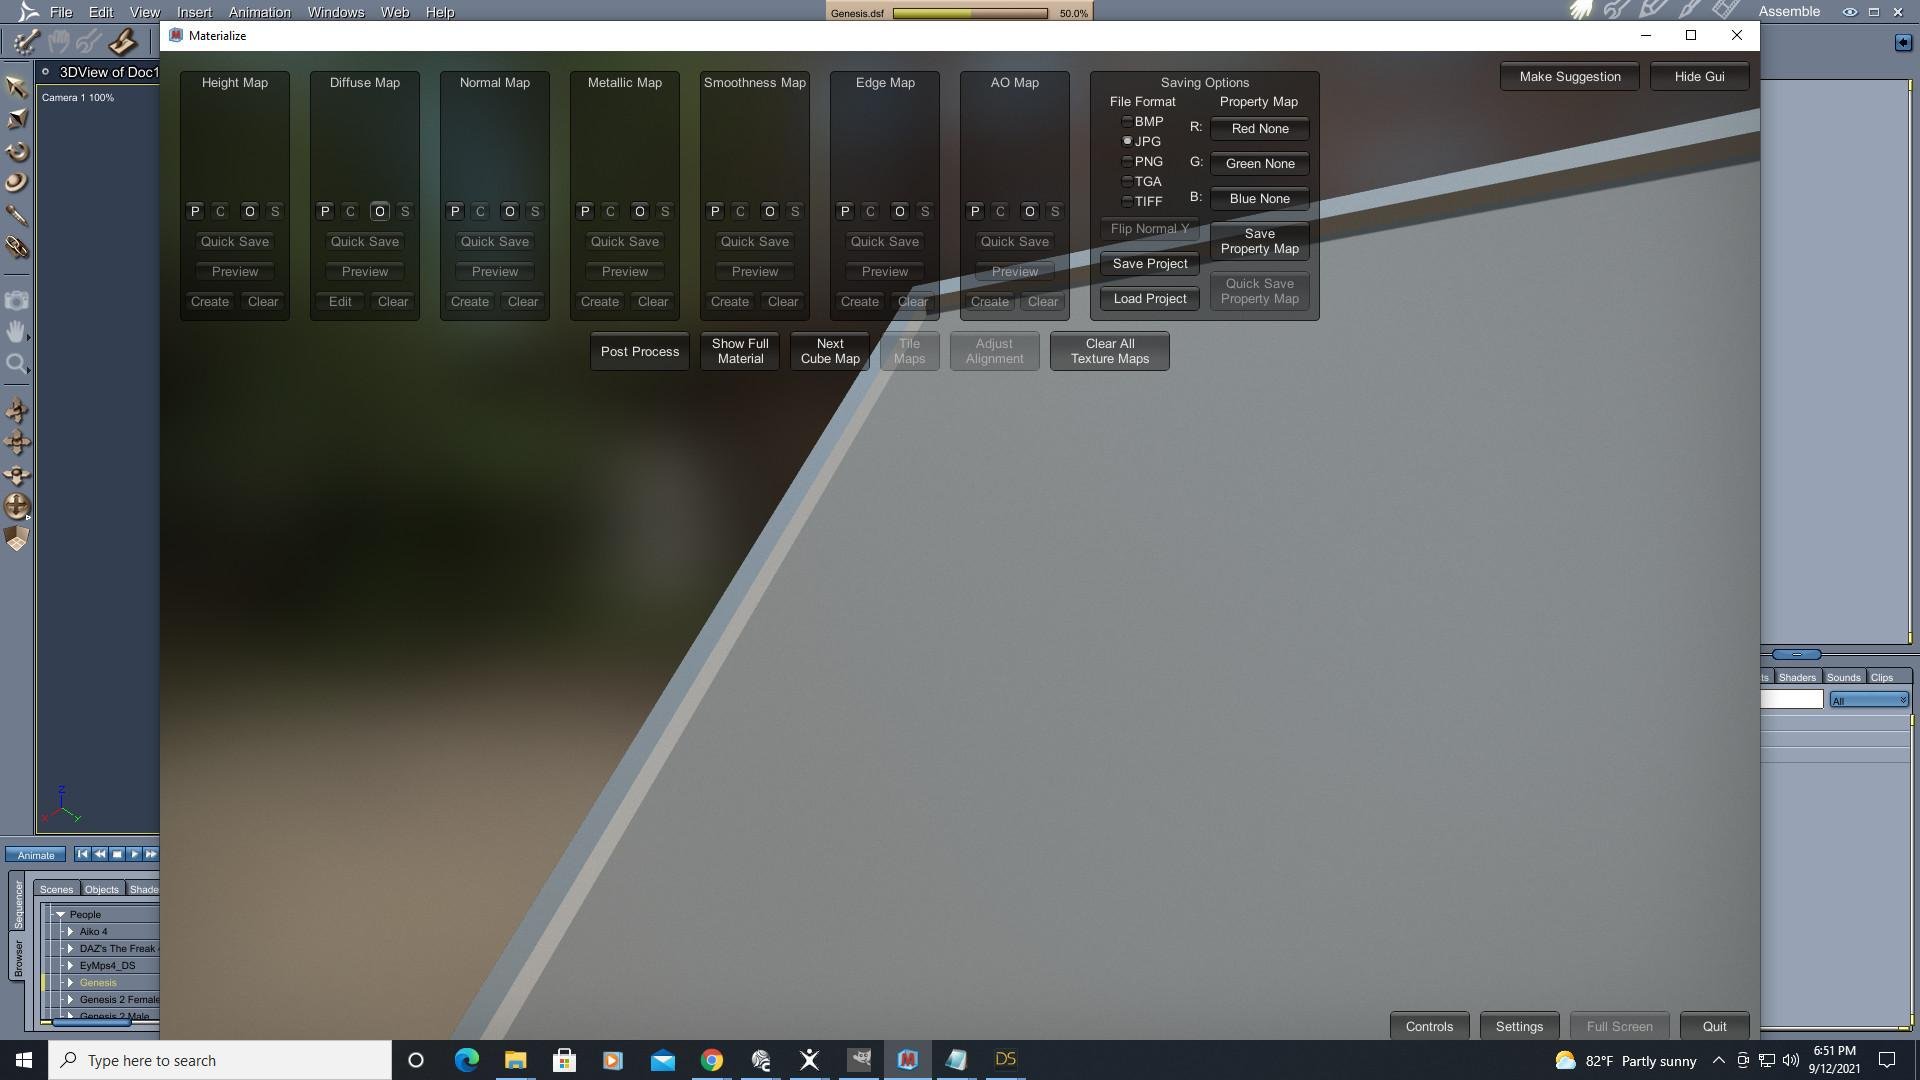
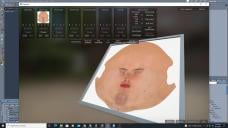
First, load up Materialize. The UI might seem counterintuitive at first, but you'll see across the top of the screen various empty boxes for all the types of textures you can generate. All will be empty at this point. You'll want to go to the 'Diffuse Map' box first, which is the second from the right. Click on the little 'O' (which I imagine stands for open): (all pics can be clicked for bigger, if it's hard to see)
Now navigate to wherever you've got your Diffuse map of your character texture you want to use as a base. It will load that map into the Diffuse box. By the way, you can click the 'edit' button on the diffuse map to bring up a bunch of options to change the way your original Diffuse map looks. I'm not doing that now, but just know that you can alter the original Diffuse map if you want to (maybe you want to make the skin color different, lighter or darker, etc).

You'll also notice that the big square 'picture frame' on the screen will now show your Diffuse map in it. You can grab/pull/rotate that picture frame with your right mouse button, so that you can turn it back and forth in the light to see it from all angles.
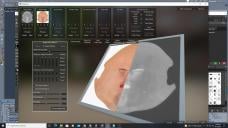
Next, we're going to make our Bump map. In the 1st box to the left, which is labeled 'Height Map' (same thing as a Bump map, just different softwares use different names) click on 'Create'.:
This will bring up a dialogue/option box, and the picture frame will now show what the bump map it is generating will look like. The top 'height reveal slider' lets you use a slider to roll back and forth between the original diffuse map and the bump map. The options I use currently are to set the Frequency Weight Equalizer with the left 2 sliders all the way at the bottom and the other five sliders all the way at the top. Final Gain: 0, Final Contrast: -1, Final Bias: 0
But feel free to play around with sliders and presets to find the best possible bump map that you like.
When you're ready, click 'Set as Height Map', and the bump map will now appear up in the top left box:

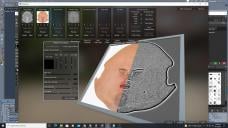
Next, we're going to create the Specular map. This one is the 4th box from the right, which is labled as 'Metallic Map'. Again, click the 'create' button in that box and a new option box appears, as well as the picture box changing to show a rolling slider which wipes back and forth between the original Diffuse map and the Specular map it is going to create. My settings that I like so far are: check 'Use Original Diffuse', Hue all the way at the top, Sat slider at 50%, Lum slider at 35%, Low slider at 35%, and High at the top. Blur size 0, Overlay Blur Size 87, High Pass Overlay 10, Final Contrast: -0.423, Final Bias: .0336
When you're happy, click 'Set as Metallic' and it will generate the Specular map, which will appear in 'Metallic Map' box above.

Currently this is all I use Materialize for, as the Normal maps it generates have a steep drop off at the edges of the skin color on the texture and where the background color is, which creates a tiny (barely visible) seam between UV zones. I can really only see it where the thighs meet the hip zone. Dart mentioned a fix for this, though I haven't tried it myself yet. Normal maps render faster than Bump maps, which is certainly an advantage, but it's a tiny render speed increase. At the same time, I actually find the Bump maps generated by Materialize are more finely detailed than the Normal maps (but this may simply be a consequence of not yet finding the 'perfect' settings when generating a Normal map)
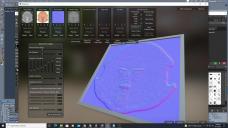
For those who want to generate a Normal map though, click on the 'create' button in the Normal map box (3rd from the right).
Again an option box pops up, and the picture box will change to show the normal it is thinking of generating. For me so far I just click on the 'crisp' preset button and then click 'Set as Normal Map'
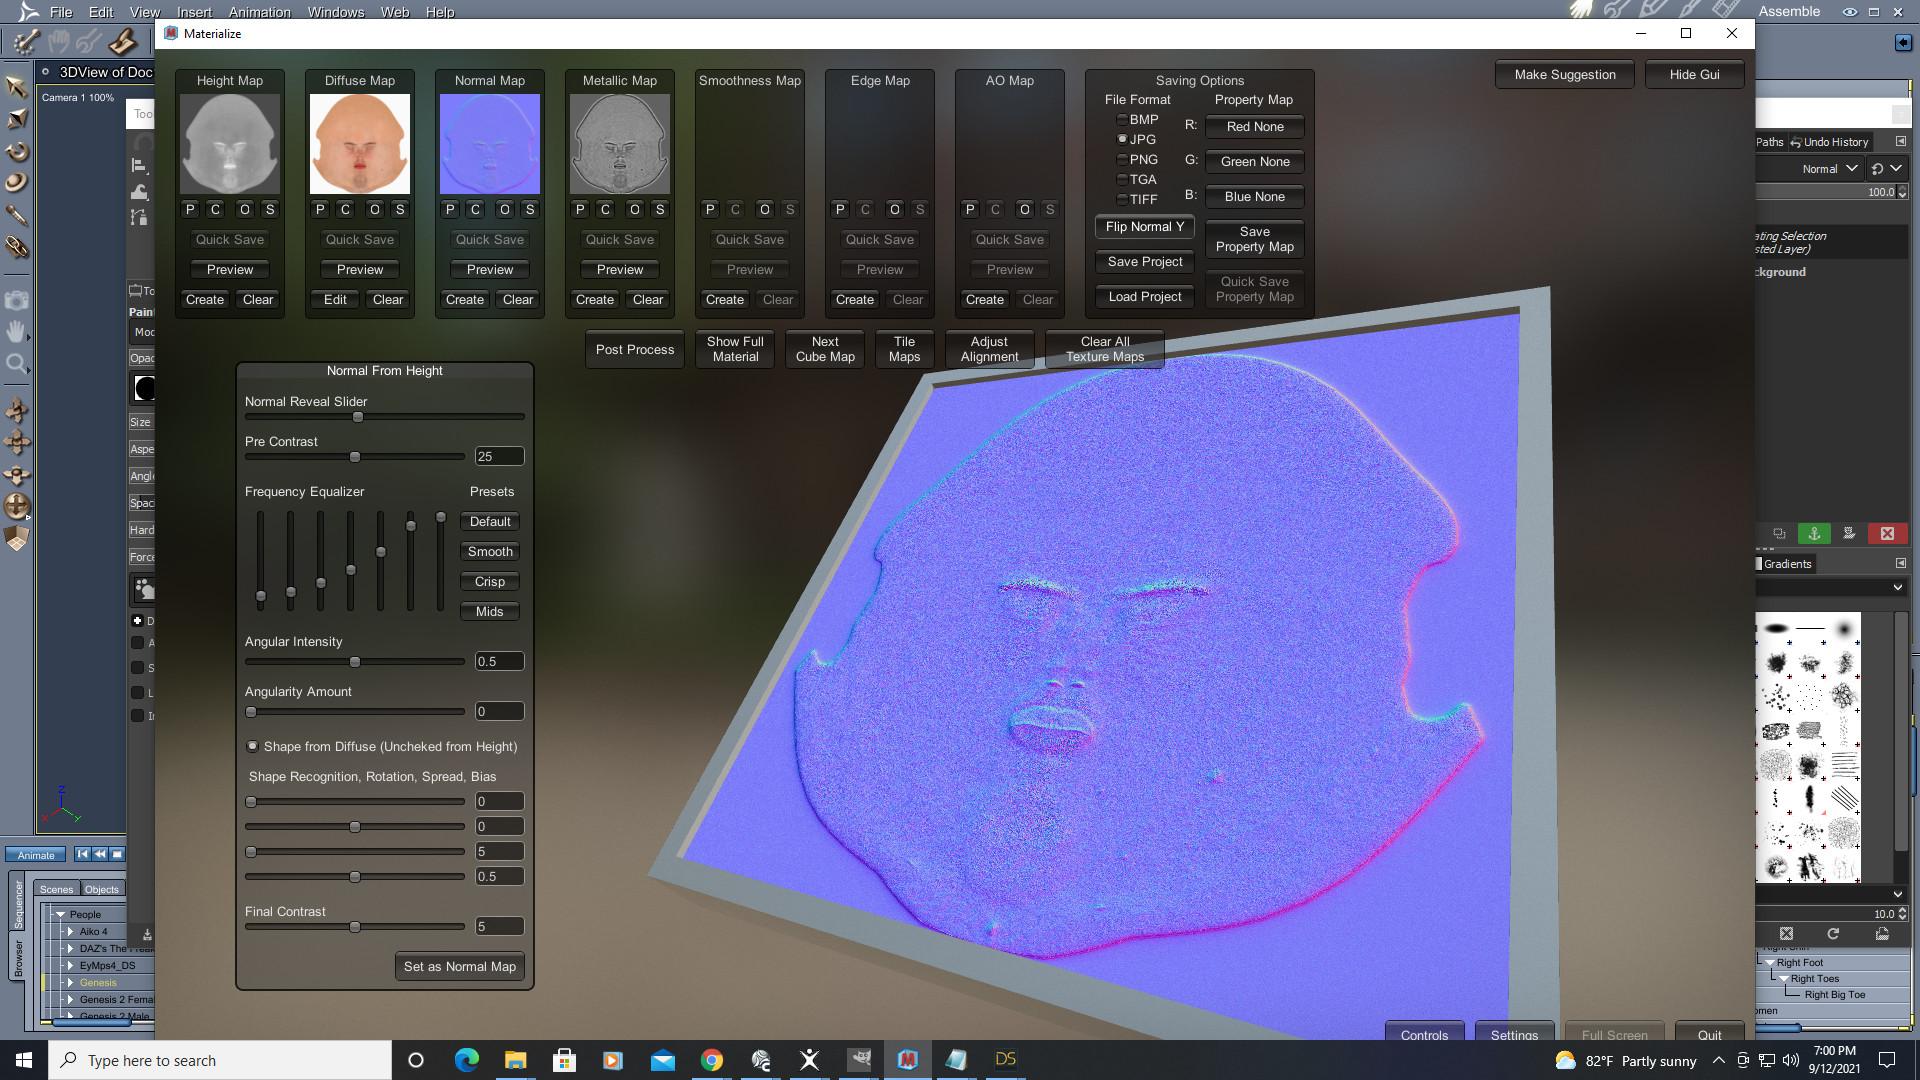
The Normal map will appear in its box, just as expected, but there is one more step us Carrarists must take.
Over on the right top of the screen, in the section titled 'Saving Options', we need to click the 'Flip Normal Y' button. I think Materialize was created mostly for Unity users, but Carrara reads Normal maps inverted to the way Materialize produces them. So unless you want inward-facing eyebrows, click this button. If you look carefully, you'll see the map change inside the little Normal Map box.
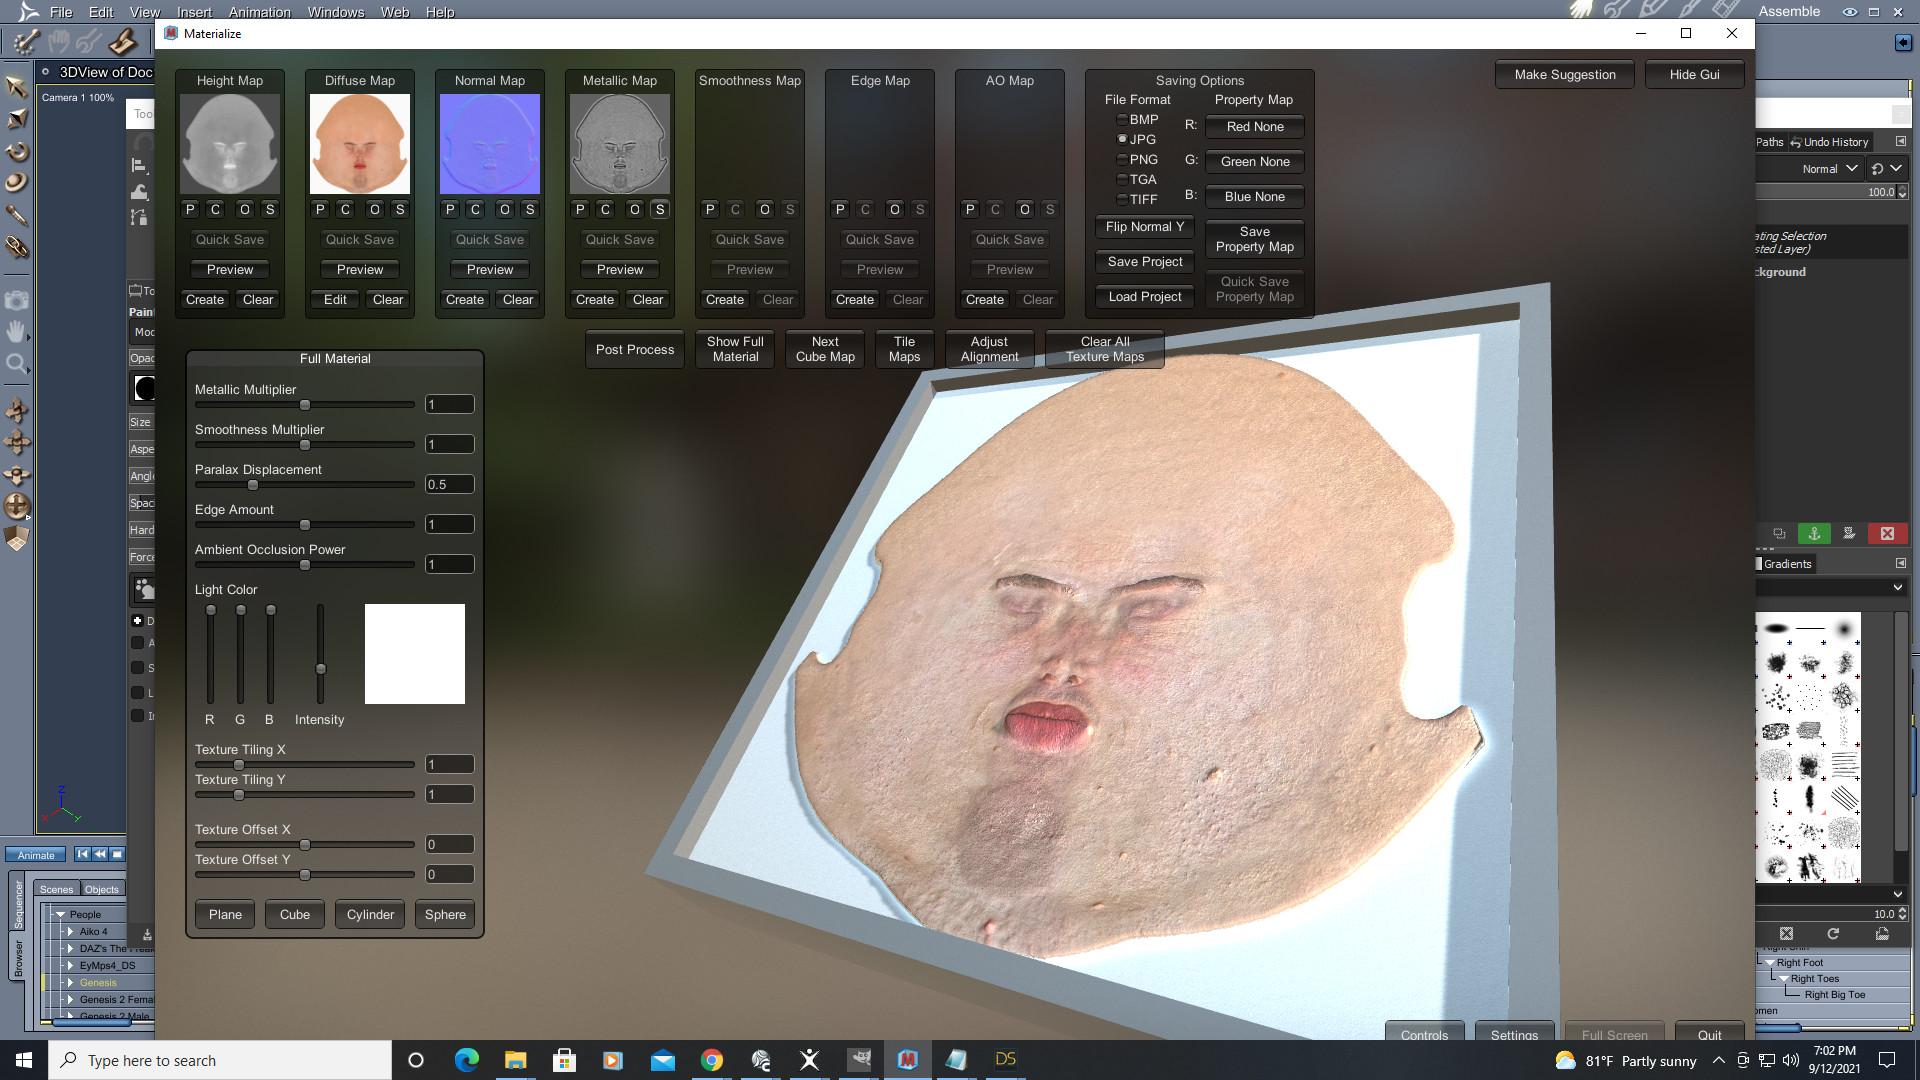
Also, at any time you can click the button 'Show Full Material' in the top middle of the screen right below the 'Smoothness Map' box, and the picture box will change to show what all of your textures you've built so far look like all together.
Now we're ready to save our maps for use. In each little box, you'll see an 'S' button. (for 'save', I presume). Click the 'S' and navigate to wherever you want to save your new spec/bump/normal maps. Then use with delight. :) (or, if you're a masochist who enjoys the painful experience of rendering with Studio; you're ready to 'use with 3Delight' Ha ha, seriously folks, have you ever heard puns this good? Thank you, thank you, tip your waiters; I'll be here all week...) 
Daz 3D is part of 
Connect
DAZ Productions, Inc.
7533 S Center View Ct #4664
West Jordan, UT 84084
Licensing Agreement | Terms of Service | Privacy Policy | EULA
© 2026 Daz Productions Inc. All Rights Reserved.
Comments
Just to demonstrate the difference these maps can make, here's V4male Paul from 3Dream over at Rendo. Although this is a very old product, the textures are quite decent. The problem is that it doesn't have any bump or spec maps at all. So the original looks like this:
Now here's what it looks like when we add Bump and Spec maps generated by Materialize:
That is quite an improvement, nice!
Thanks for this; much appreciated. Excellent tutorial.
wow, yes makes a hug difference - thanks for the mini tut(s) - keep them coming! (please)
Thanks !!!
As good as Crazy Bump which I have a student licence for, sometimes the many sliders in CB give extreme results, that it's hard to get a natural look for skin and faces, especially for rough prehistoric peoples' textures. I use normals all the time, solves so many problems! The rest of the time I use Terrain Bump in Carrara. Prepping the skin textures ahead of time to test side by side, with and without normals really helps.
Ok, I was working on hair shaders tonight, and tinkering around improving my upcoming freebie hair, but I took a few minutes to swap out shaders for M4 Jeremy Elite from the original bump and spec maps to the bump and spec maps I made from the Jeremy diffuse map in Materialize. So basically this is my first comparison shot between the original Elite maps and what Materialize can give. First, here's Jeremy with the original maps:
Next, here's Jeremy with spec and bump from Materialize:
Interesting... I'm mulling it over. An argument could certainly be made that I've boosted the specularity levels a bit too high on the Materialize maps (which causes more light to bounce around to make everything a little lighter), so maybe this isn't quite and even head-to-head comparison. But even factoring that in, I'm leaning towards thinking that the Materialize maps give better details. Which would be amazing if so, considering the work and tech that went into making the original Elite maps.
First, thanks for the Materialize tutorial. That could really help down the road when I have more time.
Second, I'm not sure that the second one is better. It certainly is brighter. I assume that you kept all other parameters the same, and the different maps were the only thing that changed.
It might be helpful if you had the faces closer to the camera, so it is easier to see if the skin differentiation changed in a meaningful way.
There are a LOT of adjustment options in Carrara to add realism, especially with those Elite maps and higher. I guess the question is, will the new Materialize maps really make a differenct in realism, or will they just make it easier to get good results?
For comparison's sake, below is M4 with the original Jeremy face and lip maps, (the eyes, ears, etc are not Jeremy, but whatever loaded, default with no adjustments). I used the default distant light, dropped the ambient to 9.
Ah, I bumbled things last night... I blame the fact I was tired and working on something different (carrara hair shaders are seriously hard). The scene was a full GI enclosed space in studio, but I mistakenly left the Scene ambient light on full blast, so everything is blown out, which makes it very difficult to fairly compare.
So I re-rendered today for a better/fairer comparison.
UB, since you mentioned loading up the DAZ default shader for Jeremy, I realized I had never before thought to do that. I hunted up the duf shader in the Content library for Jeremy, dragged and dropped onto my actor. Took a look and it loads with no highlight and no bump at all. It's a very good texture though, but it does have a tiny bit of painted on highlights. I thought it would make a nice 'control', so we can see what the base texture does all by itself:
Next was with my own shader tuning, but using the original Spec and Bump maps from the Elite set:
And last is using the Spec and Bump maps I created using Materialize:
Honestly, I don't know what to think. It's damn close though, which is crazy that a piece of software can extrapolate a spec map from a simple diffuse map and nothing else, and yet it's comparable to a spec map captured with a (no doubt) high-tech camera from a living model which was specifically set to record specular information.
I'm thinking the original Elite map might be superior, but man I'm having a hard time saying for sure, they're both giving good details imo, and originally I thought for sure the Elite map would be a runaway winner.
Dammit, I realized there's a simpler way to compare, just looking at the Specularity pass. So I imitated your own setup above UB, just using one distant light and ambient at 9%, rendered again to obtain the render passes. Original:
Materialize:
I think looking at the spec maps that Elite is finer detailed. Still, Materialize makes a decent showing, just not enough to threaten Elite territory. :)
How do you know this about spec maps? I have always assumed that PA's make spec maps after stiching together textures onto characters, and not from the original skin images. However, I figure that you have looked into it deeper than me.
Whatever, your results in Materialize were very good. The apples to apples comparison was useful and nicely done. Much appreciate you sharing.
I don't trust my memory, so it's possible I dreamed this up, but I think back in the day when Reby Sky Elite was coming out, DAZ did some publicity thing where they released and interview (written form) with her, and during that either she or they mentioned there were specialty cameras used (highest tech available at the time, I think was the boast) which were able to capture specific specular and bump details. I may be completely wrong on this, though, it's been a while. I do think there was a different and much more tech and expensive method of capturing and creating the Elite maps though compared to pretty much every normal texture put out by PAs, which I think a lot of those are spawned from merchant resources and use of photoshop to make skins look different from each other, while still coming from the same original picture. :)
Jonstark, you have left the building like you periodically do, but I want to thank you again for doing the Materialize tutorial. In my case, it is especially useful for creating maps for older characters.
I just basically followed your instructions without further experimenting. That alone saved a bunch of hours. But I do suspect that further tweaking can improve the maps, especially the normal maps.
Hope you read this eventually, and that you are doing well.