how to set up depth of field?
 Mistara
Posts: 38,675
Mistara
Posts: 38,675
i know how to do it in DS.
hoping its that easy in CA?
i saw the thing how to blur the whole scene.
but how do you set up the non-blur area?
Daz 3D is part of 
Connect
DAZ Productions, Inc.
7533 S Center View Ct #4664
West Jordan, UT 84084
Licensing Agreement | Terms of Service | Privacy Policy | EULA
© 2026 Daz Productions Inc. All Rights Reserved.
Comments
Yes it's easy. It's a camera thing. Select the camera you're rendering with, and in the Effects tab you can enable the Depth of Field thingy. Then you tell it how far from the camera you want to be in focus, and how much to blur the non-focus area. The little preview on the right side is where you can click in the scene to set the clear area, the focal point thingy.
Yes, but I noticed two things with this method:
1- The sharpness of the focus point isn't as good as a "normal" render, especially in animation.
2- The blur is unified, it does not matter the distance from the camera.
For this reason, in this case, I make my render of the principal subject with an alpha layer and the remainder in various layers whose blur varies according to the distance from the focus point.
If you're talking quality, IMO the depth of field in Carrara is horrendous. You can get far better results by doing it in Photoshop, or some other app that is designed for DOF effects. In my view, the DOF in Carrara looks like someone smeared grease on the lens... :)
Also, Carrara's DOF doesn't work with things like Dynamic Hair.
As Joe says, you select your camera and go to the camera's Effects tab, enable the little Lens Blur checkbox and click the edit button to open the editor window.
If the window is too small, you can resize it by dragging the lower right corner of the window outwards. This will give you a larger thumbnail. To set the focal point or in-focus subject in your scene, click the little cross hair icon just to the left of the thumbnail and then click to set the cross hair on what you want to focus on. You change it, by clicking on the cross hair icon again and then clicking on a different area.
The blur percentage slider may need to be exaggerated depending on the scene.
Regarding Joe's comments about the quality, you will get a better effect if you render a depth pass and use Photoshop or Gimp (or some other image editor) to create the DOF, instead of the standard DOF effect.
There are two DOF effects that Carrara can do and both are accessed through the DOF editor. The standard one is a post render effect applied by Carrara after the render is done. This is the one Joe says looks like a greased lens. The other one is the Raytraced DOF, which is done as the image renders. It is orders of magnitude better, but it also orders of magnitude slower.
For still images, my preferred method is Joe's method- rendering a depth pass and creating it in Photoshop.
My preferred method for animations is to use the standard Carrara DOF, as it looks good enough for an animation especially if I am animating a change of focus. It may be easier to use the depth pass and do it in a video editor/compositor, but I haven't tried it yet.
Edited to add larger render.
Great point! But to clarify, the standard DOF doesn't work with Carrara's hair. I think the raytraced DOF does, but oh-my-gawd-is-it-slow!
Also the depth pass doesn't see dynamic hair, or clouds or alphas. There are other passes you can render, such as the volume primitive to get the hair and clouds to show. composite them with the depth pass and viola!
http://www.daz3d.com/forums/discussion/42599/P105/#634024
funny they put (slow) next to the option.
learning the habit of looking under that effects tab :)
Thanks all!!
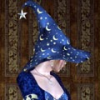
playing with the DOF :lol:
not toooo slow, prolly boosted by the 64 bits.
was trying to make the tabletop look like a tablecloth. the table top made wonky with the checker shader, but kinda like it.
was hoping to find a ready burbur carpet shader for the plane.
lots of good stuff in the objs library. luv the rocking chair extraspecially.
is there a way to set up like a radius from the focus to the blurred area?
like can i tighten the focus area to the plate of eggs or widen it to include the teapot?
thanks!