Ellis 8 Smoothing out Graininess in skin

Hello All,
I recently purchased the Bridget Pro Bundle and I got the Ellis 8 add on for that as well:
https://www.daz3d.com/ellis-for-bridget-8
I have noticed when I made my first renders with her that her skin isn't as smooth as with some of my other dark skinned ladies I have. There seems to be this kind of 'rough' orange peel look to it. (See attached)
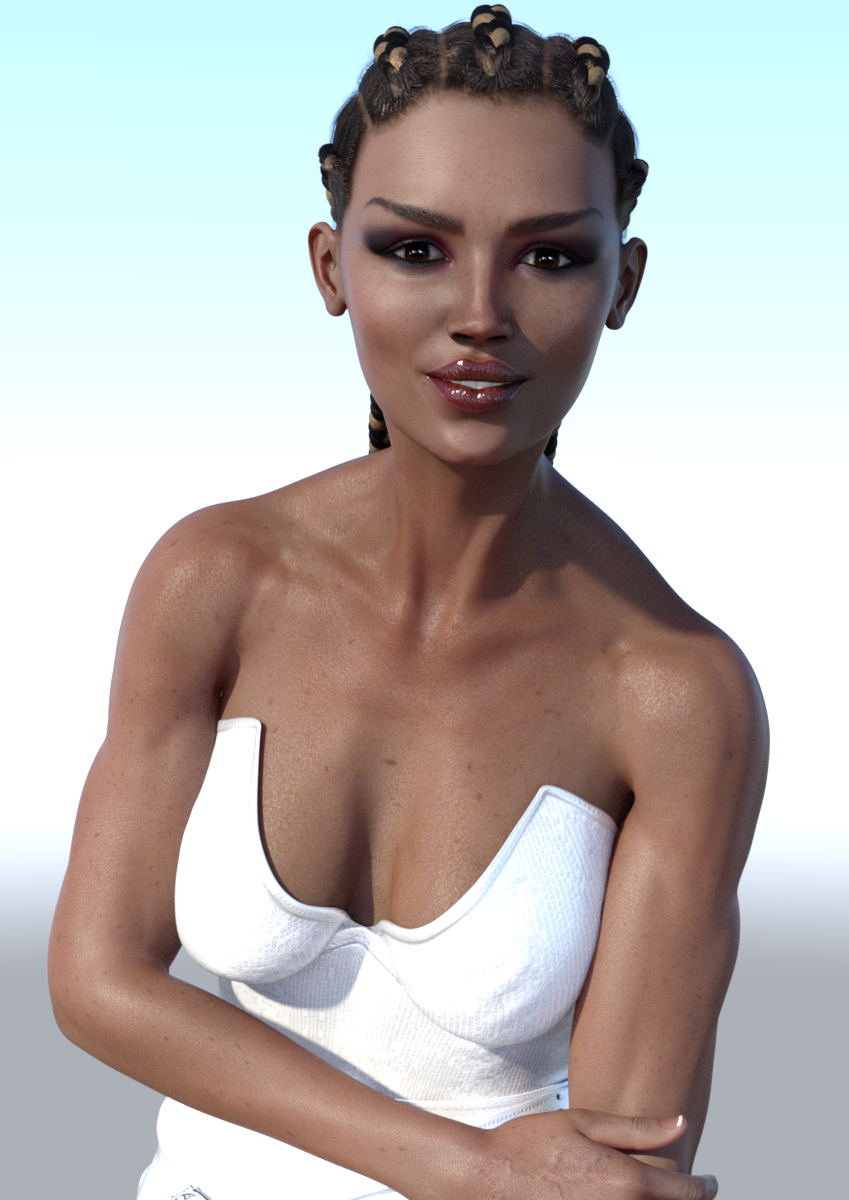
Are there any surface adjustments I can make to smooth that out?
Thank you.

Ellis-StockSkinMakUFrontShotArmOverChest2.png
849 x 1200 - 1M
Post edited by jukingeo on
Daz 3D is part of 
Connect
DAZ Productions, Inc.
7533 S Center View Ct #4664
West Jordan, UT 84084
Licensing Agreement | Terms of Service | Privacy Policy | EULA
© 2026 Daz Productions Inc. All Rights Reserved.
Comments
I don't have Ellis and the product page isn't specific about what textures are included. However, my first thought is the roughness you're talking about is bump, not skin color. If I got that right, then what you probably want to do is select the skin material zones and look for Bump and Normal. If there is a Normal Map, lower the strength, and do a test render. If there isn't a Normal Map, try lowering the strength of the Bump setting and do a test render.
Hello Again!
Well, yeah, I kind of figured that not many people have Ellis since she was part of the add-ons for the new Bridget package. But frankly, Ellis was an incentive to buy the package outside of some of the clothing in it and also for the Audrey character. Those three main things sealed the deal. Ellis is my favorite though and for a few reasons, specfically, her face for starters and on her body, I like that she has nice protruding collarbones AND nice rounded shoulders, so that makes her a good candiate for an athletic looking build. Anyway, below is an attached render of Ellis using a different skin from another woman of color in my library. Although I don't like how the face transferred to Ellis, what I want to point out is the body. See how smooth her skin is now?
That is what I am looking for, but with her own skin. Her skin has these freckle like spots on them that I like.
What's a bump? I heard of this a few times in product descriptions, but I really don't know what it means. Anyway, since you are mentioning a setting, I am assuming you meant to select the skin and look for those options under the Surfaces tab? I will check that out as soon as my render is done, I currently have one in the cooker :). Oh! wait, it's almost done...
Alright, I loaded Ellis back up and went to 'Skin' under the Surfaces tab. There is a control for both Bump and Normal. Bump is set to 0 and normal is set to 1. I currently set it to 0.20. So lets see what the render looks like...
Well, it might have done a little, but it is still there (see 2nd attached). Looking at the skin with a sharp lighting angle, the colors of the 'speckling' (as I would call it) are a dark yellow or gold color.
Ok, I played around with a few more settings, it is not the translucency settings, it is not the SSS color settings, it is not setting SSS to mono, its not the glossiness levels. I turned that down and there is still a yellowish tinge in that orange peel speckle pattern. So I don't know what it is from here.
Any ideas as to what else it could be?
Thanks
I do not, without buying her, and I don't want Bridget, at this point. (I have most of the G8 named figures, but I'm holding out to spend the last of store credit on a male release. Hopefully there will be a male release this Tuesday. Fingers crossed.)
Well, I think I am going to toss her skin into Skin Builder and make some alterations to it...hopefully in the process I remove the offending 'orange peel' look.
Well, I did what L'Adair said about lowering the normal map setting. I put it to zero. It does diminish the effect a bit and I found that hitting Ellis's body hard with a bright light dimishes the effect too. I did this render today in an attempt to solve two problems in one shot:
Introducing Princess Fraeya. She is an Elven princess. While this mainly started out as a test rende, I wanted to make Ellis an elf character and I wanted a nice outfit for her and that was the outfit she has on now. But I was having a clothing problem in which using Genesis 2 and 3 outfits with high heels on a Genesis 8 caused fitting problems. That thread is here:
https://www.daz3d.com/forums/discussion/314616/backward-compatibility-issues-with-clothing-on-genesis-8-shoes-not-fitting#latest
But anyway, reducing the Normal Map setting under the Surfaces tab must have had some effect, for now when I shine a bright light on her, much of that 'orange peel' look goes away. But if I have the light coming in on angle and/or it isn't bright, then you could still see the discoloration. So while this idea works to a degree, in dimmer lit areas it will more than likely be more apparent. So I guess it is somewhat of a fix for now, but as I said above, I am going to try to put her skin into Skin Builder and see if that might fix it.
two or three things that might help, though I don't own her so I cant say for sure. One is the displacement map if she has such, that could be lowered as well and.
Next one to check would be the glossy roughness to lower and then you can look what maps are in the top coat and the overall weight and or the top coat roughness.
Things I though of to play with, the result I don't know, good luck
It seems as if there is a Displacement Map just for the arms and legs. But the effect is on the torso as well, there doesn't seem to be a displacement map for the torso. I turned Top Coat off completely and that doesn't seem to do much. It might be something in the skin itself. What I am going to do is drop her skin in Skin Builder and see what I can do with it from there.
Thanks!
I lowered the Glossiness Roughness AND the Glossiness Reflectivity and it seems to have no effect. I also adjusted the Glossiness Layered Weight and that didn't seem to do much as it was set to about .4
The way I think of it is that Bump gives a surface slight (or not so slight if you really play with it) raised or lowered trait. You could use it to simulate goosebumps, for example, or make pores on skin look like they have actual depth instead of being painted on the texture. Displacement does the same thing, but its a newer setting. Normal, same story, but even newer. There are differences in the way you make the maps and the specifics of the settings, but they all do basically the same thing. If your problem is the bumpiness of the skin, turning all these settings down to zero may help, but be careful. I find that adjusting multiple surfaces at once copies the maps from one onto the others (a Torso surface with an Arms map, for example).
Normally, I'd say adjust the Translucency Weight down to get rid of any odd coloring in the skin, but looks like that didn't work. Maybe try the Transmitted color. Check what the setting says on the skin you like, then adjust the transmitted color on Ellis to whatever the other one says. Alternately, try 0.77, 0.51, 0.23. Also try dialing down Transmitted Measurement Distance. Both of those affect a sort of shade of the skin, duplicating the effects of light hitting a vaguely see-through surface like the very top of your skin. The lower the transmitted distance (try .25 or .10), the less the Transmitted color shows through the skin appears to be how it works.
If you've got the extra cash, check out Altern8 Skin Shader. It's how I'm getting these exact settings, but its a ton faster and has a lot more options.
Good luck!
Yes, I had noticed some differences when L'Adair suggested to adjust a couple things. So perhaps it was just removing the texture, but there is also a (dis)coloration too. I tried individual settings and also multiples. I notice a slight change, but nothing dramatic. So I started to think that the discoloration could be in the skin itself.
Transmitted Color was one of the first ones I looked at considering that is normally an offender with lighter skinned women. Daz seems to think that everyone likes that orange 'Oompa Loompa' spray tan look. I hate it actually, but I found out what causes it and it is the Transmitted Color setting. Setting to a lower level of orange or going slightly pink gets rid of the spray tan look. However, Transmitted Color didn't seem to do much in this case. I will try that setting when I go back into Windows and Daz and see if it does something. I will check out the Transmitted Distance settings as well.
I have Skin Builder 8, which seems to be something similar. Not exactly though. The attached render is of Ellis with a new skin created by Skin Builder 8.
However, I think I tinted her skin too dark as much of the magic with this character's face seems to be lost now. I thought it was the eyebrows since the process of creating a new skin erases the eyebrows. Ellis just has a wonderful set of eyebrows! Well, anyway, in Skin Builder there is an eyebrow tool and I tried my best to recreate the original eyebrows and I think I did pretty good there. But the darker look just seems to make her face look a bit harsher. However, below the head...her skin is perfect. The discoloration is gone, the orange peel look is gone and now her skin is smooth. Like with Altern8, I can add skin details too and I gave her some freckles over the nose and also in the chest area.
So overall I like what Skin Builder did, but I am going to have to go back and try it using something closer to her original skin color. I just went a bit too dark here.
Thanks for the information though. I did put Altern8 in my wish list as it seems to be not an expensive item and it does have some features that Skin Builder doesn't have. And likewise it does look like there are things Skin Builder can do that Altern8 can't.
Ellis' nose is another thing that bothered me. The bottom is just too...straight across. So I changed that as well. So here is 'Fraeya' again, but with the new skin and altered nose:
I had to use a totally different makeup scheme because if I tried to use the one for Ellis, her face would revert back to the original skin texture. Overall, she came out great and I do like her look here, but something about her face is just different from the other render with her lighter skin and I like the way her face looks better in that render. So I am going to go back and try it again, but go lighter on the skin and see what happens.
...And this time I DIDN'T forget the pillows!
Not entirely correct;) Displacement is the only one that actually alters the topology, the other two just simulate height by shadowing the surface according to the maps. But since IRay doesn't support microdisplacement, you have to up the SubD level to give the mesh the density needed for it to work properly. 3DL supports micro displacement, but there you are limited to SubD level 1, so that's why bump and normal maps are very good for adding fine details.
Hello All,
Below is an attachment using the adjustments Losing Signal mentioned for the Transmitted Color setting 0.77, 0.51, 0.23 and turning down the Transmitted Measurement Distance to 0. Comparing side by side. It actually made it worse than the original.
I tried to adjust the SubD level both going up and down, and it seems to have little effect on the 'orange peel' look. It seems to me that it is more of a color issue rather than a surface texture. And this was apparent when I dialed the SubD level all the way down. All her body details just disappeared, including her muscle definition...yet the orange peel look was still there. Dialing all the detail up brought the surface details back but it didn't seem to affect the look again. It seems as if changing the color levels have more an affect on it, but it seems that I can't get totally rid of it (without using Skin Builder). It must be something within the skin build itself on the end of how the artist made her skin. What I am going to try now is to make a small minute change to her skin in skin builder. Perhaps even make it a shade lighter rather than darker and see what happens...
Ok, I played around in Skin Builder and I just created something basic, so no details...just the new skin (see second attached photo). A little lighter in color:
So there you have it, the orange peel effect is gone. This is beautiful. The lighter skin looks better on her actually, like a dark caramel color. Me likey! So I am going to finish this off.
I guess it is just a problem in the (original) skin itself and I am not sure if I could dial it out in any way. I certainly can recreate those spots on her skin in Skin Builder and as you seen above, I can even add more details, such as freckles. I think the thing that hurts the most in not using her skin are those beautiful eyebrows. There was just something different about them and even though I can recreate them to about 97% So, until a solution presents itself, I am just going to go with the skin above.
Thanks for the help and suggestions.
Yes, as you noticed, SubD won't change the color, only geometry. But it (and displacement- bump- and normal strength) will affect how the skin looks because light interacts differently when hitting and reflecting off a rougher surface.
Agreed:) I like the olive skintone.
I'm a 3Delight user so can't advice on skinsettings in IRay much, but it should be fairly easy to get rid of the orange tone if you want to use the original skin. I would look at diffuse color, SSS amount/color, translucency color and other related things, sorry don't know what they are called in the IRay Uber;)
Adding just a bit to what Sven had to say, My Displaced Bumps tutorial that I did several years ago talks about the technical difference between displacement and bumping. And I added Is This Normal? to basically go over how a Normal map is really just a bump map with the changes to the surface normal pre-baked into the map. This makes it much more efficient for real time engines like games, but it isn't really "better" than a high quality bump map for our purposes.
Also completely agree that one of the things I liked much better about 3Delight is the microfaceting that it did automatically to make displacement work better. As a technology, I actually prefer displacement since it isn't fake. There are things that displacement can do that bump/normal maps can't. But in Iray the model creator almost has to make the model with subdivision / displacement in mind; so it ends up not being as useful.
Back ON topic ... I've seen a lot of skins come out with too strong of settings on bump/normal strength. These may look okay from a distance, but as the camera gets closer (or like jukingeo notices the angle of light is more extreme) the skin looks more like an orange peel. It's not at all uncommon to have to reduce the values in the Geometry category of the surface settings.
As for the color, I have repeatedly seen where the translucency and transmission colors (and depth settings) have more of an impact on the appearence of the skin than the base color does. I have to add a plug for my favorite tutorial on this topic Skin Shading Essentials Tutorial which is also part of the Skin Shading Bundle both of which are on sale right now. The tutorial does an excellent job of explaining how the settings the Uber Shader affect skin surfaces. The tool that's included in the bundle makes it quicker and easier to make adjustments by providing a single UI for all your skin settings instead of having to select and manipulate them in the surfaces pane.
Okay, now I think I see what you're talking about. I thought the problem was the fake orange tan that so many characters, especially Core characters, seem to come with. But if its about the weird pattern on her skin, I'd almost bet that's painted on to the texture. Since you've already fixed your problem with Skin Builder, great, but you can check the original if you want (or are bored). With the original skin loaded, you can go to the Surfaces tab, pick Torso, then click the map for Base Color. Select Browse... and that will open up the folder where the textures are stored. Then just pick the one that looks like the main torso map and open it in Paint, Gimp, or whatever photo editor you want to use. If the orange peel look is there, then yeah, there's nothing you can do except pick or build a different skin. Unless you're super awesome at Photoshop, of course.
It looked to be a surface texture issue at first and it might still be, however, there is more work at play here and there is that yellow/gold tinge to deal with as well. So in the end even though the bump or other texture settings might have helped a bit, the greater issue was the color.
Yup! Her face seems to look prettier with the lighter skin tone. The next thing I want to try is to see if I can use the SAME skin color in Skin Builder and perhaps create a skin color that will be the same as the original, but without the artifacts. Yes, I do have to add her skin (age) spots, but I am hoping that I could get her eyebrows back. Yes, this will restore some of the original face texture in the face area, but the orange peel effect was not a strong on the face. So that is the next experiment.
Yes, I am familiar with the 'Oompa Loompa' orange tan issue and it is the 'Transmitted Color' setting that takes care of that issue. Usually going a bit paler in color or going with a brighter orange there takes care of the problem.
ited to SubD level 1, so that's why bump and normal maps are very good for adding fine details.
Much of what you said in that paragraph is pretty much Greek to me as I am still a newbie with Daz. But I have ventured in that surfaces tab already and had made some setting changes in the past. Mainly for the aforementioned 'orange tan' issue and also for my favorite control: Cutout Opacity. Yeah, I like that one because with it I can create new many new outfits out of one! But the whole bump, distance thing is out in left field for me.
I been always an avid user of Iray from the beginning. It seems to make figures look more realistic looking. 3DL seemed a bit more CGI cartoon like. But for some reason, 3DL doesn't run well on my system at all and it takes a VERY long time for a render. I tried it twice and had close to 3 hour renders both times...also in both cases I had to do a restart as it locked my system up. I never had that with Iray. So I been sticking with Iray.
As for the other controls having more of an impact than the base color? Yep, I experienced that first hand as well.
Yes, it turned out that the problem was not a surface issue, or at least it wasn't JUST a surface issue. There is definitely some kind of (dis) coloration on the skin. I probably do that test later on to see if it is indeed a condition with the skin itself. I have Gimp so I can check it out in there. However, with what the Skin Builder did above. I am happy with that.
Thanks-+