Daz 3D is part of 
Connect
DAZ Productions, Inc.
7533 S Center View Ct #4664
West Jordan, UT 84084
Licensing Agreement | Terms of Service | Privacy Policy | EULA
© 2026 Daz Productions Inc. All Rights Reserved.
Comments
I think you're right. Material details are critical. And not just on the model, but the whole scene. I've seen great looking models that I can easily tell are 3D because the walls in the room don't look right. The biggest factor in this this often imperfections. In the real world things aren't digitally perfect and we tend to pick up on those factors even if it's subconciously. It's one of my frustrations with a lot of shaders we can buy today. First, they are almost always tiled textures which can look very strange when you try to scale them across larger objects like walls, floors, etc. And second, they are typically designed to be perfect without options for chips, cracks, scuff marks, etc.
So here's the interesting thing in today's world. I would say you're 100% correct IF what you are looking for is an image that looks like a photographer who used an actual camera to take the picture. But what percentage of pictures today are taken with cameras verses with phones? And phones, because of the way their optics are designed, typically have nearly infinite depth of field. So if the goal is to create an image that looks like 98% of the pictures posted on Instagram today (stat totally made up), then the sharp focus isn't as much as a factor.
That statement about cell phone cameras and the infinite field of view may have been true 5 years ago, but in more recent years cell phone manufacturers have been working very hard to make your next phone into a legit camera replacement. My current phone (1 1/2 years old One Plus 5t) has a main camera that can open up to f1.7 and a "Portrait Mode" that will blur the background even further using data collected from a second lens and sensor. The near infnite DOF was a product of how simple phone cameras used to be, after all they where just glorified laptop web cams... The trade off to that was that everything would be a little soft because there was no f-stop or focus adjustment in the camera assembly.
Even full SLR cameras loose their ability to make a sharp focus with most affordable lenses when running too high of an f-stop.
Latest renders
EDIT: sorry, was not quite happy with the first one. Now it's perfect. ;-)
Nice! Cool expressions;)
Fantastic work as usual! I find that 1 light is all I need in Octane to get the realism. A small light for TV's or computers screens don't interfere too much.
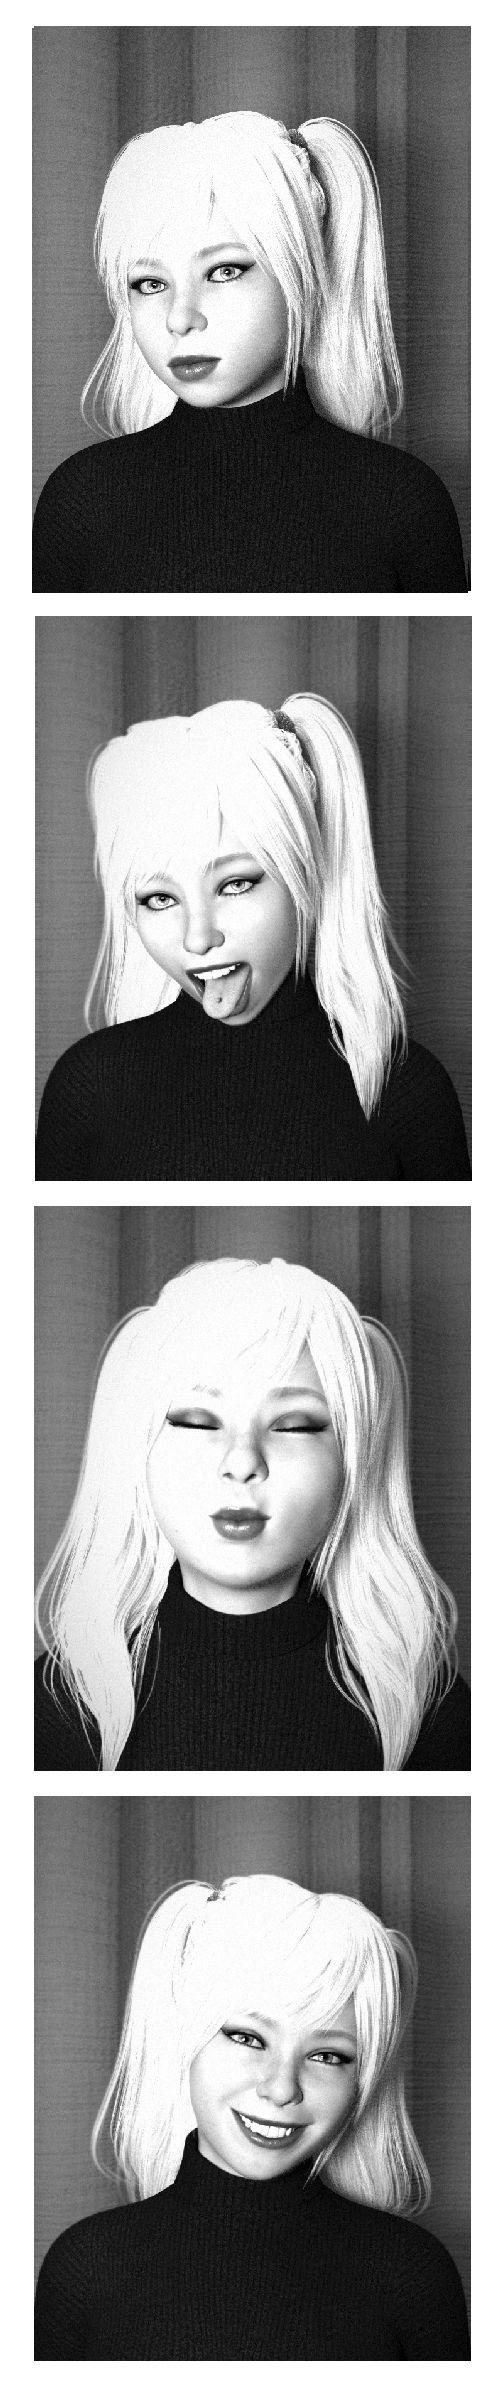
Masterstroke - nice work! And here are my latest renders in a collage. Comments welcomed! Thanks.
Wow, Jeff youd definitely nailed it! All you need is 1 light. You have the skin material down perfect as well. The skin textures do have slight variations in tone which is natural. Skin textures that have little or too much variations can look fake..especially in more direct lighting. Notice the little freckles and beauty marks on the skin. No overdone SSS or too glossy skin in the renders. Specularity is well done. Hair on the arm is the perfect little example that adds to what you eyes and mind expect to see. Not only does she look real but her surroundings look real as well.
Not everybody is a trained CG artist and can spot the obvious clues that make something look CG, but our minds are trained to see certain things that to us are dead giveaways but to non artist may look odd. We see ourselves and other people everyday so we become accustomed to the way things look. If a CG render violates those norms we are used to seeing then it looks CG or not right.
Here is something I started. Lots to work on!
You have got yourself in a lot of trouble. I hope you know how to write a decent text, b/c you have to write a damn tutorial! This is photorealism I can currently only dream to achieve.
Btw.
This is my latest attempt I tried smth I've never done before. A brown coloured light from below. Any suggestions are appreciated.
The body hair on the arms and purple blue veins in the second pic look totally convincing. Awesome pic. How much of that scene is custom made, aside from the Coco hair?
I think realistic iRay renderings will always be out of the reach of newbies. You would think it's as simple as clicking on the render button, but it really requires a lot of technical and artistic talent. Which is why I think you're really an ArtStation student who has come to Daz to tease us with your godlike skills. Just kidding. :)
Wow, these are so impressive. I'm almost certain I've never seen work with Daz/Poser figures that's close to that. What do you use for the arm hair? I've tried a product for body hair, but it was too course to look real, even to the lesser standard I'm working at.
@jeffam112368_9a28fbd572 Awesome. And others too!
I'd like share couple of my renders in which I aimed for reality. First is Tasha 8. It's simple but I think it rendered well with a hdri (I don't remember which one it was). The other I don't remember who she was XD.
As always the girl is absolutely realistic, apart in the last picture where the smile is not totally convincing. But as always there are odd shadows and the character seems isolated from the environment, that gives the "collage" effect. Apart the third picture where the strong shadows seem actually projected on the wall so the character is better integrated with the environment. While the fourth picture doesn't get lucky the same. Here the shadows are again off.
The strong shadows you use may simulate a camera flash so they may be believable. But you need to integrate this kind of light in the environment too.
I'm appreciative of critiques, however, I admit I do not understand your comments regarding the odd shadows in the environment parts. The shadows (be it on the human figure or the environment) are all cast from the same, single light source and, accordingly, are projected true to the real world using established ray-tracing mathematical formulas. That is not to say the shadows may look odd to you, that very well may be your perception, just note they are accurate as to the laws of physics/geometry.
Thanks! As for arm hair, probably using the same one you are, however, I do have to set the Cutout Opacity to like 20% to get it to be more subtle. Give that a shot perhaps...
Nice!
Thanks for the comments. The figure itself was Genesis with a blend of marketplace and my own custom ZBrush geometry modifications. Texture-wise, same thing, it's a blend of marketplace and my own trial-and-error texture maps edited in Photoshop. As for ArtStation, there's some amazing high-end stuff on there I could only strive for....that said, I have participated on that board in the past and may get back into it. Thanks!
Thanks - I may do a tutorial sometime - so will keep you posted. Your latest attempt is looking good, would recommend the following: 1) always use white light sources, preferably project directed in front...e.g., there are typically no brown lights in the real-world, 2) i'd reduce the Camera Focus so the blurriness on the ponytail is less extreme, 3) overall, her skin tone seems a bit washed out...maybe up the Saturation and/or edit the texture map to have more color diversity, 4) for kicks, I'd try closing her mouth (Pose - Head - Mouth Open/Close) and see if that makes it more realistic... anyhow keep it up!
Then it means you're using odd iray settings. That is, in your setup you did find a way to fool the pbr rules. I'll explain it better.
In the real world there's no way to have zero ambience light in a closed environment (well unless everything is black). Because any light source will bounce around thus producing some ambience light. While in your renderings the shadows are black. Thus no ambience at all.
Also in the real world any shadow will blur the more distant it is from the casting source. Even a single light source. This is because any real light has both a shape and a volume and again it bounces around. In your examples you get perfectly black and sharp shadows independently from the distance. This is not phisically possible. Apart in cosmic space for planet-size objects may be.
So. I've tried some of your tips. And well, that is the result.
Removed the previous lighting setup and replaced it with Kelvin scaled lights. The camera is really weird. I had to push the f/stop into triple digits to get the DOF reduced.
Played with SSS on her skin as well as translucency colours. And I closed her mouth. ;) But I think I like her open smile more.
I like it better -- but yeh, you should do whatever feels right for you. Also, recommendation, the texture map on the face is too perfectly clean and similar color... I'd pull the raw texture into photoshop and add coloring to the nose, cheeks, and add imperfections, etc. Then re-render and see if you like it better. May want to try SkinBuilder 8 if you'd prefer a program handle to heavy lifting for you. Keep it up!
Toyed around with Skin Builder. Jepp was an improvement. Here is the final spin for her.
Those are both in that zone that's so close to something that passes as a photo, that I can't quite figure out what's keeping it from convincing me. This is where I often feel I'm stuck. With the first image, I think there's something not quite there with the skin. It needs more details—the little lines that somebody of that approximate age would have around the eyes, little folds around the armpits, etc. The texture is too smooth, as well. With the white dress image, the first thing that struck me is the texure on the corset is off. It's too metalic for a silk and probably needs a touch of SSS or translucency to capture the way light moves through fabric. Assuming they both use the same skin, it works better in this one, but when I study it, I still notice the lack of those details.
Another small thing is there aren't any fingerprints/smudges on the instruments. With such polished surfaces, there should be a little bit of surface grime and fingerprints even on a very clean surface, I'm not sure if that contributes to the uncanny valley effect, but it could be contributing in such well-light environments.
Aargh, having done that analysis, I can see how it would apply to my own work and how I don't have either the skill or the tools to fix it :(
This is about as close as I've gotten with a close up. Barring, of course, the sweater. That probably needs some kind of hair system/fiber mesh to sell it. The glasses might help, since they hide the lack of detail around the nose.
That's probably from using a point source instead of settng the light to a sphere or disk. A phone light is pretty small, though–no more than a few mm diameter. @jeffam112368_9a28fbd572, I'm assuming you're using a single point light. Does your shader/set-up work if the light is larger (and thus softer), more like a photographer would use?
Point lights give good results.
Yes, you are correct - a single point light. I can (and sometimes do) set it to Rectangle of 20x20 or so, and yes, it makes it softer, but that is not the 'flash-like' look I was going for.
Nice job!
Can you post your point light settings and your Tone Mapping settings?
I've played around with the "crush blacks" and "exposure values" dials, but I can't get my point light shadows to be super black like yours. They're always like, 50% black.
Thanks for analysis! Very good points. I am lazy and I usually use characters and props straight from box without tweaking them or doing much postwork. I see the grime and imperfections would add a lot.
I like your render a lot, the overall composition and lighting looks really good. B&W always elevates the real feeling of a picture. Perhaps a little tighter DOF, so it slightly starts from the ears and back portion of the hair. Somehow I always find it adding reality while I think it comes from photos I've seen during my life. Well, the title of the thread says "photo"realism :)
I'll add one render I did with a trombone. It's a bit of an lighting accident how it came out but I liked it and took it as it came. It could use postwork and the guy on the background the same attention to detail than the main character. G8M base figure with Edward 8 skin, default age morph and George hair set, DarkEdge's glasses.
Tone mapping settings are what I'm going to dig into next.
@Tammuz43
That looks very good!