Use hair as grass?
 Hansmar
Posts: 3,194
Hansmar
Posts: 3,194
Hi,
You may think I have been smoking some, but in the discussions on what Bryce 8 or 9 should have, there was the issue of 'not proper grass creation' in Bryce. That's true, as far as I know. David Brinnen made some tutorial about using leaves of pine trees as grass; very nice idea and I got some nice results. Someone else, sorry, forgot who and too lazy to look for it, stated that the grass problem in Bryce was similar as the hair problem in DAZ Studio and mentioned products for making hair in DAZ and "could they be used for grass in Bryce?"
Now, that is a nice thought. The simple answer must be: "yes!"
I do have 'Look at my hair". But since I hardly render humans, I have not used it a lot. This idea (not mine, why didn't I think like that?) led me to make some quick attempts.
Workflow: create landscape in Bryce --> copy (export - import or Bridge) to DAZ Studio and select there --> open Look at my hair --> create hair --> export as obj --> import in the Bryce scene with the landscape --> texture --> render.
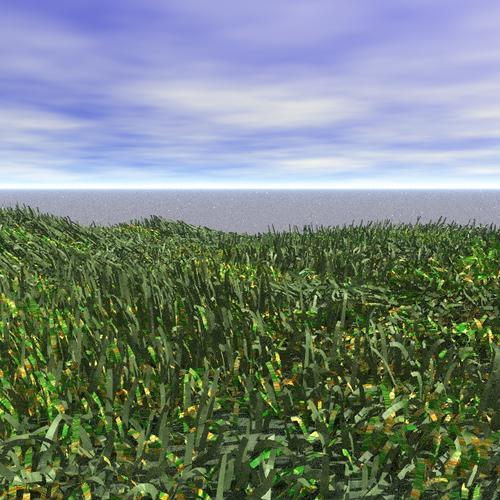
Here are my first 'quick' attempts. Not very good yet.
Need to play a lot with it to find the proper size of the landscape, correct hairstyle, thickness, height etc. And you can export with more or less 'hairs' (per unit) and much can be improved there too.
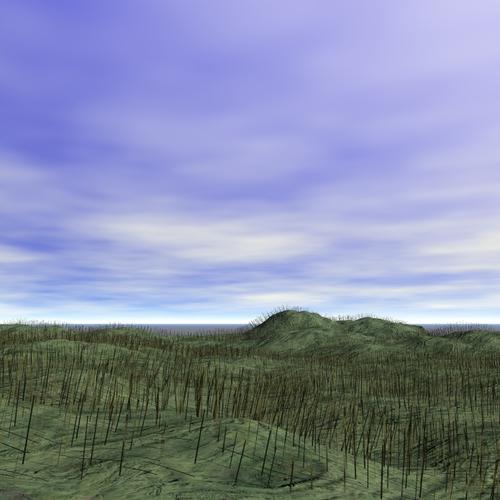
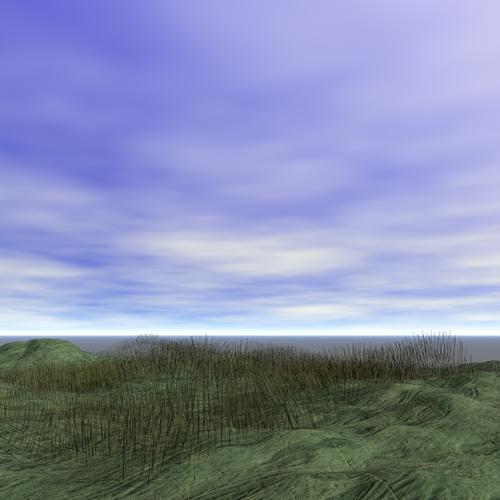
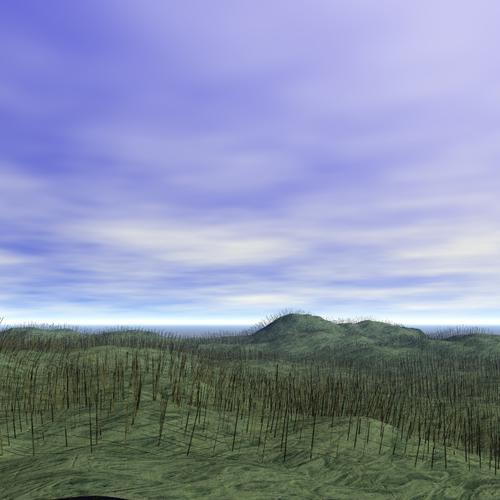
First three are made on a large lanscape with default amount of hair per unit in the export.
Last version contains two times the same 'grasshair' slightly moved and with different textures to make it more lively. They are made on a smaller landscape with more (5 times) hair per unit in the export.
So, here they come. I see potential, but much work to get something really great.
What do you think?
Daz 3D is part of 
Connect
DAZ Productions, Inc.
7533 S Center View Ct #4664
West Jordan, UT 84084
Licensing Agreement | Terms of Service | Privacy Policy | EULA
© 2026 Daz Productions Inc. All Rights Reserved.
Comments
The idea definitely has merit. I love the density of the bottom picture the best, although the leaves seem a bit wide for grass and look like some other type of vegetation. The other renders seem a bit thin to me, perhaps they could use some scattered thicker clumps here and there, or maybe I'm just basing that on the last time I saw grasses growing in the sand dunes on my local coast.
Another option, if you don't want to repeatedly export/import your terrain, would be to import just a clump of grass instead of the entire scene full of grass, and use Bryce instancing to cover your terrain with it. You can use the default, with the grass objects instanced straight up and down, or there's an option when painting instances to have the instanced objects point out at angles based on the angle of the terrain at the point where they are located.
Admittedly, the few times I have tried this I have ended up manually going in and rotating many many instances to make it a bit more random in appearance. Although with proper arrangement and selection of a group of grass clumps rather than just a single identical clump perhaps that could be avoided.
@hansmar: The first three images remind me of burned out forests, rather than grass. The fourth image is more grass like but lacks definite definition of individual blades to give me the opinion its grass. That image is definitely in the right direction and with a bit of tweaking will probably be very close to looking like grass.
Hansmar,
Fantastic work. I had not had an opportunity to test the theory before I posted about it in the other thread, but I assumed it would probably work. The examples you have uploaded are moving in the right direction for sure. I have a couple of questions.
1. What is the polygon count of the mesh hair object?
2. How much detail did you use in the terrain export?
These questions have importance because I have found that a model comprised of 1,000,000 polygons takes about 100mb in memory while running an instance of Bryce. Depending on the number of polygons per strand of hair and the density, one may be able to paint grass over a significant area while still remaining under 1 million polys. The polygon count is important also in the way of smoothing. A model holding a million polygons will take forever to smooth in Bryce, so another indirect benefit of importing the mesh via the bridge is that it is already smoothed.
The resolution of the terrain that is being exported over to DS is important as well. Retaining fine details is very challenging when the terrain is at a 4096 resolution.
Thanks for taking time to test this theory, it does look most promising.
@hansmar - great idea! I like it when people think out of the box. This is not yet ready to use but there is a great potential that it will eventually. Thanks for showing.
Great idea, I have Garibaldi and will play with that when I get a chance. Recently been playing with the instancing lab learning some dos and don'ts (it loves to crash). Here is a render using an instanced grass picture (maybe xfrog?) on a transparent plane. Needs work but shows potential. Unfortunately, the scene that produced this render now makes Bryce unhappy, and will not open without crashing.
I have seen a render done in DS where the person used Garibaldi hair to make grass. Looked good in DS, would love to see how it would translate to Bryce.
http://www.daz3d.com/forums/index.php?&ACT=50&fid=4&aid=92057_nqrTjnTuuCxn8eabTJOC&board_id=1
This a a rather pitiful attempt at instancing a small patch of Garibaldi hair, exported as a .obj from Garibaldi (Daz bridge does not work for Gari Hair), imported into Bryce, set to any old green material and instanced over a plane. Admittedly it does not look much like grass, but little effort was spent trying to make it so.
The .obj hair file is 174 KB, the Bryce file with about 100 instances of the hair patch is 883 KB and when loaded takes up only about 54 K according to Task Manager. So it seems that Bryce would probably handle many more instances of the patch before barfing. Also, I set the instances much closer than necessary to achieve a dense look, so one could probably cover a larger area with the same number of polys.
I don't have LAMH so can't compare, and haven't played around much with Garibaldi settings. Reportedly, Gaibaldi specializes in hair only so may not be able to generate a blade-like hair; its grass will look more like a fescue than a rye.
One of my regrets in life is spending too much time watering and cutting lawns, like so many in suburban America. So I am not feeling like working on the perfect virtual lawn at the moment. But I can see the potential, it seems like with a little effort and not too much memory one could model a passable lawn.
I couldn't resist one last Garibaldi grass scene. The grass is a bit rod-like unless scaled way down, in which case more instances are needed and memory may be a problem.
The rendered scene is 2.8 MB file, takes only 93K memory when loaded.
There may be better grass objects out there to be instanced over a scene, but one advantage to the Garibaldi exported hair grass is efficiency. Few polys are needed.
The main point is, Garibaldi hair can be imported into Bryce as a .obj for whatever use you can put it to, but you will have to supply a texture.
I have seen a render done in DS where the person used Garibaldi hair to make grass. Looked good in DS, would love to see how it would translate to Bryce.
http://www.daz3d.com/forums/index.php?&ACT=50&fid=4&aid=92057_nqrTjnTuuCxn8eabTJOC&board_id=1
Thanks Pam. That grass looks painted on the terrain directly from Garibaldi, which will work in Studio but maybe not in Bryce. Playing with this last night, I could not get Garibaldi to apply hair to a terrain imported from Bryce to Studio. Garibaldi recognized the terrain but would not let me paint hair onto it, don't know why. If Garibaldi could apply hair onto a Bryce terrain, it "should" be possible to export the hair as a .obj from Garibaldi and render in Bryce right on the terrain, to get an effect similar to the image you linked to. However, trying to export a larger patch of hair applied on a plane primitive did not work for me last night -- could not import into Bryce -- not sure what the problem was. So there may be an issue with larger hair patches, needs more exploration.
I could ask Barry to pop in and tell you how he did it. I don't use DS and he is new with Garibaldi.
Thanks. I would like to know what he used for the terrain.
Thanks. I would like to know what he used for the terrain.
He used the terrain out of this set http://www.daz3d.com/the-tent, which is apparently just a basic ground Plane.
He used the terrain out of this set http://www.daz3d.com/the-tent, which is apparently just a basic ground Plane.
Thanks again! I guess I will experiment with exporting a Studio contoured ground plane to Bryce, with the hair grass exported from Garibaldi. That might work.
I might also ask futurebiscuit if he has any idea why the imported Bryce terrain cannot be populated with hair in Garibaldi, perhaps there is a simple fix. No idea whether he is a Bryce user, but he doesn't seem to be much into modeling terrains and is not much interested in supporting exports to applications outside of Studio. So no high hopes there.
Searching for a fix I earned that Carrara hair can also be used for grass/moss. http://www.daz3d.com/forums/index.php?&ACT=50&fid=66&aid=74301_nzecxSbjpVUOWlWjqXxG&board_id=1. Another thing to try. Have played with Carrara's instancing lab a bit. It seems more versatile and powerful than Bryce's. If only I could get Carrara to produce a render that I actually found appealing!
Yes. I have seen some good renders out of Carrara, but have yet to produce anything yet that I would willingly share. But it is early days yet I suppose, after all I have been playing with Bryce for about 15 years, and only about 15 days with Carrara so far.
Agree - there is beautiful stuff out there, but not so easy to achieve attractive renders just using the default shaders or lights, or at least the ones I've tried so far. It seems there are a few more tricks to learn. It's been fun nonetheless, and I have experienced the thrill of easily making Carrara do stuff I could never do, or only with more difficulty, in Bryce. So looking forward to learning more.
More on Garibaldi hair on terrains: couldn't get the Garibaldi plug-in to grow hair on any deformed ground plane, only on an un-deformed plane. Growing hair on a ground plane of reasonable size and exporting as a .obj creates a massive file. Mine was 5GB and growing, so I shut it off. Went back to using a small tile of hair-grass, and instancing it over my Bryce terrain. This worked pretty well, as you can see from the result. Still very low memory requirement and fast rendering. A decent way to put in background or mid-ground grass; not enough realism for the foreground.
I've posted the grass object at:
http://www.sharecg.com/v/72066/view/5/3D-Model/Grass-tile-for-instancing-to-make-a-lawn-or-meadow
That looks very good! And fast rendering? That is impressive, one of the problems I have had with grass is that while the initial passes are not too bad, the AA pass (due to the use of transparency) is rather crippling.
That grass has the "Leaf 1" texture from the materials library, which uses 20% ambient glow but no transparency. Render time for the scene about 4 minutes using an older 5i, including AA. That seemed pretty fast to me, not sure what else you might compare it to.
Looks fantastic, and renders quickly. As far as the quality of the blades, it isn't any worse than the pine tree leaves used as grass in some simulations. Up close the pine tree leaves also fail to be convincing, but if you have enough blades it can be fine even up close.
It is unfortunate that the Garabaldi doesnt want to paint directly onto terrains. I have a suspicion one might need to prepare the target mesh in some way. From the look of characters like bears and cats it appears as though Garabaldi should be capable of painting onto a dynamic surface. At some point I hope to have time to test it myself. If memory was the problem then that is a different concern altogether.
Looking at this terrain there are a couple of considerations. Even though the grass object itself is low poly there are still a few considerations if you plan to populate an extremely large area. It is still possible to consolidate the grass into a single object but you need an external UV mapping application to do it.
1. Create the grass in DS using Garabaldi or Look my Hair just as you did above.
2. Export the clump as an obj.
3. Open your external UV Mapper and ensure that the hair has a default UV which it most likely does.
4. Once you are certain you have a UV map in place save the obj again.
5. Open an instance of Bryce. Import the Uv mapped grass clump you just exported from UV Mapper.
6. Once in Bryce you will build up your target terrain.
7. Now you are ready to start painting. But there are few important considerations:
A. Make sure you give the original grass object a unique family color.
B. Make sure you assign the original clump as "Show as Box" before you begin painting it.
8. Now enter the Instance Lab. Within the Instance Lab make sure to UN-CHECK the "Instance" option. In the current situation we want to paint real copies, not instances. I will explain.
9. Paint as you see fit, but do be careful of total polygons. You dont want to exceed about 1 million polygons. I will explain this too.
10. Exit the Instance Lab and you will notice that the canvas updates very quickly due to the show as box setting.
11. The newly painted objects are in a group called Unnamed. All you need to do is to export the entire group called Unnamed as an .obj. But before you do make sure the group doesnt total over 1 million polygons.
12. In UV Mapper import your collection of grass clumps. You will see it takes a minute or two for UV Mapper to get to grips with the complex mesh. Even though it is made of a million separate copies, they share the same uv mapping domains. This is why we need to stay under a million polygons
13. All you need to do now is to export the grass collection but do so with the following options checked
A. Enable the check mark for "Flip UV along Vertical coordinates" (This step is only necessary because Bryce erroneously flips the uv maps on objs when it exports. If you dont fix this the texture will appear upside down when rendered)
B. Enable the check mark "Dont Export Materials." This will allow Bryce to import the model as a single object instead of a bunch of separate pieces.
Save the model.
14. Now comes the magical part. You will now re-import the model you just saved out of UV Mapper. The OBJ importer will give you certain options for import, you want to select the top one called "Materials". Now wait a minute or two. It is a complex object with nearly a million polygons in it so it will take a couple of minutes to load into the scene and may cost over a hundred mb in ram memory. No matter.
Once loaded you will find that the model that used to be comprised of hundreds of separate pieces is now a single mesh object. AMAZING, No?
All you need to do now is to copy the matrix of the original Unnamed, and apply its matrix settings to the new consolidated mesh you just created. That's it.
Now you've got grass covering the terrain without using up all your instances. Success. Make sure you delete Unnamed now that you dont still need it.
Why does this all matter? Have you ever tried to paint grass into a scene by using a single blade of grass instanced hundreds of thousands of times? What you discover is that even though instances are cheap, they are not completely free. There is a limit to the number of unique instances the software is willing to keep track of, as each instance no matter how low poly still has a position, rotation and scale information that must be retained costing memory. Over time, the more instances in a scene the more memory used keeping track of the matrices. For this reason, it is sometimes best to consolidate things like grass into a real solid mesh so that you can use your instances for trees and flowers and stuff.
Is this all making any sense? If It's not please ask me to clarify. Though this might seem like a lot of babble, there is an important point here and I hope you appreciate what we are on the verge of accomplishing here.
One can even create "Tiles" that can be used to cover super large areas.
I have for example, created grass clumps that are spread out over several Bryce units covering a small area. I then save it as a obj and reimport it as a material so that it is all one mesh. I call this a tile. I can then instance that Tile easily spreading grass for as far as the eye can see in all directions without running out of memory. It only works well with generally flat terrains so that the tiles edges arent too noticeable. Yep, that's right.
I've got more to share bu no more time for now. See ya soon!!!!!!!
Thank you Rashad.
Not sure what you mean by external UV mapper. I guess a program like Hexagon, Carrara or Blender that does that sort of thing? If something else please clarify. I'm also not familiar with the idea of a default UV map. I've done nothing with UV maps and have only a vague idea of how they work. I thought that no UV map exists until the modeler creates it, and am unclear on how Bryce uses UV maps if at all. If there is an option for specifying the UV map for an object in Bryce, I haven't found it yet.
Your recipe is useful, I gather, any time a huge number of instances is needed. I can see why you might need that in a large, landscaped terrain like your island model. In my simple-minded approach, I just try to avoid anything that resource intensive as I have so many other skills to develop in less challenging circumstances. Admittedly instancing won't work in Bryce once the number of instances gets too large. Whatever "too large" is, it does seem to be inversely related to the complexity of the item being instanced.
I'm kind of surprised that a model with a million polys is workable; never worked with something that large myself and noticed that the UI gets laggy before that number of polys is reached. Perhaps setting the wireframe to box mode reduces the lag, but makes it so much harder to visualize what's going on without pushing the render button.
You must be a very patient person, to push the limits of Bryce as you do. Respect.
You can download "UVMapper", a 3rd party piece of software, here: http://www.uvmapper.com/ . The basic application is free, you can also pay to upgrade to another version that has more features.
Hi,
It's me again. Didn't have time to check all posts out and do 3D work. I will react to earlier posts later. But wanted to show my newest achievement. I now used Marvelous Designer 2 (a clothing creation program!) to create clumps of grass. After searching for proper info, thanks to Rashad Carter I finally got the picture of how to do instancing, so I did.
I made this in several groups and now have in those groups 128732814 polygons. Size is only 1.38 MB and rendering time with regular aliasing (and IBL, which is a stupid combination, I realise) took about 45 minutes.
This is my best attempt so far. I will keep playing with this.
Hans
Very nice!
Why is that a stupid combination? Very nice example.
Hallo all,
Thanks for many inputs, suggestions and replies. I will try to answer a number of questions and ideas in the order they were posed from the beginning.
@GussNemo. I think the approach in my last original picture (of the 'look at my hair' grass) could lead to reasonable or even good looking grass. Depends on the length of 'hair', colours, etc. However, that approach was to make a very large 'hair' on a full terrain and Look at my hair tends to crash very often when I attempt this. So, it is not the way forward, I am afraid.
@Rashad Carter. The polygon count of the hair object (in third example) was 404064. The terrain was 'ultrafine'. But it was not a very big terrain, so I am afraid that with a slightly bigger terrain or with a denser 'hair' the grass will easily be more than a million polys. I think that instancing is indeed a better idea (as can be seen in my previous mail).
@Horo. Thanks. Though the exact way of doing it is not optimal, I think using hair as grass can still work (with instancing). Still have to try that.
@JStryder. Indeed: instancing is a good idea. I saw a posted tutorial by Rashad that thought me a lot. Before I read (and mostly understood) it, the lab crashed on me very frequently. When making the grass in the previous mail, it worked more or less flawlessly! Your second mail shows that Garibaldi hair is like tubes (which hair is too). Strangely enough, Look at my hair hair is like leaves and therefore (by accident) more suitable for grass. Your (first) picture doesn't really look much like grass indeed.
The second attempt is slightly more grassy, but the hairs are in my view too thick.
In the render that chohole referred too, it does look reasonable in the distance.
Am I to understand that Garibaldi cannot paint grass on an imported object? Look at my hair makes grass on any imported object.
The Carrara moss looks nice.
And your final terrain with Garibaldi hair/grass works well when seen from somewhat further apart. Although I can still see the tubelike forms. Not much can be done about that, I fear.
@David Brinnen. Indeed, I noted slow AA, even withouth transparency. Of course, good grass and good leaves do have some transparency. That is why I made my last attempt with no transparency, but somewhat lighter colours (which I, by the way) made somewhat more vibrant in Picturenaut after exporting the Bryce render to HDRI.
@JStryder: impressive render speed! My attempt was much slower, though part of that may, of course, be related to differences in our machines. Mine is not a very modern one with Core 2 Duo T6600 2.20 GHz and 4 GB RAM. I assume that even an 'older' 5i can be faster.
@Rashad. I do have to try your method! Looks complicated, but probably I will be able to follow it after a few trials. I would like to see an example of what you made with it! Luckily, my last attempt did work quite nicely without memory problems (yet).
Finally. to ad to my thoughts on using clothing instead of hair for grass.
1. I find that Marvelous Designer (which I bought in version 2, still rather cheap) works easier than Look at my hair, although I will attempt is again.
2. You can make several forms of blade that you want.
3. You can control where each blad comes. That is relatively tedious, so I just made lots of lines and fixed blades within regions more or less random.
4. You can add wind, though in my example it didn't seem to have a lot of effect.
5. You can choose the stiffness and flexibility etc. of the material. I used settings for leather, but stiffer and more flexible can also be used.
6. You can make one basic 'clothing pattern' (pieces of not yet stitched cloth). When you 'run' the tool, the cloth is stitched, but also dynamically falls around the avatar. When you stop the run after longer or shorter time, you can export the result as object. By rearranging to starting position and doing the run again (longer and shorter periods and more or less wind, or even with changed material settings) you can very quickly create several more or less similar, but slightly different clumps. (Something similar can be done by modifying hairs too, I have to admit).
The process I used was:
a. Make a terrain in Bryce, export as object, import as avatar in Marvelous Designer
b. Create a ground cloth pattern and place it right over the terrain/Avatar (so when running, it falls and stays on the terrain/avatar)
c. Create many lines in the ground cloth to fix the leaves to.
d. create many leaves (one or more forms and sizes)
e. prepare the future stitches by 'seaming' the underside of the leaves to a line (you can put more than one on the same line). See picture 1 for the result (from the pattern window).
f. In the 3D window, place the leaves close to the and above the ground cloth and ensure that they have a more or less free fall zone (to prevent strange clumps within the clump of grass). See picture 2 for the result (in the 3D window).
g. Now run, until you like the result (example picture 3). And stop the run!
h. Export the object to obj.
i. Rearrange all patterns.
j. Rerun until you like the results
Repeat h, i and j several times for more clump objects that are not exactly the same. When you want to, also modify the patterns or the material in between reruns.
I think I will give it more tries later. But I will also reattempt Look at my grass with small clumps and instancing!
I would love to see more hair-grass and clothing-grass attempts!
Hansmar,
Everything you are doing here looks incredible!!!!! Thanks so much for all the detail you've provided on your work flow. I will look into this more specifically when I have some time.
Thanks all for the positive feedback.
I made another one. I used several results with the ground 'cloth' either fixed or free to move. I wanted to try out Rashad Carter's advice, but Bryce crashed on exporting (step 11). So I made this one with instancing many times. I also added some trees and it rendered fine, but on saving Bryce crashed again. Probably too many instances.
Still, this one looks nice, I think, though some grassleaves upfront may be a bit big (wide). I will retry the set-up of Rashad later.
@hansmar: The last image is nice looking, even if you believe the foreground blades are too wide. I don't think this is something to worry about because it's how they'd look in RL, depending on the species, and if this is what you're after. What I think needs to be considered is angle of view and viewing height. At the angle in your latest scene, the blades will look larger. Had that same angle been higher, while the blades would be wide, they wouldn't necessarily look wide. Regardless, your results are amazing.
@hansmar - grass looks really good. I suggest that you use these blades only near the camera. From the middle ground to far you can just use a a bumpy material using the same colours. That'll fix the memory issue.
I wonder - have you ever used Bantam Grass? It's free and if you cannot find it on Bantam3D anymore, you can download it from my site (see sig). Go to Raytracing > Tools > Bantam3DGrass.
this is my new grass (jpg) man I hope this comes out.All Bryce hair made in Daz 4.6 and then redone in Bryce big render time ,5MINS,BMP IS 2.9MIL Just a thought works for now in what I going to do soon.