How to use the 7 Point Light Setup when you have 2 or more characters
 galactica1981
Posts: 1,251
galactica1981
Posts: 1,251
I'm taking the Dreamlight Light Master course on lighting. I haven't finished it yet, but I was wondering if anyone could tell me how it differs when you use the 7 Point Setup with 2 or more characters in the scene. Would you light each figure separately?
Daz 3D is part of 
Connect
DAZ Productions, Inc.
7533 S Center View Ct #4664
West Jordan, UT 84084
Licensing Agreement | Terms of Service | Privacy Policy | EULA
© 2026 Daz Productions Inc. All Rights Reserved.
Comments
I've not read anything about these tutorials but I will try to offer some general opinions.
Lighting is the single most important aspect of CG to my mind, I never tire of its study. There is no one particular way to light a scene. 3 Point, 4 Point and even 7 point light set ups are not strict but are merely conventions. All situations are unique, there is no one solution. In fact once you really get your legs warm you wont think in these ways at all, at least not consciously.
that said, once one gets the basics they should try to break way from specific formulas as they are all fraught with shortcomings of one sort or another. Look at nature, watch the way light enters the window and bounces off the floor and walls....that is the true nature of lighting....let real life be your tutorial!
There is more to CG than portraits of Victoria, a fact I feel Daz 3d often forgets. The training you are getting seems like it is aimed at those "portrait studio" type of renders, which while great only represent a small set of circumstances for which we artists should learn how to illuminate.
Most likely the 7 point light set up assumes there is a single target object at the center of the world and all of the lighting is rigged and aimed to improve the look of the single target model. For the theory to work the target model must be at the center of the scene, and the camera must have a specific and unchanging perspective. There are very limited situations and very rarely in life will we be imaging a single object in a void of a room. Life is usually more complicated than that. Real life doesnt stop to ensure all 7 lights are set up, real life just does its thing without apology. Light starts in one place and bounces around the environment. That for me is what really matters. Not everything has to look pretty, things should look gritty from time to time as well.
I would assume that all you need to do is to place the two models close to one another near the center of the scene so that your light set-up can illuminate them both. Problem solved.
But now we get to why you need to release yourself from any tight adherence to formulas like those in the tutorial. What does one do if they need to light a scene that is more complex and not based around a single target model. How do the 7 points work in such a scenario?
The answer is that they dont. Period. They just dont. Dont focus on the "results" before you've gotten clear on the "process." Formulas tend to give people the idea of results but they often skip the step of explaining the processes behind it.
The tutorials are better suited to giving people ideas about how to use lights in general, the strengths and weaknesses of different types of lights, how to consider issues such as shadows and highlights and fills and the like. All great stuff. The Dreamlight Tutorials look like a wise investment as a learning tool. Just dont get stuck in one way of thinking.
Here is what I suggest.
1. First you must ask yourself about the environment the final shot will be made in. Is it indoor, or outdoor? If indoor, are there windows or lamps or other light sources acting on items within the room? If so, start with representing those lights first. You could use interior lamps to "represent" the concepts of the fill and other concepts introduced in the tutorials. If it is outdoor, what is the weather like and the time of day? Once you know that stuff, you are now ready to begin making a scene. Notice my first consideration is the environment, not the target model.
2. Once you know generally where the scene will occur, then you have to decide how and where you want to place your object of emphasis. In many renders, there is no single point of interest (such as a landscape image) yet the idea is to make everything look amazing. Again point lighting schemes dont handle complex situations well, only portrait type renders. So for a landscape or a scene with multiple characters all over the place, you need a more "global" approach to your lighting.
3. Once you have a general idea of where the scene will be shot and what and where the target object will be and located now you can begin.
4. Your tutorial talks about the concept Key lights. Sunlight is the only Key light you need for outdoor renders in the daytime.
5. Your tutorial also talks about Fill Light. For an outdoor scene this fill light comes from the Sky Dome, it comes in from all sides and is blue tinted. Some call this ambient light, which is a bit unfair but forgivable.
6. In real life sunlight gets scattered not just by the atmosphere, but by local geometric objects as well which is why the environment is the first consideration. A brightly lit white sidewalk will 'bounce" a considerable amount of light onto the underside of your target model, On V5 she'd have a lot of light under her chin and under her breasts for example....dont think the point light schemes address that unless you use Reflectors.
I could go on, but I've got to run now. Hopefully I've given you some hope in that there are still situations out there for which there is no formula that can help you instead you;ll have to trust your own instincts and test exhaustively until you find what works the the current situation.
I searched and found a short video that gives a clue as to how the training works. It essentially gives the user a set of tools to understand how lights are affecting the viewers psychologically, a rather impressive approach and one I can agree with totally. In the examples in the video he appears to show how to render lots of situations, including somewhat more complicated scenarios. From what I can see this training should prepare you for almost anything provided you know how to apply these concepts in all sorts of situations.
Based on the original question I'd say that you should be able to light both characters with generally the same 7 point light set up, no need to do two separate rigs. If the rig is as I understand it to be, it already addresses most of the issues you'd need even for multiple characters. That doesn't mean you might not need an additional light here or there to get the look you want from each. Since the mood of the scene will be the same you should be fine.
Best of luck.
Not only that, but render them separately as well. As in, render everything in the scene with one character lit, then everything in the scene with the other character lit.
I've also taken the course :)
Not only that, but render them separately as well. As in, render everything in the scene with one character lit, then everything in the scene with the other character lit.
I've also taken the course :)
Makes sense. But what if you had 10 characters? I doubt anyone would composite 10 renders. There has to be a better more efficient and logical solution than that. There has to be a global solution of some sort out there to deal with such situations.
You said you found a video about this, but I don't see a link. Can you post it? Thanks.
...I used to work in theatrical lighting which is why I found Daz Studio's basic lights (Distant, Spot, Point) to be so much more intuitive than other apps, particularly those which rely more heavily on global illumination.
---Distant lights are basically "Floods" as they illuminate a wide area of the stage. This effect could also be created by a "light bar" which had a series of spot lights mounted on it with different coloured "gels" to illuminate the entirety of the stage.
---Spot Lights pretty much speak for themselves and the ones in Daz function vary similarly to the RL versions (save for falloff)
---Point Lights pretty much were represented by "on stage" lights such as a lamp or candle prop.
In the pre UberEnvironment days, It wasn't uncommon for me to have a multitude of lights to create certain moods. For example, in one night scene, I needed light to be shining out of a window. There also had to be that bluish night time ambient glow as well as illumination from a streetlight off stage. Finally there was a special lighting effect I needed in a trash can as well as illumination from a glowing orb (basically a sphere primitive with the opacity turned down and an embedded point light) in one of the figures' hands.
All totalled, the scene had something like twenty eight individual light sources. Yes a lot of work especially since I was still doing this in 32 bit and had to run a lot of time consuming test renders to make sure all the light components did what they were supposed to do.
For large outdoor scenes I often relied on Dreamlight's LightDome Pro as it supplied a skydome with the necessary lighting (at the proper intensity) for the type of daylight or night time effect desired. The downside is this would load in anywhere from between twenty five to forty nine individual lights all which had a cumulative impact on render time (particularly because it used a mix of DSMs for the skylights and ray tracing for the primary "sun" light) to create the effect of global illumination.
As I became more experienced, I began to work up my own outdoor light sets to save on memory load at render time (and increasingly frequent crashes as scenes became more involved). This came out of experimentation with the MPC as often time the "ground plane" would appear much darker in the render than the backdrop. Falling back on my theatrical experience, I developed both a five and seven source "daylight" setup using primarily distant lights, one for the sun and three to five for ambient effect with a point or spot light light for "fill" to soften harsh shadows on a characters face. The pic of Sadie (as Maria VonTrapp) below is probably my most successful. It employed a seven source setup with six distant lights and one spotlight. The setting used only ground plane prop and a photo backdrop.
Granted, now that I have a much more powerful (64 bit) system I have been working almost exclusively with UberEnvironment lighting. For the scene below, a single Uber Envrionment sphere would do the work of the six distant (ambient) lights, and give softer overall illumination to the entire scene as well as providing the necessary fill light. With the addition of two low intensity distant specular lights (to stage left and right) for rim illumination and the single "sun", the same scene would employ only three individual light sources.
http://basic3dtraining.com/product/3d-light-master/ this is it.
Ten characters is not the same as ten subjects. Most images, and I can't think of a single one that does not, has far fewer subjects. Usuall it's one, sometimes two, and three is a stretch. Everything else, including extra characters, are background.
Hopefully DreamLight will pop in here and give us a clearer understanding of what the courses should be teaching us. My personal feeling so far is that these tutorials cover lots of situations and do so in a very smart way allowing room for improvisation as needed. The tutorials seem highly impressive in so far as they get one thinking about lights in clever ways.
My suspicion is that this tutorial teaches the user more than just how to light portraits, but how to light entire scenes. Is this not the case?
Ten characters is not the same as ten subjects. Most images, and I can't think of a single one that does not, has far fewer subjects. Usuall it's one, sometimes two, and three is a stretch. Everything else, including extra characters, are background.
You forgot to mention that there are some renders that have no specified focus at all. Not every image needs a clearly defined focus of some kind, which I think DS users dont often realize. A "still life" is a good example. To my mind there is no such thing as mere background. DS tends to inadvertently instruct artists to focus all rendering resources on the Daz figure at the center and to just place some sort of backdrop skrimm to fill in for the "environment." While this is fine for portrait style rendering, it misses the point of CG overall.
The point of CG is the create a "world" that is compelling, at least to my simple mind.
Here for example is a link to an architectural image I rendered recently testing fake GI to look as much as possible like full GI. Now I ask you, what do you think is the central focus of this image model-wise? Where is the background of this image? If I was going to throw my best lighting at something in this room, what would I point it toward? For me the actual "focus" of this scene is the behavior of the light itself. How would the 7 point light set-up help me in this current render? I am convinced the 7 point light rig can handle this room interior, but I could be wrong so let me know.
Now to be fair, Bryce 7 has some seriously sweet lighting tools such as the 3d Fill Light which can produce fake GI looking better than people would expect, so I cant take too much credit. I only upload this example to explain how if I'd been thinking in terms of primary focus and background being less important I would have been totally lost on how to approach the lighting for this scene. One cannot even call the building outside the window as backdrop since most of the light inside the room is actually coming from the outside.
Instead I did exactly what I suggested to the OP. I first chose a space to work within, in this case by Jack Tomalin. I considered where the light was coming from and I manually placed lights to "bounce" around the room including from the floor (a floor bounce is essential since the sunlight strikes the floor very strongly). Most of the lighting in this scene is indirect lighting created with hundreds of dimly lit radials, so it wasn't easy to pull off. Anyplace the viewer places her eye I want her to see believable lighting even if her eye falls into the corner of the room or the underside of a shelf. For the illusion to work all of the items in the scene need to look more or less correct. I have lit the room and merely placed items within that room. I chose and lit the environment long before I decided what content to place within the environment. If I would add a character I might add an additional light or two around her face, but 90% of the work would already be done because the environment itself is already plausibly lit without her.
Architectural renders are a good example of why more global approaches such as the light domes are needed for scenes that are more complex and cover a larger scale and don't have singular focus if any focus at all. DreamLight has Domes and other more global tools available in the store so its probably not a bad idea to be familiar with those too.
http://www.bryce5.com/details.php?image_id=5259
Stick a figure in there or ten and you'll find that the lighting is inadequate.
Sorry, my opinion holds on the lighting.
...nice image.
Unfortunately to use a DL light dome you have to backtrack to Ver 3 of Daz Studio as it is incompatible with 4.5.
This is the one issue I have with Dreamlight in that they (he) are (is) currently more interested in producing/selling tutorials and recruiting members into the DL club than producing new and updated advanced lighting tools for 3D artists. From what I heard, there pretty much are no plans to update of their signature LDP plugin for 4.5 as it was put to me after directly inquiring about it, "there isn't the time". That is sad considering all the "spam" I get daily about their tutorial programmes (sometimes three or more emails a day). In my book, LDP2 was a great lighting resource as it was simple to use and incredibly effective, particularly as it also embraced IBL.
Dreamlight pretty much built their reputation on LDP and other lighting plugins for 3D enthusiasts. However, now the focus has switched to "lets make cool nude Vickies" and "we can help you make Zlotys with your 3D work" (the latter which is unfortunately a very difficult road considering the CG industry is actually contracting rather than expanding, and unless you have/know a pro grade app like 3DS, Maya, or C4D, you won't even get a toe in the door).
...my two Zloty's worth.
Stick a figure in there or ten and you'll find that the lighting is inadequate.
Sorry, my opinion holds on the lighting.
In this instance we may end up disagreeing. But that remains to be seen. Give me til tomorrow morn and hopefully I'll have a render or two to share. Ideally I will produce two renders, one without any additional lights at all, and one more with a couple of added lights to enhance the figure. I look forward to your feedback.
I look forward to your render :)
Wow, they aren't going to update it ever? I am not a DS user typically but I think I remember lots of good looking renders in the galleries that referenced these Light Domes. Hmmm very interesting.
...pretty much. Big disappointment as I really like the quality it gives to some scenes. This is why I still have 3Advanced installed.
Tip Create Scene in DS3 with LDP2 note down the SIZE of the Dome. Point DS4 to that content folder and load the saved Scene. The dome loads at default size Scale back up to noted size. Finish scene and render. This worked in DS4.5.1.56, I have not tried it in the new Beta's.
EDIT: I only use LDP2 not LDP, by the way. So I edited the post.
Wancow,
Looks like the renders are going to take longer than I expected. I had forgotten how long this render takes. The first one should be done in a few more hours, then I'll start the next one. When I've got them both I will upload them so we can continue our discussion. Thanks for your patience, see ya soon!!!!!!!!!!!!
Here’s nine figures in one render (sorry it doesn’t have ten).
I have two questions GreyCat. First, is this illuminated with the 7 Point Light or some other means? The second question is are you open to criticism about the lighting? I ask only to be certain we are all on the same page in that images submitted are likely to be commented upon with praises and or demerits. The purpose being to get to the best lighting possible under these more complex conditions. My suspicion is that this current render is not with the 7 Point Light but some other means. But I could well be wrong so please let me know.
Here’s the lighting setup. Note the light ball, all distant lights and no spotlights.
I am not interested in praise or critique. My point is that ten figures can be lit well and rendered in one scene. It requires the use of distant lights not spotlights. galactica1981 I hope this helps you in what you’re trying to do. Take the advise of self appointed “ lighting master” with a gain of salt.
I wish they would update their products, as I would love to be able to use Motion Master for DAZ 4.5.
Can anyone create a render with two or three characters as a possible lighting tutorial for me and anyone else who might be interested in this? It would be greatly appreciated!
Edit.
I’d write a long reply, but I actually have a life. “Lighting master” didn’t refer to you (see first post) get over yourself. Why don’t you post a render so I can write a long post flaming your work. Know-it-all jerks like you are the reason I don’t post that often.
Grey cat out
My bad then, I apologize, I am a jerk! I misunderstood your point just as maybe you misunderstood mine when I asked about whether you were open to criticism at all. This is a discussion after-all. The tone of your post was very dismissive. Since the first part of that post was in response to me I assumed the later bit was as well. If I somehow misunderstood you then I will gladly apologize.
And in fairness, I would love your feedback on any render of mine. I already provided a link to a recent work but if you want more here's a few.
All I ever want is to get better. To get better requires criticism and challenging of old ways of thinking.
I will edit my last post, as I'd typically not go down such a route but I felt I was being attacked for no reason. Please do accept my apologies. Hopefully we can put this behind us.
As stated in a previous post.....Below is an example of a recent lighting study I've conducted in Bryce. The challenge, was to create a scenario where the scene is lit almost exclusively with indirect lighting. No tricks, no gimmick, just straight lighting. The room has six sides but light can only enter from one side. My study was to manually bounce the available light in a plausible way and to capture the scene backlit. It is all calculated by the eye, so it is far from accurate. My only hope is that it is generally plausible.
The model is by Jack Tomalin called Deco. Sent from DS to Bryce 7.1 via the bridge. The room started off completely black.
Wancow is of the opinion that after I add a few characters I will wish for more light. I am inclined to disagree, but I cant be sure until I test it out which is what I have cooking at home right now. Soon I will have two more renders with a character to compare. What will turn out to be better? Who knows? For me it is all about making sure the whole thing makes logical sense so any lights I add to my scene are necessary. I'm not going to use all sorts of wizardry on a human and forget everything else.
Could this render be better? Yes, absolutely. But it would probably require more sophisticated tools such as full GI or an unbiased renderer, both options I turned down purposefully for the sake of training myself to think about light in logical ways.
The other two renders are of an outdoor scenario called the Volcanic Archipelago. I have developed a light system not so different than Dreamlight has done, but my rig is for Bryce. It is called EGDLS (EarthGlow Dome Light Strategy). It makes difficult and complex scenes easy to illuminate and cover all of the bases with decent render times. DreamLight and I are more alike than different
Feedback positive or negative, is greatly appreciated. Thanks for your time
Beautiful, Rashad! :)
I enjoy your posts, and your opinions.
I have only done two renders, and although I have that lighting series, I decided to do my own as placement of spotlights, linear point lights, etc are adjusted depending on where I want the focus. I thought I would use the 3 point, 7 point as a starting point, but I don't even do that.
Everyone doing lighting differently is what makes renders interesting- and I really like your style, very crisp and inviting.
Please do remember bullet point #2 in the Forum TOS.. Criticism should be directed towards the subject or topic at hand, rather than an individual.
In the picture with the Deco set, you said you have the light simply entering the window and you have it bounce a number of times, correct? That sounds a lot like Radiosity. There is a video on that in the Light Master course, but I haven't watched it yet. I plan to do that soon, though.
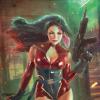
Here is a picture I just did. It is a 1950's version of Buffy The Vampire Slayer! In this picture, I focused all the main lights (Key, Fill, Back) around Buffy. There are no lights focused on the vampire attacking her, and yet the vampire still came out looking pretty good. Perhaps in a scene with two people, it's best to still focus the lighting on just one character first and see how well it turns out. If it's not enough, you can always add more lights.
Yes, I think you are getting the idea. Play around with it. Never be afraid to add a light or two if you need it.
The render is fun and light, not broodish in mood so I think the current lighting maintains the lightheartedness you desire. If you had wanted a darker more sinister depiction, you'd have to do a few things differently.
One question I do have is about the hallway itself. Does the set come with any lights? Are there any overhead lights within the environment? Are there any windows?
I don't have that much experience rendering in DS, Bryce is my primary rendering tool. If I was more familiar with all the tricks in DS I'd gladly step by step the whole process for you. I'd say trust your instincts, you cannot go wrong.