Put together and "postwork" animations - how?
 XoechZ
Posts: 1,102
XoechZ
Posts: 1,102
Hello!
Recently I was going to try out animating in DAZ Studio. It is a lot of fun and I think that I will go deeper into this topic. Rendering still images bcame boring to me lately :-)
Nevertheless, I have read the advice to render an animation as single images. Ok, but what´s next? After doing that, I have series of, let´s say 120 images. Which kind of software do I need now to put these images together to get a movie file and add sound? Can I also "postwork" animations, like I do with still images?
My budget is short, so please don´t recommend me anything high price. Just something that let´s me create and edit movies from my rendered animations.
Thanks in advance!
Daz 3D is part of 
Connect
DAZ Productions, Inc.
7533 S Center View Ct #4664
West Jordan, UT 84084
Licensing Agreement | Terms of Service | Privacy Policy | EULA
© 2026 Daz Productions Inc. All Rights Reserved.
Comments
Hitfilm Express!!
price? a and share on Facebook!
I don't use individual PNG graphics for a animated scenes unless the scene requires special FX in it. . I usually save my animated renders as AVI using Microsoft uncompressed codex option which you find in the renders settings and set your render option to movie instead of series of PNG's ( see attachment) this saves the render as AVI. but before saving the avi after rendering it, go to your daz temp render folder and copy the render tmp folder that has all the raw png's before they are processed into av when you click save. I use this copy of the folder as a back up. sometimes I use rib which creates huge PNG files but i use rib for series of png's when i need to add FX to the scene . It creates a huge folder so beware of that if you use rib as a option Adobe premiere has a option for handling Rib files.. I know lots of people prefer individual PNG graphic for each frame of their scene . but to me it just takes to long to do film editing that way. saving in avi allows you to join each avi scene you renders together easier in a film editor . if you don't want to buy a film editor you can use the MS default Movie maker that comes with windows or download it free from the Microsoft site. Just remember movie maker does not create HD film it only goes to 480 dpi . But hey its free and give you a starting point to learn film editing before you invest in something better that will cost you $$
If you don't mind spending a $100 you can get adobe premiere & photoshop elements , which almost does everything that My full version of CS5 does. minus the fx plugins and film layering and Flash overlay & bridge options. But does create 1080 HD films which is a better options.IMO
I hope that helps gets you started, to me I just found going the individual PNG route for each keyframe takes 10x longer doing your film editing .. But that is just my opinion other opinions may vary on this site
depends on your workflow, Hitfilm will load and treat the image series folders the same as avi files so no more steps editing compositing.
as a side note, your videos are very professional and great to watch Ivy but as far as sheer quantity over quality I churn mine out pretty damned fast!
I can throw a bit of crap up onto Youtube in an hour from start to finish!
Adding a +1 for Microsoft Movie Maker being free and very straightforward to use as a starting point.
The Corel version of Adobe's Premiere and Photoshop Elements is Paintshop Pro and Video Studio Pro, also around $100. http://www.paintshoppro.com/en/products/photo-video-bundle/
Thanks for your answers!
I have downloaded Hitfilm4 Express, which is free. And now I am learning how to use it. It seems to be very cool!
But there is one thing that really confuses me - and that is framerate.
Let´s say I am going for a framerate of 24 images per second. So I set the timeline to 24, which gives me a one second animation. But it actually renders 25 images (frame 0 to frame 24). So there is one frame to much?
Same when I want a 10 second animation. I set the timeline to 240 frames, but again I get 241 frames (frame 0 to frame 240).
As said, this confuses me. Can anyone please explain how I deal with that?
Thanks again!
I started with hitfilm . but as my skills grew with animation it no longer fit my needs that is why i went with Adobe premiere. & I agree film making is a a personal preference & all has to do with work flow.. But I can not imagine creating the films I do using 1000,000's of png images. when my films run 100's of scenes with 100,000's of keyframes. I just don;t have that kind of man power to go threw them all for editing.
So it maybe best if I give y'all a glimpse of a demo into my work flow using Daz Studio as my animation tool. . As I said I don't make silly dancing girl animations.with a few scenes . I set up my film work flow like i would if i were building a web site.
Pic1) I use a dedicated HHD drive for my animation films projects which is drive G
Pic2) This is my projects folder for just animation projects I am currently working on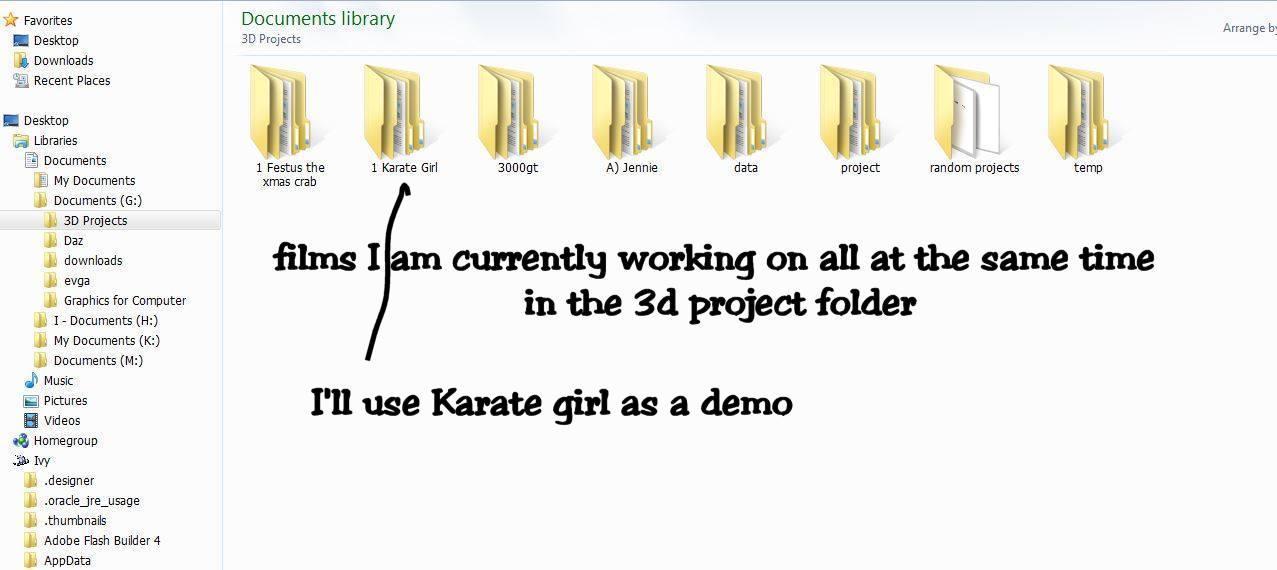
Pic3) is the inside of my work flow . . I'll use Karate girl as my demo folder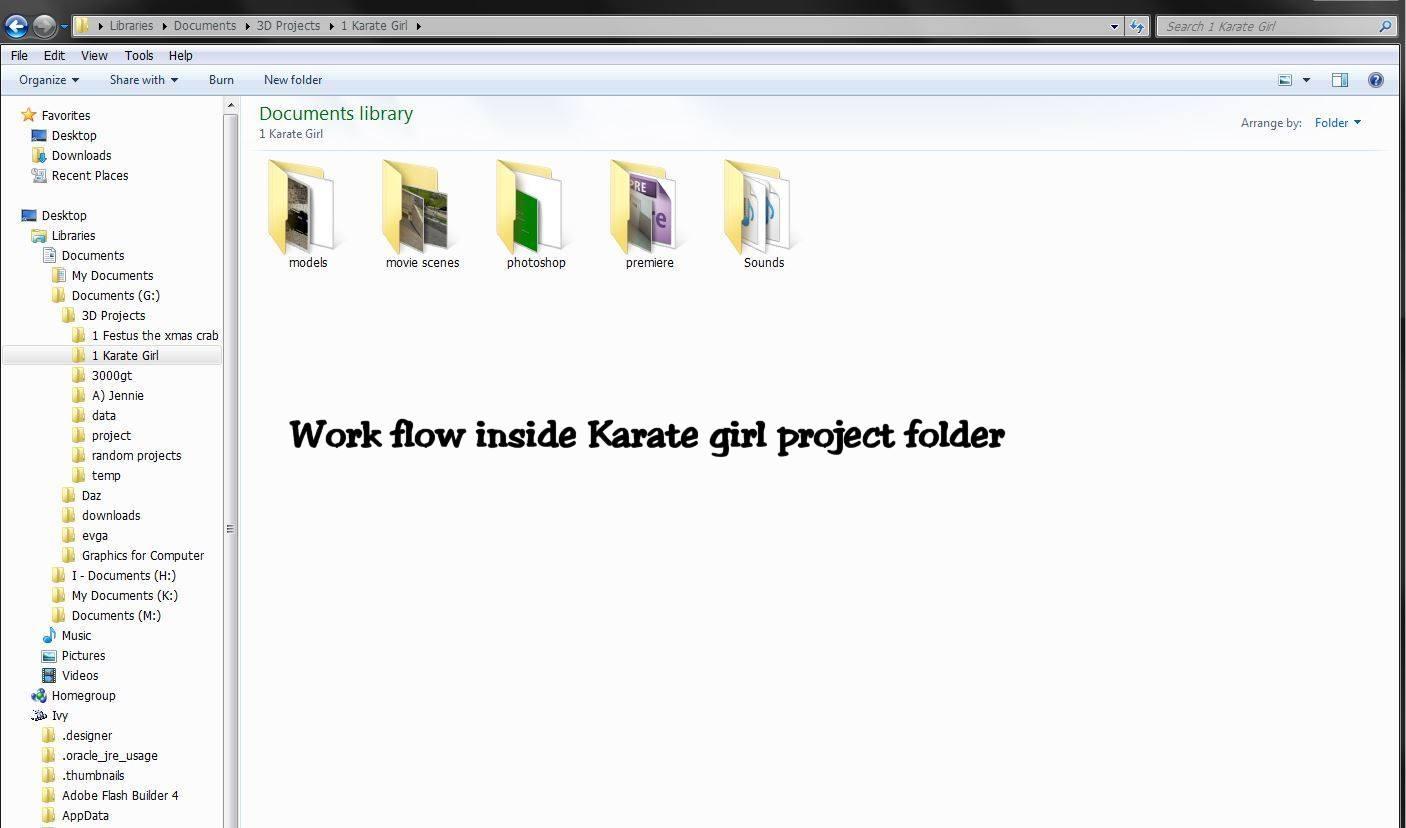
Pic4) the model folder is where i keep all my story board scenes for the film I made using daz content. ready to render.
Pic5) is my rendered AVI movie folder which this one is about 2/3 done. When it is finished it will have the planned 189 AVI scenes & over 46,000 PNG graphics stored in another folder when done. as of now. I am up to 91 scenes completed. and is only 18 gigs total so far.
.
Pic6)is my Photoshop folder and where i keep all my still renders including my PNG & RIB folders for the scenes that require fx. the scene folder already has 12,000 PNG in 5 scenes totally 11 gigs which is almost what my movie folder size is containing my 91 avi's scenes, But I also keep back up of my Temp rendered avi in PNG's form in a storage folder
Pic7) is my Adobe premiere cs5 folder which is my flm editor.
Pic8) is the sound folder just for sound files I have created in my studio & sound tracks I have purchased on the internet.
So when i started making a film that had just 3 or 4 scenes under a few 100 png's then using individual PNG's was not be a big deal editing them. but as my skills progressed & i start making films with 100's of scenes its just was not practical for me to use them in all my scenes even though premiere cs5 has a option for editing them. I just use that import option for the PNG's series of grapics to make the scene that requires special FX and post work or if i had to use the png's i had backed up.
I know everyone has their own way of doing thing and I never would say what is right or wrong for what works for them .. what works for one person may not for another. . But for me this is the best work flow I have found that works for me to make the type animations I do.
I hope this helps someone. I would be interested to see inside you guys work flow
I think maybe it just counts the start frame as the time from 0 to 1 etc, you would not be gaining an extra frame at the end
I would say if one uses avi and I do too just prefer png series, uncompressed is the highest quality, applying any codec will only add lossiness but you need a nice big NTFS formatted drive!
those files are huge, I use 200GB avi files if I go that path and never keep them after
in fact I delete my image series too, all I keep is the end result and maybe saved scenes I can rerender if needed.
but each to their own, you do what works best for you.
I keep everything i have created in a storage HHD Drive . The raw renders & avi's I compress down in zip files for storage( I may need them for another film in the future). its funny Wendy your avi's are so huge i found it the other way around that PNG's folders were much bigger than avi's, and Rib folders with png's are 5 x bigger than the raw png's folders
Unfortunately not. If I render a 24 frame timeline as single image series, I get 25 images. Numbered from image_00 to image_24.
The problem is that if I insert this series into Hitfilm, it does not match the expected length of one second. Due to the extra frame, it is a bit longer than a second. This may sound a bit picky, but before I start creating and rendering bigger animations, I want to be sure to use the correct formats and lengths for editing and composing.
It starts counting at 0, so 24 on the time line is the 25th rendered frame.
That's easy to solve...enter 24 in the Total box.
You are very much correct about being off by one frame in these daz 1 second renders. Put enough of these together and it could throw lip sync out. It will end up looking like an old gung fu movie where people move their mouths out of time to what they are saying.
So yes to what mjc1016 says about total as well.
To the OP enjoy hitfilm , We use After effectsCS but HitFilm is a good alternative from all reports.
Post some of your animation clips when you have something you feel you want to share and continue to ask questions
I am not online as much these days as I am at the Core plot scene of my current animated film project but I will try to help as time permits.
Yes, I have another question :-)
I am working with Keymate. How can I change the cam in an animation? Let´s say, I have 2 cams in a scene. I start the scene with using cam1. Then, after a few seconds, I want to switch to cam2. Is this possible? Or do I have to render the cams seperately and put the clips together in Hitfilm?
Hi I am not aware of any method to switch cams in mid render during an animation render in Daz studio.
We have this ability in C4D and it is very useful for in scene camera cuts.
But for DS you may have to render the different cam angles separately and combine them in post.
Ok, thank you!
while I've never used it I understand this will work with Iray aswell as 3delight, http://www.daz3d.com/batch-render-for-daz-studio-4-and-rib
you would just save each camera view as a scene and then run the script,it would render each scene as viewed from the different cameras.
and space sure is an issue with animation,I recently deleted all the files for this Iray animation and it was nearly 800gb in files,half of which I never used :\
http://www.youtube.com/watch?v=BqYEMMpSvgo
I've had very good experiences with this program so far: Sony Movie Studio 12 Platinum Suite
While it's not free, it's also not blowing the budget (at roughly €30) and is offering a wide range of post effects, and comes with an audio editor.
I render in single frames (serial) and have movie studio combine the images for me, then add sound/music, and stills, texts/titles, and all other kind of stuff
I feel your pain sir
we are at 40 minutes into a feature length animated film where all of the frames are rendered to uncompressed targas before importing into after effects for color grading and other post effects.
from After effects we out put a quicktime of each clip to be used
for the final edit in a proper nonlinear editor on the Mac.
I set up a "smart search" folder to find all of those left over targas
and we periodicly delete them after they are saved out as compiled quicktime clips from Aftereffects.
we usually liberate 20 to 50 gigs of HD space per culling session.
I used Batch render script all the time it works well for when you need to add some special effects & for dragonstorms animated textures, But I only have used it in 3dl, I never tried using it for diffrent camera angles either so I'll have to give that a try.
when I need to switch camare angles during a scene, I just cut the scene where needed and start the next camare angle wih the next frame. thats been my easiest way.. I did it alot in this anime film I did
I have to also say though I'm really impressed & just amazed how you guys are getting these 800 gig files for movies files . I must be doing something wrong. because My raw movie file folder with 94 Scenes is only 19.4 gigs total and my rib folder is 24 gigs so far my finshed film rendered & edited in Adobe premeire saved at 1080 Blueray Mpeg M2T format is only 1.14 gigs for 6 minutes of movie
Hi Ivy there is nothing "wrong" with your pipeline only different
I am certain Stonemason was referring to his unconpressed raw worrkfile rendered images.
Here is an example of ONE frame a of a 300 from piloting shot
raw out of maxon C4D
note the file size is a little over 3 mb.
Now multiply 3 MB times three hundred or six hundred depending on how many frames are in this shot.
unitl these frames from various scenes are are imported into AE/Nuke/Hitfilm/natron etc for color grading and post special effects they must be kept hence they begin to take up space.
Now why do it this way??
Quality& post production effects and compositing.
you will have a high quality uncompressed version of each frame of you render to bring into post production
but only after they have been declared final and rendered from post production can those original high quality targas,png etc be discarded to free up space.
Understand in many cases these targa may be one layer with alpha channel to comped onto a separately rendered background or with mulitpl figures to be comped into one shot.
Now here are my approved finals saved out of AE with lens flares gamma correction etc.
they are in an "editing" format with only ONE compression codec
For Imovie or final cut , vegas etc.Note they average ony 3- 500 megs per clip.
In nonlinear editing Audio&sound effects are added and editorial storytelling edits are made before export to the "Delivery" format of Mpeg4 for online distribution
Thanks for the explanation Wolf I always respect your opinions and animation skills . when I render in AVI I use uncompressed compiling so I don;t loose the quality of the render. ( that is of course until I upload it to Youtube, then their compression during post processing ruins the video quality) I don;t render big files frames my render size is 1920 x 1080 and each of my keyframes usually run in KB's sizes.
I want to point out to people if they are looking for a way to make a simple animated water within daz studio. the Dragonstorms animated texture scripts are perfect for that process, thats what I used in this film for animated the water pane.
,I used it even in the stonemason street of asian sets I used in film below