-
The Complete Guide to Animating Dynamic Characters in DAZ Studio
-
-
-
-
$59.99
Artist:Compatible Figures:N/ASKU:90781Optional License Add-Ons:
$1.99*Unless otherwise specified, no discounts or offers will apply to License Add‑Ons.
Optional License Add-Ons:
$1.99*Unless otherwise specified, no discounts or offers will apply to License Add‑Ons.
-
Details
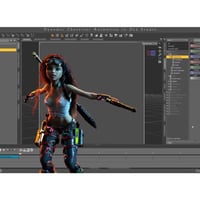
Daniel Beck (Dartanbeck) has created extraordinary results with animating DAZ Studio characters!
For the first time he shares in detail his complete animation workflow in this tutorial set.
Dartanbeck has created a proven roadmap to get the very best out of aniMate2. He's produced a series of cool techniques and tricks including custom animation helper controls. He's curated the best aniBlocks and animation scripts to make the workflow easier.
Once you've learned Dartanbeck's system you will be able to leverage the wonderful array of native DAZ Studio figures and content in your own animations.
In Part One Daniel provides the complete process of dynamic character animation. Part Two is made up of step by step courses for each topic covered in Part One. In short, it contains finer detailed lessons for everything shown in Part One.
"It is my hope that this will provide the highest quality learning experience I can give you. Each subject of the entire course will be right at your fingertips along with the run-through to vividly illustrate the flow of animating characters in DAZ Studio."
This tutorial set includes 11 MP4 videos at 1920 x 1080 full HD resolution.
Required for this Course
aniMate2 is a key part of the workflow demonstrated in this course and is required.
Total Tutorial Set Duration
4 hours and 30 minutes
Tutorial Content Overview
Introduction
- Course introduction and notes
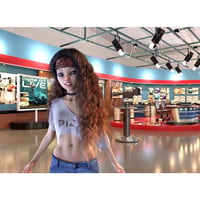
- Demo animation of Rosie 8 : an example of what you could create!
Part 1 : Complete Workflow
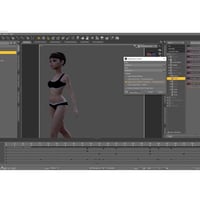
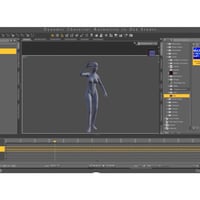
- Start by understanding the basics and determining what the character is doing.
- Use aniBlocks to select and apply animations, introducing the 30 Frame Buffer Zone.
- Ensure fluidity in the workspace by adjusting mesh resolution.
- Set the perspective view to see the entire animation.
- Add a Sub Track in aniMate and set proper Sub Track settings.
- Go back and forth between aniMate and the Timeline for effective editing.
- Apply changes to the animation where necessary.
- Create a custom aniBlock collection for convenience.
- Work with partial aniBlock sub-frames and decide whether blending is required.
- Time out the changes for Sub Tracks.
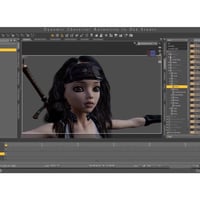
- Incorporate facial aniBlocks and understand face control for FACS movements.
- Use custom partial pose dials and aniBlocks for Genesis 3 and 8 Face Controls .
- Check and review the animation within aniMate before proceeding.
- Save the progress at appropriate intervals.
- Transition to the DS Timeline by baking the animation.
- Utilize advanced view in the Timeline and understand the 30 Frame Buffer Zone.
- Adjust keyframe interpolation types to refine the animation.
- Develop muscle memory habits for working with the Buffer Zone.
- Master the selection of keys in the DS Timeline for easier editing.
- Use the Hierarchy in the Timeline as a guide for adjustments.
- Fix any issues and fine-tune custom pose changes in the Sub Track.
- Pay attention to dForce problem areas and experiment with tweaks to enhance the animation.
- Continues through the processes of dForce cloth and hair simulations, rendering, and working with the final render in post.
Part 2
- About Dartanbeck's Custom Pose Dials and how they help the animation workflow
- How to create Custom Pose Dials quickly and efficiently
- An Animator's Base Scene and how this saves time in the workflow
- Creating Custom Wearable Presets
- Creating Partial aniBlocks
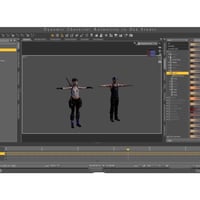
- Converting Animations from Other Generations of DAZ 3D Figures
- Bonus - Animated Backplate Rendering
- Bonus - Car Chase Piranha vs Nemesis - Behind the Scenes
Learn More about the Course in this Introductory Video
About the presenter : Daniel Beck
Dartanbeck began his Digital Art journey by painting game tiles for tabletop fantasy games. He then became a texture artist for 3d game characters for a world-wide gaming community from which he has received several Hall of Fame awards. This immediately sparked his desire to create digital animations in the form of movies or shorts and has been dedicated to that pursuit ever since.
Now as a Daz 3d published artist, he has released several environment kits for Carrara software - specifically designed with animated movie makers in mind, plus released two character animation packs.
Dartanbeck is currently animating using Daz Studio and Carrara software and is having a lot of fun and success with it. Throughout his animation projects, he loves to share his experiences to help others to succeed as well.
His animation workflow includes Daz Studio with a collection of add-on plugins, Carrara 8.5 Pro, PD Howler, Affinity Photo, DaVinci Resolve, HitFilm and Magix MusicMaker Premium.
Dartanbeck lives in a small fishing city in Wisconsin and loves the changing seasons and has always been at home in the wilderness. He has spent his career chiseling custom stonework, designing and building cliff extensions, waterfalls, ponds, walls, patios... even custom outdoor furniture made of stone. He is also a performing musician.
What's Included and Features
- The Complete Guide to Animating Dynamic Characters in DAZ Studio
- Video 0 : Introduction : 8 minutes (.MP4):
- Who this course is for
- Required : aniMate2
- About dForce, keyframes and aniBlocks in this course
- About custom tools
- Genesis 3 and 8 face controls
- About Dartenbeck
- Advantages of native animation in DAZ Studio
- Video 0-1 : Rosie 7 Animation Demo : 3 minutes (.MP4)
- Video 1-1 / 1-2 / 1-3 : Dynamic Character Animation Workflow : 30 + 38 + 48 minutes (.MP4):
- Getting Started
- What's the Character Doing?
- Select and Apply aniBlocks (I explain the 30 Frame Buffer Zone later)
- Workspace Fluidity with adjusting the Mesh Resolution
- Set Perspective View to see the entire animation
- Adding a Sub Track in aniMate
- Adding a Buffer Zone for dForce (explain Buffer Zone)
- Set the proper Sub Track SettingsHow and Why
- The Importance of Going Back and Forth between aniMate and the Timeline
- Where to Apply a Change to our Animation
- The Importance of Creating a Custom aniBlock Collection.
- Working with Partial aniBlock Sub Frames
- To Blend or Not to Blend
- Timing out the Change (for Sub Track)
- Add Facial aniBlocks
- A word about Face Control for FACS movements
- Custom Partial Pose Dials and aniBlocks for Genesis 3 & 8 Face Controls (DAZ 3d product)
- Working with and Editing Custom FACS aniBlocks with the rest of the Animation
- Check everything while we're still in aniMate
- Perfect Time to Save!
- This has all been pretty straight forward so farnow we really Dig In!
- Bake to DS Timeline
- Getting Back to aniMate if we need to
- Setting the Timeline to Advanced View
- Understanding the 30 Frame Buffer Zone. What to Delete, What Not to, and How
- Key Frame Interpolation TypesHow they Work and Why we need to make a change
- Our new Buffer Zone Muscle Memory Habits
- We're in the Timeline nowLet's Make this motion Our Own!
- Work Out the Sub Track Transitions
- An example of Failure, and how to fix it
- Using Collapse to Isolate what we Edit
- Using Selection Highlights to determine What to Select
- Let's become Pros at Selecting Keys in the DS Timeline
- Tips on making the DS Timeline easier to work in with Working Examples
- Dealing with Odd times when keys Cannot be Deselected
- Use the Buffer Zone to Transition into a dForce Simulation
- Set the Transition Interpolation Type
- A Warning about the TCB Interpolation and Pasted Keys
- All Animation Software has "Specific Things" to get used toDon't get Put Off
- Using the Hierarchy in the Timeline as a Helpful Guide
- Finding Specific Adjustments within the Hierarchy
- Let's work out our Custom Pose Change from the Sub Track
- Ooops. Houston, we have a Problem! Let's Find it and Fix it
- Now that we're Key Selecting Pros, Let's Practice Now
- Let's make this intro Pose Look Better
- Custom Pose Helper Dials - Aren't They Awesome?
- I liken this to Using the Graph Editor Without Using the Graph Editor
- Transitioning To and From our Changes
- Scrubbing Dials to Hold their Position
- Asymmetrical Transitions and Changes
- Work out the Custom Pose at the Most Crucial Spot
- Our Custom Control Dials we make in Part make All the Difference
- Transitioning to and from the Custom Pose Changes
- Watch for dForce Problem Areas as we work
- Being Gradual with Major Changes
- Experimenting to find the Best Tweaks
- Getting Help from the Timeline Information
- Dealing with a Sluggish View
- Finalizing Changes before Changing Back from the Custom Partial
- Aren't These Custom Dials Awesome?!!!
- Anticipate for Elements to be Added (Hair)
- The Importance of Using Partials
- Changing the Partial into What We Really Want
- Reminder of Interpolation Decisions
- Again, Being Gradual with Changes
- The Magic of Animating in this Organic Flow
- Protecting the Motion Capture, Why?
- Comparison to Traditional Animation Technique
- Rendering the Final Result
- Continue Getting Deeper with our Edits
- Set View and Play the Animation
- Interpolation Issues
- Try New things - Make This Look Good
- My Animations are Unique, yet they are composed from aniBlock Packs
- Keep Playing it Through - Watching for Issues
- Isolating the Timeline View
- Let's Use Interpolation to help our Head Fix
- Consider the Hands - Don't make them Wacky!
- Hand Control Dials can be as Fun to Make as they are Powerful
- Working out the Arm that got Left Behind
- More Assymetrical Editing
- A Brief explanation of the Hand Dials I'm Using
- Keep Playing It Through
- Posture Shift Dials
- Timing Posture Shifts, etc., Using the Timeline
- The Daz Studio Workflow Difference
- Working more realism into the prominent hand
- This work compared to Traditional Workflows
- Why such a Complex Animation for this Course
- Making Our Camera
- About a Camera's Key Frame
- Using Real World Actions to Drive Decisions
- Save
- Using custom pose control dials.
- Preps for hair and cloth simulations using dForce.
- Using cameras and helpers to control hair movement during animations.
- Ensuring natural looking hair for motion
- Making custom wearables for characters and setting up dForce settings.
- Focusing on getting natural facial and expressions, especially with the eyes
- Tips for optimizing render settings to balance quality and speed for animations.
- The importance of composition and camera angles to enhance storytelling.
- Preferences for gamma correction in tone mapping
- Tips to achieve a cinematic look.
- Tips for naming animation sequences.
- Compositing animated characters over backdrops using the free version of Da Vinci Resolve.
- Basic compositing techniques in Resolve's Fusion page to create professional results.
- Concludes with rendering the final animation and recommends exploring further possibilities with Resolve's advanced tools.
- Video 2-1 : Dartanbeck's Custom Pose Dials : 47 minutes (.MP4):
- Introduction to Dartanbeck's Custom Pose Control Dials
- Overview of characters with and without custom pose control dials
- Unimesh figures like Genesis 1 and Genesis 9 work universally
- Are Genesis 3 Female dialscompatible with the male figure?
- Genesis 2 Male has default pose control dials
- Various pose control dials available for arms, feet, and hands
- How custom dials provide additional control and expression options
- Custom dials were present in Predatron's custom figures and Daz 3d's Generation 4 figures
- How basic dials lack twisting options, except for waist and head
- Custom leg dials designed for specific figure needs
- Genesis 2 Male hand dials include finger control options
- Rosie 7 hand dials designed for expressions and corrective poses
- Genesis 2 Male and Rosie 7 share common hand dials
- Considering detailed head dials including cheeks, eyes, nose, and expressions
- Creation of custom expressions using GenX2 transfer
- Considering additional custom expression dials for various emotions and gestures
- Dials created individually and continuously added for more control
- Missing feet bend and toes bend control for animations
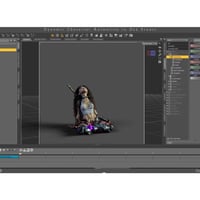
- Custom pose dials for bow and arrow animations
- The power and significance of custom pose control dials3
- Video 2-2 : Creating Custom Pose Dials : 31 minutes (.MP4):
- The process of creating custom pose control dials starting with a basic arm twist example.
- It is easy to create these dials by adjusting sliders and selecting the appropriate parameters.
- The Pose Controls section and a naming convention is suggested for easy management.
- Custom labels and colors can be assigned to the dials for better organization and visibility.
- The process involves creating a new property, setting the type to "Modifier Pose," and specifying custom attributes.
- The ERC Freeze function is used to connect the dial to the desired rotation or pose changes.
- Recommendation on starting with a fresh figure and scene.
- Properties can be deleted and recreated to refine the dial's settings.
- Multiple arms twist dials can be created for each arm separately or together.
- The importance of choosing the direction of maximum travel and adjusting limits is explained.
- Linking dials to other properties allows for further customization and control.
- The process is flexible and can be adapted to individual preferences
- Video 2-3 : An animator's base scene : 12 minutes (.MP4):
- How a base scene is crucial for maintaining consistency in character animation and rendering.
- Where that consistency is important.
- How base scenes saves time.
- Lighting and rendering options, including tone mapping and environment settings, are included in the base scene.
- How the base scene serves as a starting point for animating and allows for customization and experimentation with settings and accessories.
- Video 2-4 : Creating custom wearable presets : 12 minutes (.MP4):
- What are wearables and how do they help for animation?
- How to create wearables and save as a preset.
- What wearables can include
- What the wearable preset can be applied to
- Custom icons and images can be added to wearable presets for visual representation in the library.
- Video 2-5 : Creating Partial aniBlocks : 11 minutes (.MP4):
- The process of creating partial aniBlocks is explained, by selecting specific body parts and copying their animation.
- After copying the desired keys, the original animation is collapsed and the selected keys are pasted.
- The resulting animation of the body parts can be saved as a new aniBlock for future use.
- The process is demonstrated using different body parts such as arms, neck and head, and pelvis.
- AniMate 2 is praised for its smooth and efficient preview, and the importance of creating a variety of partials for blending in sub tracks is emphasized.
- Video 2-6 : Converting Animations from Other Generations of DAZ 3D Figures : 23 minutes (.MP4):
- The author has been collecting aniBlocks since 2010 and discusses changes in Daz Figures.
- Demonstration of methods for making motion captures work with newer generation figures.
- Creating Custom Pose Control Dials to adjust motion capture data.
- Recommended script that converts poses between generations.
- What the script can do
- The process of converting aniBlocks using the script.
- Alternative method to convert poses.
- Method 2 allows for converting poses and morphs between different figures.
- Method 2 for converting poses with custom pose dials and morphs.
- An experiment using a soft-body physics simulation and converting it into an aniBlock.
- Final step involves restoring the initial pose and reviewing the converted animation.
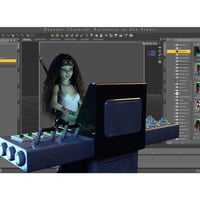
- Video 2-7 : Bonus -Animated Backplate Rendering : 7 minutes (.MP4):
- Animated backplate created to match a moving character animation
- Camera operators walk smoothly backwards throughout the shot
- Keyframes used to control the hair simulation and reveal camera
- A new camera and adjustments made to match the backplate scene
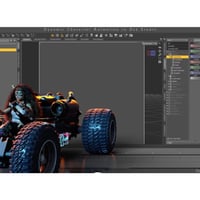
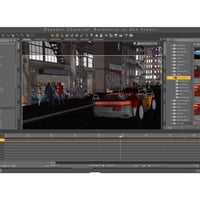
- Video 2-8 : Bonus - Car Chase Piranha vs Nemesis - Behind the Scenes : 31 minutes (.MP4):
- The text discusses a car chase scene between two vehicles, Piranha and Nemesis, in a Cyberpunk setting.
- The Four-Wheeler Template by Linday at Daz 3D.
- The template allows for realistic vehicle animations based on real-world physics.
- There are pre-installed wheel presets and ready-to-animate cars available.
- The car chase scenes include aniBlocks for two cars, chaser and chased, and action cams for cinematic shots.
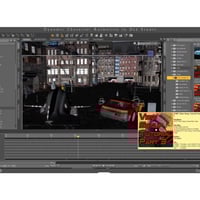
- The scenes are designed to work with Stonemason's Urban Sprawl 3, a city sprawl block with detailed props.
- The city scene was enhanced to look cyberpunk by adding signs and props from Polish's Cyberpunk Back Alley.
- Use of Magix101's Iray Worlds Sky Dome for the city night scene.
- Predatron's LoRez people were used to populate the city with animated characters.
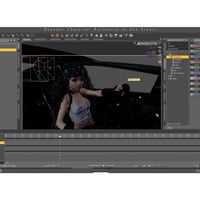
- The Starship Piranha and Nemesis vehicles were used in the chase scene, with custom paintwork and Sci-Fi gadgets.
- The process of animating Rosie, the main character, inside the car and the challenges of simulating her hair.
Notes
- This product includes:
- 13 DSON Core Installers


Daz 3D is part of 
Connect
DAZ Productions, Inc.
7533 S Center View Ct #4664
West Jordan, UT 84084
Licensing Agreement | Terms of Service | Privacy Policy | EULA
© 2026 Daz Productions Inc. All Rights Reserved.