-
Trouble with Morph
With Victoria 4 there should usually be soem subcompoenents as the morphs are on the bones - I had to add those to favourites before the command would work. It may be that when a morph is loaded in DS (I was using one of the stock morphs as a test) that isn't quite what happens and the whole thing ends up betwixt and between. The other thing you could try is using the Geometry Editor to create a Selection Set, then in Morph Loader Pro load the OBJ use the Attenuate By settings.
Can't get NBM for V4 to workThanks, here are the screenshots. Also after posting this I manually extracted the files so that they'd be in the same directory as Victoria 4.2's runtime and they do appear in the Content Library. But still nothing happens when I click on a V4.2 model and double click the injection file. The blacked-out username is the same for all photos.
Learn to Strike a Pose SaleIf you're anything like me, you're just not that into buying pose packs - so when I saw that today's sale was all about poses I had a less than excited reaction. But before you go all "meh" about this sale, you might want to look twice (I'm glad I did). A lot of stuff in this sale isn't just poses. Oh no - many of the items listed come with goodies! From weapons, to buildings, to outfits, to dogs and horses and even characters/figures bundles.
I did some hunting and found quite a few of the sale items that come with goodies. I thought I'd share what I found here (keep in mind that I might have missed a couple and that some of these things come with only one goodie while others of these come with many goodies). So here's some of the sale items that come with other things other than just poses:
- http://www.daz3d.com/night-slayers-half-moon-blades
- http://www.daz3d.com/play-like-an-egyptian
- http://www.daz3d.com/dm-wishing-well
- http://www.daz3d.com/santuario
- http://www.daz3d.com/by-lamplight-vignette-scene
- http://www.daz3d.com/garden-collection
- http://www.daz3d.com/wicked-teen-accessories
- http://www.daz3d.com/shackles-of-the-inquisition-shackles-poses
- http://www.daz3d.com/artyficial-furniture-and-poses-1
- http://www.daz3d.com/persian-bundle
- http://www.daz3d.com/millennium-puppy-bundle
- http://www.daz3d.com/daz-horse-2-starter-bundle
- http://www.daz3d.com/daz-horse-2-pro-bundle
- http://www.daz3d.com/ultimate-canine-bundle
- http://www.daz3d.com/pandora-s-box
- http://www.daz3d.com/mei-lin-6-battle-fan-pose-set
- http://www.daz3d.com/show-stage-v4
- http://www.daz3d.com/le-nuit-v4
- http://www.daz3d.com/dm-s-memorial-poses-and-swords
- http://www.daz3d.com/signs-of-protest
- http://www.daz3d.com/rw-candy-collection-poses-props-for-aiko-6
- http://www.daz3d.com/winter-games-for-genesis-2-female-s
- http://www.daz3d.com/rub-a-dub-bundle
- http://www.daz3d.com/billboard-poses-for-michael-6
- http://www.daz3d.com/tenshi-for-cyborg-version-4
- http://www.daz3d.com/rock-it-bundle
- http://www.daz3d.com/dm-s-retreat
- http://www.daz3d.com/rw-my-dear-diary-props-poses
- http://www.daz3d.com/da-wizardry-poses
- http://www.daz3d.com/da-nunchuck-pose-set-for-lee-6
- http://www.daz3d.com/witch-gear
- http://www.daz3d.com/pinups-n-props-for-the-girl-6
- http://www.daz3d.com/fitness-pole-dance-poses-and-prop-for-genesis-2-female-s
- http://www.daz3d.com/sci-fi-heavy-weapons
- http://www.daz3d.com/heroine-fantasy-poses-weapons-for-genesis-2-female
- http://www.daz3d.com/cabaret-poses-and-props-for-genesis-2-female-s
- http://www.daz3d.com/classic-recurve-bow-smart-prop-and-poses
- http://www.daz3d.com/lee-6-sword-poses
- http://www.daz3d.com/art-nouveau-fun-kit
- http://www.daz3d.com/skate-park-poses-and-boards
- http://www.daz3d.com/sleeping-cutie-bundle
- http://www.daz3d.com/cabaret-bundle-for-genesis-2-female-s
- http://www.daz3d.com/cirque-collection-for-genesis-2-female-s
- http://www.daz3d.com/time-assassin
- http://www.daz3d.com/floor-hammock-relax
- http://www.daz3d.com/dj-remixed
- http://www.daz3d.com/fangtastic-bundle-for-genesis-2
- http://www.daz3d.com/sleeping-cutie-rock-it-bundle
- http://www.daz3d.com/music-in-motion
- http://www.daz3d.com/fresh-faces
- http://www.daz3d.com/gemma-for-v4-2-and-v5
- http://www.daz3d.com/shimuzu-s-proportional-poses-for-genesis-2-female-pin-up
- http://www.daz3d.com/sleeping-late-for-victoria-6
- http://www.daz3d.com/buff-bundle-for-genesis-2-male-s-and-gianni-6
- http://www.daz3d.com/ballerina-bundle
- http://www.daz3d.com/futucar
- http://www.daz3d.com/the-studio-bundle
- http://www.daz3d.com/bwc-runway-and-bwc-fashion-poses-bundle
- http://www.daz3d.com/midnight-martians-bundle
- http://www.daz3d.com/xtech-bundle-for-genesis-2-female-s
- http://www.daz3d.com/melody-man-electric-guitars
- http://www.daz3d.com/melody-man-acoustic-guitars
- http://www.daz3d.com/karynna-basics-bundle
- http://www.daz3d.com/just-beachy-bundle
- http://www.daz3d.com/love-potion-bundle
- http://www.daz3d.com/giselle-at-home-bundle
- http://www.daz3d.com/dark-sisterhood-bundle
- http://www.daz3d.com/gated-courtyard-bundle
- http://www.daz3d.com/the-briefing-room-bundle
- http://www.daz3d.com/atticus-warrior-bundle
- http://www.daz3d.com/mei-lin-6-geisha-bundle
- http://www.daz3d.com/olympia-add-on-bundle
- http://www.daz3d.com/keshi-indian-character-accessories-and-poses-bundle
- http://www.daz3d.com/as-you-wish-bundle
- http://www.daz3d.com/faylinn-4-seasons-character-outfit-and-poses-bundle
- http://www.daz3d.com/fantasy-tavern-bundle
- http://www.daz3d.com/la-llorona-ghostly-hd-characters-outfit-and-poses-bundle
- http://www.daz3d.com/teacup-fairy-bundle
- http://www.daz3d.com/wachiwi-native-american-character-outfit-hair-and-poses-bundle
- http://www.daz3d.com/say-it-with-music-bundle
- http://www.daz3d.com/mei-lin-6-starter-bundle
- http://www.daz3d.com/lilith-6-starter-bundle
- http://www.daz3d.com/lee-6-starter-bundle
- http://www.daz3d.com/aiko-6-starter-bundle
- http://www.daz3d.com/gianni-6-starter-bundle
- http://www.daz3d.com/stephanie-6-starter-bundle
- http://www.daz3d.com/boudoir-bundle
- http://www.daz3d.com/the-tourist-bundle
- http://www.daz3d.com/horse-stables-bundle
- http://www.daz3d.com/mei-lin-6-pro-bundle
- http://www.daz3d.com/lee-6-pro-bundle
- http://www.daz3d.com/aiko-6-pro-bundle
- http://www.daz3d.com/giselle-6-pro-bundle
- http://www.daz3d.com/gianni-6-pro-bundle
- http://www.daz3d.com/stephanie-6-pro-bundle
- http://www.daz3d.com/the-girl-6-pro-bundle
- http://www.daz3d.com/storm-queen-poses
- http://www.daz3d.com/ultragenesis-23
- http://www.daz3d.com/dm-s-more-than-words
- http://www.daz3d.com/dm-s-blox-n-poses
- http://www.daz3d.com/dms-drake-tower
- http://www.daz3d.com/dm-s-arcum
- http://www.daz3d.com/action-poses-with-sci-fi-rifle-for-genesis-2-female-s
- http://www.daz3d.com/chair-time-poses-for-genesis-2-female-s-with-morphing-chair
- http://www.daz3d.com/in-solitude-ds
- http://www.daz3d.com/i-m-playing-here-gamepad-and-poses-for-genesis-3-male
- http://www.daz3d.com/z-comfort-in-red
- http://www.daz3d.com/assault-rifle
- http://www.daz3d.com/premium-katana-with-poses
- http://www.daz3d.com/premium-handgun-poses
- http://www.daz3d.com/sword-and-poses-for-michael-7
- http://www.daz3d.com/hangin-out-poses-and-props-for-genesis-3-female-s
- http://www.daz3d.com/z-the-new-star-poses
- http://www.daz3d.com/dm-s-fit-n-sexy-poses-and-props
- http://www.daz3d.com/have-a-seat-poses-and-prop
- http://www.daz3d.com/selfies-for-genesis-3-female
- http://www.daz3d.com/pistol-and-poses-for-m6-and-v6
- http://www.daz3d.com/sands-of-time-prop-and-poses
- http://www.daz3d.com/harem-poses-for-genesis-2-female-s
- http://www.daz3d.com/sci-fi-military-dormitory-poses-and-props
- http://www.daz3d.com/sultry-poses-and-props
- http://www.daz3d.com/z-a-taste-of-luxury-props-poses
- http://www.daz3d.com/z-seashell-dream-prop-and-poses
- http://www.daz3d.com/bella-donna-poses-chaise-shaders
- http://www.daz3d.com/z-enchanted-moon-and-poses
- http://www.daz3d.com/lee-6-karate-bundle
- http://www.daz3d.com/sweeney-todd-the-demon-barber-of-fleet-street
- http://www.daz3d.com/the-lawless-room-and-poses
- http://www.daz3d.com/pin-up-backgrounds-poses-and-expressions
- http://www.daz3d.com/all-hands-and-real-hands-hd-bundle
- http://www.daz3d.com/salem-props-and-poses
I hope that I've helped you guys find something(s) that you like. There are a lot of great items in this "poses" sale that are way more than just poses! :) I really wasn't going to pay much attention to this sale, but then saw that there where quite a few items with added goodies and some up to 79% off - that made me quite a bit more interested! :)
Low texture resolution. Please help.Alright - so here's the solution.
In the Surface tab, the Torso should have its Diffuse options, bump map, etc. Somewhere there you will find the UV - it will read something. Usually its either Base Female or Victoria 5, etc. Clicking it, the figure will show you available UV settings. You have to use the UV setting that MATCHES the Diffuse map. Otherwise the textures will not be correctly applied.
For example, a Victoria 5 Torso diffuse map should use a Victoria 5 UV setting for it. Make sure you apply the correct UV setting to the map.
Outside of that - I guess you could try decreasing the Horizontal and Vertical Tiling in the surface tab but... that might create weird results.
If that doesn't help - the only thing you can do is create your own UVs in an outside program.
Learning Carrara and Need some Help?It might not be needed, but CAN be used to create many more different types of result.
Add - will increase the brightness of one source by another source, where black adds nothing, and white creates white as a final output - and everything in between.
Subtract - similar to add, but inverted.
Multiply - multiplies this input by the other source to give a new result.
So if you're using Gamma Correction, for example, and one (or more) textures or channels give really washed out results, try multiplying the channel by itself. Additionally, we can multiply the color map by a color gradient which is controlled by a specular, bump, or color map to create a whole new look - which I find to be quite useful when making monsters or other creatures without having to make new maps.
Really neat about Carrara, the resolutions so NOT have to match, as long as the maps work with the UVs - so we can use low resolution maps multiplied by high ones. (In the image below, the skin blemishes are added using a color gradient controlled by a 512 x 512 specular map against a 2000 x 2000 color texture map)
Try making a color gradient where one side is red, the other side is green, and under "Shader" place a map which works with that figure - like a color, specular or bump map. Then multiply that by the original color map. Recently there were many generation 4 products on sale for really low prices. Some of these were texture expansions which contained many maps for different results. Those sorts of thing can really bolster the ability to combine effects like this to create all manner of characters!
Using the above example, we can also use Multiply to deepen the effect of the Highlight channel. Sure, we could also just lower the brightness of the image map. But sometimes it can be fun to multiply two colors together to achieve entirely different results! For example, when I was just working on my new Eye shaders, I'm using multipliers in the highlight channel with a fairly broad Shininess value to cause a colorful inverse gleam on the Iris.
 So, looking at this image, notice how the highlight of the irises are opposite the highlights on the skin. This is caused by using a concave iris shape. I think all Daz figures' irises are convex (bulging outwards), following the arc shape of the rest of the eye, which causes the highlights of the eyes to appear on the same side as the highlights of the skin. Jeremy Birn teaches that eyes naturally cause an inverse gleam - which we may simulate easily by shaping the iris concave (bulging inwards). So when I saw Arki's EYEdeas 3+ in the store, I was just about to try reshaping the iris mesh a second time - which was fairly easy the first time, but by buying these, I don't have to - plus I get the other added benefits of being able to light-link the separate eyes figure, since Carrara won't let us link lights to just a specific bone within a rig.
 Anyways, I'm using Gamma Correction = 2.2, which has really been my favored method of rendering these days. I was getting great results without multiplication before, but by multiplying the highlight map (I used a color map, as I wanted a colored effect in the gleam) by a completely different map of a completely different artist to get the result shown. The somewhat broad shininess value of somewhere around six or so let the highlight pass across a large portion of the concave iris, yet is tight enough to stop it from spilling onto the side I want to remain shadowed - which is actually where the highlight is on the skin.
Magaremoto, whom is a friend which I respect highly (and am constantly learning a LOT from), noted that Rosie's skin looked too smooth - or something similar. At first I thought he was talking about bump. But then I noticed that he was using a skin product which doesn't even use bump! So I concluded that he must have been talking about imperfections in the color - something which ALL skin has... it's made up of multitudes of tiny little dots of multitudes of colors to create the color that we see.
After trying many, many different texture kits, I came back to the same one that I have been using. I just like it best. But to add the skin imperfections, I used the specular map of the standard resolution Victoria 4 map, provided by Daz 3d as the controller shader of a color gradient, which was set from very light brown on the right to white on the left, which adds very little (multiplying by white is the same as not multiplying at all) except for the subtle freckles and minor imperfections seen here.
Additionally, I felt that the inside of her mouth and her teeth were turning out a bit too bright. I went to the Color channel which has a Texture Map, and set it to Multiply, and then Ctrl/Dragged the color map into the new source 2, multiplying the color map by itself. This didn't actually change the color, but deepened it in my Gamma Corrected render. After seeing that work so wonderfully, I did the same (almost) to the hair - except instead of using the same color map, I chose a different map for the same product, and reduced its brightness, creating a bit more natural look to the hair. If I take that multiplied hair color channel into the reflections channel (not shown here), it turns out looking very real indeed... but takes too long to render, for my liking. But it provides a very realistic looking hair!
GET UP TO 5 FEATURED RESOURCES AND TOOLS FREEHad two of the 5, but will be getting several of the things in the promotion to get the rest; wasn't really going to get the Victoria 7 HD, but at that price...

Yeh still expensive.
GET UP TO 5 FEATURED RESOURCES AND TOOLS FREEHad two of the 5, but will be getting several of the things in the promotion to get the rest; wasn't really going to get the Victoria 7 HD, but at that price...
Two Directories IssuesA few weeks back, I took advanage Daz's big Gen3 and V4 sales; buy one item at regular price and selected others were only $4.00. And while getting bundles usually going for +$100.00 for only $4.00 is great, I discovered some issues while trying to use some of the new software. It appears at some time my directories were modified, I now have 2 sets of DAZ 3D libraries: ( sorry, my .PNG images won't load)
Daz Connect Data:
- /Users/Marc/Documents/DAZ 3D/Studio/My Daz Connect Library
DAZ Studio Formats:
- /Users/Marc/Documents/DAZ 3D/Studio/My Library
- /Users/Public/Documents/DAZ 3D/My DAZ 3D Library
Poser Formats:
- /Users/Marc/Documents/DAZ 3D/Studio/My Library
- /Users/Public/Documents/DAZ 3D/My DAZ 3D Library
and the Install Manager has also changed the location for downloads:
/Users/Public/Documents/DAZ 3D/InstallManager/Downloads
Case in point: Victoria 4.2 Creature Creator Morphs and Victoria 4.2 Creature Creator Add Ons (located in /Users/Public/Documents/DAZ 3D/My DAZ 3D Library):
I load Victoria 4.2 base (from /Users/Marc/Documents/DAZ 3D/Studio/My Library) and PowerLoader only shows The Girl 4, V4.2: Base Morphs, V4.2 Legacy INJection Slots, and V4.2: Morphs++, no other morph injections.
Although I can get the tail, legs, and horns morphs from Victoria 4.2 Creature Creator Add Ons to work, none of the morphs (head, body, hands, feet, and teeth) from Victoria 4.2 Creature Creator are loadable. I can locate them , but just can't get them to load.
I'm pretty sure the base issue is having the two directories, it is the solution I'm not sure about.
1.) Copy the InstallManager folder from /Users/Public/Documents/DAZ 3D to /Users/Marc/Documents/DAZ 3D;
Change DAZ Install Manager download setting to the new folder
Uninstall all 719 items listed in DAZ Install Manager
Delete the /Users/Public/Documents/DAZ 3D folder
Reinstall all 719 items
or
2.) Uninstall everything, delete both folder and then reinstall everything all over again.
Any suggestions on the best course of action?
Daz keeps crashingWindows 8 PC
The issue -
1. Daz crashes with fatal error if I try to work ONLINE - immediate crash
2. Trying to work offline.. it crashes with fatal error after a few seconds simply browsing my library. At most I have been able to load Victoria 4 with 1 character skin.
I ran the install manager today and installed the new update for Daz 4.9 and the problem is still happening. My video card is updated, but shouldn't be an issue because I don't even make it to the render phase.
I just came back to the program after a couple of years not using it. New PC, clean install. Disappointing not to be able to work on images. Does anyone have any ideas?
Can't get NBM for V4 to workPlease post screenshots of your DAZ Studio Content Directory Manager (Edit>Preferences>Content Library pane) showing the Poser Formats list, your Install Manager folders (click the gear cion at top-right to open preferences and go to the Installation tab) and an operating system window showing the folders with the Victoria 4.2 CR2 file and the NBM injection poses.
Learning Carrara and Need some Help?The Diffuse shader (with Multiply) is NOT needed in carrara,.
it's an incorrect translation from the Poser / Daz shaders,. which all use a Multiply function to multiply the diffuse texture map, over a colour value.
in Carrara,. you only need the Photo/texture map (diffuse) ,. and nothing else.
If you load a base Victoria 4 figure,. and simply render what carrara loads in,. you'll see a Green tone to the skin,. which is obviously wrong,. but you don't see that same green tone in a Poser or DS render,. because they work differently. the render engines work differently,. the shaders work differently. and the shaders were built to work correctly within those programs.
Any Poser / Daz "content" you load into carrara,. is "translated" into carrara's shaders,. ..and that translation isn't perfect.
If you think about it,. a "photo based" texture map,. should not need any adjustments,. it's already an adjusted composited image
a Multiply function, multiplies the Colour value, with the colours of the photo/texture. to change the image.
Carrara ships with shaders pre-built for V4 / M4 ,. They're also a good example of "how to" build your own shaders.
with ALL "imported" (non carrara native) content, you should check the shaders and adjust them to work better in Carrara, or whatever other software / render engine you're using,
relying on carrara's Automatic shader conversions works to an extent,. Generally speaking you can load in a figure,. render,. and it looks OK.
but when you adjust the shaders to work correctly in Carrara,. then it looks much better.
In many shaders,. you can see that not all of the maps are being imported,. and some channels have Multiply, or other incorrect values for Carrara.
the Bump map ,. Specular (highlight) maps may not be loaded,. and you'll need to load those manually, to build a better carrara shader.
For example: look at the relection channel (for the eyes) in any Poser/Daz figure,. it's normally using an image map,. to create a "fake" reflection.
the reason for this is,. the standard render engine in Poser / Daz cannot calculate the real reflections in the scene.
Carrara can use real scene reflections and real transparency / refraction,. rather than relying on texture maps to provide a fake reflection ,. or an Alpha map for transparent areas.
On displacment,. Carrara doesn't work the same way that DS does,. so the displacement works differently,. you won;t get the same results in carrara,. you'd probably be better using a normal map in the bump channel.
hope it helps
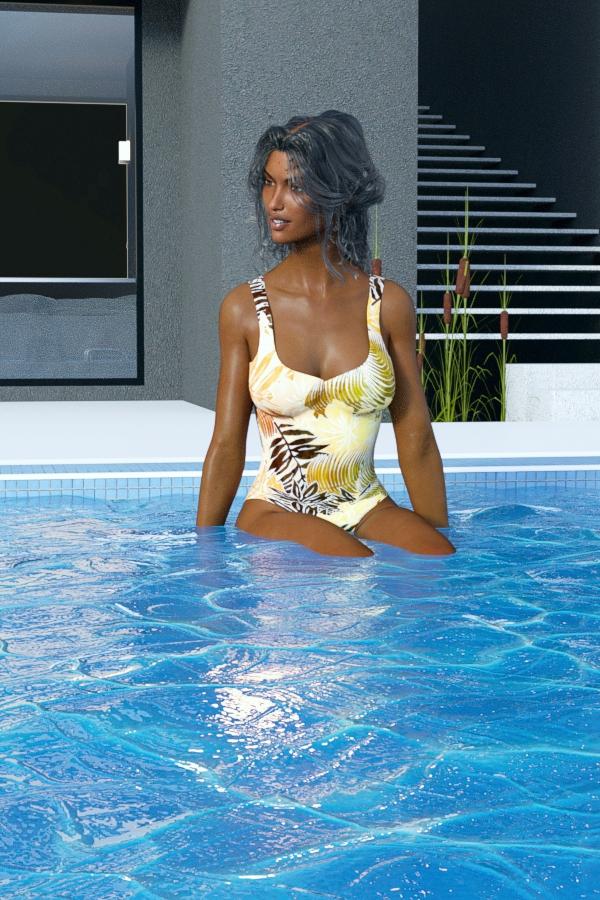
Novica & Forum Members Tips & Product Reviews Pt 7I've added a figure in a swimsuit and hair, and it's taking about ten minutes. Will post the render here in a few minutes. Using the render settings given previously, if you use Y Dome Orientation set to 230, you'll get very nice default lighting positioning.
Not a fan of the default water up close though. (It does look fine from a distance.) That isn't a swimsuit, it's Dance Gear, the leotard. Makes a great swimsuit. I used the Tropical Fabric Shaders and put tiling at 1 for the large print. I love Taia's sheen, I think it's perfect out of the box.
At The Pool Poses Taia Tropical Fabric Shaders Galene Hair
 Can't get NBM for V4 to work
Hi,
I recently bought this NBM for V4, http://www.daz3d.com/nbm-for-v4
I at first installed it using DIM but after clicking V4 and injecting the morph, nothing seems to appear in the Parameters tab (even if I click the chest). I then clicked the chest to inject the morph there, but nothing happens too.
The readme says you gotta install it in the same folder as Victoria 4's runtime else it won't work so I got DIM to install it in 'My Library' where my Victoria 4.2 file is. (I got Victoria 4.2's location by right-clicking the V4.2 icon in the Content Library and then going to file location). But by doing this NBM's injection files don;t even show up in the Content Library.
Please help?!
GET UP TO 5 FEATURED RESOURCES AND TOOLS FREELog out and check again. You already have the other 3, that's why they are not showing.
These are all the 5:
http://www.daz3d.com/genesis-3-female-expressions
http://www.daz3d.com/genesis-3-female-body-morphs
http://www.daz3d.com/genesis-3-female-head-morphs
http://www.daz3d.com/victoria-7-hd-add-on
http://www.daz3d.com/genesis-3-cross-figure-resource-kitAhh, should have thought of logging out. I thought something was broken because I have all 5 too.
Victoria 7 & second skin content?Folks,
I'm having some difficulty and I'm not sure why it's not working... So I'm asking for some help.
I want to use Victoria's Carbon Fiber (By Darkworld), with Victoria 7. Now with Victoria 4, it's easy, just double click, and it loads and instantly shows up...
With Victoria 7, nada.
I'm not sure, but what I gather is that V7 has quite a bit of difference from v4. I've read about it, but I'm not sure what VCF is doing, so I'm not sure what I need to do to make it work with V7. Assuming that it can even work with V7.
Has anyone been able to get any of Darkworld's "second skin" style content to work with V7? And if so, do I need any add-on (ala Legacy UV's?), if so, what add-on?
Any help would be appreciated. Using VCF would simplify this character build...
- Ben
The older generation: Victoria 2/3, Michael 2/3 and their children rendersI decided to start a new thread for older generation figures, as the idea comes up now and then ...
If you are interested in getting these figures (apart from Victoria 2 and Michael 2 - those are vaulted by Daz): Knittingmommy has accumulated links to the store pages: http://www.daz3d.com/forums/discussion/comment/1501496/#Comment_1501496 and there is GiGi_7's thread here: http://www.daz3d.com/forums/discussion/comment/925540/#Comment_925540
Freebies for V2/M2: http://www.daz3d.com/forums/discussion/22725/links-victoria2-michael2-v2-m2-freebie-list/p1
Adventuress
Victoria 3 (in letters THREE - yes, really ...), rendered in DazStudio 3Delight.
I wouldn't call her old if I were you, she has a big sword and knows how to use it!Credits:
Victoria 3 - Daz
Daniela - IllusionsDesigns
Subsurface Skin Shader - Tofusan (a bit modified)
Veronica Year Three - Uzilite
PD Dirty Pretty - Parrotdolphin
Adventure Hair - 3Dream
UberHair Shader Upgrade for UberSurface - Omnifreaker
The Ruins of Angkor Wat - Merlin Studios
Nature Shaders - JGreenlees (Water and Grass, a bit modified)
Songbird ReMix Jacanas - Ken Gilliland
Songbird ReMix Pet Shop - Ken Gilliland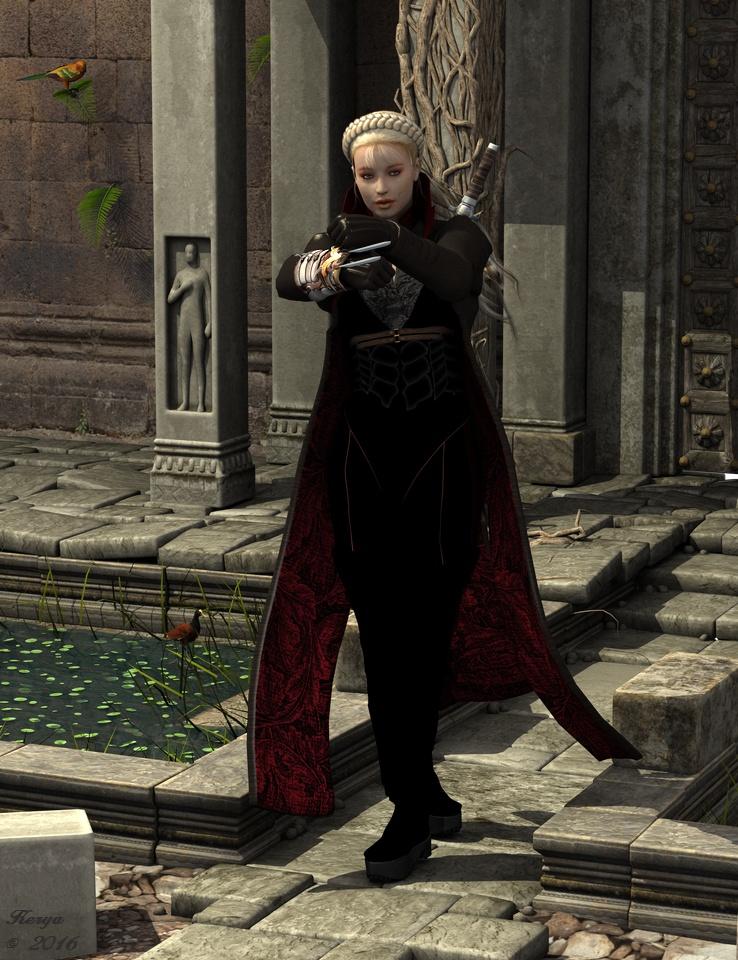 GET UP TO 5 FEATURED RESOURCES AND TOOLS FREE
Log out and check again. You already have the other 3, that's why they are not showing.
These are all the 5:
http://www.daz3d.com/genesis-3-female-expressions
http://www.daz3d.com/genesis-3-female-body-morphs
http://www.daz3d.com/genesis-3-female-head-morphs
http://www.daz3d.com/victoria-7-hd-add-on
http://www.daz3d.com/genesis-3-cross-figure-resource-kitTween Julie 7Nelsonsmith: That is Julie with some added morphs--- a mixture of Hannah, Kalea, Karen, Lexi, Rune, Sasha, Sophia, Victoria bodies, all muscle volumes, Tween Julie at 100%, and Julie's materials in SSS (not iray) format.
Kyoto Kid: It ran for around maybe an hour maybe 90mins max. I don't have a real powerful laptop either. I like r4 alot. Have had some issues with it but nothing major. the updates to reality have been pretty good. but i do better with people with it than I do iray, but metals i do better with iray than r4.
...ahh sounds like you have a CPU that can take advantage of the speed boost, I don't.
I really wish Lux didn't abandon their GPU development . AMD GPUs cost a lot less than comparable Nvidia ones. I could have bought a 16 GB Firepro a couple years ago which costs less than the forthcoming Nvidia Quadro P5000.
..apologies fr the slight derail. Carry on.
Abandoned GPU development? I'm running R4 using GPU. No problems but memory anxiety.
Tween Julie 7Nelsonsmith: That is Julie with some added morphs--- a mixture of Hannah, Kalea, Karen, Lexi, Rune, Sasha, Sophia, Victoria bodies, all muscle volumes, Tween Julie at 100%, and Julie's materials in SSS (not iray) format.
Kyoto Kid: It ran for around maybe an hour maybe 90mins max. I don't have a real powerful laptop either. I like r4 alot. Have had some issues with it but nothing major. the updates to reality have been pretty good. but i do better with people with it than I do iray, but metals i do better with iray than r4.
...ahh sounds like you have a CPU that can take advantage of the speed boost, I don't.
I really wish Lux didn't abandon their GPU development . AMD GPUs cost a lot less than comparable Nvidia ones. I could have bought a 16 GB Firepro a couple years ago which costs less than the forthcoming Nvidia Quadro P5000.
..apologies fr the slight derail. Carry on.
Tween Julie 7Nelsonsmith: That is Julie with some added morphs--- a mixture of Hannah, Kalea, Karen, Lexi, Rune, Sasha, Sophia, Victoria bodies, all muscle volumes, Tween Julie at 100%, and Julie's materials in SSS (not iray) format.
Kyoto Kid: It ran for around maybe an hour maybe 90mins max. I don't have a real powerful laptop either. I like r4 alot. Have had some issues with it but nothing major. the updates to reality have been pretty good. but i do better with people with it than I do iray, but metals i do better with iray than r4.
Daz 3D is part of

Connect
DAZ Productions, Inc.
7533 S Center View Ct #4664
West Jordan, UT 84084Licensing Agreement | Terms of Service | Privacy Policy | EULA
© 2026 Daz Productions Inc. All Rights Reserved.