-
Despite Studio's Popularity, People Still See 'Poser Art'
I have observed that viewers from other user communities only use "poser art " in a derogatory fashion when it depicts scantily clad or naked northern european white women.
The online poser/Daz community has to accept some of the blame for this Negative stereotype.
+1.
Scantily clad or naked northern european white women who went to the same plastic surgeon for perma-dripping wet silicon lips and oversize contact lens implants.
That is the Daz look of 2015-2017, I reckon.
Bruh, if you ever end up in my neck of the woods, I owe you a beer. Because that's savage yet true. The sameface Vickies with the same bloated fish lips, button pixie noses, and big doe eyes is creepy and kind of a hallmark of the "Daz Look". I don't know if anyone is familiar with YTMND, but if that was still a thing, I would totally do a "Call On Me" meme variant with all the Victoria-based female PA characters that have the exact same face (albeit with slight variants), lmao.
Also, I came across a video on YouTube from a channel called 'Deviant Cringe' (if you're familiar with DeviantArt, you can see where this is going), and one of the episodes -I could tell by the thumbnail- was about a fetish-rooted Poser artist, and there was another episode for 'Headless/Limbless women/characters' and the thumbnail again had Poser-based art in it. Argue all y'all want about "What is/isn't true art", but I think there needs to be more acknowledgement of the big honkin' elephant in the room that's holding back the Poser/Daz Studio-based artwork from being more accepted by more professional people: people who use it to make poorly crafted (and sometimes creepy/uncomfortable) fetish-based artwork. I know it's been briefly mentioned in this thread before, but I get the impression it's one of those open secrets/that one family relative that people know exist, but never want to actually talk about at family gatherings, lmao. Because regardless of where you stand on the matter (I don't care if people make it, just mark it with Mature filters appropriately and/or if you shove it in peoples' faces, don't get all whiny when they tell you it's disgusting), you can't deny that's another huge reason why Poser/Daz artwork has the soured reputation it does.
Help needed for the newbieYou can solve the Victoria 7 isntallation issue by using the Daz Install Manager, which will place the content and add it to the Content Management System (Smart Content, Products, and Categories).
Help needed for the newbieHi guys
I've just installed Daz 3d and I'm eager to get started, but I've got a couple of problems.
First of all, I've Victoria 7 in a zip file on my Mac, but I've no clue how to install them correctly. Also, afterwards, nothing from the bundle shows up in the smart content. Do I have to create the metadata myself, or is there a shortcut?
If you guys (or girls) could help me, it would definitely be appreciated.
PS: This topic is probably already talked about, but I'm buried in all the information :/
AIFan re: Ultra Detailed Displacement Maps for Victoria 7Could you please show some renders with some skin textures on top your maps? It's hard to tell what it will really look like when you just show the greyscale images. Thanks. :)
+1
Also want to know if those can be used with any character based on G3F and not just Victoria 7 without any loss of fidelity?
+1
I'm REALLY curious about this. I've been creating and using my own displacement maps to get some nice detail to my characters (particularly on the knuckles and to give a little more depth to moles and stuff -but the AlFan maps look a LOT more detailed and intricate - so I'd be really excited to see any renders that anyone can provide of this product (hopefully some side by side/before and after). :)
AIFan re: Ultra Detailed Displacement Maps for Victoria 7Also want to know if those can be used with any character based on G3F and not just Victoria 7 without any loss of fidelity?
AIFan re: Ultra Detailed Displacement Maps for Victoria 7Could you please show some renders with some skin textures on top your maps? It's hard to tell what it will really look like when you just show the greyscale images. Thanks. :)
Silent Sally for g3fyup - attached is victoria 7 texture
You can achieve much the same with just the G3F body morphs:
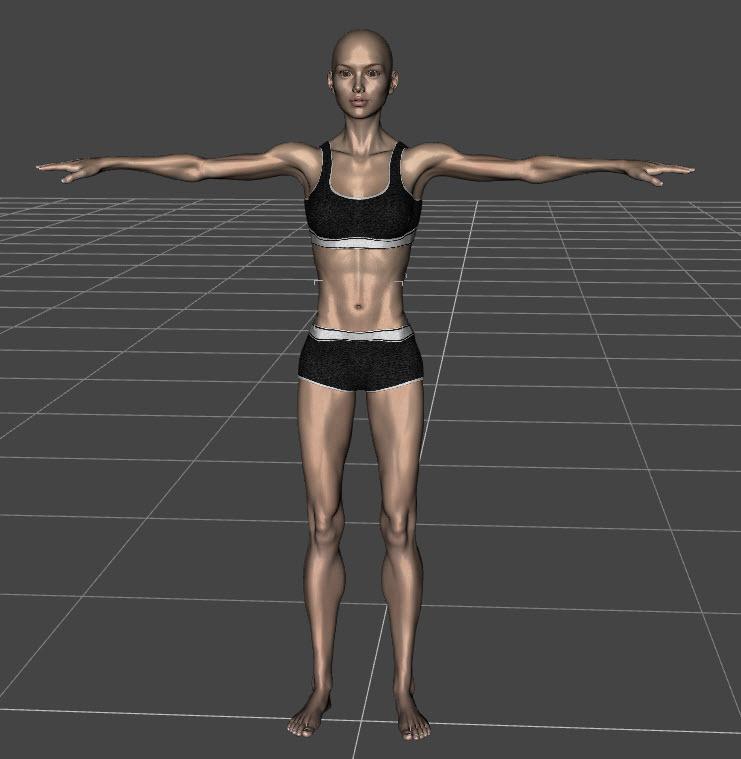
True and well done, but not what was asked.
Well as I understood Divamakeup she was looking for the body shape only, I was just showing that it (or something very close, this was just a quick example and you can probably come even closer) could be achieved just with the G3F body morphs, which she probably already have.
Silent Sally for g3fyup - attached is victoria 7 texture
You can achieve much the same with just the G3F body morphs:
True and well done, but not what was asked.
Morph Targets do not appear on Victoria 4.2 on daz studio 4.9The gen 4's ExP morph system requires that all morphs be installed to the same library as the figures, due to this I prefer to install them to their own library that I name "DAZ Generation 4" to make it easy to find. Once morphs are installed they have to be initialized, DIM is suppose to do this automatically. The morphs may also be initiliazed from a batch file (on Windows at least) found in their library folder at; /Runtime/Libraries/!DAZ ; there is a separate batch file for Victoria and Michael.
How can i learn more about ExP location and how to install stuff outside the install manger.....haveing a hard time re wraping my mind aropund this
thanks
iray skin needs its own base mixing.As I continue to follow this thread, the original
...unfortunately until Skin Builder Pro 3 comes out (which I believe will also support SSS), I am pretty much limited to the default G3F, Josie 7 and non image mapped presets in Beautiful Skins with G3. About the only adjustments I make is changing the gamma of the map using the Image Editor to lighten or darken skins.
Cannot afford to drop 100s on a bunch of G3 characters/figures just to get different skin maps and certainly not at all up to manually convert older skins to G3 due to the change in mapping structure.
Even the best texture map under necessary consideration of PBR standards won't get you any significant improvement if important parts of the shader still don't fit.
On the Genesis 3's, change the "DAZ-dark-red" Translucency Color to a more appropriate RGB 217-133-114. That's more towards what a regular bled-through dermis skin layer's color will look like "down below".
Translucency Weight for a Caucasian 0.45 to 0.5, Asian 0.45 - 0.35 and African-descent about 0.25. (The higher melanin fractions and melanin type blends from eumelanin to pheomelanin in Asian and African-descent skin is what make their skin tone darker and their dermis' color less influent).
Load a (no make-up) diffuse map of your character in your prefered image editing software and pick the skin tone from forehead or cheek. Put that RBG color value you got into Transmitted Color [avoid "255" for any! of the RGB color channels] and set Transmitted Measurement Distance to 1.00.
Set your SSS Reflectance Tint to a neutral RGB 255-255-255 (RGB 250-255-255 for a more pale, or RGB 250-240-215 for a more tanned look).
Keep your fingers away from Glossy Color. Human skin is a dielectric, and the color of the reflection of a dielectric is always white. Plain white. Neither grey, nor blue, nor pink... nor anything else. Only someone without the slightest idea about physically based shading would do such thing.
To counter too much glossiness, increase Glossy Roughness (decrease Glossiness). Still too glossy, check if maybe Glossy Reflectivity is set to something above 0.58151 (Glossy Specular to something above RGB 63-63-63). That corresponds to a maximum in vitro measured Refractive Index of 1.55 for the stratum corneum skin layer of a human. If you use Top Coat, the default Reflectivity of 0.5 ( the default Top Coat IOR of 1.5) is appropriate.
Below some render examples [DS 4.9.2.70]:
"Victoria 7" with her default material, and one which's material set-up includes the above described changes ("Neutral SSS RT" means SSS Reflectance Tint RGB 255-255-255). The lighting on both is J.Cade's "Painter's Lights Classical 2R", in combination with the "Painter's Lights Studio Neutral" Render-Settings preset.
For the close-up a neutral Spot Light with "Luminous Flux (Lumen)": 15000.0; "Temperature (K)": 5000.0; "Light Geometry": Disc; "Height (Diameter)": 10.00; "Width": 10.00 tied to a Camera with "Focal Length (mm)": 105.00; "Z Translate": 100.00, "Y Translate": "between the eyes", and an "Aspect Ratio (Global)": W: 2.00 / H: 3.00, as recommended by Andy Grimm.
Victoria 4 can "morph into a man", and Victoria 7 (and any other Genesis 3) can, using some "a bit more physically appropriate" parameter values, "morph from mulatta (mulatto) to caucasian".

+10 :-)
This is the kind of detailed explanation I've been trying to find to better understand what's going on under the hood, so to speak. Thank you very much for this. I'm definitely of the school of thought that knowing why something should be done is just as important as what.
Agreed; sometimes knowing how the watch works is as important as what time it shows on the face. (Anyone know where the reference I'm making comes from off-hand? ;) )
Product Updates: DIM Zips starting July 2013Updated September 24, 2016
Rune Outfit Textures for Genesis 2 Female(s) 11/3/2015 corrected material presets Rune Outfit Textures for Genesis 3 Female(s) 11/3/2015 corrected material presets Roxanne for Victoria 7 1/12/2016 updated nails morphs SeaFolk KelpHair for V4, A4, M4 and H4 6/17/2016 unknown Pharos Fantasy for V4 Ps 6/21/2016 add Pharos Fantasy (PC freebie) to Children of Aten Fantasy Friar Outfit for Genesis 3 Male(s) 6/29/2016 metadata update only Dashing & Daring Poses 6/30/2016 add Ivan 7 poses Blood Red Outfit for Genesis 3 Female(s) 7/21/2016 corrected rigidity on skirt piece Isa for Rune 7 7/21/2016 clarify labeling of wound makeups Hemlock Folly Ca 8/15/2016 content updates (Carrara 8+) Archaic Ruins DS 8/26/2016 unknown (DS4.5+ only) Iyeyasus Tomb DS 9/6/2016 metadata update only Eastern Terrace DS 9/6/2016 add .duf version w/metadata (all version of DS) Eastern Terrace Ps 9/6/2016 no change (all except DS4.5+) MynX for Victoria 7 9/8/2016 content fixes? MynX for Victoria 7 9/12/2016 metadata update only Mini Haven Interior Vignette DS 9/15/2016 metadata update only Eastern Terrace DS 9/20/2016 metadata update, remove pre-DS4.5 material presets (DS4.5+ only; KEEP OLD VERSION if you use older versions of DS also) iray skin needs its own base mixing.As I continue to follow this thread, the original
...unfortunately until Skin Builder Pro 3 comes out (which I believe will also support SSS), I am pretty much limited to the default G3F, Josie 7 and non image mapped presets in Beautiful Skins with G3. About the only adjustments I make is changing the gamma of the map using the Image Editor to lighten or darken skins.
Cannot afford to drop 100s on a bunch of G3 characters/figures just to get different skin maps and certainly not at all up to manually convert older skins to G3 due to the change in mapping structure.
Even the best texture map under necessary consideration of PBR standards won't get you any significant improvement if important parts of the shader still don't fit.
On the Genesis 3's, change the "DAZ-dark-red" Translucency Color to a more appropriate RGB 217-133-114. That's more towards what a regular bled-through dermis skin layer's color will look like "down below".
Translucency Weight for a Caucasian 0.45 to 0.5, Asian 0.45 - 0.35 and African-descent about 0.25. (The higher melanin fractions and melanin type blends from eumelanin to pheomelanin in Asian and African-descent skin is what make their skin tone darker and their dermis' color less influent).
Load a (no make-up) diffuse map of your character in your prefered image editing software and pick the skin tone from forehead or cheek. Put that RBG color value you got into Transmitted Color [avoid "255" for any! of the RGB color channels] and set Transmitted Measurement Distance to 1.00.
Set your SSS Reflectance Tint to a neutral RGB 255-255-255 (RGB 250-255-255 for a more pale, or RGB 250-240-215 for a more tanned look).
Keep your fingers away from Glossy Color. Human skin is a dielectric, and the color of the reflection of a dielectric is always white. Plain white. Neither grey, nor blue, nor pink... nor anything else. Only someone without the slightest idea about physically based shading would do such thing.
To counter too much glossiness, increase Glossy Roughness (decrease Glossiness). Still too glossy, check if maybe Glossy Reflectivity is set to something above 0.58151 (Glossy Specular to something above RGB 63-63-63). That corresponds to a maximum in vitro measured Refractive Index of 1.55 for the stratum corneum skin layer of a human. If you use Top Coat, the default Reflectivity of 0.5 ( the default Top Coat IOR of 1.5) is appropriate.
Below some render examples [DS 4.9.2.70]:
"Victoria 7" with her default material, and one which's material set-up includes the above described changes ("Neutral SSS RT" means SSS Reflectance Tint RGB 255-255-255). The lighting on both is J.Cade's "Painter's Lights Classical 2R", in combination with the "Painter's Lights Studio Neutral" Render-Settings preset.
For the close-up a neutral Spot Light with "Luminous Flux (Lumen)": 15000.0; "Temperature (K)": 5000.0; "Light Geometry": Disc; "Height (Diameter)": 10.00; "Width": 10.00 tied to a Camera with "Focal Length (mm)": 105.00; "Z Translate": 100.00, "Y Translate": "between the eyes", and an "Aspect Ratio (Global)": W: 2.00 / H: 3.00, as recommended by Andy Grimm.
Victoria 4 can "morph into a man", and Victoria 7 (and any other Genesis 3) can, using some "a bit more physically appropriate" parameter values, "morph from mulatta (mulatto) to caucasian".
+10 :-)
This is the kind of detailed explanation I've been trying to find to better understand what's going on under the hood, so to speak. Thank you very much for this. I'm definitely of the school of thought that knowing why something should be done is just as important as what.
iray skin needs its own base mixing....unfortunately until Skin Builder Pro 3 comes out (which I believe will also support SSS), I am pretty much limited to the default G3F, Josie 7 and non image mapped presets in Beautiful Skins with G3. About the only adjustments I make is changing the gamma of the map using the Image Editor to lighten or darken skins.
Cannot afford to drop 100s on a bunch of G3 characters/figures just to get different skin maps and certainly not at all up to manually convert older skins to G3 due to the change in mapping structure.
Even the best texture map under necessary consideration of PBR standards won't get you any significant improvement if important parts of the shader still don't fit.
On the Genesis 3's, change the "DAZ-dark-red" Translucency Color to a more appropriate RGB 217-133-114. That's more towards what a regular bled-through dermis skin layer's color will look like "down below".
Translucency Weight for a Caucasian 0.45 to 0.5, Asian 0.45 - 0.35 and African-descent about 0.25. (The higher melanin fractions and melanin type blends from eumelanin to pheomelanin in Asian and African-descent skin is what make their skin tone darker and their dermis' color less influent).
Load a (no make-up) diffuse map of your character in your prefered image editing software and pick the skin tone from forehead or cheek. Put that RBG color value you got into Transmitted Color [avoid "255" for any! of the RGB color channels] and set Transmitted Measurement Distance to 1.00.
Set your SSS Reflectance Tint to a neutral RGB 255-255-255 (RGB 250-255-255 for a more pale, or RGB 250-240-215 for a more tanned look).
Keep your fingers away from Glossy Color. Human skin is a dielectric, and the color of the reflection of a dielectric is always white. Plain white. Neither grey, nor blue, nor pink... nor anything else. Only someone without the slightest idea about physically based shading would do such thing.
To counter too much glossiness, increase Glossy Roughness (decrease Glossiness). Still too glossy, check if maybe Glossy Reflectivity is set to something above 0.58151 (Glossy Specular to something above RGB 63-63-63). That corresponds to a maximum in vitro measured Refractive Index of 1.55 for the stratum corneum skin layer of a human. If you use Top Coat, the default Reflectivity of 0.5 ( the default Top Coat IOR of 1.5) is appropriate.
Below some render examples [DS 4.9.2.70]:
"Victoria 7" with her default material, and one which's material set-up includes the above described changes ("Neutral SSS RT" means SSS Reflectance Tint RGB 255-255-255). The lighting on both is J.Cade's "Painter's Lights Classical 2R", in combination with the "Painter's Lights Studio Neutral" Render-Settings preset.
For the close-up a neutral Spot Light with "Luminous Flux (Lumen)": 15000.0; "Temperature (K)": 5000.0; "Light Geometry": Disc; "Height (Diameter)": 10.00; "Width": 10.00 tied to a Camera with "Focal Length (mm)": 105.00; "Z Translate": 100.00, "Y Translate": "between the eyes", and an "Aspect Ratio (Global)": W: 2.00 / H: 3.00, as recommended by Andy Grimm.
Victoria 4 can "morph into a man", and Victoria 7 (and any other Genesis 3) can, using some "a bit more physically appropriate" parameter values, "morph from mulatta (mulatto) to caucasian".
Morph Targets do not appear on Victoria 4.2 on daz studio 4.9Victoria 4 does work in the latest DAZ Studio all the generation 4 figure do. The gen 4's ExP morph system requires that all morphs be installed to the same library as the figures, due to this I prefer to install them to their own library that I name "DAZ Generation 4" to make it easy to find. Once morphs are installed they have to be initialized, DIM is suppose to do this automatically. The morphs may also be initiliazed from a batch file (on Windows at least) found in their library folder at; /Runtime/Libraries/!DAZ ; there is a separate batch file for Victoria and Michael.
Morph Targets do not appear on Victoria 4.2 on daz studio 4.9I tried the older Version of DAZ3d studio and it both dont work.
Some Months ago i bought 2 females Meshes for Victoria 4,2. And the complete Morph Targets.
I think victoria 4.2 is no longer supported. Which Victoria has completely made Morphs targets with Faces and Talk Morphs ? As far as i have seen the newest Victiria is the 8. I would eed a new Female mesh for her and the Morph Targets.
So i hoped someone could give me a hint what modell would be the better for work on. either victoria 6 or 8. I must have the Morph targets.
Despite Studio's Popularity, People Still See 'Poser Art'Photorealism? I don't even think that most Pozer/Daz users are even trying to make photorealistic artwork. That's because photorealism is a very complex job even for the professional CGI artists. And most people who use Studio or Poser are definitely just amateurs who use the software for slightly different purposes.
There is something called "Fun" that is just as important to Studio as making art. I myself am not making art. I'm just making fun. As I'm a software developer and not a professional artwork, using CGI is just a way for me to relax. And sometimes I use CGI to illustrate my work by creating images to use on websites I develop or to illustrate technical documents to make them less boring to read. It's not my job to be an illustrator but sometimes the customer isn't providing any artwork so I either has to "steal" it online or make it myself. So I make it myself...
Still, I started in 2005 or so with just Poser and nowadays I combine Poser with Vue for some nicer renders. I still use Victoria 4 as my main female model and I have a lot of additional props for this model to use. The reason is simple, as I just don't have a lot of time to work on CGI as it isn't my main job. So I've taught myself to set up a scene in Poser within 30 to 60 minutes before I export it all to Vue, where I will spend another 15 to 45 minutes setting up the environment and adjusting the materials. And if it is just for my personal fun, it will often include a scandily-clad lady in some fantasy-style pose with grass, water, trees and perhaps even a building. And sometimes even scenes that are a bit difficult to explain, like two primitively-clad ladies drinking wine in a classroom. Because that's where the fun actually starts. That's when I have to come up with a background story behind the image, which is just as fun as making the image itself.
Is it art? Meh. I don't even care. To me, it's just fun. It's different from my regular job, anyways...
Noob having issues with some V4 productsTry selecting the neck of the hair, or the ehad of Victoria 4, to look for the morphs. The older figures did not consistently have the morphs on the figure node to the same extentr as the Genesises
Hey, that actually worked! Thanks! One problem solved lol
Noob having issues with some V4 productsTry selecting the neck of the hair, or the ehad of Victoria 4, to look for the morphs. The older figures did not consistently have the morphs on the figure node to the same extentr as the Genesises
AutoFitting Hair From V4 to G2F And Losing Transform OptionsHello all, so I'm using a braided hair style that has long tails. I own the Victoria 4 for Genesis 2 Female tool and it works great to get the hair auto-fitted to my G2F character's hair. The only problem is once I apply the auto-fit, I lose the ability to control the tails of the hair style using the parameters. Without using auto-fit each little part of each tail is articulate and I have tons of flexibility as far as posing, using the parameters tab. However, once I apply the hair to auto-fit none of the parts of the tail show up in the scene tab and I can no longer control them. Is there a way to fix this? Thanks for any help
Morph Targets do not appear on Victoria 4.2 on daz studio 4.9Daz Install Manager normally installs to the Public Documents folder in "My Daz 3D Library", not in the private folder. Do you have more than one content folder with a "Runtime\Libraries\!DAZ\Victoria 4" folder?
The Victoria 4.2 Base StudioCF has material presets for V4 that are optimized for Daz Studio. The main Victoria 4.2 Base zip has the figure itself.
Daz 3D is part of

Connect
DAZ Productions, Inc.
7533 S Center View Ct #4664
West Jordan, UT 84084Licensing Agreement | Terms of Service | Privacy Policy | EULA
© 2026 Daz Productions Inc. All Rights Reserved.