-
Getting on the 9 train, or not
Diomede said:
See the blender video at this comment. In general, for posing and animation purposes, an even mesh is inefficient. There needs to be more polygons where there is more bending, and there can be fewer polygons where the body does not bend or express. For example, the middle of the front of the shin does not bend, so the mesh need not have as many polygons there. But the ankles and the knees bend, and the back of the calf muscle contracts and bulges. So the top and bottom and back of the shin bone need more polygons. The top and bottom blend when the ankle and knee joints bend. The calf muscle contracts and bulges when the muscle exercises. It is good to have plenty of polygons near the joints and near muscles, but extra polygons are not needed in the middle of long bones. Genesis 9 has even polygons, so it is inefficient from the perspective of edge loops. Given the total number of polygons used, there are too many in the middle/front of the shin and not enough by the ankle and the knee and back of the calf. That is an oversimplified explanation. There are actually plenty of polygons in the ankle and the knee. But hope it helps get the general idea across. See this video.
See here. Getting on the 9 train, or not - Page 30 - Daz 3D Forums
The reply is that an even grid is better for sculpting. (1) The even gridmakes it easier to completely reshape the base figure. (2) For posing and animating, if the creator is going to rely on morph fixes instead of good edge flow, then the even grid gives maximum freedom to the sculpting brush.
Trade-offs.
OK, even grid is more versatile and specialised grid is more efficient. I think I get that, but
Padone said:
Hylas said:
To be fair, SubD 3 for G9 is the equivalent of SubD 4 for G8, right?
It is rather the opposite.
In terms of geometry, a G9 at subD 3 will take up (very roughly) as much space while renderng as a G8 at subD 2?
How? I thought G9 had denser mesh (= more geometry?) than G8.SF-Design - Easy Feet for Gen 9SF-Design just released the teeth morph set and a home run! Hoping soon for the easy-feet for Gen 9. I can do all of this in Zbrush myself, but those morphs make it much quicker. Here are some of my morphs with toe lengths I have done in Zbrush plus nail morphs etc.
Getting on the 9 train, or notHylas said:
Padone said:
Hylas said:
wurger said:
Ugh. My G9 train just derailed. Can't render two G9s at subdiv 3 without dropping to CPU with an RTX 2070 Super. Not sure I want to spend $400+ for a 3060 just so I can render a pair of G9 figures.
Good info to have. To be fair, SubD 3 for G9 is the equivalent of SubD 4 for G8, right?
It is rather the opposite. Since G3-G8 have a detailed topology you can use a lower subdivision. With G9 you have a higher density but no topology, this means the mesh density is not "where it counts" if we speak of human figures. Indeed the main reason for a good topology is to optimize the figure adding details where they're needed. As for the hardware resources, again, G9 is HD based so needs a more powerful hardware this is expected.
Ok, I didn't understand that... can you (or sombody) explain this further, or phrase it differently?
My understanding so far had been:
G8 geometry has a certain amount of polygons, which at base resolution (subD 0) uses N amount of space on your GPU while rendering.
Increase subD to 1, now the geometry uses 4 x N amount of space on your GPU. Increase subD to 2 and it uses 16 x N amount of space. Geometry quadruples with each subD increase.
G9 has twice the mesh density of G8, so quadruple the amount of polygons (roughly). At base resolution (subD 0) G9 already uses 4 x N amount of space on your GPU (roughly).
G9 at subD 3 is the equivalent of G8 at subD 4, regarding the amount of space its geometry uses on the GPU (roughly).
Everybody, please do correct me because my understanding of these things is iffy and I want to learn if I got it wrong.
See the blender video I will link. In general, for posing and animation purposes, an even mesh is inefficient. There needs to be more polygons where there is more bending, and there can be fewer polygons where the body does not bend or express. For example, the middle of the front of the shin does not bend, so the mesh need not have as many polygons there. But the ankles and the knees bend, and the back of the calf muscle contracts and bulges. So the top and bottom and back of the shin bone need more polygons. The top and bottom blend when the ankle and knee joints bend. The calf muscle contracts and bulges when the muscle exercises. It is good to have plenty of polygons near the joints and near muscles, but extra polygons are not needed in the middle of long bones. Genesis 9 has even polygons, so it is inefficient from the perspective of edge loops. Given the total number of polygons used, there are too many in the middle/front of the shin and not enough by the ankle and the knee and back of the calf. That is an oversimplified explanation. There are actually plenty of polygons in the ankle and the knee but their edges do not match the typical peaks and valleys of healthy human adults. But hope it helps get the general idea across. See this video.
See here. Getting on the 9 train, or not - Page 30 - Daz 3D Forums
The reply is that an even grid is better for sculpting. (1) The even grid makes it easier to completely reshape the base figure. (2) For posing and animating, if the creator is going to rely on morph fixes instead of good edge flow, then the even grid gives maximum freedom to the sculpting brush.
Trade-offs.
EDIT: Given that the square grid does not line up the edges of the grid with the natural peaks and valleys of human muscles and bones, the sculpting solution is to make the grid smaller so that there are points everywhere. Increase subdivision to increase the density of scuplting points (make grid smaller). Summary. Subdivision is a strain on computer resouces, subdivision would not be necessary if the edge loops lined up better, the square grid is inefficient.
Toonish for G9 (Free full Character)Aged Body Morph for Feminine, and works with masculine but not purpose built for it is available.
Also through in some bonus morphs.
MDBridge for Daz3DHere is a project I have been working on and it will be released shortly is now available.
This is a port of Fverbaas MDBridge to Daz Studio. The script will allow Daz Studio to send poses and receive clothing from Marvelous Designer.
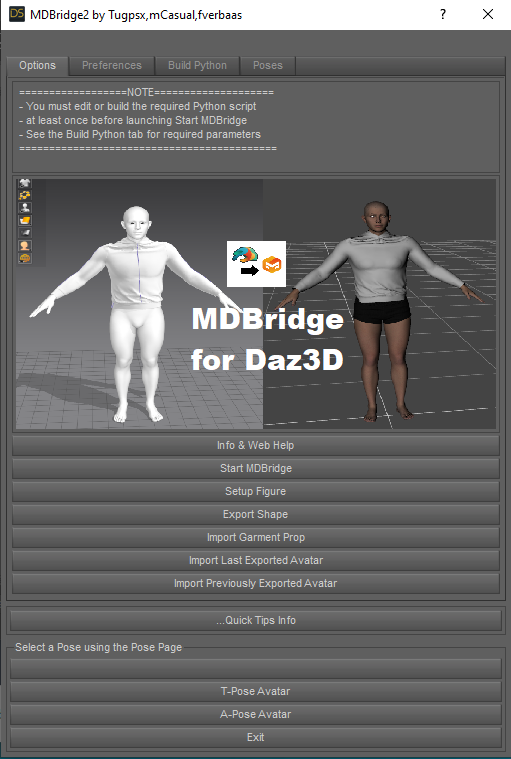

Here is a quick YouTube video of MDBridge for Daz Studio.

A typical session will always start with “Start MDBridge”, usually followed by “Setup Figure”. You can then change attention to MD to load the avatar in an A-pose and morph to T-Pose and Posed Avatar for testing prior to creating or fitting a garment to your avatar. Once the garment is fitted to the A-pose you can use the “Morph to” option to test the garment on your Daz posed figure. If you would like to change the avatar’s pose in Marvelous Designer, you can simply select the “Start/Stop AutoUpdate” option in MD and send a new pose from Daz Studio with the “Export Shape” option. When done you can export the garment from MD, back to Daz Studio using the “Export Thin Garment” option and the “Import Garment Prop” option in Daz Studio to get the result in your Daz scene. For more complete info consult the main manual
• Start MDBridge: Starts your session. It launches Marvelous Designer with the bridge functions running. The first time you use the bridge Daz Studio will ask you to select the location of the Marvelous Designer executable file. The information will be stored so you not need to do this again. You will likely find the executable in the default install path: C:/Program Files/Marvelous Designer 9 personal/MarvelousDesigner9_Personal_x64.exe ◦ If you want to change this later you can use the preference page options to select the folder location.
• Setup Figure: This is an automated option that will send your figure’s current pose as well as a compatible A-pose and T-pose to Marvelous designer as the essential avatars. The data is stored on your hard disk in a temporary folder that can be chosen on the preference tab. The data will normally remain available between sessions unless you or the operating system do a clean-up.
• Export Shape lets you export the current posed shape of the selected figure in your scene.
• Import Garment Prop lets you import the geometry that MD made of the garment fitted to the posed figure. The name of the garment prop is forDaz3D. ◦ If there is already a prop with the name 'forDaz3D’ in the scene, another prop will be added with the new import. If you want to keep the current 'forDaz3D' prop rename it in your scene.
DOWNLOAD HERE if not working below
SereneNight’s Sci-Fi Fun Thread 3Serene Night said:
Very true, my mistake. M9 has no nipples in morph. Usually, there is an option to click them on.
The morph I use are the ones that come with the masculine base.
Edit: I see. The Nipple Depth morph makes them super spikey. Good to know. Don't use that one!
Well, well. HerYun has made sure that the guys will not have to be Mr Wee Torpedos of 1950. Kind of surprised that it's in this store, but at least someone has made it possible for the guys to look properly cold!
(I do wish Daz would spell check the promo images with text before they go into the store, though. I mean ... "Femine"?)
*Released!* Natural Eyes 9 For Genesis 9 {Commercial}I love, love, LOVE the eyes. Probably the best eyes I've ever rendered. These S1Green2. I only have the lacrimal morph dialed in at about 75% and the lacrimal fleshy dialed in at about 65%. I love the difference it makes when you blow the picture up to full size. I might have to adjust my settings in DS though. I think it could have rendered longer. I'll have to play with it more.
 Knittingmommy's Laboratory
Playing around with a couple of new things. Used Victoria 9's skin, but the eyes textures are from Natural Eyes 9 for Genesis 9 which I'm in love with. Seriously good textures. The figure is one I created using Face Morphs Kit for Genesis 9. I had a lot of fun with that. I started with Victoria 9 and dialed her back to 75% and added in a little bit of VYK Sydney for Genesis 9 at 15% and then adjusted the nose, cheeks, mouth, and brow until I got something I liked.
Male Chest Breath MorphsFor chest breathing, the morph is very easy to do with Blender, regardless of the 3D character.
Just import the character's OBJ file and use the Lattice modifier to deform very slightly the rib cage.
There are many tutorials for the Lattice modifier. In a few minutes you will be able to do this job.Generation 3 Aiko and Hiro Appreciation Threadvrba79 said:
Coulda sworn she came out in 2002. I've slept since then though. Maybe I'm thinking of the original Aiko model.
Yup, you're probably thinking of this one:
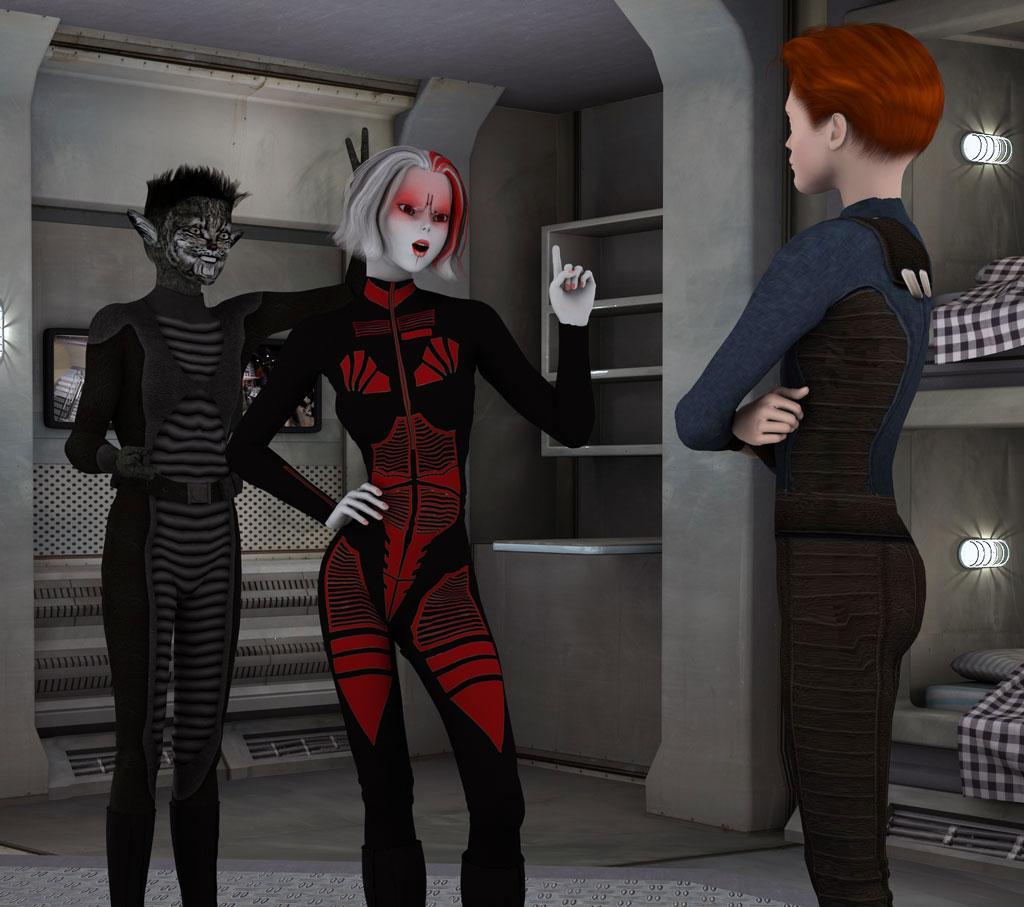
She (and her male morph "Maiko", unofficially named by PA Xena) was a morph of the first Stephanie, who herself was created from Mike2's mesh.
Fun times.
Zirael Flyte Hatchback Car - Underside?Ok. Confirmed that the surface material for 18 and 73 were indeed missing. And the texture didn't have 18 on it. So why I specified 18 as an option is beyond me. Brain fart. However, I've added it to the texture so it will be an option after the next update. I've fixed the weight map glitch with the hatch rear trim. Which will be in the next update. I'm going to wait to submit it until after the weekend in case anyone finds anyuthing else that needs fixed. Apologies for the hassle.
FYI @barbult if you check the parameters tab while the plate is selected, there's a morph that will let you center the text on the plate.morphing a geograft asset in custom poseyeah you're right. I'm using morph systems of other 3D apps, but Reverse Deformation, which I should get more accostumed to, is indeed a great option for that too.
SereneNight’s Sci-Fi Fun Thread 3Serene Night said:
Okay, here, this looks better without the cleavage and the nipple depth morph.
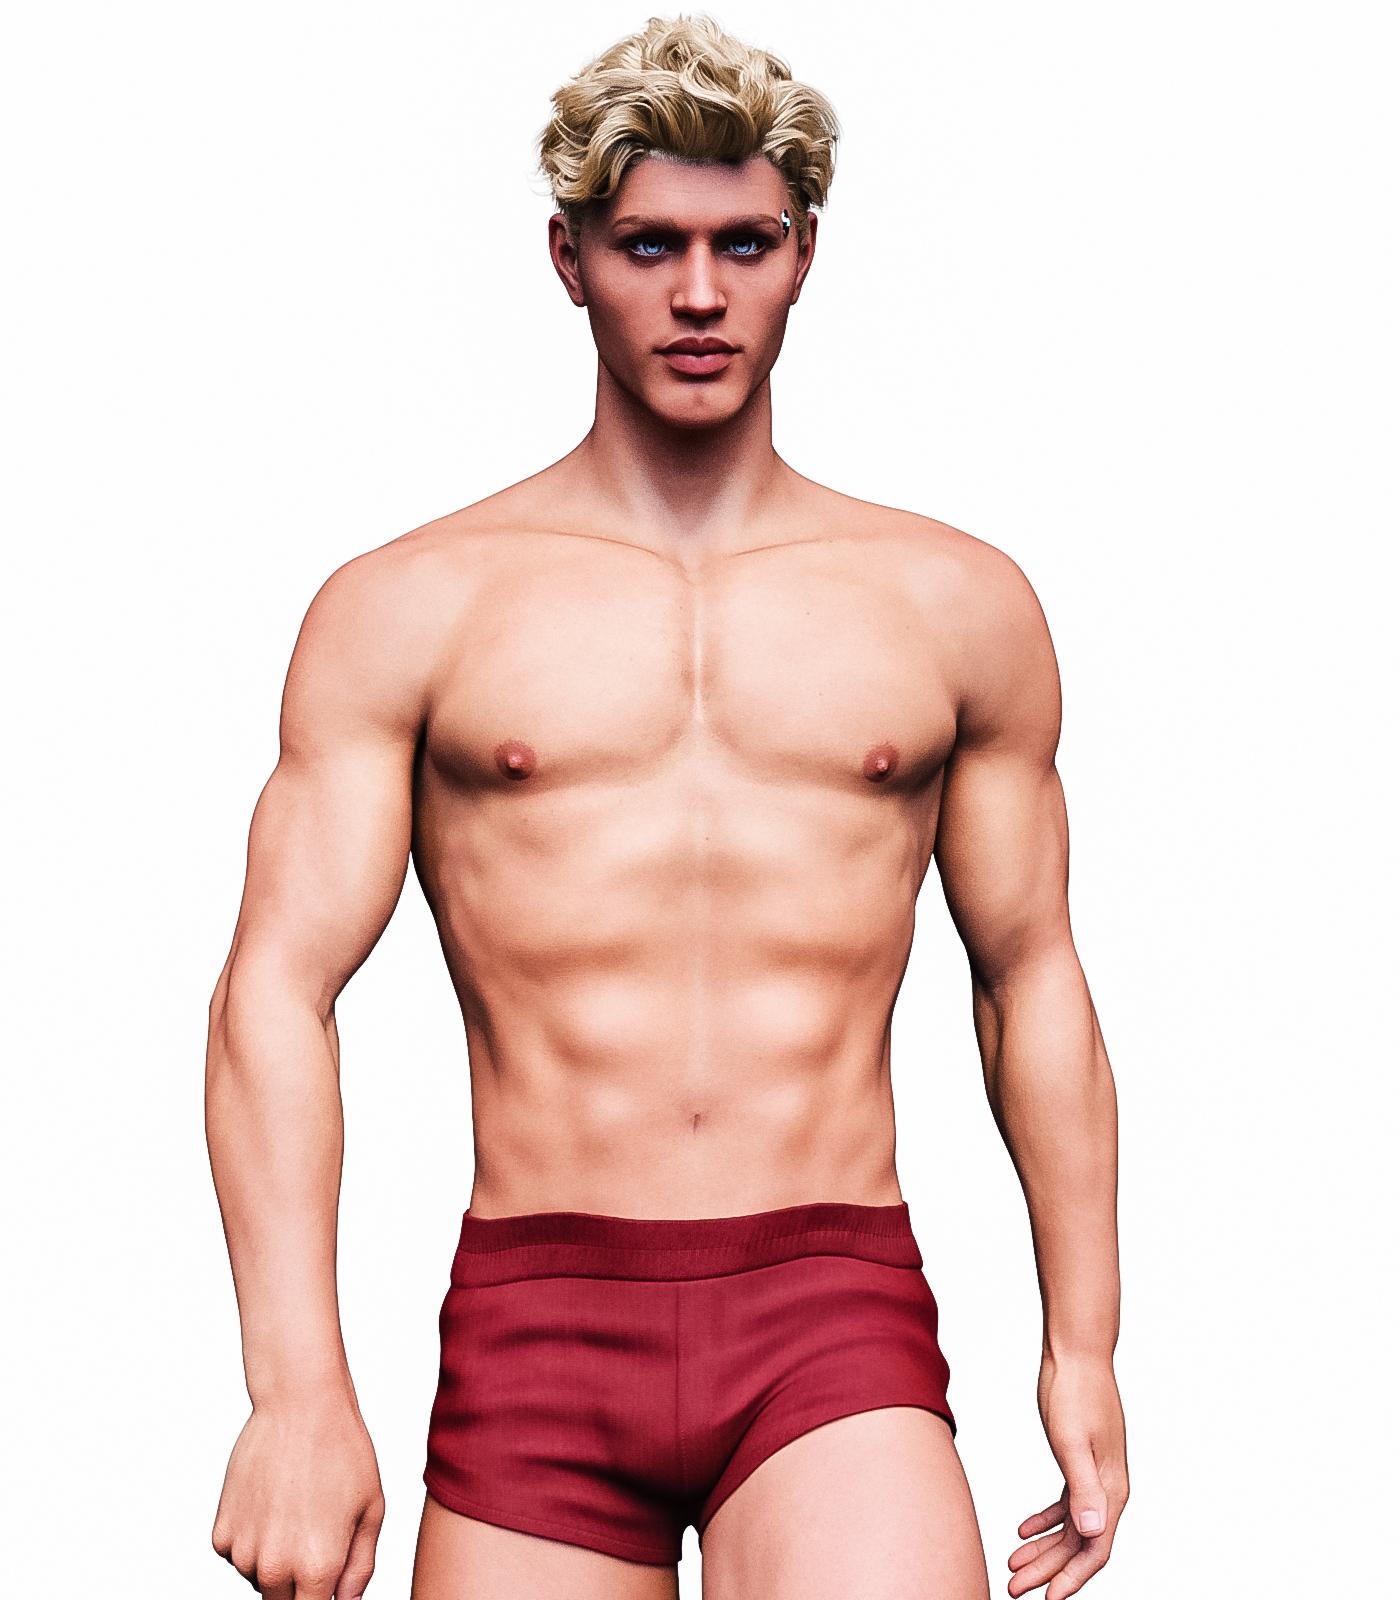
OK. now it's starting to really look like Boyd again.
morphing a geograft asset in custom poseMorphing to a pose is cetainly part of many workflows, especially clothing and morph creation where the figure needs to be posed to see how a corrective morph should be shaped. That is what Reverse Deformations is for.
SereneNight’s Sci-Fi Fun Thread 3Okay, here, this looks better without the cleavage and the nipple depth morph.
SereneNight’s Sci-Fi Fun Thread 3Very true, my mistake. M9 has no nipples in morph. Usually, there is an option to click them on.
The morph I use are the ones that come with the masculine base.
Edit: I see. The Nipple Depth morph makes them super spikey. Good to know. Don't use that one!
morphing a geograft asset in custom poseTo create custom shapes for specific poses you could use the morph system of Blender :
Export Genesis as obj, no SubD, default pose.
Import in Blender. Create a Shape Key.
Export Genesis in your final pose. Export as obj.
Import in Blender. Add that second obj as a second Shape Key on the first imported Genesis.
Now do the same with the Geograft. Export it as base, default pose and shape. Import in Blender and create a Shape Key.
Export the same geograft in the final pose. Import in Blender, add that as a 2nd Shape Key on the base geograft.
In Blender, slide the 2nd Shape Key for both Genesis and the geograft.
You now have your final pose for both, but as morphs. Create a 3rd Shape Key for the geograft and make modifications to the geometry to shape it the way you want. NONE of the vertices connected to the Genesis can be moved, even so slightly. Or morph won't be usable on the Daz geograft.
Once your geograft is shaped as you want, slide the 2nd Shape Key down to 0. Geograft is now in its default base pose but with your modifications added to it. Export that geograft from Blender as obj. Import in Daz using morph loader pro.
You can now, in Daz, go to the keyframe of your final pose. And load your custom geograft morph.
As for your issue, I guess it's related to the fact that you may have moved one or more vertices from the open edges (the ones connected to Genesis). That's very probably why the morph can't be used, as I can confirmed that all that still works as usual in the most recent version of Daz.
*Released!* Natural Eyes 9 For Genesis 9 {Commercial}I've got my first render going using Natural Eyes 9. I have to say I love what it's looking like so far. The eyes look amazing and I love the lacrimal morph. Thank you for including the PDF. I was messing everything up until I read that. I'm looking forward to exploring it more. So many options to play with.
SereneNight’s Sci-Fi Fun Thread 3nonesuch00 said:
Serene Night said:
vwrangler said:
carrie58 said:
Looks tastey ,but I'm confused there was all that fussing in the G9 thread about lack of nipples .......
The geometry is less dense and specific in G9 than in previous generations in that area, so you can't get as much detail. At least, that seemed to be the gist of it.
I will note that in the workspace, the G9 male nipple is this sharp pointy cone. It renders OK, but looks very weird in Studio itself.
Lol, the traffic cone nipples seem to be all there is. Hopefully, one of the Pa's with attention to detail will make some nipples, or perhaps soto. The options seem to be: Smooth or Madonna pokey-bra nipples.
Are those Mike 9's morphs? They seem way too near the center of his chest but since Boyd is an android maybe that was done on purpose.
The nipples moved as a result of a morph I applied. The pectoral cleavage morph moves them inward slightly. The body morph is M9's. Thanks for noticing. I prefer them out more, so I will remove that morph. Its tough because M9's chest is really flat. And Boyd is pretty muscular. Hopefully better male chest morphs will be out soon.
The I Miss the Old Days Complaint ThreadAlso further complaint. Our gov is planning to compensate some of the costs as a tax break for those of us who have a decent salary by using a system already in place which is meant for home improvements (yes, you can get a tax break for those). The thing is that it's for the period of january to april and the cost must exceed 2000€ but can be no greater than 6000€ and it only covers the cost of electricity itself, not the grid fee. Also they first deduct 100€ from it (because why not) and after that you are eglible for compensation of 60% of the total cost but only up to 2400€ for some reason...
Where does the remainder go? I guess you can split it with your spouse like in the normal system... except if you live alone in which case you are limited to that 2400€ even if you end up paying the maximum 6000€.
Of course this only applies to folks if they have high enough taxable income to actually benefit from it. If not the gov has your back by covering anything over 400€... well, 60% of anything over 400€ and... only up to 1500€. That is up to 660€/month so up to 2640€ for fourt months.
I mean I guess they could have made the system even more complicated if they had really tried...
Edit: Forgot to mention that they are also considering reducing the electricity sales tax from 24% to 10% temporarily but it's anyone's guess if the power companies actually transfer this to prices... and again it's sales only, not the grid fee.
Daz 3D is part of

Connect
DAZ Productions, Inc.
7533 S Center View Ct #4664
West Jordan, UT 84084Licensing Agreement | Terms of Service | Privacy Policy | EULA
© 2026 Daz Productions Inc. All Rights Reserved.