-
DAZ, MD, and Traditional Pattern Making - Graduation
Whew! I made it through most of the steps. I did not do any custom weight mapping or JCMs.
Here is the sloper on G9B, posed in Daz Studio.

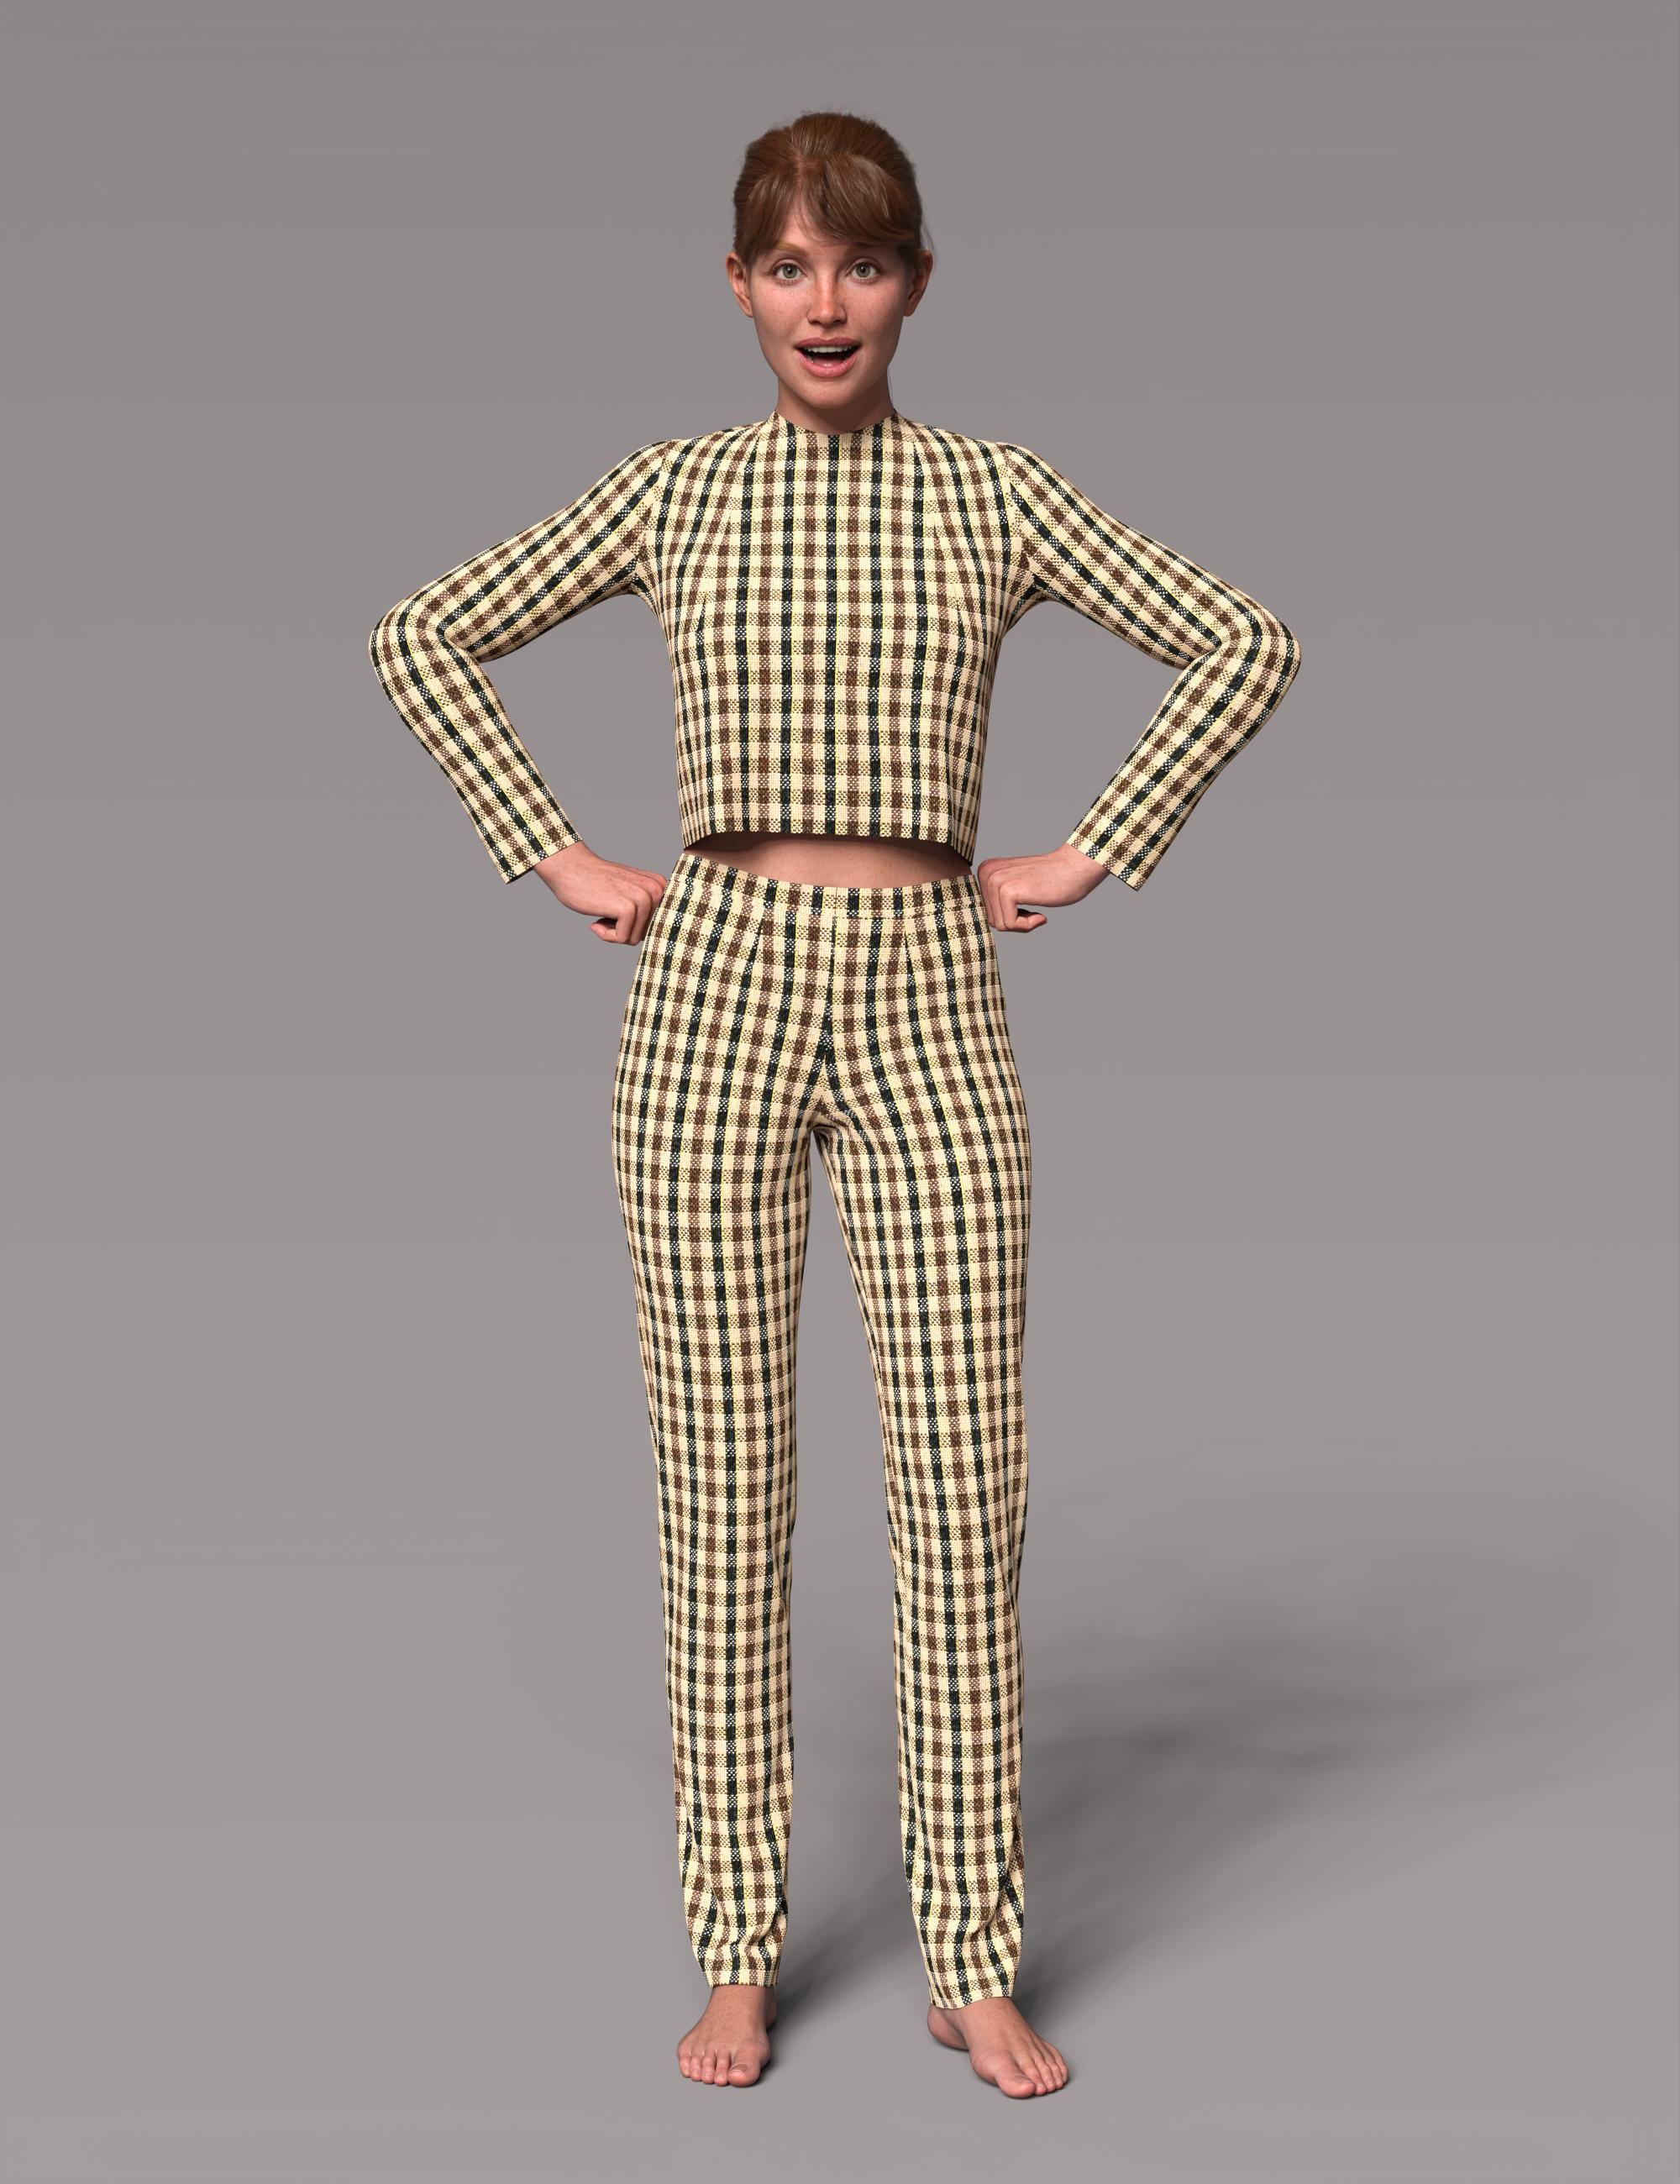
Here is the sloper fit to V9 with her custom body morph, and posed in Daz Studio.
 String and knots?
String and knots?
String, twine, rope not preferred but could work if there are no alternatives.
Wondering if there is a prop of string that has a tied in a knot morph (or alternate prop in that shape)?
Thanks!
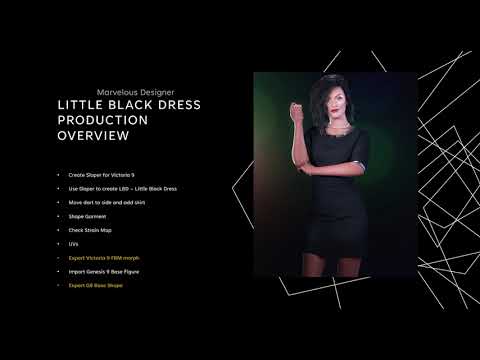
DAZ, MD, and Traditional Pattern Making - GraduationI think these are all the steps now start to finish for creating a custom "couture" fit. There are extra steps from creating the pattern for the G9 Base Mesh. I'll update if I think of anything else. *Asterisk indicates any figure you want to create custom fit for. Avatar and Garment geometries absolutely must stay the same throughout. Simulate and drape before each MD export.
DAZ I/O
DAZ
MD
MD I/O
1
Export G9 Base Shape
2
Export V9* Figure
3
Import V9* Figure Avatar
4
Create Sloper
5
Modify Sloper to Pattern
6
Finalize Pattern
7
UV Mapping
Export Stitching Mask
8
Export Displacement Mask
9
Export V9 Figure Garment Victoria9_body_bs_Body
10
Import G9 Base Morph
11
Export G9 Base Garment
12
Create Tight Fit
13
Export G9 Tight Garment
14
Import G9 Tight Garment
15
Transfer Utility
16
Weight Mapping
17
JCMs
18
Update Base Geometry with G9 Base Garment
19
Morph Loader Pro V9 Shape Morph Garment Victoria9_body_bs_Body
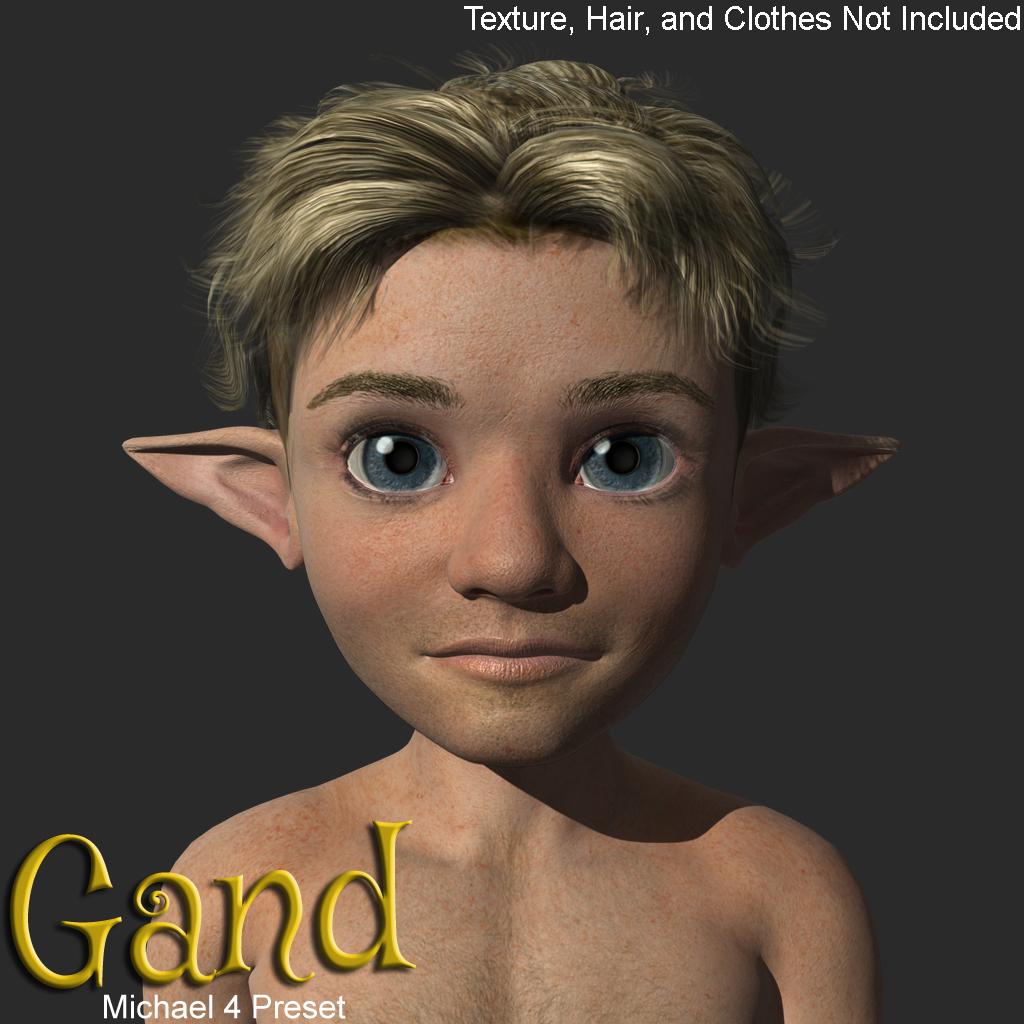
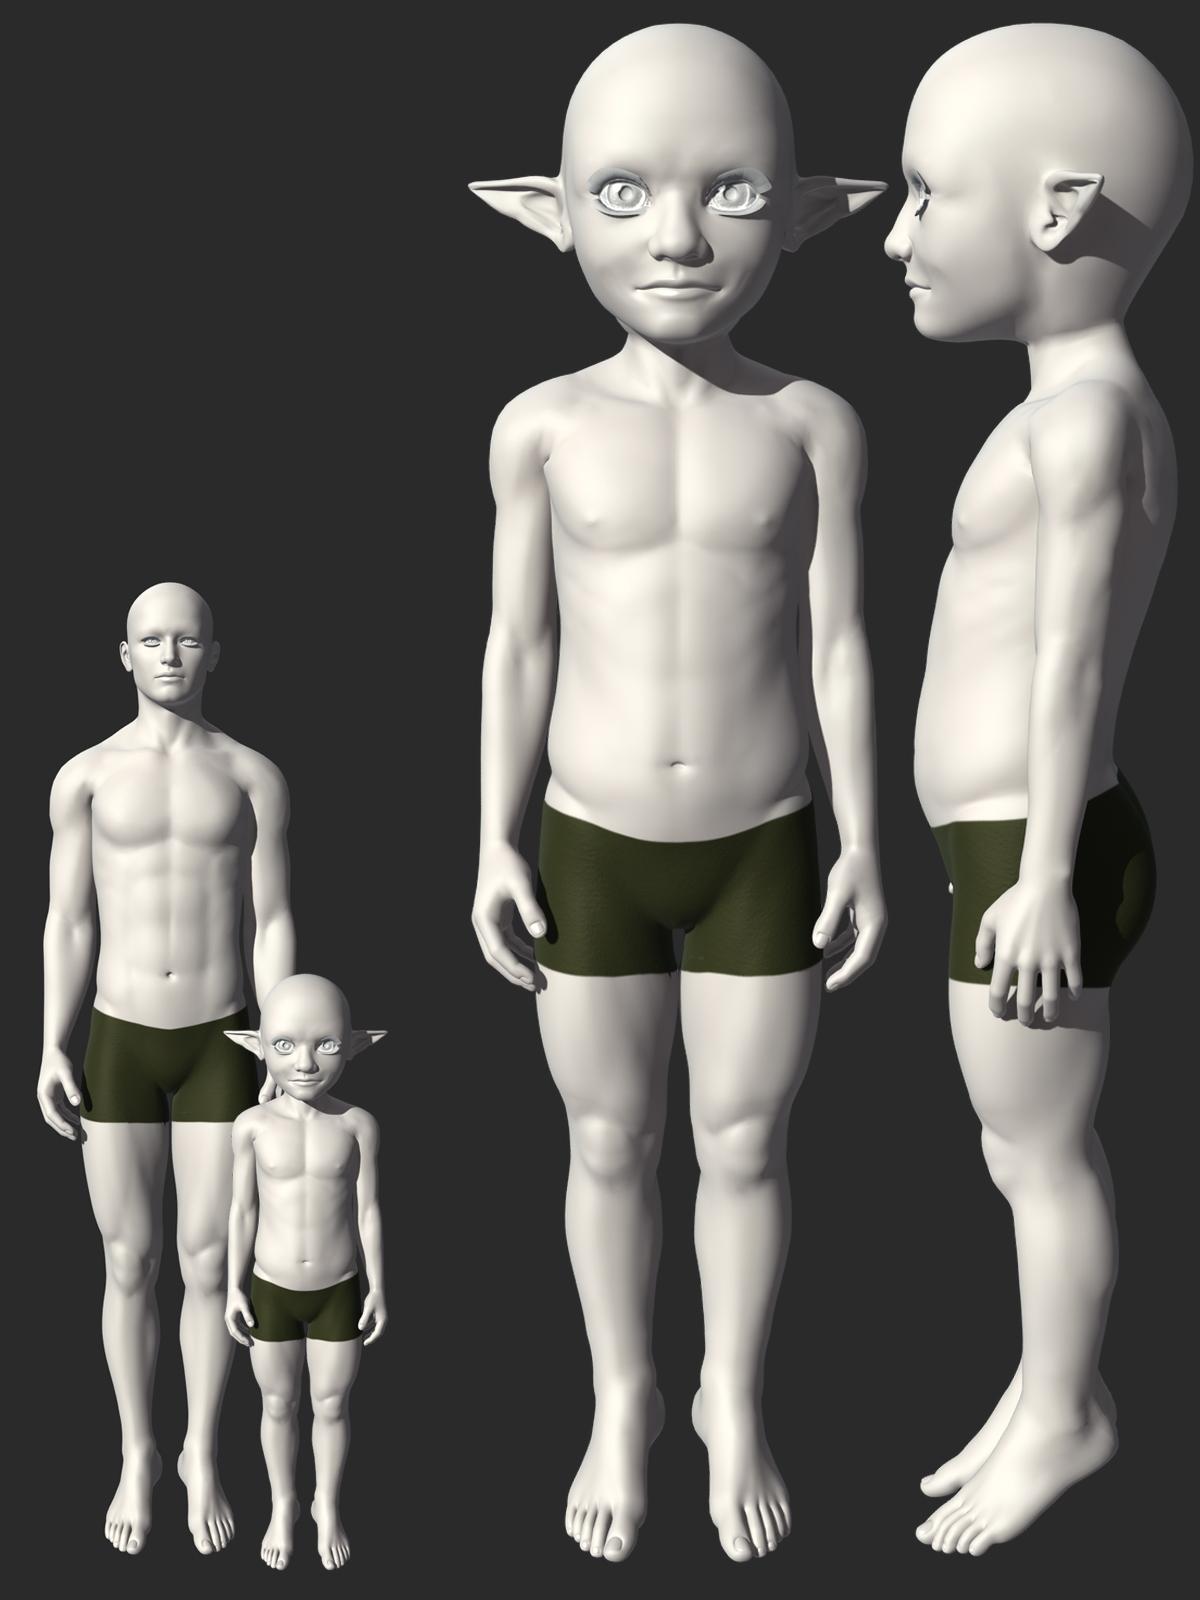
Gand Morph Preset for Michael 4Gand Morph preset for Michael 4.
Texture, Hair, and Clothes Not Included!
Requirements:
Michael 4 Base
Michael 4 Shapes++
Hiro 4 Base
Michael 4 Muscle Morphs
Michael 4 Creature Creator Morphshttps://sharecg.com/v/99715/view/11/Poser/Gand-Morph-preset-for-Michael-4
https://www.renderosity.com/freestuff/items/93641/gand-morph-preset-for-michael-4
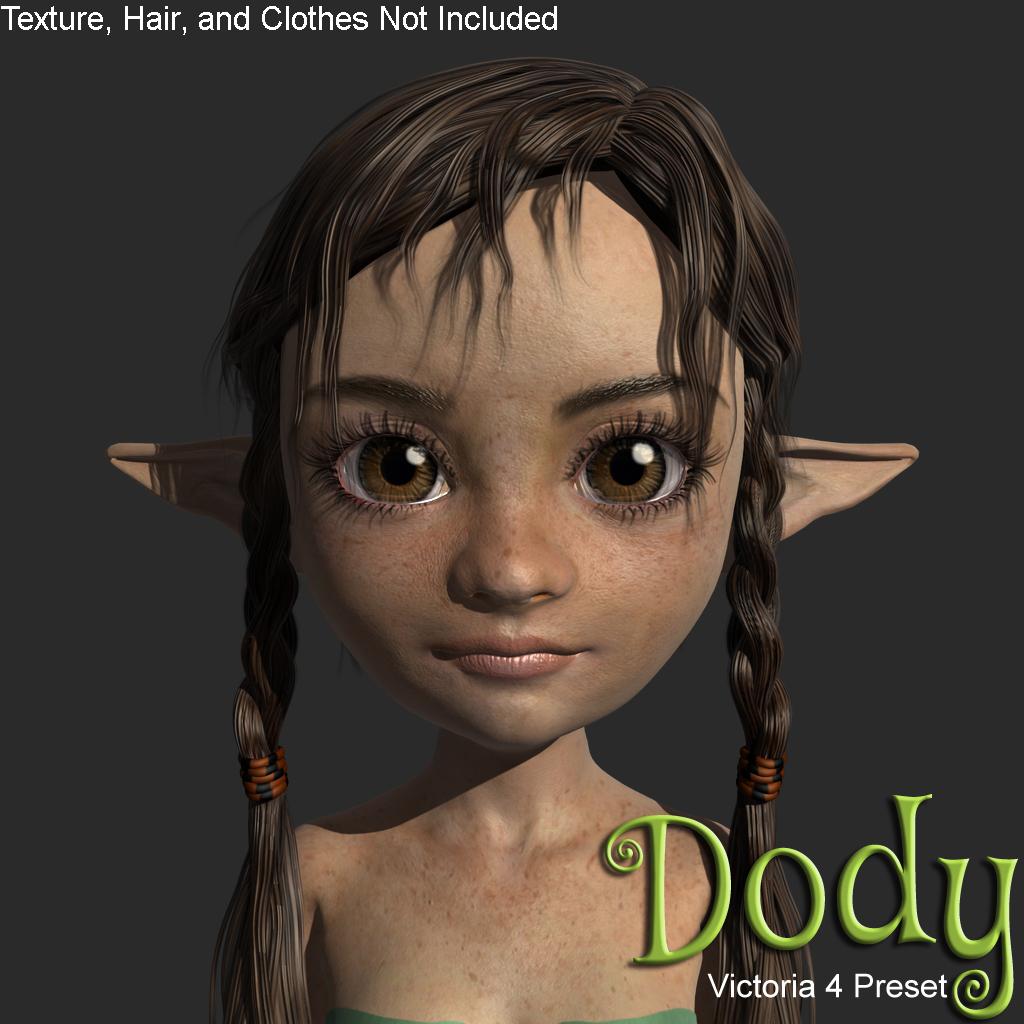
 Dody Morph Preset for Victoria 4
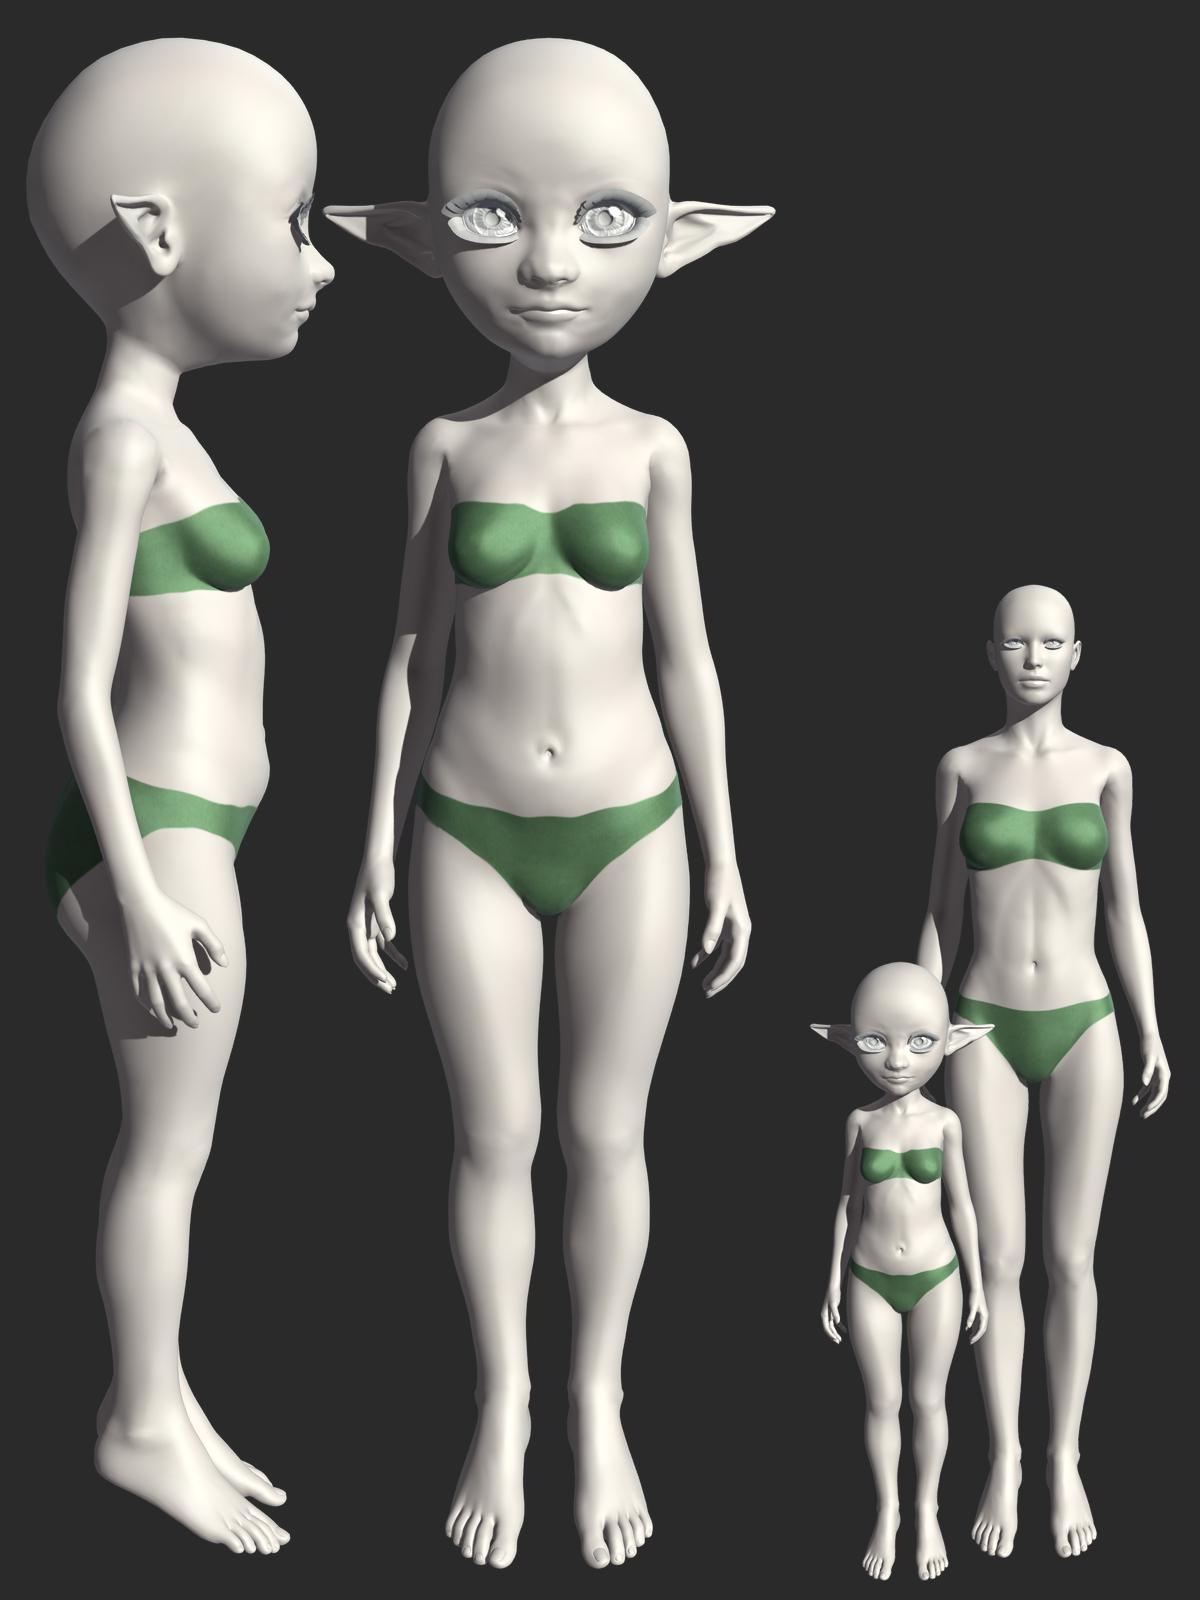
Dody Morph Preset for Victoria 4.
Texture, Hair, and Clothes Not Included!
Requirements:
Victoria 4.2 Base
Victoria 4.2 Shapes++
Aiko 4 Base
Stephanie 4 Elite Base
Victoria 4.2 Creature Creator Morphshttps://sharecg.com/v/99714/view/11/Poser/Dody-Morph-Preset-for-Victoria-4
https://www.renderosity.com/freestuff/items/93640/dody-morph-preset-for-victoria-4
 Face Transfer
As long as programs like Face Transfer and Facegen use a single photo, there will always be limitations. I've never had any luck with Face Transfer, it always flattens the upper lip or streches the neck in strange ways. Facegen is a little better, because it uses a black box approach with real world data. But, they are good enough to give you a starting point, if you happen to have some 3d modelling skills, and don't mind tweaking the face in Blender or ZBrush.
Free Flexion Enhancement for G8/8.1F. Also SWM Flex Vein ControlEmrys' Sandra has an athletic build right out of the box, but in the full-length shots below, she has been in the gym for about six months, and displays her short-bellied biceps and peaked triceps in various poses. TD's skillfully created and generously provided flexion morphs are a critical driver, superimposed over several other muscle morph products. The only edits of these renders are for the purposes of modesty as required by forum rules. Thanks again, TD, for your creativity and generosity.
Cloth distorted on some character modelswalkermuz_e2ba454edf said:
Hello Catherine, thanks for the reply. I tried and it doesn't look like a good method due to several reasons
1. If manually dial those morphs out is really the only option, that mean's I have to dial in morphs for every single character and I do not own all the characters ever made in the world for G8F
2. I'd like to keep glove fitted into the character, but by doing "dialing the morph out", glove will be 'floating' around.
I can imagine that doing this on morphs that make character bigger will be problematic for being too smallI wonder if there is another method available...?
If the way Richard mentions works for you, fine.
If not, yes you could leave the distorted glove on and remake the morph for that character from that starting point -- and then make that as the replacement morph. I have a .pdf tutorial which goes through the steps. And yes, one would need to own several "core" characters to make them usable for several figures ... that's why one sees a list of "core" characters on the product pages. If the character one wants to use is not on the page, then the user has to make their own or switch characters if so required.
Josie 9 Botox lipsIceCrMn said:
What morph package are you using?
it looks like this:
https://www.daz3d.com/genesis-9-head-shapes

The highlighted morphs are the ones mentioned but there looks to be a few other morphs that would help.
DAZ, MD, and Traditional Pattern Making - GraduationHiya @barbult - if you go back to the very first video at around 2:38 it covers importing the base G9 base morph into Marvelous designer - You need to "shrink wrap" to that G9 base. Then back in DAZ you'll load the Victoria9_body_bs_Body figure shape back in DAZ after you've done the transfer utility and your weight mapping. The rest of the first video covers that Hope that all makes sense. Lots of steps, I know. I'm working on yet another video on working with multiple shapes - you're always one step ahead of the game !
Also, if you are working with dresses, There are better projection templates in this product:
https://www.daz3d.com/sy-ultra-templates-for-genesis-9
barbult said:
I tried the tight/loose scheme with the V9 Sloper, but I can't figure out how to do the process in the transfer utility, because the shape is V9, not the G9 Base. I assume since the transfer utility is involved, that the intent is to make a garment that is fit to the character and moves with the character poses.
Parameters Sub Directory Creation SavingI have bought quite a few morphs from different vendors and some of them dont organize them well meaning all the morphs are in one directory under the parameters tab and I was hoping to separate the morphs into sub folders within the parameters tab or the shaping tab either one that allows this to work. what I do is edit the Parameters of a specific morph and set a new directory in the file path name. it creates a new subdirectory afterwards and the morph works fine. the problem is when I either delete the model or close the program that director setup is not saved. what can I do to organize the morphs and create sub directories to help to organize these files.
Josie 9 Botox lipsDaventaki said:
And with some other morphs dialed in.

What morph package are you using?
You made her look usable in this image.
If I can get the rest of her sorted out with the available morphs packages; I would have at least one anime style character I can build with.
I still don't like the skin materials she comes with, but I could use V9's instead.
V9 has the only good materials so far in my opinion.
Hopefully I'm not stuck with a single materials set for all of G9's life span.
DAZ, MD, and Traditional Pattern Making - GraduationI tried the tight/loose scheme with the V9 Sloper, but I can't figure out how to do the process in the transfer utility, because the shape is V9, not the G9 Base. I assume since the transfer utility is involved, that the intent is to make a garment that is fit to the character and moves with the character poses.
Genesis 8 Female Facial Elasticity MorphsInstalled program to use the morphs. The program installed and I seem to have the rest morph, The product said their was 48 Sculpted HD original expressions. I can not seem to find those files. Any help would appeciated.
Cloth distorted on some character modelsHello Catherine, thanks for the reply. I tried and it doesn't look like a good method due to several reasons
1. If manually dial those morphs out is really the only option, that mean's I have to dial in morphs for every single character and I do not own all the characters ever made in the world for G8F
2. I'd like to keep glove fitted into the character, but by doing "dialing the morph out", glove will be 'floating' around.
I can imagine that doing this on morphs that make character bigger will be problematic for being too smallI wonder if there is another method available...?
No one asked me - Diomede screenshots on whatever - Warning AI Discussion OKApply New Morph in Carrara
- open a new Carrara scene and load your blended weight G9 character preset. Conform your blended weight eyes etc to G9.
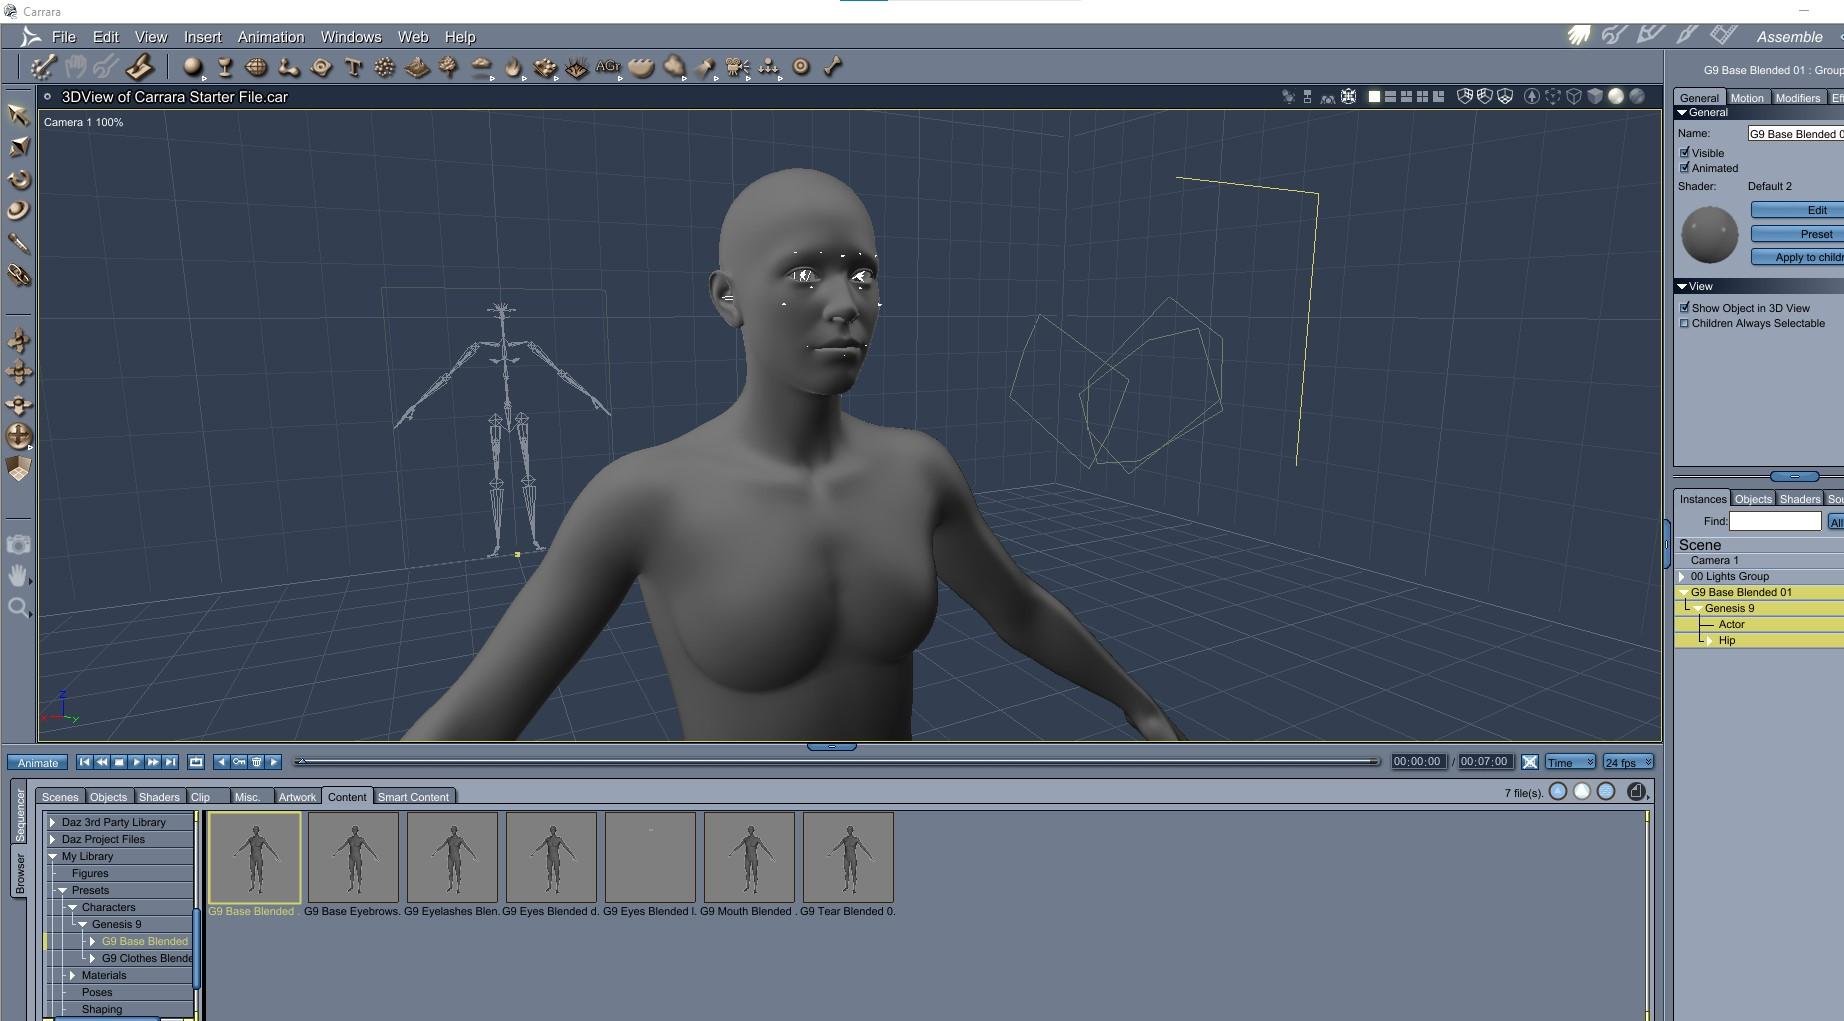
- locate the morph. it could be on figure menu or actor menu depending on where you saved it in Daz Studio.
- Yay, custom morph seems to work in Carrara.
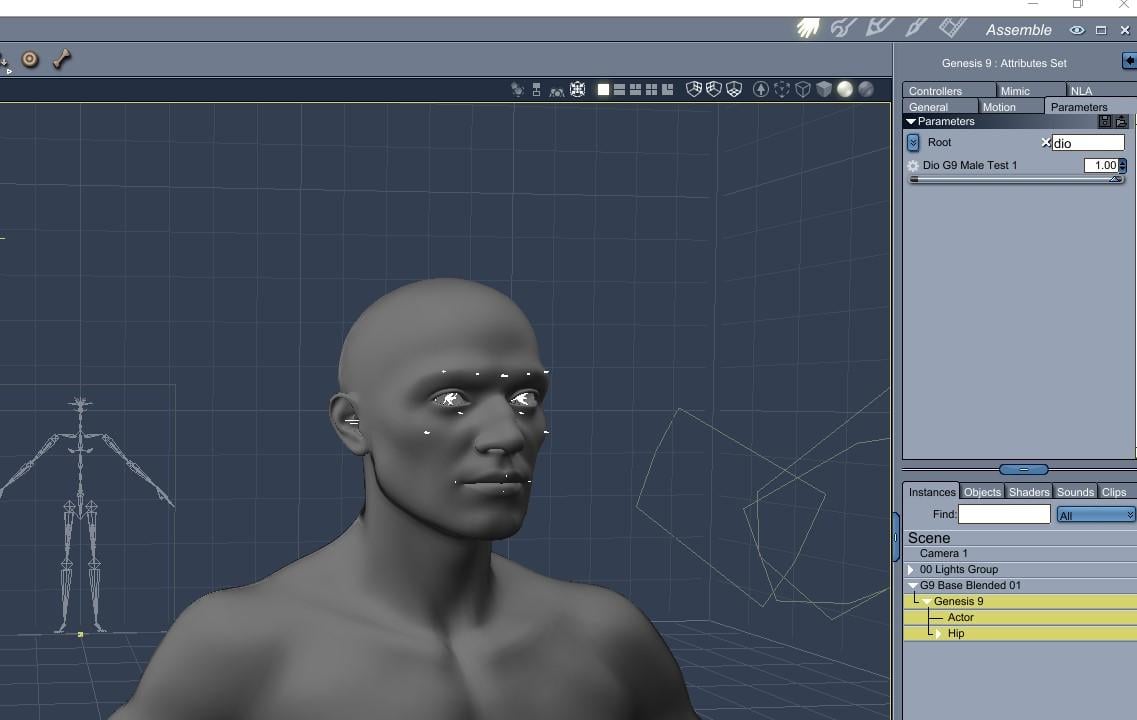 No one asked me - Diomede screenshots on whatever - Warning AI Discussion OK
Test New Morph in Daz Studio
- open a new fresh Daz Studio scene and load the default G9 (or any other G9 character I guess)
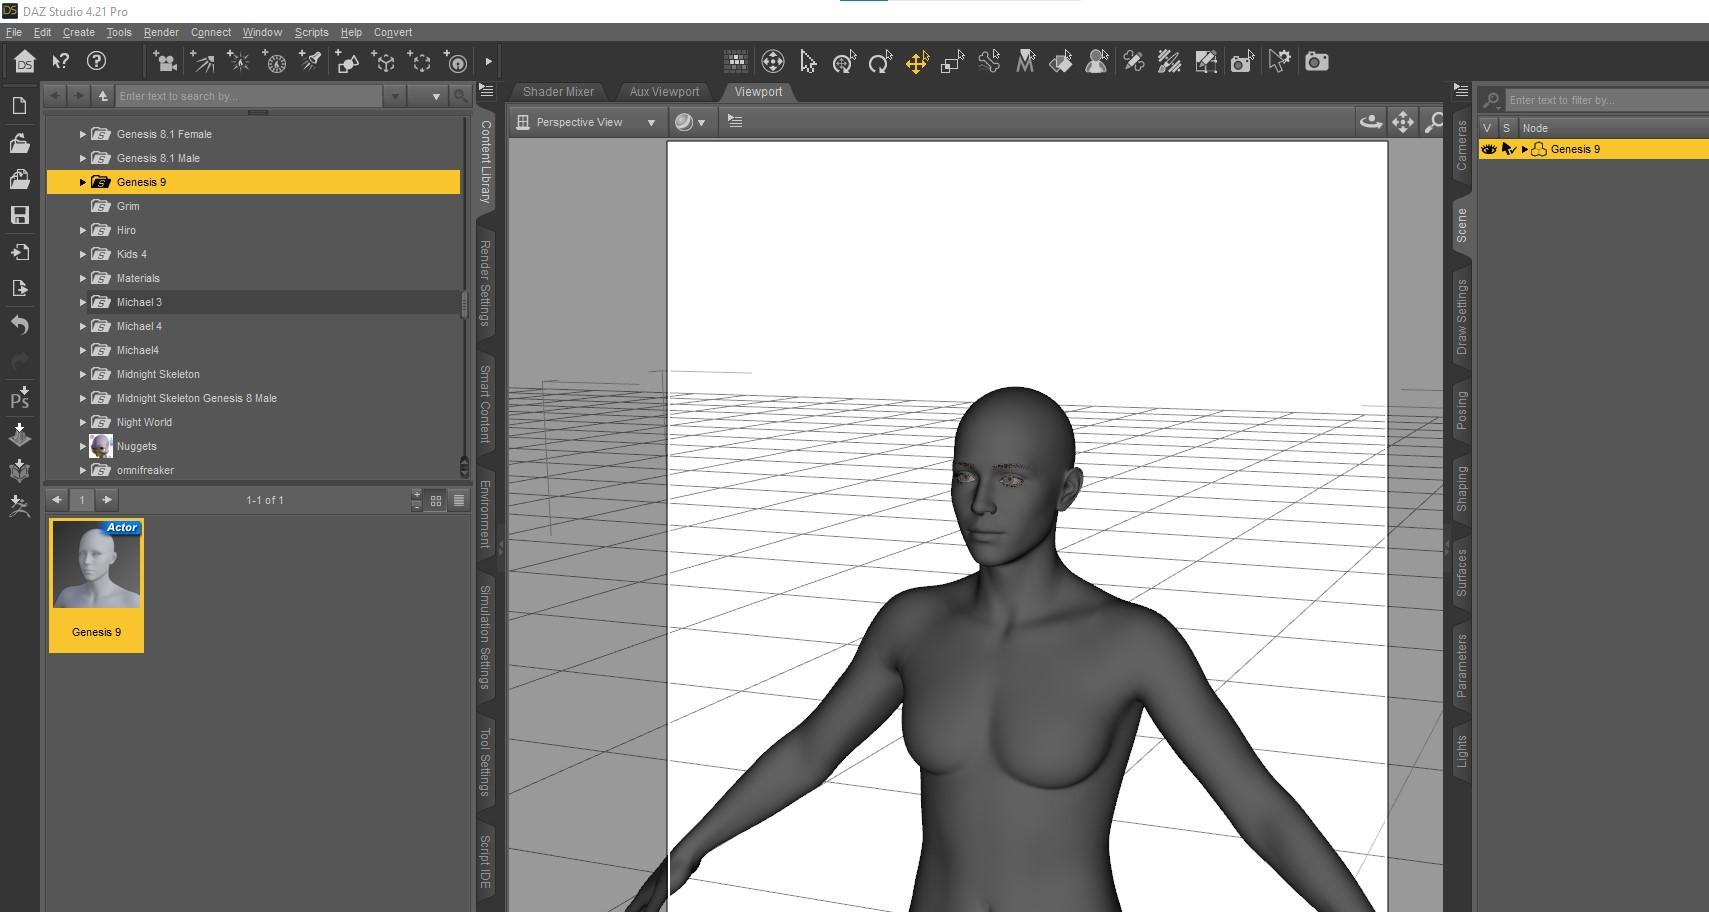
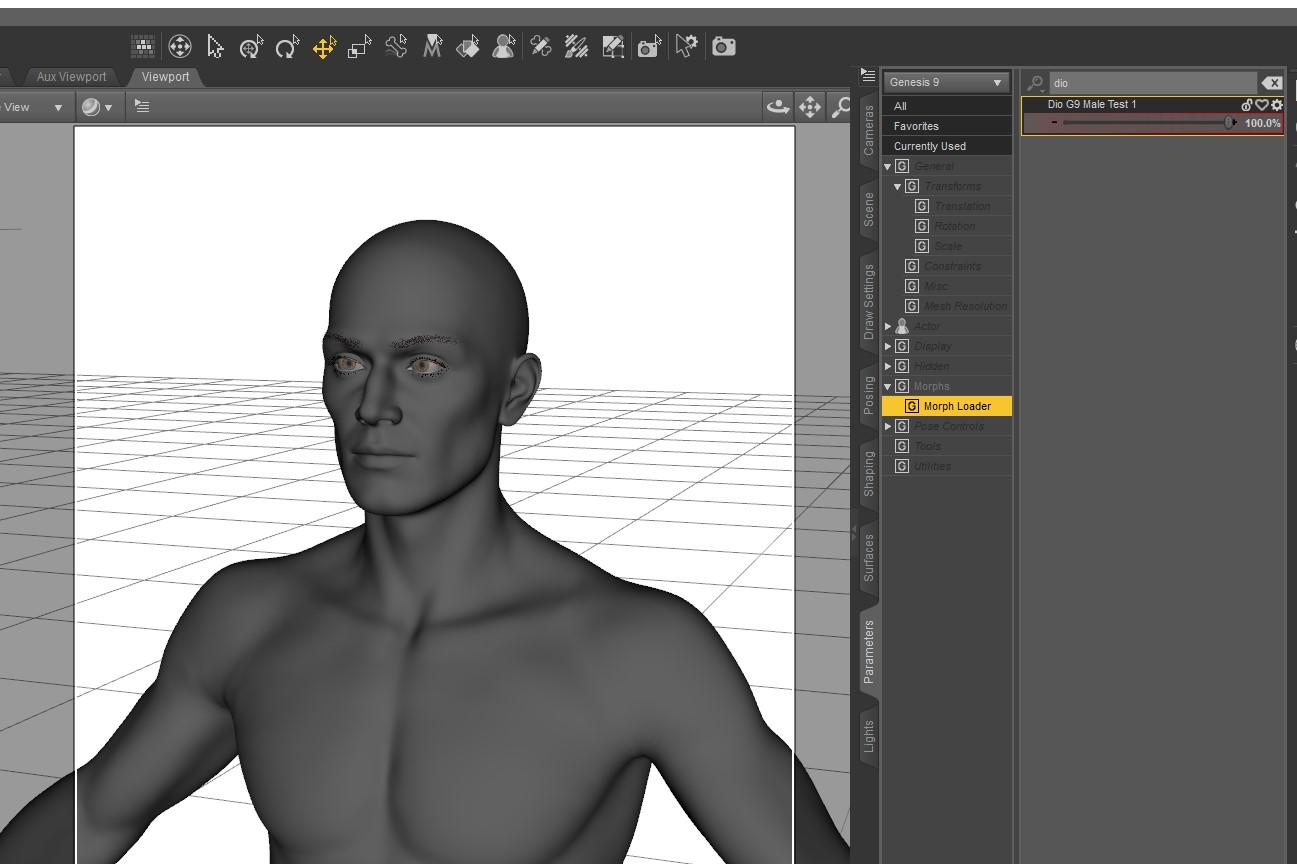
- locate the new morph in the parameters pane and dial all the way up
- My test appears to be working. See that the eyes, eyebrows etc moved with the morph changes
 No one asked me - Diomede screenshots on whatever - Warning AI Discussion OK
Save Morph for Future Use
- Save File As Support Asset
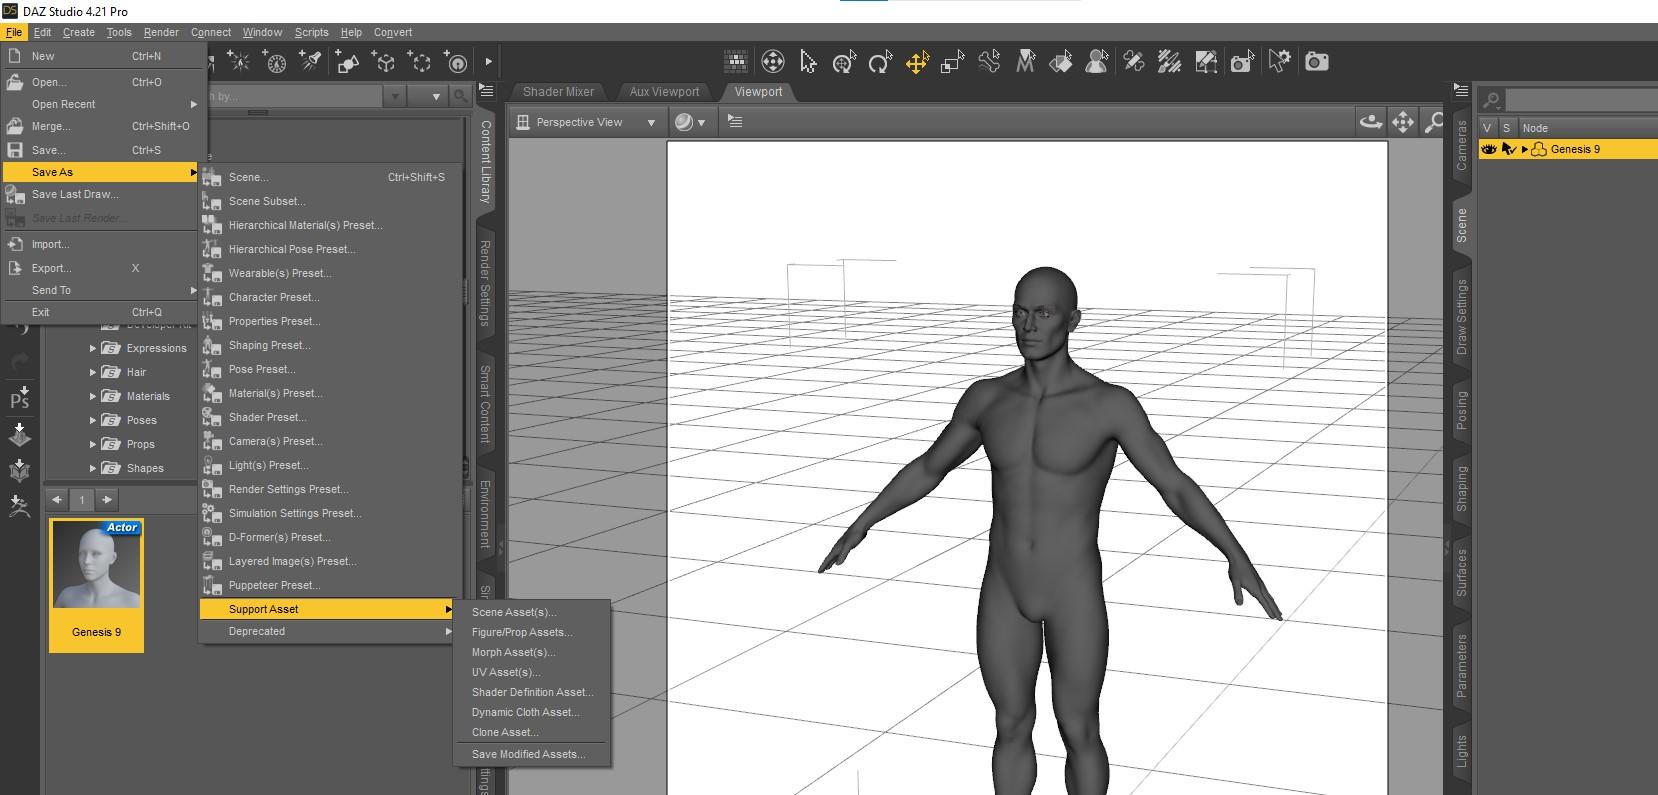
- !!! - in save morph menu make sure check only the new morph. Find it in the file tree. - !!!!!
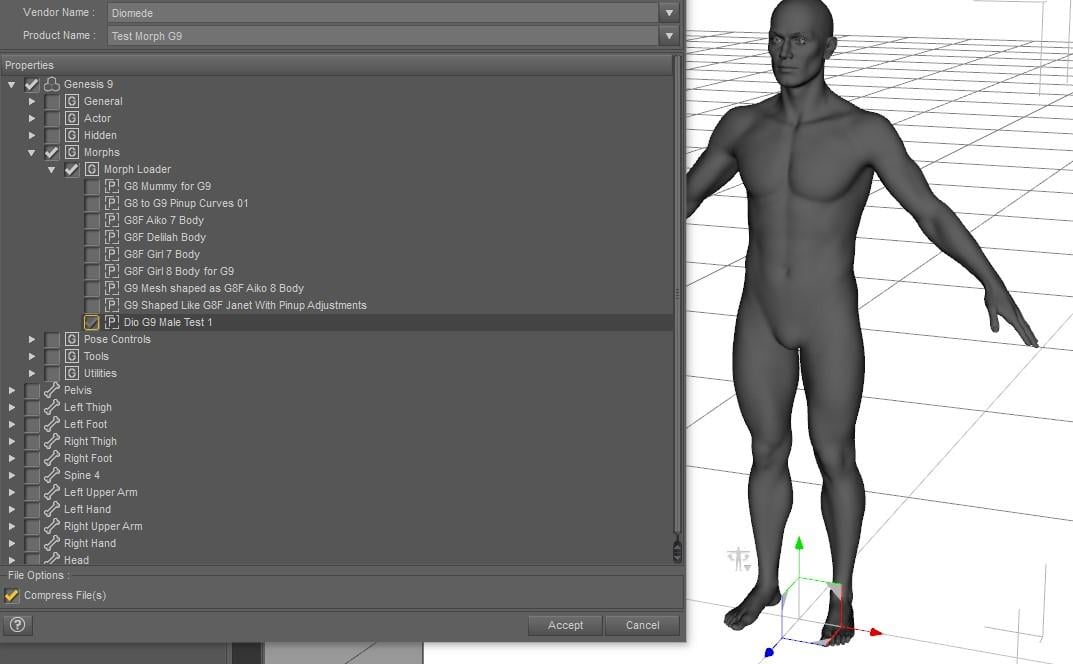
- Get a vendor menu, so choose your vendor name, etc.
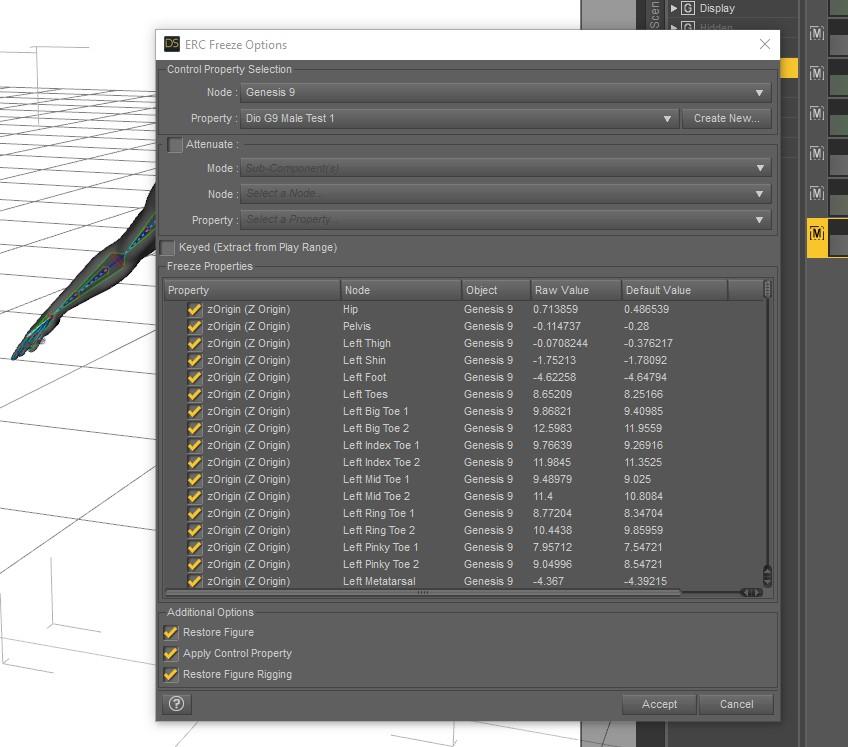
No one asked me - Diomede screenshots on whatever - Warning AI Discussion OKERC Freeze and Morph Dial Adjustments
- the changes need to be saved through ERC freeze
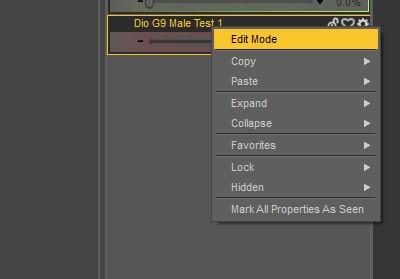
- In parameters pane, right click on morph dial to start Edit mode
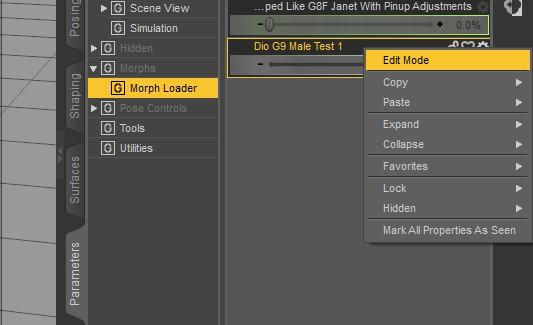
- right click on the morph dial a second time to select ERC Freeze
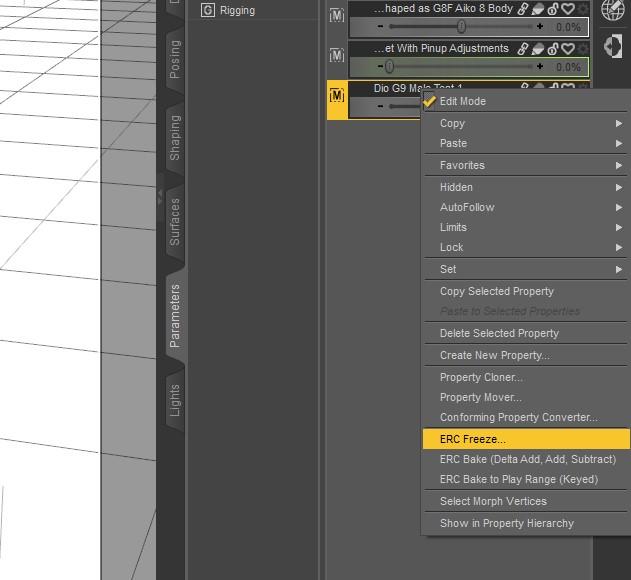
- accept the ERC freeze menu
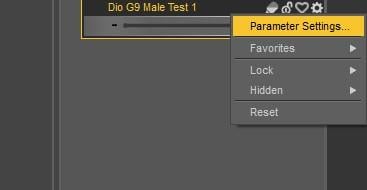
- while here, can change other parameter settings by clicking the gear icon
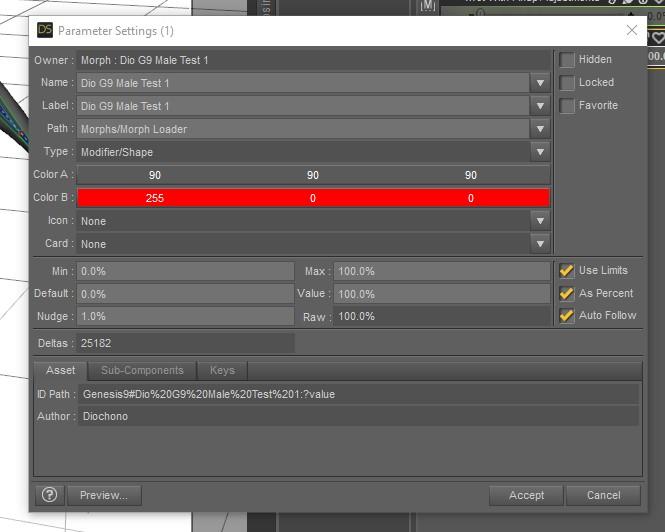
- I like to change the color of my custom morphs so they are easier to find. Made this one red. Can make other changes.
- Remember to right click and uncheck Edit mode when finished.
 No one asked me - Diomede screenshots on whatever - Warning AI Discussion OK
Adjusting Rigging to Morph Shape
- The skeleton no longer matches the geometry. Use the joint editor tool.
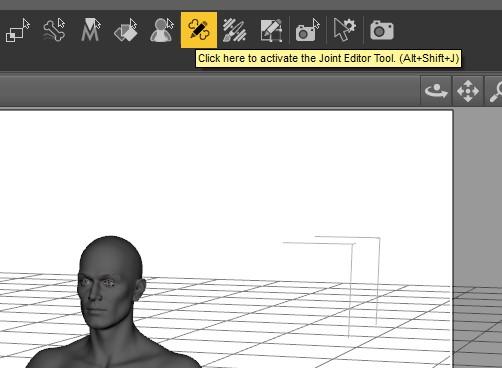
- With joint editor activated, right click on any bone to bring up the menu
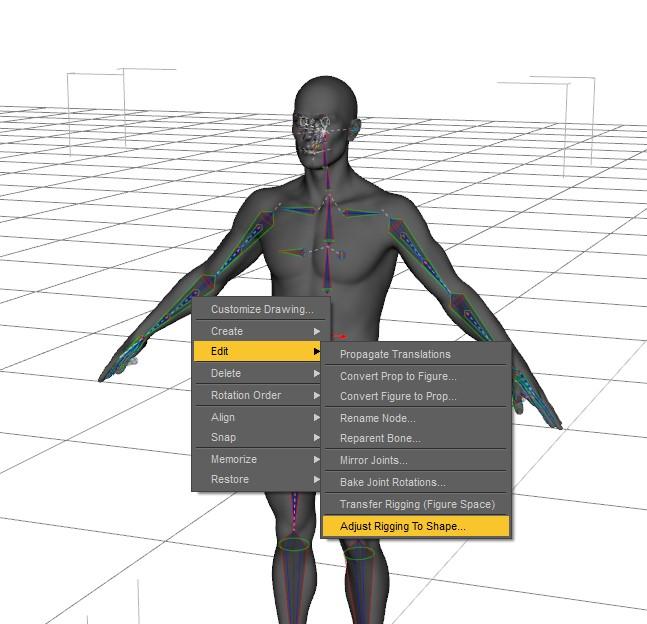
- Use adjust rigging to shape
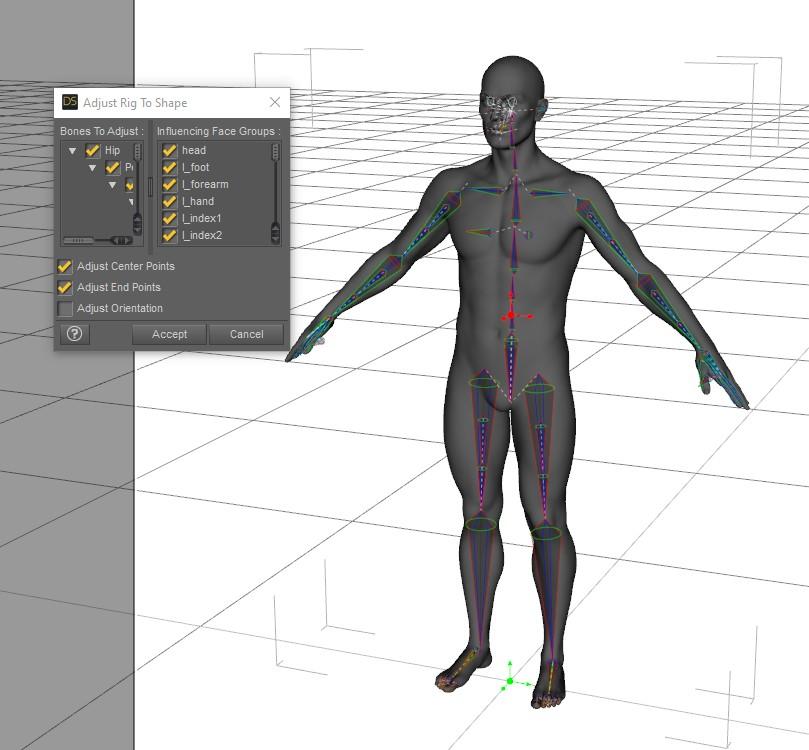
- Accept the adjust rigging to shape menu. Some people check orientation here. Instead, I right click again and choose align bones. I might be wrong but worked so far.
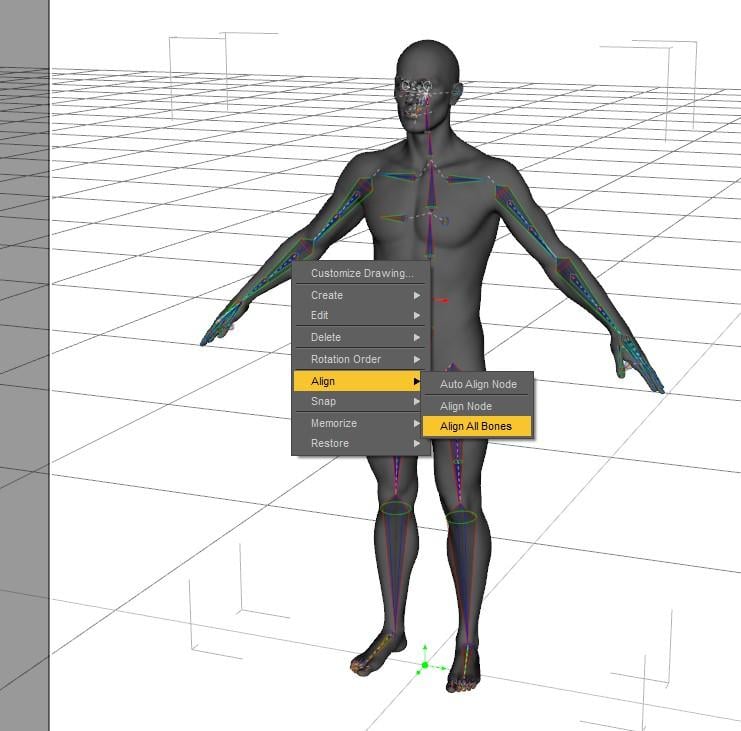
Daz 3D is part of

Connect
DAZ Productions, Inc.
7533 S Center View Ct #4664
West Jordan, UT 84084Licensing Agreement | Terms of Service | Privacy Policy | EULA
© 2026 Daz Productions Inc. All Rights Reserved.