-
Genesis 9 clothing questions & answers
Mada said:
Diomede said:
Thank you again. A lot of great information to digest.
I am still confused about templates and morphs. I can understand the template transferring rigging related to the skeleton, such as placement of bones, rotation of joints, and weightmaps. I don't understand the discussion of the template and morphs. I thought the meshes needed to have the same number of vertexes in the same order for morphs to work. How does a template created from one garment match the number of vertexes and order of vertexes for another garment?
Its not a vertex based morph like you use on the figures - its a projection morph. Basically it will take your clothing mesh and project the morph from the template into your clothing item. That is why the closer in volume/position your clothing item is to the template the better the results. The further away the receiving mesh is from the donor mesh, the smaller the effect of the projection morph.
Thanks for the explanaton. I was indeed thinking of a clothing figure morph. This clears it up.
Let's appreciate/discuss today's new releases - ongoing threadRichard Haseltine said:
PixelSploiting said:
Right now there's conflict between Vinme morphs and previously released morph packs for G9, I need to check which G9 morph pack exactly is causing it.
Body Morphs, at least - the morphs here have unique main names but truncate them to the name of the standard morph in the formulas, so of course they conflict.
So, do we need to put in tickets for this to be fixed, is there any chance of it being fixed, or may I as well return the Vinme morphs?
One assumes this was tested for before release, and yet...
[Released] RSE Mirror Geometry for Genesis 8 [Commercial]Thank you for that link!
Ok, this really is a special case, although I don't know why. The rigging looks perfectly normal, no reason why it should behave so crazy.
For me, it does auto-follow. The dials are generated and set to 100% when the figure is morphed, and the auto-generated morphs do something, even though they don't follow the shape perfectly.
I have found a way to make it work better (with smoothing on), but I don't know why it works and I can't guarantee that it will work for you, too. But it's worth a try:
- With the glove loaded, run the Transfer Tool. Set G8 as source and the glove as target. Leave all other settings at default.
- Apply a morph to the figure. The glove will probably still not work perfectly. If it does, proceed with step 5.
- Delete the glove.
- Make sure the figure is selected (do not zero or reset it) and load the glove again. Now it will work (at least it did for me).
- Save it to the library: File > Save As > Support Asset > Figure/Prop Asset(s)
As I said, I don't know why this worked. It shouldn't because I didn't save it after running the transfer tool. But for some reason it does.
Please try that and let me know how it goes :)
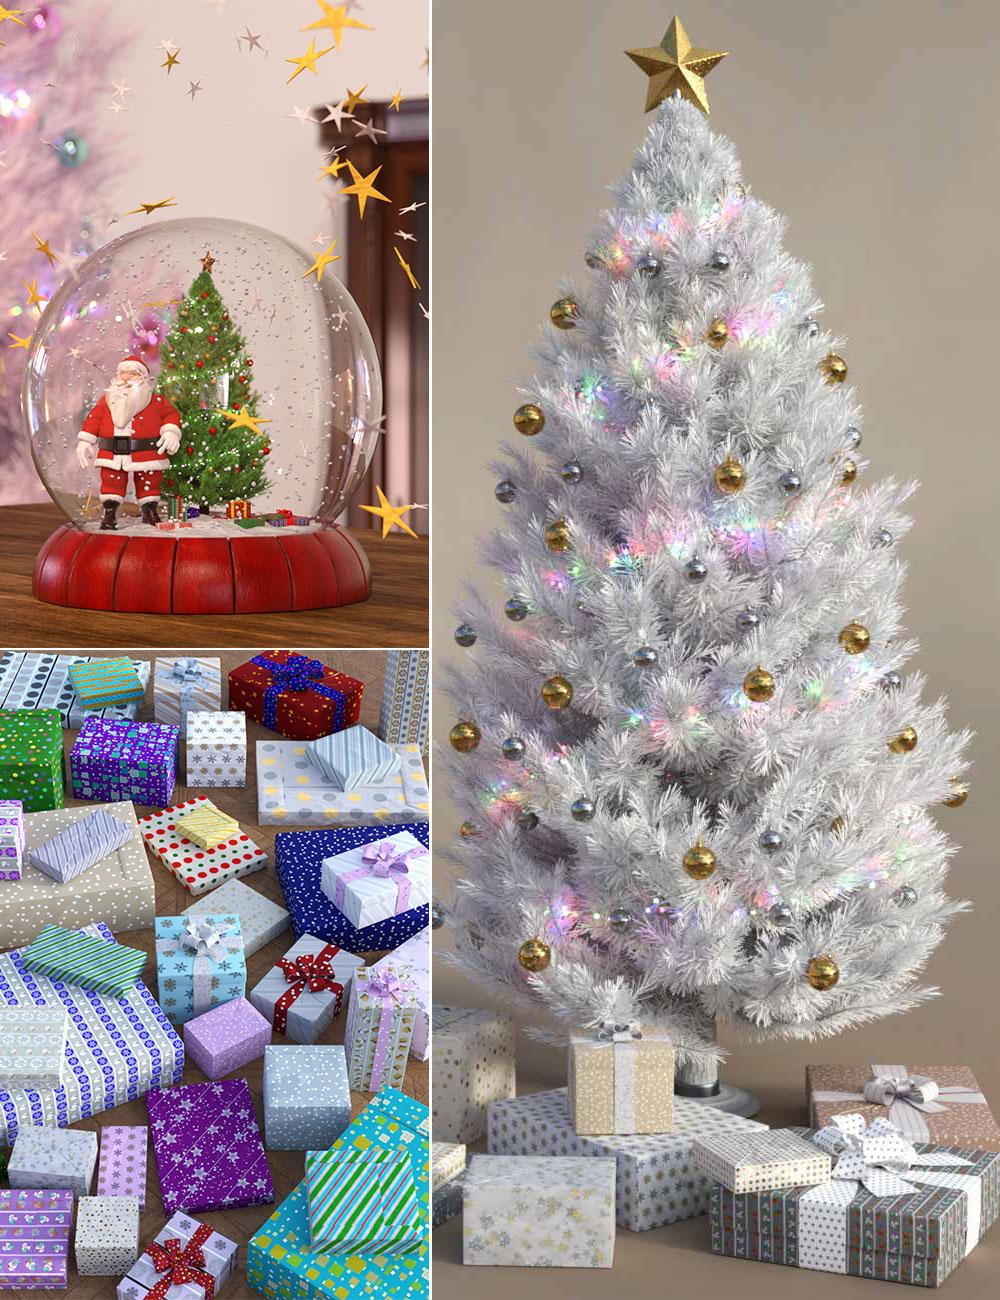
"V3D Christmas Bundle" (Commercial)Released, you can find it here : https://www.daz3d.com/v3d-christmas-bundle
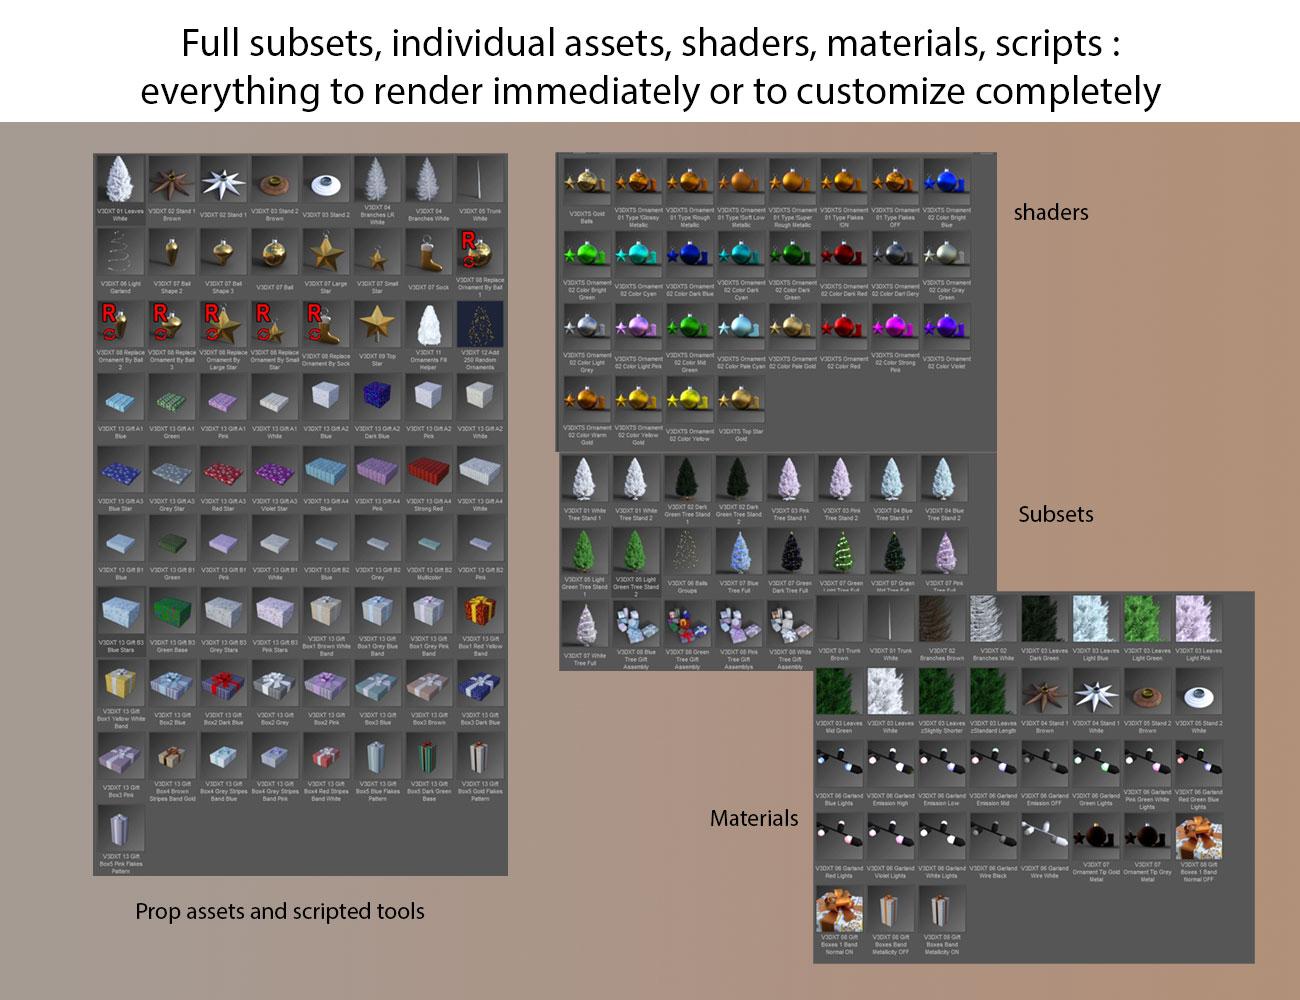
In the V3D Christmas Bundle you will find 3 products based on the Christmas theme, but which can also be used at any time of the year for any scene (well, except the tree maybe).
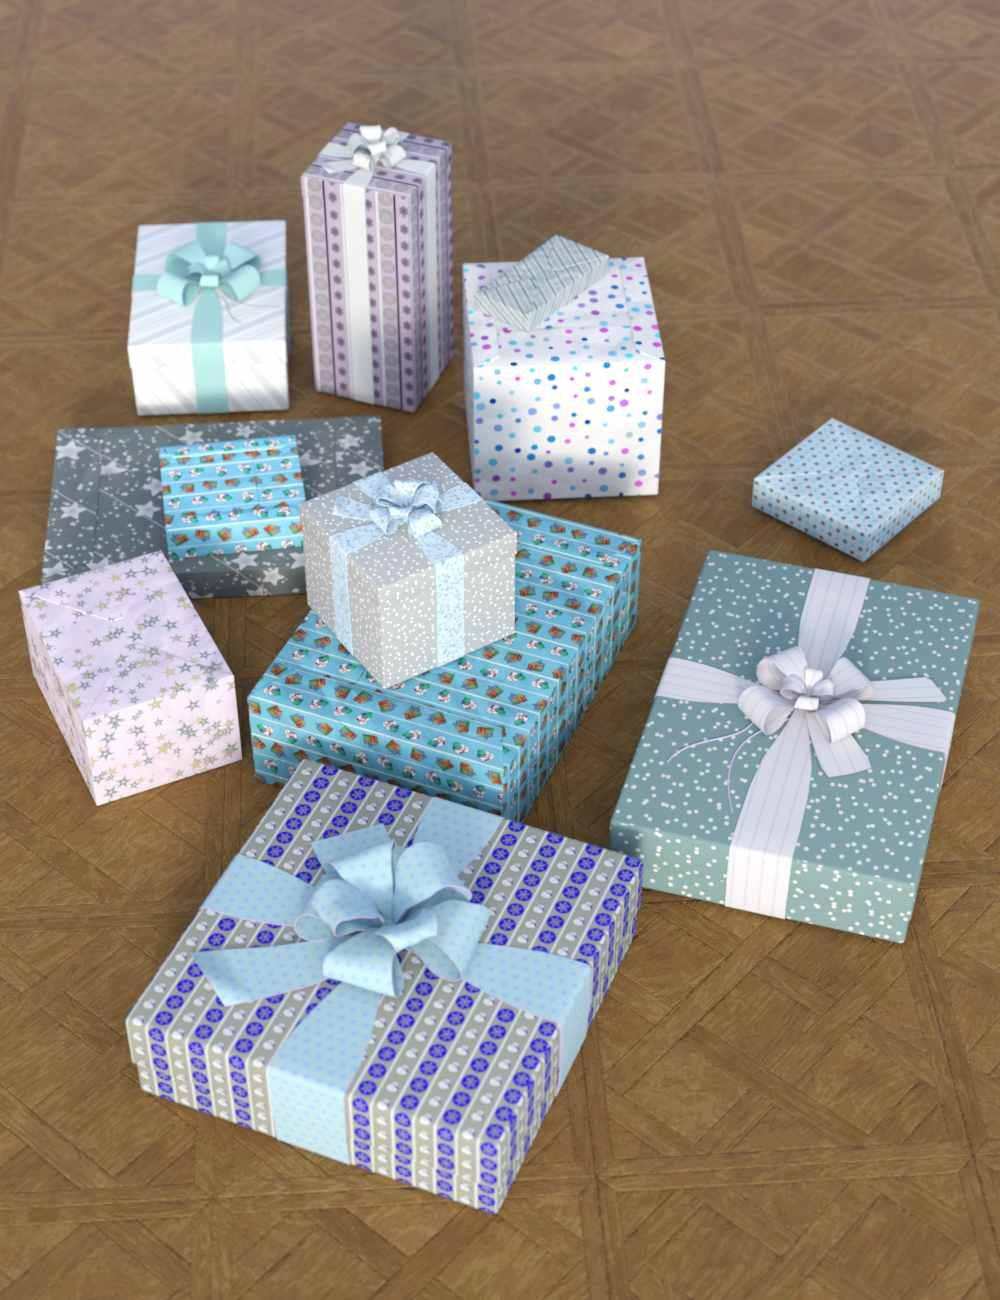
- V3D Gifts Shaders : a set of plenty of seamless shaders for gifts and gifts papers. Some based on Christmas, others more general so that you can use them at any time of the year – and not only Christmas -, some being classical shaders, others shaders being based on overlays (based on diffuse overlay) allowing you to choose the exact base color you want. Additional tools such as normal maps (for “imperfect” gifts) maps and strengths, gloss, and tiles are also included.
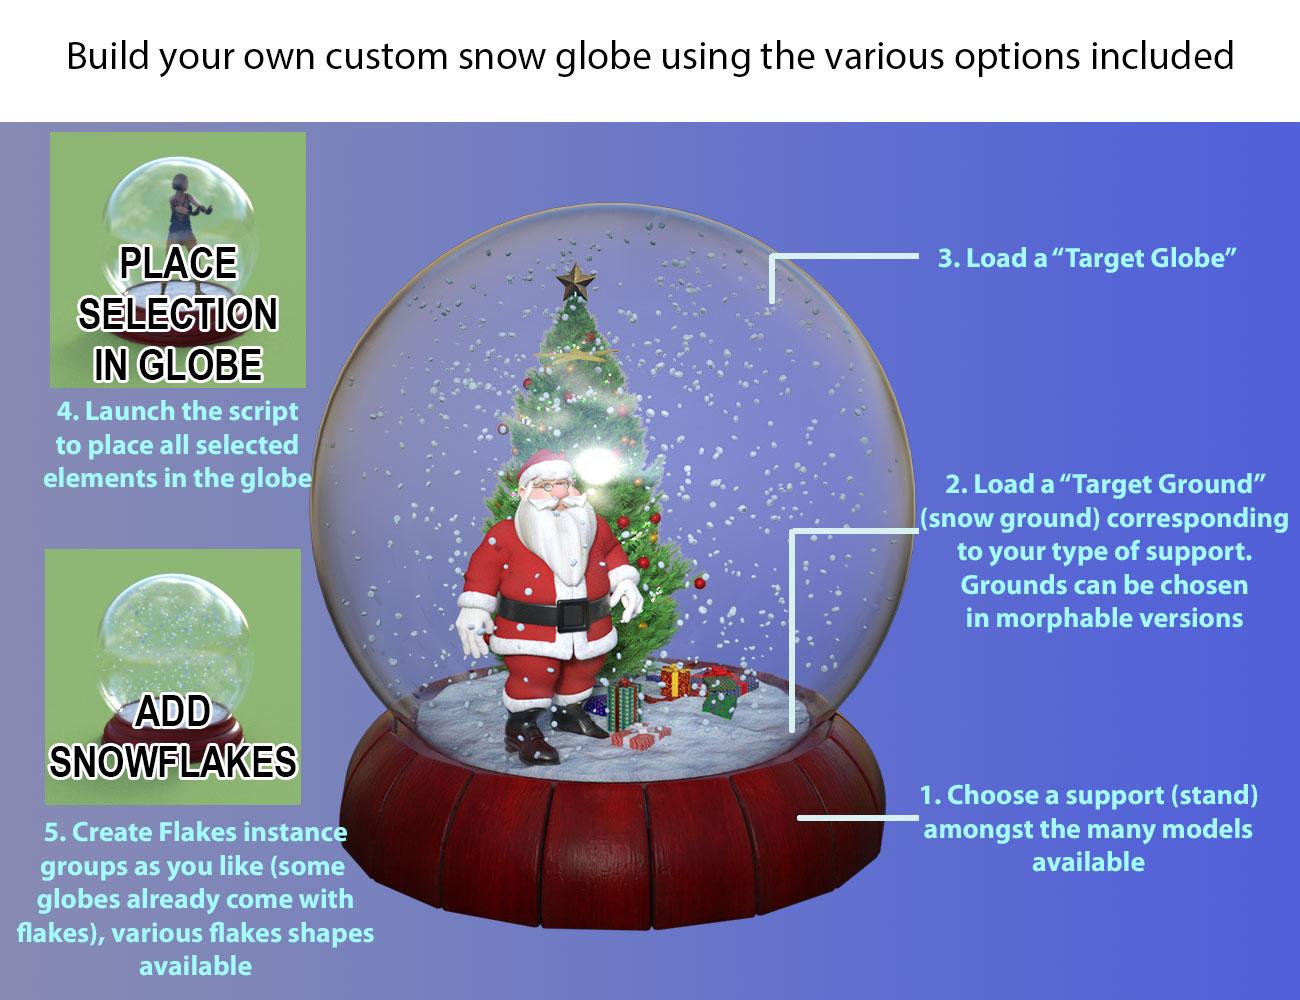
- Snow Globe your World : all the props, shaders and scripted tools you need to put anything you want in a snow globe easily (a script will do everything for you), to reshade it if you want to, and to create instance groups of different types of snowflakes. You can load many different globe stands (supports), the morphable ground can be rescaled to be used as a “classical” snow ground, and the flakes instance groups can be also used for bokeh or falling snow effects (once put at the right scales). Anyway the flakes can be flakes of “anything you want” (birds, butterflies) since you simply have to change the target for the Instance group for that. A script will allow you to perfectly create the instance “snowflakes” groups of your dream, with many options (number, size variations, rotations variations, preferred location, type of flake - several types available). Depending on what you put it, the globe can be used as a decorative prop of any scene, not only Christmas.
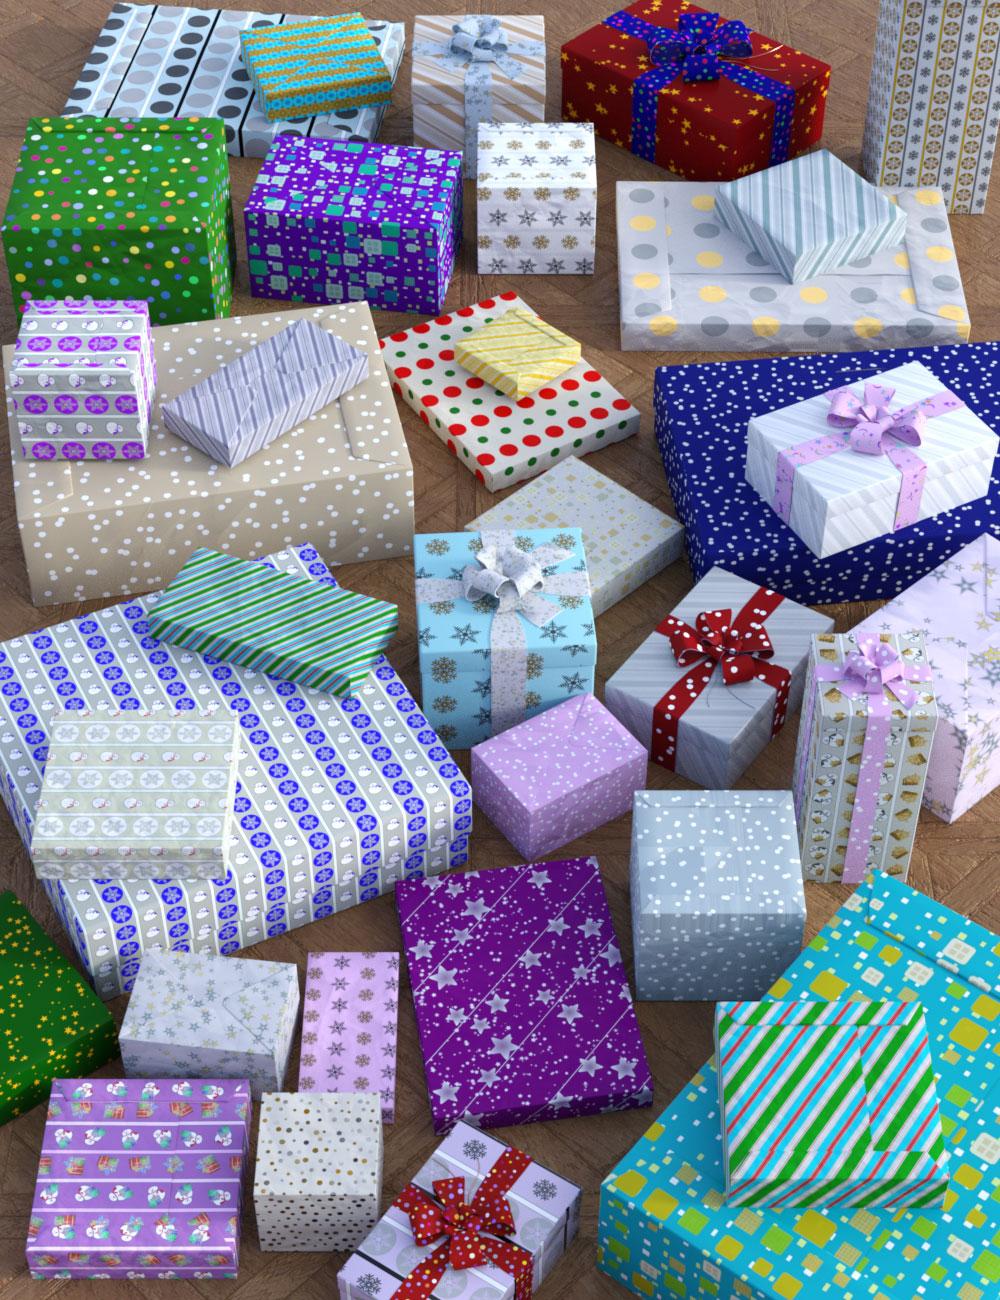
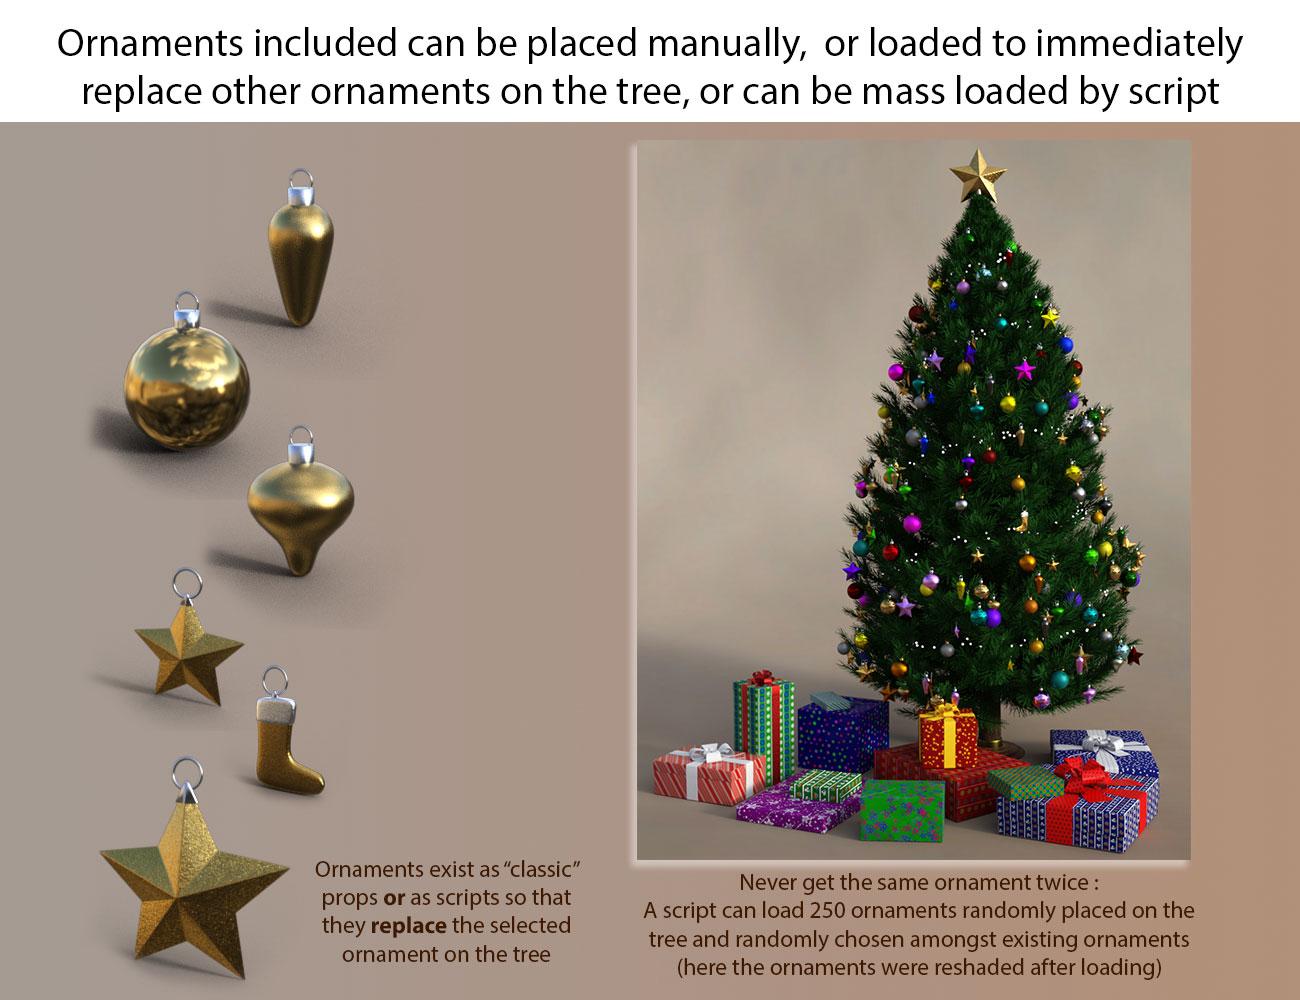
- V3D Christmas Gifts and Tree : a set of gifts and Christmas trees to place in any room you want to give it the perfect “Christmas touch”! The trees come in several colors and ornaments variations, and really cool tools are included for the tree. The "leaves" can be made thinner/thicker (morph) or shorter (material). Several tree ornaments props are included, and new ornaments can be placed manually on the tree, or if you want you can use the script which will randomly load 250 individual ornament on the tree (on random tree locations, with random types of ornaments). Furthermore, scripts allows you to replace any tree ornament by another type of ornament “in place” (you can replace anywhere in the scene a “ball” by a “star” by simply selecting the ball and use the “replace by star” script). A light garland is included with 3 possible different emissive colors, various emissive materials presets are included for it but you can setup the 3 emissive colors you want. The gifts can be loaded individually or in a group of gifts already created to be placed “under” and in front the tree, and there are 4 of these groups available in 4 different colors themes. As individual props for gifts, there are 11 different gifts, all different both in term of type (shape, foldings, boxes or wrapped paper) and sizes. Each gift can be loaded with a minimum of 4 different materials, allowing you to reach more than 40 different gifts. If you use the “gifts shaders” in addition, you can reach an incredible amount of possible different and unique gifts! In brief everything can be either used as is, or is fully customizable!
The two products including scripted tools are fully documented, even if they are super easy to use, and you can come here for any questions, remarks or feedback you want to share!
Now a few images, not all enlarged, you can click on the small images at the bottom to enlarge them if you want to see more details


 Let's appreciate/discuss today's new releases - ongoing thread
Wonderland said:
Timbales said:
Vinme Morphs for Genesis 9 looks like it offers a lot in one package.
I just took it out of my cart waiting for other's opinions. The morph list looks very useful but the promo images are awful. If anyone gets this I'd like to see some better promos, especially of female face and lip morphs.
There's, uh, a lot of lip morphs, any names/areas in particular catch your eye?
Mouth and eyes dont fit Genesis 9 after new morph loaded and appliedHi, Just tried to create my first morph for G9. Watched some youtube vids and then went through the process. All seems to have worked except that the mouth and eyes no longer fit the new shape which has a much smaller head. Didn't have this issue with G8 as these were part of the same mesh. Do I need to create separate morphs now for mouth and eyes?!
Head gamesluci45 said:
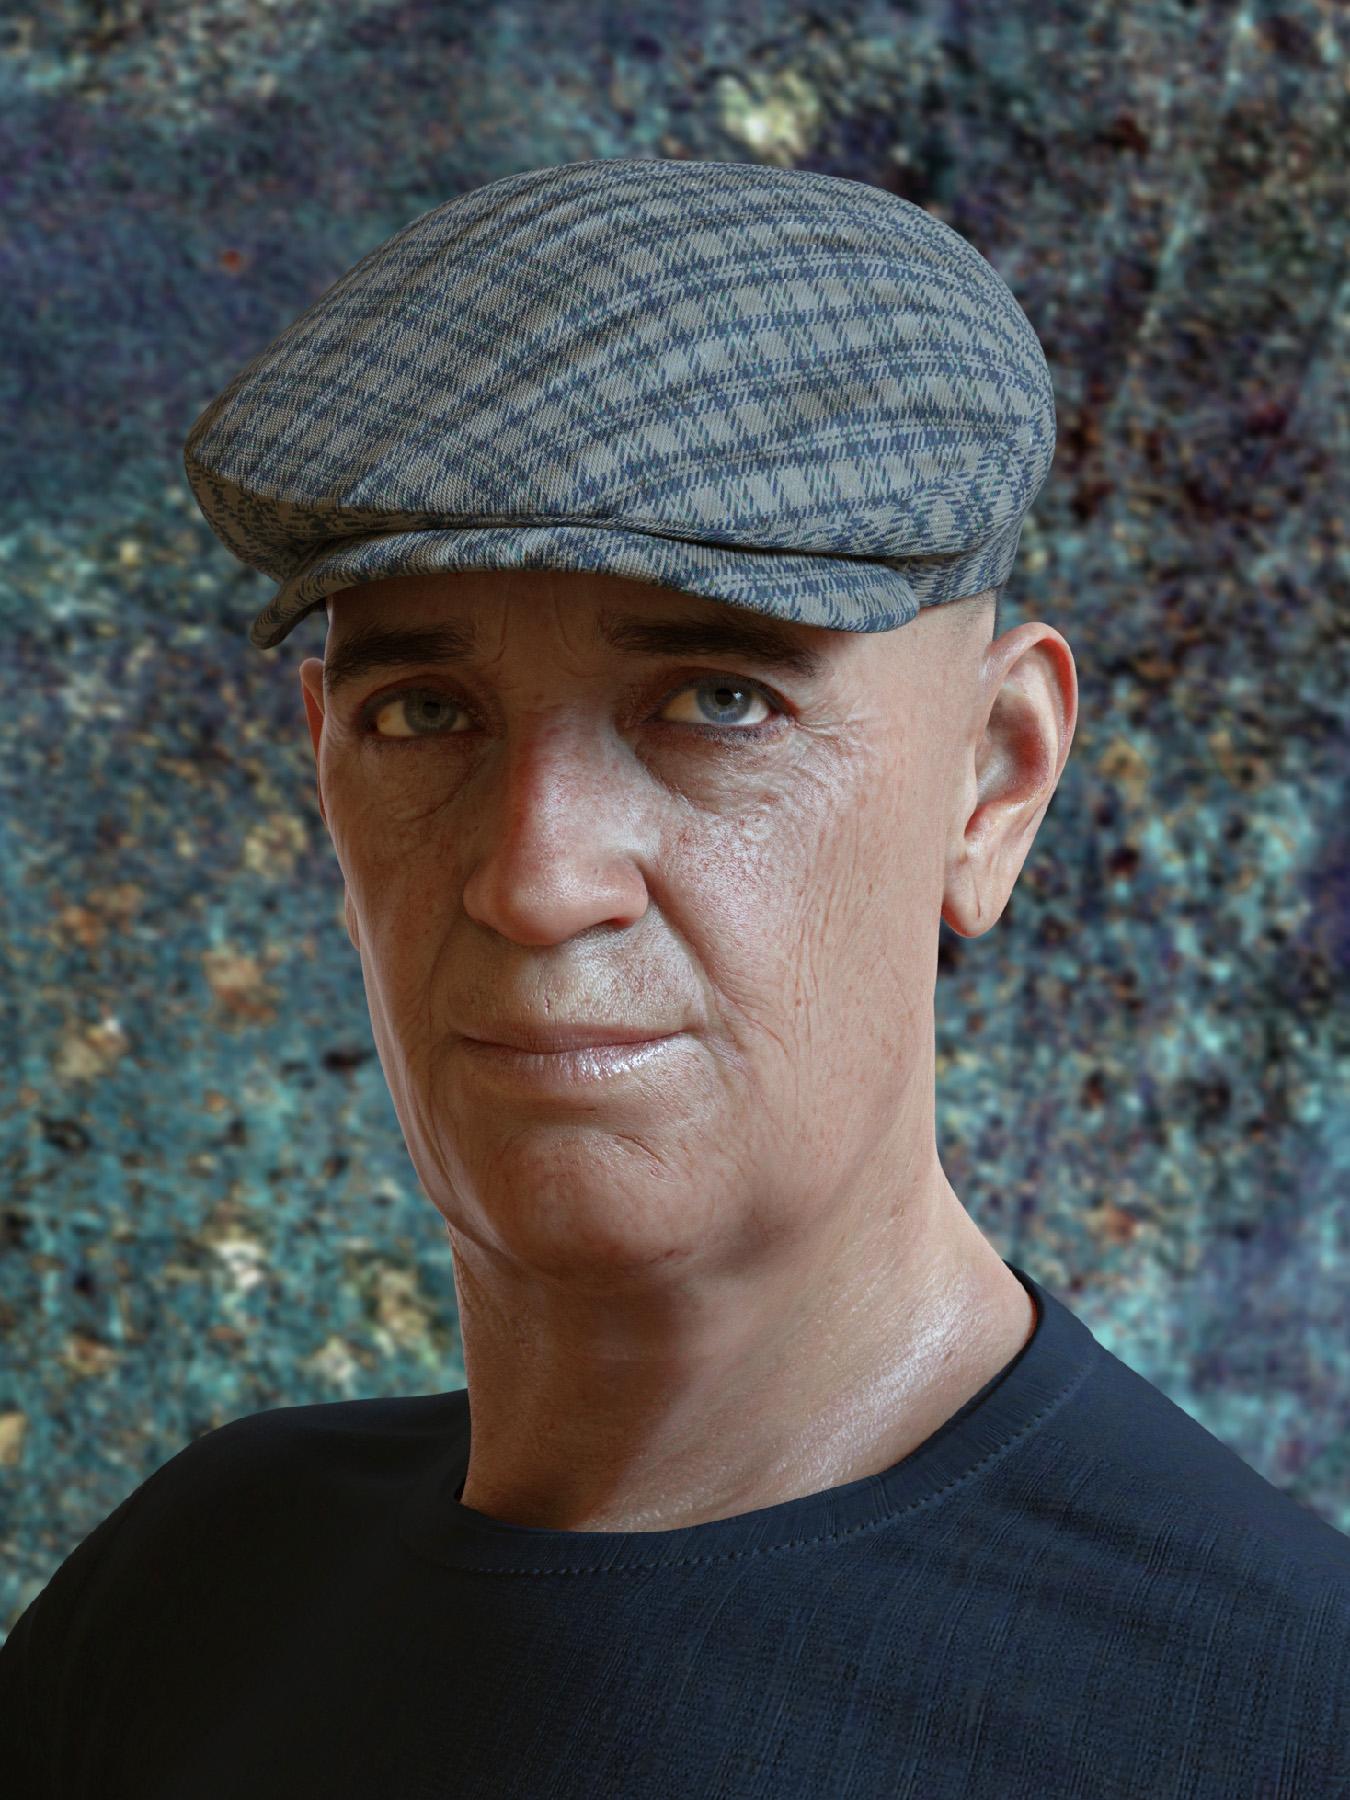
I wasn't going to get involved with the 9 generation for a number of reasons, mostly expense. But I was lured in by the beautiful eyes. Anyway I bought the morph package and Legacy UVs for Genesis 9: Genesis 3, 8, and 8.1 Female and Josie's Cat Suit. I hope to stop there. LOL. The guy has Mabel's textures and uses the aged face and body and some others. The cat lady has August textures.
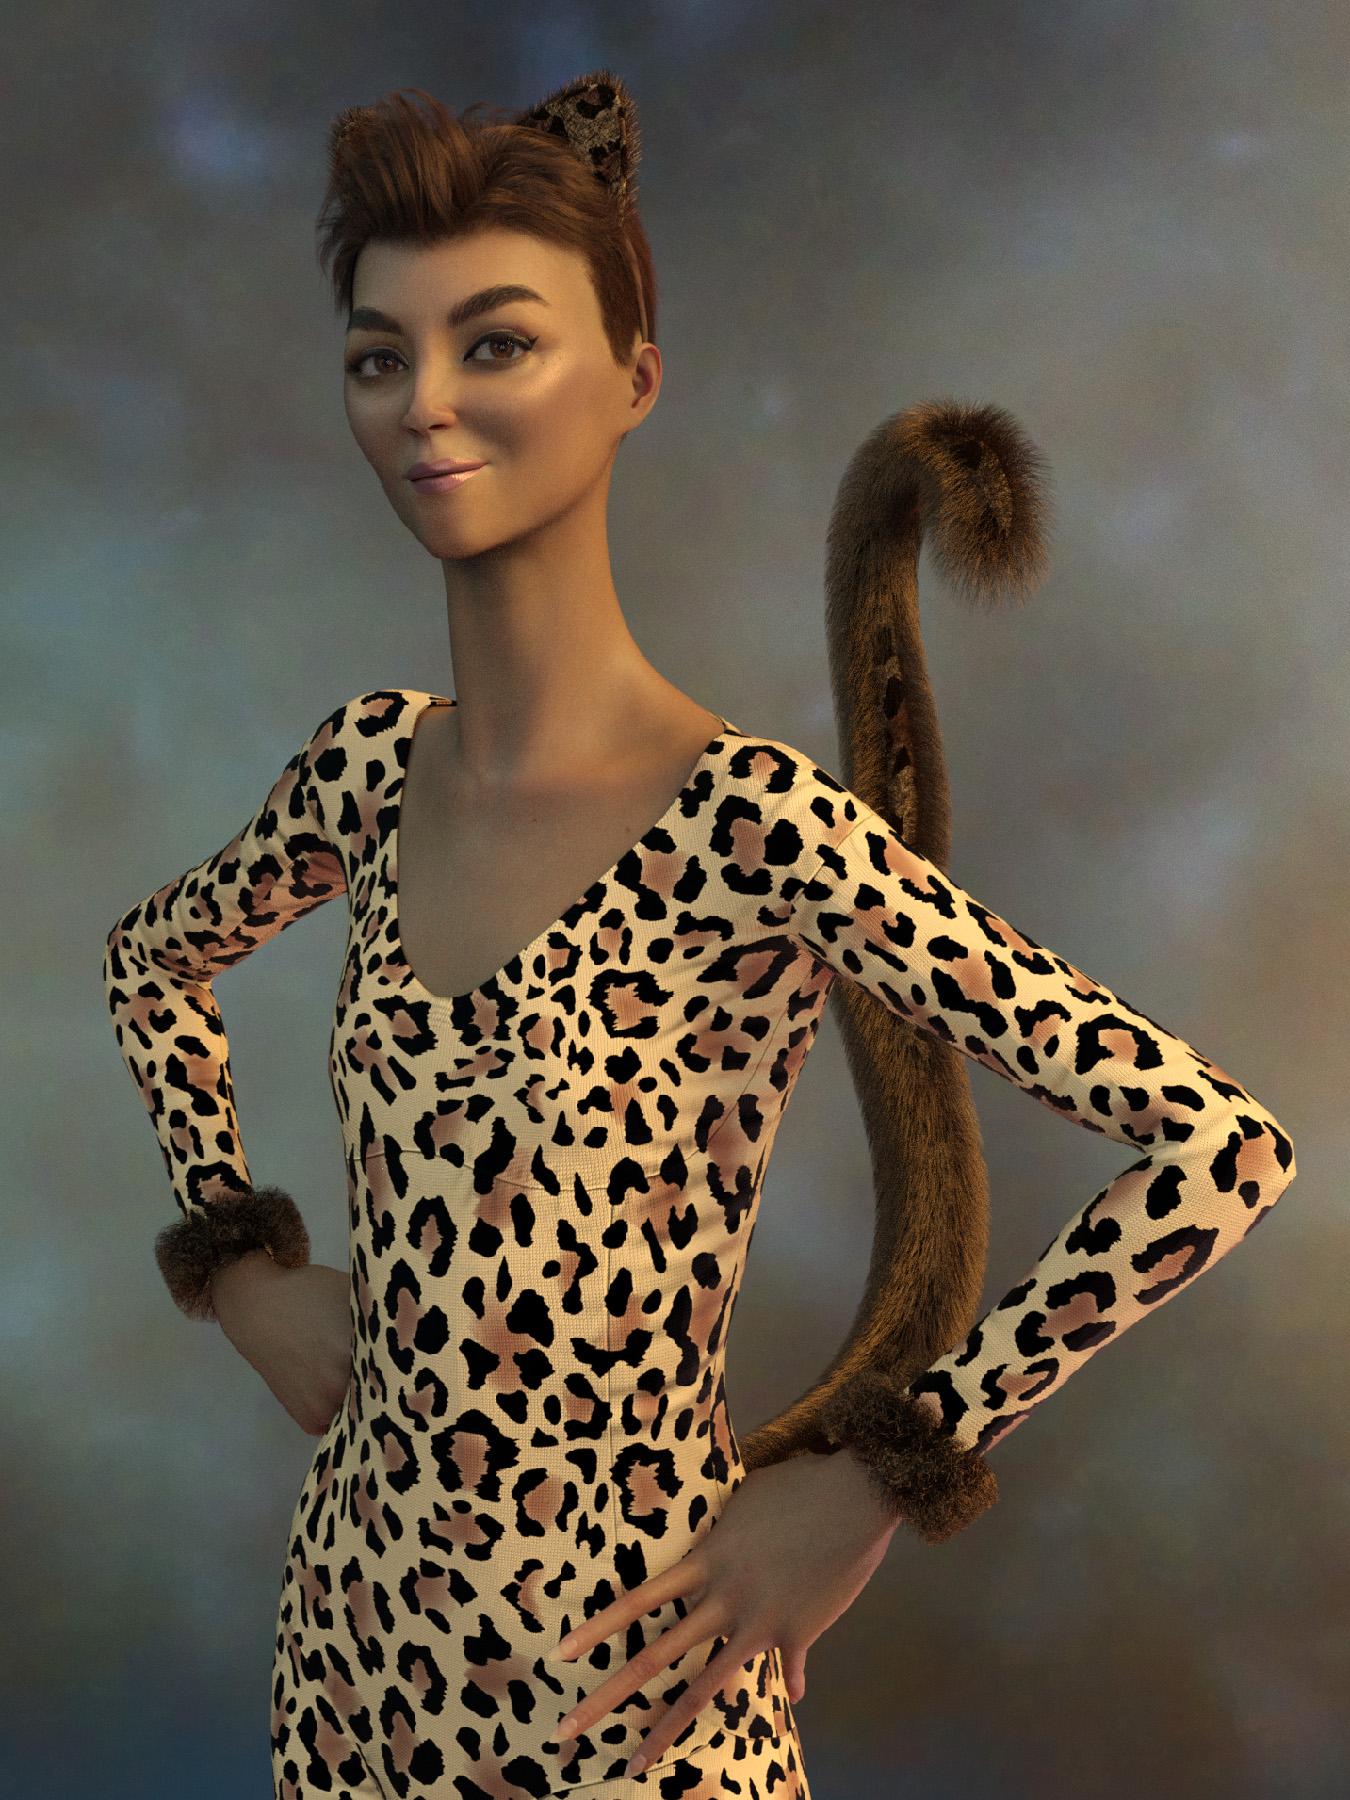
They both look fantastic! :) I had the morph package in my cart, but decided against it. I'd rather wait for some of Zev0 and I think it was Dogz morphs? :)
Genesis 9 clothing questions & answersA couple questions about templates:
- Why are there no breast adjustment morphs? There are morphs for many other body areas.
- Who is Nikolai9? He looks kind of chubby according to the morph. Why would he have morphs in the bodysuit template, but released characters like Michael and Victoria do not? Do they not need them, but he does because of his size?
I have reinstalled Bend Control three times and I am still not getting any results fromAll morph sliders coming with Bend Control are liste here : Bend Control
What does not work ? If you look for some of the sliders names listed in the link above, do they appear in the Parameters Tab ? If so... everything is installed properly and should work ?
it use to work great, but now nothing at all.
This is a bit short to help understand what's happening on your side.
Head gamesI wasn't going to get involved with the 9 generation for a number of reasons, mostly expense. But I was lured in by the beautiful eyes. Anyway I bought the morph package and Legacy UVs for Genesis 9: Genesis 3, 8, and 8.1 Female and Josie's Cat Suit. I hope to stop there. LOL. The guy has Mabel's textures and uses the aged face and body and some others. The cat lady has August textures.
help with D-Forcefelis said:
Or you can use animated timeline for dForce and dial the character in during the timeline.Careful though, if dForce simulation runs while a morph is timeline animated, dForce takes over and cloth doesn't adapt properly to the new morphology. If Base Genesis and morph are similar it'll be just fine. But if they're too different... then the problem will become obvious :
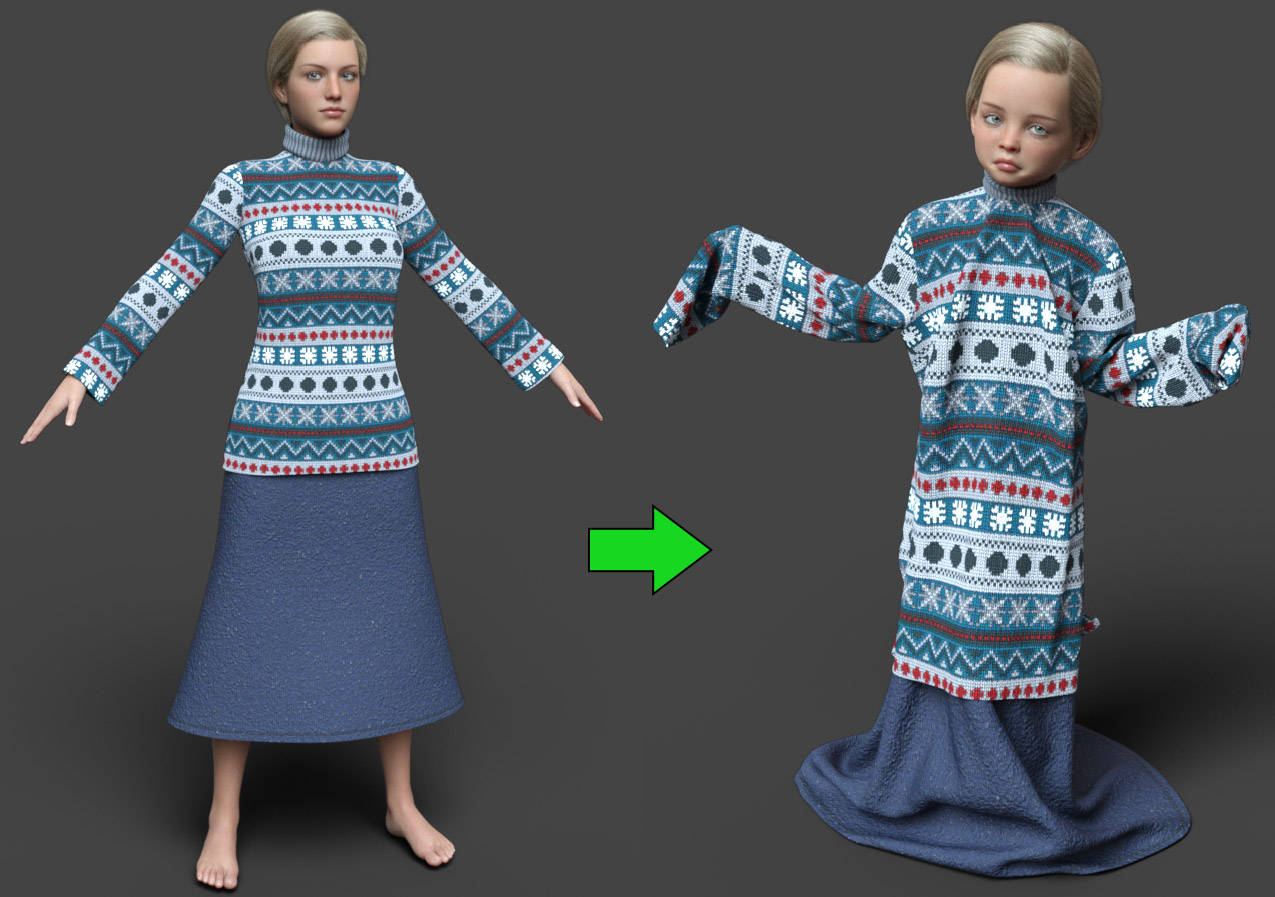
Such issue as the one described by the OP can be fixed with the Weight Brush Tool, by smoothing a bit the way vertices in the breast area are weighted to adjacent bones (Abdomen Upper, Chest Lower).
---
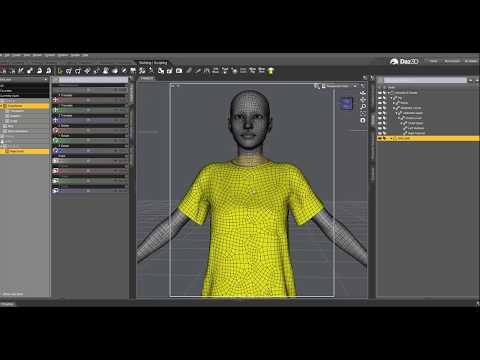
If you're using Blender or ZBrush, this video gives another way (custom morph) to fix such issues. Could help too :
 help with D-Force
felis said:
Richard Haseltine said:
It's probably the way the figure morph is projected into the clothing - that is broadly done by matching the moves of the nearest bit of the base figure, if the breasts are pulling in more than the lower chest then it will leave a ridge behind. The only real way to fix that, if smoothing won't do the job, is to make a custom morph to match the body morph that will smooth out areas like this.
Or you can use animated timeline for dForce and dial the character in during the timeline.
True, yes.
Quick question about SubD and detail maps.No problem. Glad if it helps you understand. I just finished something that'll make it easier to explain than words. I wanted to make a quick example... but ended up working on it for about 3 hours (ᴗ˳ᴗ) So I hope it'll help some.
In the following exampling, I use a Base plane and an HD subdivided plane. It'd be the exact same for a Base Genesis and an HD subdivided Genesis.
I started with a simple plane in Daz. I subdivided it and exported that plane to ZBrush. I sculpted a Lion head in it then used that sculpt to showcase the 3 main different options available (in Daz) to get more details onto a Base object : 1/ HD Morph 2/ Displacement Map 3/ Normal Map.
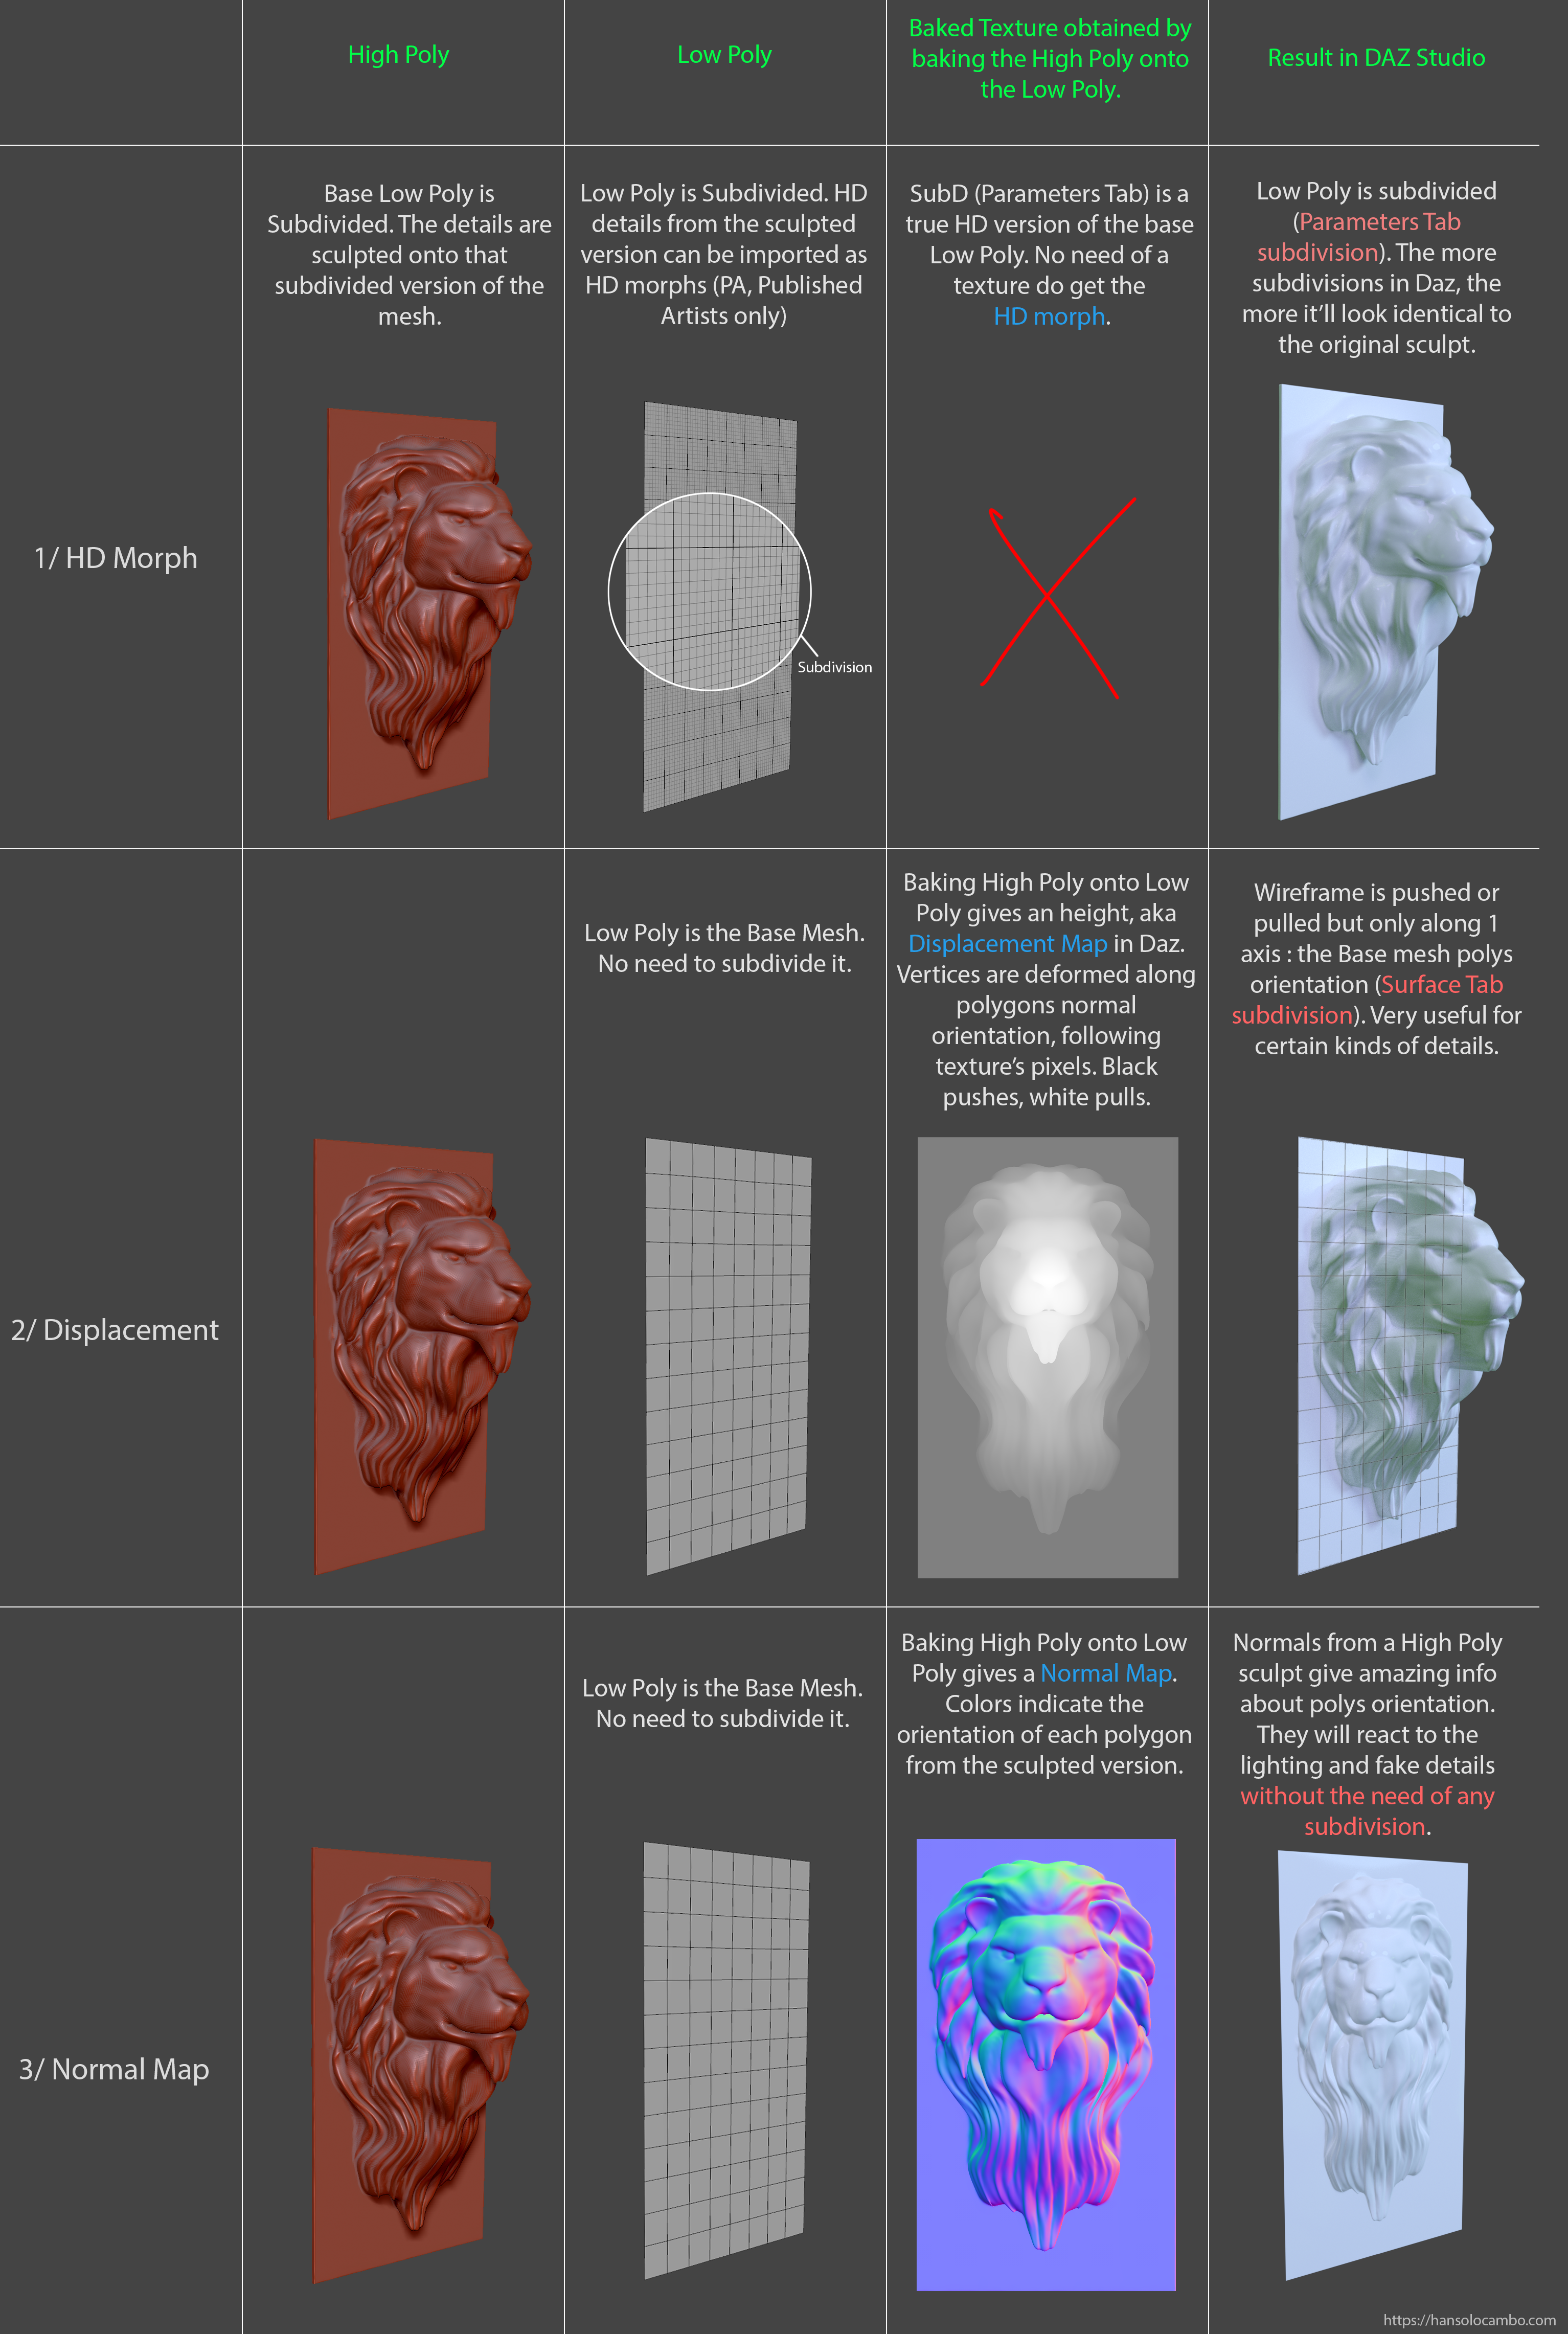
And again, all 3 methods can be combined. None eclipses the other. They are all very useful and complementary.
Genesis 9 QuestionI can understand your view of G9's 'doughy' look, as that was my first reaction as well. I think I called them 'Gumby'.
I love Victoria 9 and Michael 9, and picked up both Mega bundles because of their excellent content, and got the Pixie 9 bundle yesterday. But after going through my 20,000+ products to pick which to load onto my MacBookPro M1, and try to keep it simple, I found what I like to use and not use. And many of the items I installed go back to David 3, M4/V4, G1, G2, G3, and of course, G8/G8.1.
In between, I have pulled up the Base 9 figures and played with them as more morph packs, and then the few characters I bought from by PAs, that gave me a little more confidence in the character. As each release comes from my favorite PAs, it will give me the options I look for. And I am finding many of the non-G9 clothing and hairs I put on them work quite well, with some reservations (shoes and I understand long hair).
As far as clothes go for your current characters, that is a reasonable concern. Women especially change styles often, but I am finding men do as well, especially in pant shapes. I have been studying Marvelous Designer and today broke through problem I had. I want to be able to bring my ideas to life, if set in the past or today or the future for guys or gals. That is an option for you. There are other programs I understand that can do it, Blender is one I think? And shaders which keep up to new styles in colors, can keep basic clothing fresh.
But the Genesis 9 Essentials has everything you need to play with the characters for free. No extra expense.
Genesis 9 clothing questions & answersMada said:
Catherine3678ab said:
Thank you so much.
Next question I have concerns putting morphs into my clothing template. Would I make the morphs after I have moved the clothing template to its final location? or before and then move the entire lot over at the same time?
I usually finish everything completely as a regular clothing item, including morphs etc. Once its finished I resave with the correct folder names and transfer the duf to the right folder.
Okay, thank you so much. Something new for me to discover how to do :-)
help with D-ForceRichard Haseltine said:
It's probably the way the figure morph is projected into the clothing - that is broadly done by matching the moves of the nearest bit of the base figure, if the breasts are pulling in more than the lower chest then it will leave a ridge behind. The only real way to fix that, if smoothing won't do the job, is to make a custom morph to match the body morph that will smooth out areas like this.
Or you can use animated timeline for dForce and dial the character in during the timeline.
help with D-ForceBella said:
Richard Haseltine said:
Bella said:
Richard Haseltine said:
Bella said:
Richard Haseltine said:
It may simply be the model - especially if it was not made for dForce. If it was modelled with cups around the breasts, as is often the case, and with a certain separation between skin and cloth then when you simulate the cupped areas will form loose pockets and the looseness will allow them to drop down below the breasts.
This is the item
https://www.daz3d.com/dforce-harem-jumpsuit-for-genesis-8-and-81-female
it seems it was made for dforce but indeed like you say with a certain separation between skin and cloth
The promo images don't show the same effect, do you get it on a default figure and with default settings?
yes, this is the figure
https://www.daz3d.com/millawa-8
just loaded, dressed and posed, nothing else
Do you see the issue with the base Genesis 8 (or 8.1) Female?
No I don't! I just tried with the Base Genesis 8 and it worked perfectly, loaded and it was without that wave and after dforce still no wave!
It's probably the way the figure morph is projected into the clothing - that is broadly done by matching the moves of the nearest bit of the base figure, if the breasts are pulling in more than the lower chest then it will leave a ridge behind. The only real way to fix that, if smoothing won't do the job, is to make a custom morph to match the body morph that will smooth out areas like this.
Let's appreciate/discuss today's new releases - ongoing threadPixelSploiting said:
Right now there's conflict between Vinme morphs and previously released morph packs for G9, I need to check which G9 morph pack exactly is causing it.
Body Morphs, at least - the morphs here have unique main names but truncate them to the name of the standard morph in the formulas, so of course they conflict.
Let's appreciate/discuss today's new releases - ongoing threadRight now there's conflict between Vinme morphs and previously released morph packs for G9, I need to check which G9 morph pack exactly is causing it.
Genesis 9 Questionmaikdecker said:
Richard Haseltine said:
... Beyond that, there are threads on creating your own clone shape to AutoFit Genesis 9 items to earlier versions, and to use various tools to transfer maps and non-HD morphs to Gensis 9 (or, in principle, the reverse).
...which, of course, would not be needed if such compatibility would have been just built into G9. Which, of course, would make certain products unnecessary. Which, of course, would please some customers (= spending less money) and not please some PAs (= earning less money). How's that adage? You can please some people all of the time or all people some of the time, but you can't please all the people all of the time.
It doesn't have anything to do with making more money :) It is because there's only a certain amount of staff and you have to pick what is going to be of the most benefit to users from the start. Sure - they can employ more and more people - but their salaries have to come from somewhere. Prices will have to raised even further. They already spent a huge amount of money on making clothing items compatible from previous generations - more than users realise.
Daz 3D is part of

Connect
DAZ Productions, Inc.
7533 S Center View Ct #4664
West Jordan, UT 84084Licensing Agreement | Terms of Service | Privacy Policy | EULA
© 2026 Daz Productions Inc. All Rights Reserved.