-
Looking for Central Station files...
Graygecko_63b06fd4c9 said:
I noticed the model "Central Station" was on sale for $1.99. I realized I purchased it long ago but never used it. I tried to open it and all I found was a set of cameras.No lights or files under "figures" as directed by the info page. I re-downloaded it in case the file got misplaced and still I only have cameras and nothing else. I tried going to the folder but while it contains parts listed as wall, floors etc, none of them are a type to open in Studio. There is a UV folder for each and dyson file. Clicking on either does not load anything. Anyone else have this issue?
There're separate installation packages (IM00005138-02_CentralStationDS.zip and IM00005138-03_CentralStationIray.zip) for Daz format as well as Iray... and the metadata has been updated in 2016.
I you have both them installed in DIM, you can find all the user-facing files in Smart Content ~~
The new DAZ to Blender Pluginbrainmuffin said:
MrRogerSmith said:
I'm getting a refund on this. All I see are claims about what it does but nothing about how to use it.
I found the videos on YouTube to be similar. It has many, many options and pathways in Blender, but you really need to already have a workflow to make sense of it. No why you should do something over something else and no real direction on how to use it. I was hopeful, but didn't buy it. The last time I spent nearly $100 on a DAZ Studio utility was Reality and Paolo had clear enough videos that I bought it immediately.
You should check out this video link....It has tons of information as far as getting started using the add on.
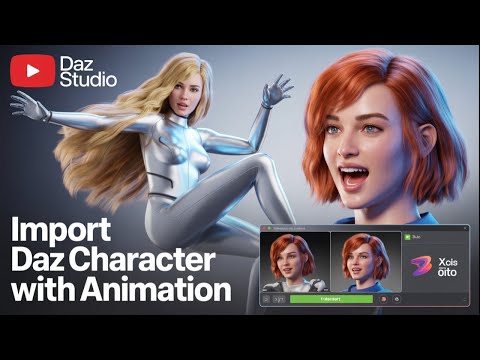
This will show you how to import Daz character and have animation automatically added on import::
It shows off basically the fastest way to create a walking talking character saying and doing whatever you want in Blender:
I’m starting a new tutorial series to showcase how my add-on works in practice. The add-on was designed as a television production tool for Blender, originally built because I needed to optimize everything in order to produce my own show.
In this series, I’ll be outputting up to two minutes of finished animation per day, along with a synopsis of how each segment was created. The goal is to give you a clear picture of the complete workflow.
All of the tools in the add-on are designed to save you time in Blender, and the tooltips are already written to be highly informative. But through these tutorials, I’ll drive that point home even further by demonstrating how each feature actually works in real production scenarios.
[Released] Blender to Daz Studio Plugin released!!! Official support thread [Commercial]Thanks @Artini !!!
As you say, version 3.8.61 is now live!!!!
Blender to Daz Studio Plugin | Daz 3D
Release notes:
1) Merge Textures Width and Height property added.
2) Scale As Percent option added.
3) If the file is not saved, the user now gets a prompt to save in any location of choice rather than in the temp file.
4) Progress bar added during the import.
5) The plugin now supports larger files.
6) Hair particle bug on export fixed.Enjoy!!!
Matronius
[Released] Bone Minion for Genesis 8 and 8.1 Poses [Commercial]OK, I got it working again. This time I deleted all the packages for DS 4.24.0.3, and all the packages for all of the bone minion products. I re-downloaded and reinstalled everything. Once again, I rebuilt the database and re-imported metadata. It is working again. Hope it stays that way.
DAZ Skins and texturesWell, for starters, it looks to me like you're trying to use a Genesis 2 skin on a Genesis 8 figure.
That's not going to work. They have different topologies, i.e. they're built different, with different UV sets.
There are two ways I go about making this work legally and morally, and which one you choose depends on whether you have more money than time or more time than money.
1. If you have more money than time:
Buy these:
https://www.daz3d.com/legacy-uvs-for-genesis-8-genesis-2-female
https://www.daz3d.com/legacy-uvs-for-genesis-8-genesis-2-male-michael-5-and-michael-6
Or search online for "Cayman Studios Legacy UVs" for the whole crop of them on the DAZ Store.
Alternatively or additionaly, to make unique Genesis 8 Female Skins, buy this:
https://www.daz3d.com/skin-builder-8-for-genesis-8-females
2. If you have more time than money:
a) Select Genesis 8 figure
b) In the Parameters Tab, find "Clones" Under "Hidden." You might have to click on the hamburger tab at the top, then navigate to "Preferences," and then turn on "Show Hidden Properties" first if you don't see "Hidden" or "Clones" under "Hidden" in the Parameters Tab.
c) Find the Genesis 2 Female or Genesis 2 Male Clone and dial it up to 100 percent. If you can't, click on the Gear icon next to "Genesis 2 Female," select "Parameter Settings," and make sure the "Min" is set to 0 (zero) percent and the "Max" is set to 100 percent. Sometimes in the past, the Max for the Clones would be set to 0 percent, causing the clone to not be usable. This is the usual fix for that.
d) Pose the Genesis 8 figure with these pose settings:
Left Collar: Twist = 0, Front to back = 0, Bend = 3.5
Left Shoulder Bend: Front to back = 0, Bend = 43.0, Twist = 0
Left Forearm Bend: Bend = 12.0, Twist = 0
Left Hand: Twist = -4.0, Side-Side = -13.5, Bend = -1.0
Left Thumb 1: Twist = 0, Bend = 2.5, Up-Down = 0
Left Thigh Bend: Side-Side = -6.0, Bend = 0
e) With Genesis 8 Female still selected, click the Hamburger icon in the Parameters Tab, select "Symmetry," and enter the following settings:
Nodes = "Root"
Propogation = "Recursive"
Direction = "Left to Right"
Trunk Nodes = "Mirror Across Y Axis"
Under Transforms: Rotations, turn on "X Axis," "Y Axis," and "Z Axis"
Click "Accept"
f) Hide the Genesis 2 Figure by clicking on the Eye icon next to the Genesis 2 figure in the Scene Tab.
g) Delete the Genesis 8 Eyelashes if using G8.0, or delete the Eyelashes and the Tear if using G8.1.
h) With the genesis 8 and geneses 2 figures in Base Resolution, export the Genesis 8 figure as posed as an OBJ.
i) Hide Genesis 8 and Show Genesis 2
j) Export Genesis 2 in Base Resolution as an OBJ
k) Open Blender 3.x or later (I'm using Blender 4.2.10)
l) Delete all the default objects. We don't need them for this.
m) Import Both the Genesis 2 OBJ and the Genesis 8 OBJ into Blender (you can Ctrl-Select them both at the same time)
n) Select the Genesis 8 figure posed as Genesis 2
o) You wil likely need to go into Sculpt Mode and adjust the fingers and thumb of Genesis 8 to more closely match the Genesis 2 figure. It's no big deal to do so. I used the "Elastic Deform" tool with X-axis Symmetry turned on to do it in 5 minutes.
p) Go to the "Modifiers" tab (The wrench), Click "Add Modifier," Click on "Search," type in "Shrink," and then find and select the "Shrinkwrap" Modifier.
q) In the Shrinkwrap Modifier Settings, I used:
Wrap Method: Nearest Surface Point
Snap Mode: Outside Surface
Target: the Genesis 2 OBJ
Offset: 0.35 meters
r) Click on the dropdown menu of the Shrinkwrap Modifier settings, and then click "Apply."
s) Now, go to Render Properties, which is the icon that looks like a monitor.
t) Go to the Surfaces Tab, which looks like a red globe with no poles.
u) Change all of the Surfaces to "UDIM Tiles" by going to each one at a time, clicking on the dropdown of "Base Color," and changing "Single Image" to "UDIM Tiles." For G8, you wil need to do this for each of 16 surfaces.
v) Go to the "Render" tab, which looks like a monitor.
u) Scroll down to the "Bake" Tab and open the dropdown menu
v) Change the following settings:
Bake Type: Diffuse
Contributions: Turn on "Color" only
Selected to Active = On
Target: Image Textures, Clear Textures = Off
w) Click on the Genesis 2 OBJ first, and then CTRL+Click the Genesis 8 figure now shaped like Genesis 2
x) Click "Bake" and see what happens. NOTE: depending on your hardware, this might take a while. It took my hardware about 15 minutes or so to bake 4 or 5 4K-res textures, but I have an Nvidia Geforce RTX 4060 with 8GB of VRAM and 32 GB of regular RAM with an i7 10-core processor as my hardware. Take a bathroom break, get something to eat and/or drink, do whatever, and then come back when it's finished.
y) If the textures are satisfactory, meaning they require little to no touchups (they shouldn't need it if you followed the instructions as listed), then switch to the UV Editing tab and then click Image > Save All Images, or else bring up each image texture and then click on Image > Save As and name and save each texture image wherever you'll easily find them.
z) Go back to Daz Studio, Select Genesis 8 figure, go to the "Surfaces" tab, and apply each base color image you just baked with Blender to Genesis 8 figure. Save as a new Materiels file, so you can apply them with a double-click from now on.
NOTE: the instructions I just laid out are how I go about transferring Genesis 2 skins to Genesis 8. This is the second option if you're low on money, as Blender, all versions, are free.
NOTE: For quick and easy PBR textures to go with your newly baked color textures, I use PixPlant 5, which isn't free, but is fast and easy and another tool to add.uniqueness to your skins.Are there any products or addons that will let me auto-fit Genesis 8 clothing to Genesis 1 (V5)?crosswind said:
Spacewarper7 said:
Pardon my ignorance, but how do you make G8 clones? That's something I would love to do myself, as I still after all this time much prefer using Genesis (1) for my renders to any of its later generations because of its greater versaility (especially in ignoring the gender, which always struck me as pointless if not ridiculous - not for social reasons but simply for the lack of convenience in using them). That and because I don't like the older props I bought for Genesis and its predecessors now being largely useless on later models.
Here's the key steps to make a G8F clone on G1.
1. Load a G1 and G8F into the Scene, Show Hidden Properties... in Parameters pane. Dial Genesis Clone on G8F.
2. Tweak G1's pose to align with G8F AMAP. Export G1 to OBJ with Base Resolution.
3. Loade G1 OBJ. Rig it onto G8F. Zero Genesis Clone on G8F. Export G1 to OBJ again.
4. Import G1 OBJ as a Genesis 8 Female Clone morph by using Morph Loader Pro.
5. Modify the morph as a Clone in Parameter Settings. Save the morph as a Modifier Asset. Done ~Here's the video of the full process: https://mega.nz/file/iWhBGABD#Syp9KF9zePDMh7D0Fq1naeJ4qUN7sGrVsE_F_lp7HPo
Edit: I also attach the Pose Preset for the alignment... so that you don't have to tweak the pose on G1 yourself ~~ Load the Pose Preset in above step 2.
Then do almost the same if you want to make G8M clone or other Genesis generation clones. The key is to choose Daz official clone, and align the pose before rigging.
Thanks so much! I'll give this a try
How do I export Gen9 w high heels to Blender to .glb?Makpah said:
(edited - I answered before watching the video, I'm gonna try that right now! THANKS)
So - that works when I start with an unmodified Gen9 and add Heels and Foot/Toe pose. But if I do the same but start with a character, the eyes/lashes/etc end up in the wrong place. I feel like there is some checkbox I'm missing.
Make sure you check Merge Followers as well as Include Animation in FBX Export Options.
The attached example was an export / import of Victoria 9's glb ~~
Are there any products or addons that will let me auto-fit Genesis 8 clothing to Genesis 1 (V5)?Spacewarper7 said:
Pardon my ignorance, but how do you make G8 clones? That's something I would love to do myself, as I still after all this time much prefer using Genesis (1) for my renders to any of its later generations because of its greater versaility (especially in ignoring the gender, which always struck me as pointless if not ridiculous - not for social reasons but simply for the lack of convenience in using them). That and because I don't like the older props I bought for Genesis and its predecessors now being largely useless on later models.
Here's the key steps to make a G8F clone on G1.
1. Load a G1 and G8F into the Scene, Show Hidden Properties... in Parameters pane. Dial Genesis Clone on G8F.
2. Tweak G1's pose to align with G8F AMAP. Export G1 to OBJ with Base Resolution.
3. Loade G1 OBJ. Rig it onto G8F. Zero Genesis Clone on G8F. Export G1 to OBJ again.
4. Import G1 OBJ as a Genesis 8 Female Clone morph by using Morph Loader Pro.
5. Modify the morph as a Clone in Parameter Settings. Save the morph as a Modifier Asset. Done ~Here's the video of the full process: https://mega.nz/file/iWhBGABD#Syp9KF9zePDMh7D0Fq1naeJ4qUN7sGrVsE_F_lp7HPo
Edit: I also attach the Pose Preset for the alignment... so that you don't have to tweak the pose on G1 yourself ~~ Load the Pose Preset in above step 2.
Then do almost the same if you want to make G8M clone or other Genesis generation clones. The key is to choose Daz official clone, and align the pose before rigging.
[Released] Blender to Daz Studio Plugin released!!! Official support thread [Commercial]I never heard from anyone about how well the Kitbash3D sets worked with it in D|S
because it's all out of my budget never worried too much but would still like to know if they import as separate objects and have all their textures
being articulated (doors opening wheels turning etc) would be a bonus
Hair rendered in Cycles lacking shine and luste
All of what's said above it fairly true. The trap people fall into every time at the start is thinking "Should be better becasue Blender!!" and that's just not the case. One thing I disagree with is the anology "Blender is more like the Swiss army knife of 3D apps. It does it all - okay-ish.". This is inaccurate. Blender is a tool box and its up to you as the mechanic to learn to use those tools well to yeild good results. Blender, Maya, 3DS Max, doesn't matter they all require the same basic understaning of how to properly build and light a scene, render it, and then process that scene.
I know I say this all the time, but its true. Daz and Blender are compleatly differnet pieces of software. So the materials need to be aproached compelatly different. The same is true for translating Daz assets over to any DCC for that matter, or more importantly translating materials over to different renderers all together. Materials in general are a giant time sink and theres no way around it. There is a reason that in a professional pipeline people get higherd just to deal wiht them, Blender is no exception. I say this becasue trying to make renders in Cycles look like renders in Daz is alwasy going to be an uphill battle. It's like forcing a butter knife to be a flat head screw driver. Sure they have some similarities but are fundamentally different tools. To get good results with Blender you need to learn to use and get good result with Blender. The same goes for Maya, or any other DCC. All of this is why I, and some others, junk the materials in import (i use diffeo) and build them form scratch.
All that said there are things to consider. Card hair in Blender will always be difficult to get looking good without all the apropriate maps. As far as cycles is concerned when you hit render its rendering a plane, not hair. The best results in Blender are alwasy going to be form stand/particle/geonode based hair. Card hair can be done, but again you have to have all the apropriate maps and use them properly.
This brings me to another horse I have to beat to death all the time. Lighting and color managment. Daz takes care of all of this for you, alt least for the most part. Daz is meant to be a kind of one-click solution. Belnder is not. To get good results you have to work for it. That means proper lighting setups, and not just relying on an HDRI. Then theres the color managment side which will greatly effect shadows and highlights. The Default "Standard" View Transform is very, very, very, very, very, flat. Change it to AgX, or even better (in my experience) Khronos for far better results. Also don't forget almost all great renders you see get some sort of post processing. Often in something like Photo Shop.
TL;DR - Daz does a lot of stuff for you while Blender does NOTHING for you, and you have to work for it.PA Names as part of product nameWendyLuvsCatz said:
I said copy and paste and rename not cut and paste and rename
the originals are still in place
and yes, in the content library, the character file and icon, tip
True, though it will mean that if the moved file is sued to load it won't have the proper metadata so it isnssssssss't a neutral option. Links are better, and involve only one file instead of two (or three).
PA Names as part of product nameRichard Haseltine said:
crosswind said:
Richard Haseltine said:
WendyLuvsCatz said:
I guess then just renaming the duf, tip and icon files didn't work
you can move them all to whatever folder you like too or copy them there
renaming files should not be stressful for most people
Moving and renaming the actual files will break the metadata, and of course will have to be redone after an update.
Moving files breaks metadata while renaming files doesn't ~~
Moving and renaming both change the path, and so break the metadata, unless done within the appliation (though the changes will be lost if the database has to be reset).
I thought the suggestion was doing so in Content Lib.
PA Names as part of product nameWendyLuvsCatz said:
Richard Haseltine said:
WendyLuvsCatz said:
I guess then just renaming the duf, tip and icon files didn't work
you can move them all to whatever folder you like too or copy them there
renaming files should not be stressful for most people
Moving and renaming the actual files will break the metadata, and of course will have to be redone after an update.
he doesn't use smart content and if he did I suggested copying and pasting to the characters folder then renaming
Smart Content is not the only thing that uses the CMS database
honestly though, everything is too much bother and if just not buying stuff is less stressful for him that might be best
PA Names as part of product namecrosswind said:
Richard Haseltine said:
WendyLuvsCatz said:
I guess then just renaming the duf, tip and icon files didn't work
you can move them all to whatever folder you like too or copy them there
renaming files should not be stressful for most people
Moving and renaming the actual files will break the metadata, and of course will have to be redone after an update.
Moving files breaks metadata while renaming files doesn't ~~
Moving and renaming both change the path, and so break the metadata, unless done within the appliation (though the changes will be lost if the database has to be reset).
PA Names as part of product nameRichard Haseltine said:
WendyLuvsCatz said:
I guess then just renaming the duf, tip and icon files didn't work
you can move them all to whatever folder you like too or copy them there
renaming files should not be stressful for most people
Moving and renaming the actual files will break the metadata, and of course will have to be redone after an update.
Moving files breaks metadata while renaming files doesn't ~~
Daz Studio 6 Beta - version 6.25.2026.19821! (Updated July 23, 2026)Richard Haseltine said:
crosswind said:
Richard Haseltine said:
crosswind said:
Richard Haseltine said:
crosswind said:
Different behavior of showing DUF file names in DS 2025 Alpha:
In cms database, a DUF file has two data fields related to its File Name: filename and default_filename . They can be different. The former is the latest modified one which comes from the file name physically saved.
Now in DS 4.x, it always shows filename which is a correct way (screenshot 1). But in DS 2025 Alpha, it shows default_filename which is a wrong way (screenshot 2). Screenshot 3 shows the file names of the DUF file in cms database ~~
Edit: I know why now... because of that new feature of Relabel in Content Library... It changes default_filename rather than the physical file name. However, showing default_filename in Content Library makes no sense at all to me ~ It's really confusing people and making things messy. Frankly speaking, this Relabel feature is totally useless to me.
Besides, if Copy such a Relabelled file, then Paste it to another folder, the physical file name rather than the relabelled one is back. These behaviors are not consistent ~ BTW, sorting is also wrong...
Instead, if really needed, the better way is to show default_filename in the tip when hovering mouse over the file thumbnail ~ or make this Relabel one of the features of Tagging... That default_filename shouldn't be modified by the user~
The field names are not exposed to the end-user, and the diect editing of the database is not supported. Even knowing the names, filename as the actual filename and default_filename as the one to show in the content pane does not sound wholly unreasonable. Actually changing the column names, let alone modifying the structure, would obviously be a compatibility issue
default_filename was designed to keep the original file name of a product item and DUF file from LOCAL USER. Then filename can be changed by the user without breaking metadata linked to Content Tyep and Category, etc. etc..
How do you know what it was designed for? And even if it was designed for that, it could still be repurposed if that was less drastic than other options.
I know that by experimenting various tests as per my exp. of using large DB as well as checking the routines in cms. Logics in cms are not complex ~ Even if there were any really needed "repurposing", the DB design could've be more rational ~~
You are inferring rather than knowing, and it is about details that are not visible in a way supported by Daz. Going off-piste you can't really complain about the lift service.
Anyway, key finding is the fact. Comitted SQL shows everything ~~
This logic has been reasonably working in DS 4.x. Relabel feature surely breaks this logic ~~ From a perspective of database architecture, a new filename data field could've been added to support this new feature, and of course, Copy / Paste and sorting behaviors have to be properly enhanced.
Daz Studio 6 Beta - version 6.25.2026.19821! (Updated July 23, 2026)crosswind said:
Richard Haseltine said:
crosswind said:
Richard Haseltine said:
crosswind said:
Different behavior of showing DUF file names in DS 2025 Alpha:
In cms database, a DUF file has two data fields related to its File Name: filename and default_filename . They can be different. The former is the latest modified one which comes from the file name physically saved.
Now in DS 4.x, it always shows filename which is a correct way (screenshot 1). But in DS 2025 Alpha, it shows default_filename which is a wrong way (screenshot 2). Screenshot 3 shows the file names of the DUF file in cms database ~~
Edit: I know why now... because of that new feature of Relabel in Content Library... It changes default_filename rather than the physical file name. However, showing default_filename in Content Library makes no sense at all to me ~ It's really confusing people and making things messy. Frankly speaking, this Relabel feature is totally useless to me.
Besides, if Copy such a Relabelled file, then Paste it to another folder, the physical file name rather than the relabelled one is back. These behaviors are not consistent ~ BTW, sorting is also wrong...
Instead, if really needed, the better way is to show default_filename in the tip when hovering mouse over the file thumbnail ~ or make this Relabel one of the features of Tagging... That default_filename shouldn't be modified by the user~
The field names are not exposed to the end-user, and the diect editing of the database is not supported. Even knowing the names, filename as the actual filename and default_filename as the one to show in the content pane does not sound wholly unreasonable. Actually changing the column names, let alone modifying the structure, would obviously be a compatibility issue
default_filename was designed to keep the original file name of a product item and DUF file from LOCAL USER. Then filename can be changed by the user without breaking metadata linked to Content Tyep and Category, etc. etc..
How do you know what it was designed for? And even if it was designed for that, it could still be repurposed if that was less drastic than other options.
I know that by experimenting various tests as per my exp. of using large DB as well as checking the routines in cms. Logics in cms are not complex ~ Even if there were any really needed "repurposing", the DB design could've be more rational ~~
You are inferring rather than knowing, and it is about details that are not visible in a way supported by Daz. Going off-piste you can't really complain about the lift service.
This logic has been reasonably working in DS 4.x. Relabel feature surely breaks this logic ~~ From a perspective of database architecture, a new filename data field could've been added to support this new feature, and of course, Copy / Paste and sorting behaviors have to be properly enhanced.
PA Names as part of product nameRichard Haseltine said:
WendyLuvsCatz said:
I guess then just renaming the duf, tip and icon files didn't work
you can move them all to whatever folder you like too or copy them there
renaming files should not be stressful for most people
Moving and renaming the actual files will break the metadata, and of course will have to be redone after an update.
he doesn't use smart content and if he did I suggested copying and pasting to the characters folder then renaming
honestly though, everything is too much bother and if just not buying stuff is less stressful for him that might be best
PA Names as part of product nameWendyLuvsCatz said:
I guess then just renaming the duf, tip and icon files didn't work
you can move them all to whatever folder you like too or copy them there
renaming files should not be stressful for most people
Moving and renaming the actual files will break the metadata, and of course will have to be redone after an update.
PA Names as part of product nameRon Knights said:
I continue to have problems with this issue. I just want to use DAZ Studio to Make Art. I don't want to work to make that happen.
I want to look at the provided content and put it together to make a creation of my own.
I can see why DAZ provides DIM, etc. But those tools should serve us. We shouldn't need to provide our own effort to make them work.
I know we can use tools or methods like "Categories" to help find things. But we're talking hours of extra effort.
My "DAZ Studio" computer sits on a 6 ft computer desk. I don't want to spend hours sitting at that desk, working on organization. In the past, I suffered from "edema," or fluid retention. I was much heavier, and my body was bloated.
The way things are now, I sit at the computer desk for a few minutes, put things together, render and enjoy my work.
Daz content, except for the bulk transfers from other stors, is already categorised. So is some third-party content, though you will need to import the metadata in most cases. Categorising, or even settings up products, for items as you install them does not take that long - I wouldn't advise doing massive stacks in a sitting - and no pre-made organisiation, using metadata or folder trees, is going to satisfy everyone.
Daz 3D is part of

Connect
DAZ Productions, Inc.
7533 S Center View Ct #4664
West Jordan, UT 84084Licensing Agreement | Terms of Service | Privacy Policy | EULA
© 2026 Daz Productions Inc. All Rights Reserved.