-
Transform a non Dforce object to a Dforce object possible or not ?
General: Yes, you can use : Edit > Object > Geometry > Add dForce Modifier: Dynamic Surface
Sometimes it works great, but with complicated objects which are composed of several meshes (and your hair looks like that could be the case) you get an explosion.
I myself prefer in those cases : Send Object to Hexangon, tweak it in the desired way (caution: do not change the node count of the mesh, don't cut etc. only deform) and send it back to DS where you can create a morphIt's tough to justify making purchasesRon Knights said:
I hadn't bought much at DAZ for a few years. I got mildly excited by the arrival of Genesis 9. I rejoined the PC Club. I cancelled the subscription soon after.
One thing about DAZ's products turns me off. Too many products use "vanity names" for their content. If I buy a "pirate" shirt, I want to find it listed as a "pirate" shirt. I don't want to guess what PA made the product, and look under a PA's folder. And now it appears there is a shortage of male clothing.
Re: vanity and 'generic' names like "Pirate" shirt- the trouble is when files are all named the same for different products- for example if two PAs make a pirate shirt and both are are in the same runtime and Category and location, and if they just name it Pirate shirt, it'll conflict with the other. If two characters for the same figure have the same name, it might overwrite, or call on the wrong fix morphs/jcms and cause other issues. I've had to go back and rename a character because it was the exact same name, spelling, and morphs as another PA's and they'd have conflicted with each other, so things are required to have the vendor's initials in front and separate the folder locations to limit that kind of issue. I thought it was kind of hilarious at the time because I'd looked very carefully for a name that wasn't already used in Daz and another primary market, and yet STILL managed to submit at the same time as another PA who had a character of the same exact name. Glad I caught it in time though, because when that happens people always get upset and blame the PA "why is this morph messing up???? This PA does garbage work!" or Daz "why didn't Daz catch this?" and then we all hustle to fix stuff but the thread is still there complaining about a bad character morph when its really a conflict of two instead. So there's reason for the "vanity" and it's to help keep every data name unique and working without problems. :) That said, isn't smart content supposed to help you find things by category? I don't use it myself ... I'm too set in my ways and install everything manually. ;)
and there's a lot of clothes for G9 if you like lingerie times 1000 :PI joke but I do get the general frustration with not being able to buy a lot. All I can say is, there's a lot of sales at daz and a lot of very very high discounts. The odds are in your favor.
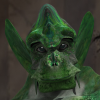
Who is this character, then?I could be wrong - but that looks like it could be a dial in or custom character from a PA that is no longer on Daz or Renderosity (RareStone) looks like a morph between Fredda, Alisa, and Kayla in the other promos (https://posercontent.com/vendors/rarestone/1878)
Need help with creating a hair morph for xyz Natural Curly Hair.Unfortunalte there's only one visible shaping morph on the hair but not relevant and no custom bone either.... For such a strand-based hair, you either use timelime to make the hair move from back to front (fit it to none first), and / or use dFormer to move the front hair to back or refine the shape...
Because only PA has the full set of the tools to make morphs on strand-based hair... though there's a promo pic, there's no such a morph, it's not good...
How to I find out if my mesh is problematic for DAZ?The script is pJCM ERC-Keyed: https://www.mikededes.com/pjcm-erc-keyed/
Very neat. I haven't found a permanent use for it, yet, but I'm going to someday. If I select an unfitted piece of clothing, it complains there's no parent node so the item has to be parented to what the morph is supposed to do. However, I imagine I could use it for a starter base: getting the joint in there so to speak.
Thanks to this thread here: https://www.daz3d.com/forums/discussion/55679/one-fader-controlling-multiple-morphs-in-a-sequence I have managed to sort of figure out how to rudimentary key things. It took me some fiddling, because it wasn't quite said in detail how you key manually. (On the other hand if the thread hadn't been short and concise I may never have gotten there.) Thanks to their example, after a while I figured out where. So now joint -70 isn't a nasty hobbitts. Just a gnarly orc. At least it's behaving so far.
So far.
I am still concerned about my mesh, though. I converted to subd out of curiosity and symmetry went nuts.
►►► A Touch of History and a Whole Lot of Carrara Info! ◄◄◄Dartanbeck's Carrara CG Workshop
This is the part of Dartanbeck.com where I like to explore different aspects of filmaking using Carrara.
I've broken it all down into these topics:
Story - a landing page with a short article
- What Happened at Odysseon Station? - using content to drive a story
- Rosie and the Winter Wolf - inspiration
Pacing and Rendering - short article to be expanded upon in the future
Pre-Production Phase - a nice landing page with some cool info
-
Concept Art - I have a few of my designs in here. I'll be adding more along with descriptions of them... eventually
-
Concept Art > Kitbashing Marcoor - The process of making my cool Marcoor Hunter space vessel
-
Scene (stage) Setup - Currently only has one offering: Volumetric Lighting, which is an early hybrid video/written article. It doesn't have much of a written version yet - but does include a Base Scene Download
-
Character Setup - This seems to be my main interest lately, as it has quite a few articles. Don't worry, I'll be getting on to other stuff soon!
-
Introducing Rosie 5 - I needed to get something started to find a focus toward developing this web site. This was it
-
Making Rosie 5 - Developmental information on creating my main protagonist - to be developed further
-
Using Genesis in Carrara - A work in progress that will explore many ways to use various Genesis generations within Carrara
-
Genesis Morph Reduction - My method of not only reducing the weight of a Genesis figure, but also the number of available sliders in the Parameters tab
-
Dynamic Hair - One of the parts of the Hybrid Video/Written article for Introducing Rosie 5
-
EYEdeas 3+ - A look at using Arki's amazing 3D eyeballs! Another part of Introducing Rosie 5
-
Millennium Teeth - Using third-party teeth to get what my character (Rosie 5) needed to complete her ultimate look. Another part of Introducing Rosie 5
-
Character Transfer using NLA - I often like to update/upgrade my character to a fresh base figure with a different set of morphs (often when I buy new ones) - here's how I transfer the shape over
-
Character Design - With its Character Template Scene download, this video/article demonstrates how I build each of my characters, monsters, animals, etc., It also covers the basics of creating shaders for Genesis (or any other figure, for that matter)
-
Modeling for Genesis - A fresh look, rejuvenating an article I wrote here quite some time ago. The video I made then is still helpful in how to send models from Carrara into Daz Studio, rig them to conform to the intended figure, and save back into the library.
-
Character Shader Basics - Explore the absolute quickest and simplest way to get a Daz Figure's materials up and running in Carrara! A very basic approach with no frills for speedy renders
Production Phase - currently just a landing page for:
-
Animating - This is where my animation articles will continue. I placed some useful info in here to get it started
-
Hybrid aniMation - another hybrid article I'm working on now. Currently contains much of the info from aniMating in Carrara
-
aniMate 2 - Daz Studio comes with a free version, but when we buy the full version we get some really great bonus features!
-
Animating Speech - Let's get that dialog looking right, shall we?
Post Production Phase is still vacant in this menu. Most of the post production articles in in other locations such as Do It In Post and others.
How to I find out if my mesh is problematic for DAZ?I'm currently trying to track down how to key morphs. I did find a nifty script tool, which would work if I were doing a character morph. With Genesis 9 clothing, it doesn't stick. I'm trying to "animate" the joints so that the slight folds move along rotation because it wouldn't be me without animation. Joint rotation -70 is being a nasty hobbitts...
Challenges in Transferring Characters with Animations and Morphs from Daz Studio to Unreal EngineI'm immersed in a project that requires the precise transfer of characters with animations from Daz Studio to Unreal Engine 4.0. In particular, I'm dealing with an animation in Daz Studio where a character undergoes morphing changes during the sequence to achieve a more realistic appearance. This technique is crucial in specific character interactions.
The critical problem I'm facing is that when exporting these animations to Unreal Engine, the characters arrive with noticeable deformations, and it seems that Unreal Engine is not properly capturing the morphs used in the animation. This results in an inaccurate and unrealistic visual representation of the animations in Unreal Engine.
I've explored various solutions, such as adjusting morph values before export and carefully reviewing export settings in Daz Studio. However, I have not yet found a solid solution to this particular problem.
I've heard mention of a possible plugin called RMC that might be useful in addressing similar issues, although I lack direct experience with this tool.
Has anyone encountered a comparable issue to mine or has experience in successfully transferring animations with morphs from Daz Studio to Unreal Engine? Has the RMC plugin or other solutions been used to resolve deformation issues in Unreal Engine? I would deeply appreciate any advice, guidance, or information you can provide on effectively addressing this complex matter and achieving accurate animation imports from Daz Studio to Unreal Engine, especially when morphs are employed. Any assistance or shared knowledge would be immensely appreciated!"
Need help with creating a hair morph for xyz Natural Curly Hair.I need some help making an initial morph for XYZ Natural Curly Hair so the hair will fall completely behind the shoulders. It's a great hair but it always settles with the hair in front:
What I need is something similar to what Linday has, which is initial shape morphs for hairs like this:
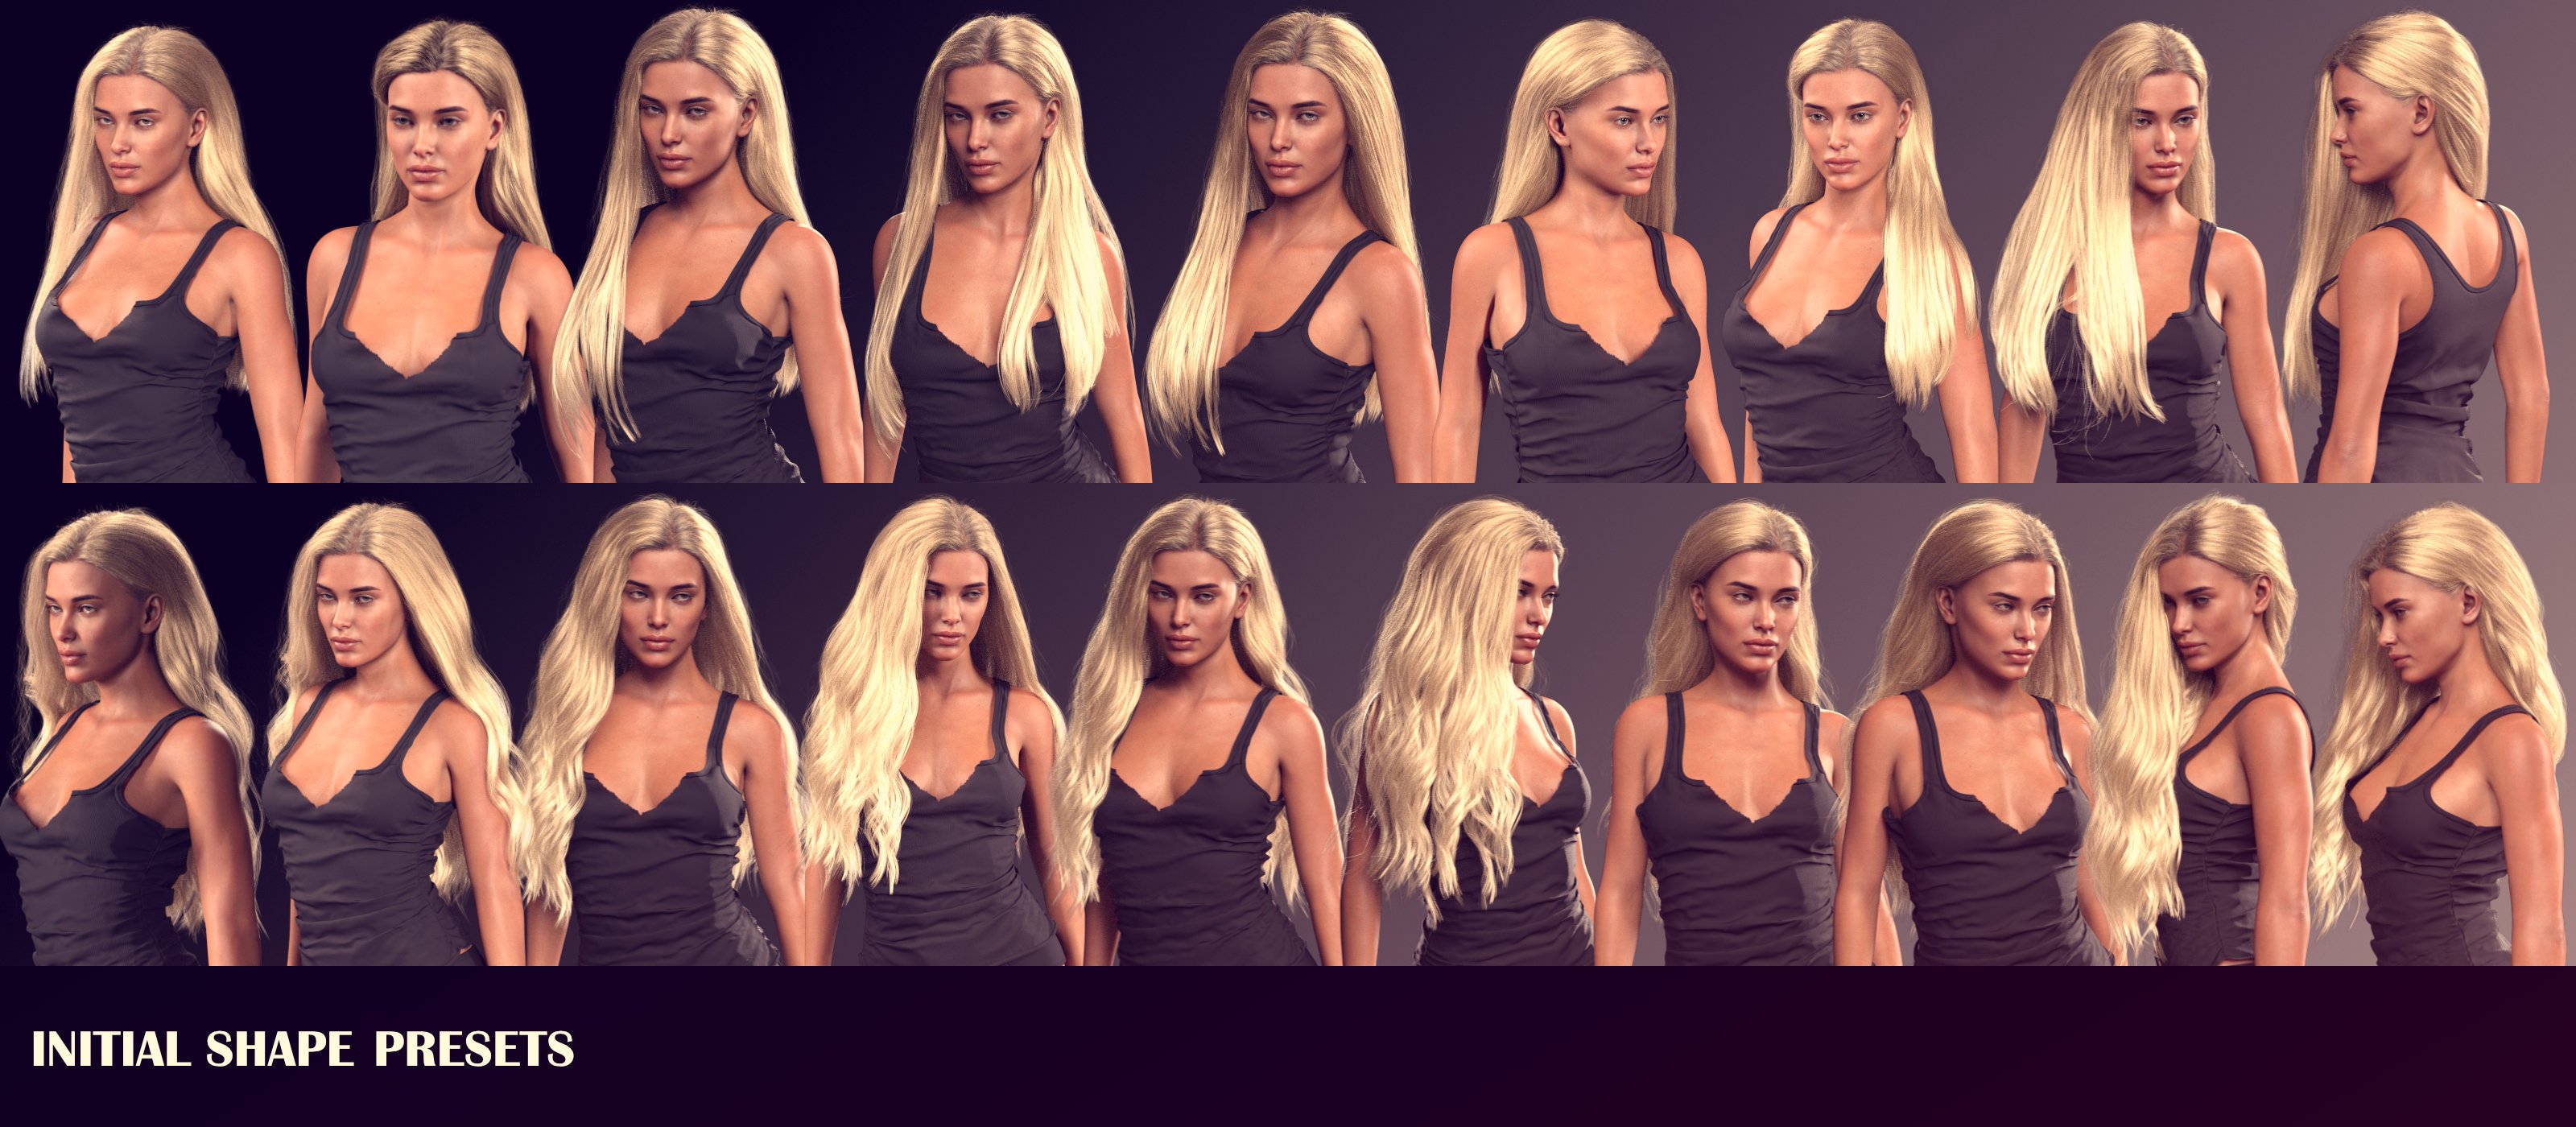
I'm trying to figure out a way to get a shape that will be like the second one on the top left, but I'm having no luck. I've tried altering the stiffness of the hairs and then rotating the figure so the hair would fall behind and save that as a morph to apply before a sim but it never worked right. I also tried using dformers but I'm terrible at that and it didn't work the way I wanted, my last attempt was creating a cylinder that would push the hair back in a 30 frame animation... that sorta worked but a lot of the hair became embeded in the figure. I dunno what else to do, at this point I don't have the skill to really do anything else. Help please.
How to I find out if my mesh is problematic for DAZ?I ask because I've got this clothing prop that dislikes draping. Or anything. I've restarted multiple times, and I'm now on my fifth time backin up to an earlier mesh. I've restarted so many times I no longer know where the starting point actually is, so it's impossible to post screenshots or anything. This latest version explodes when bending a knee. It didnt' at FIRST, I might add. I made no changes. It just steadily got worse and now it won't without a problem.
I have looked at the daz to blender bridge briefly, but I couldn't get it to behave and sequaying into a whole no venture to learn something else entirely is more than I can do right now. I've been exporting morphs out and bringing them in the old fashioned way. I did update Blender to 3.6 for this, but created some serious issues as they've changed the obj dialogue so I've had to go back to using the older version for now to at least get a morph in that works.
I just want a checklist. That's how I learn: step for step, bit by bit. Not with college lectures or long discussions, no offense to anyone else.
Yes I know I usually adopt a Gollum persona to discuss things in here, but eh. I'm too frustrated by this project right now.
Retargeting not working correctlyCurrently having a problem with retargeting animations for G8 in unreal.
Everything seems to transfer over fine, but there is a slight issue with the animations after they are retargeted to G8.
As in the image below, most of it looks fine but the hand/wrist positions have not retarged correctly (the mannequin is how it should look).
Does anyone have any suggestions on a fix for this?
Using Unreal 4.27.
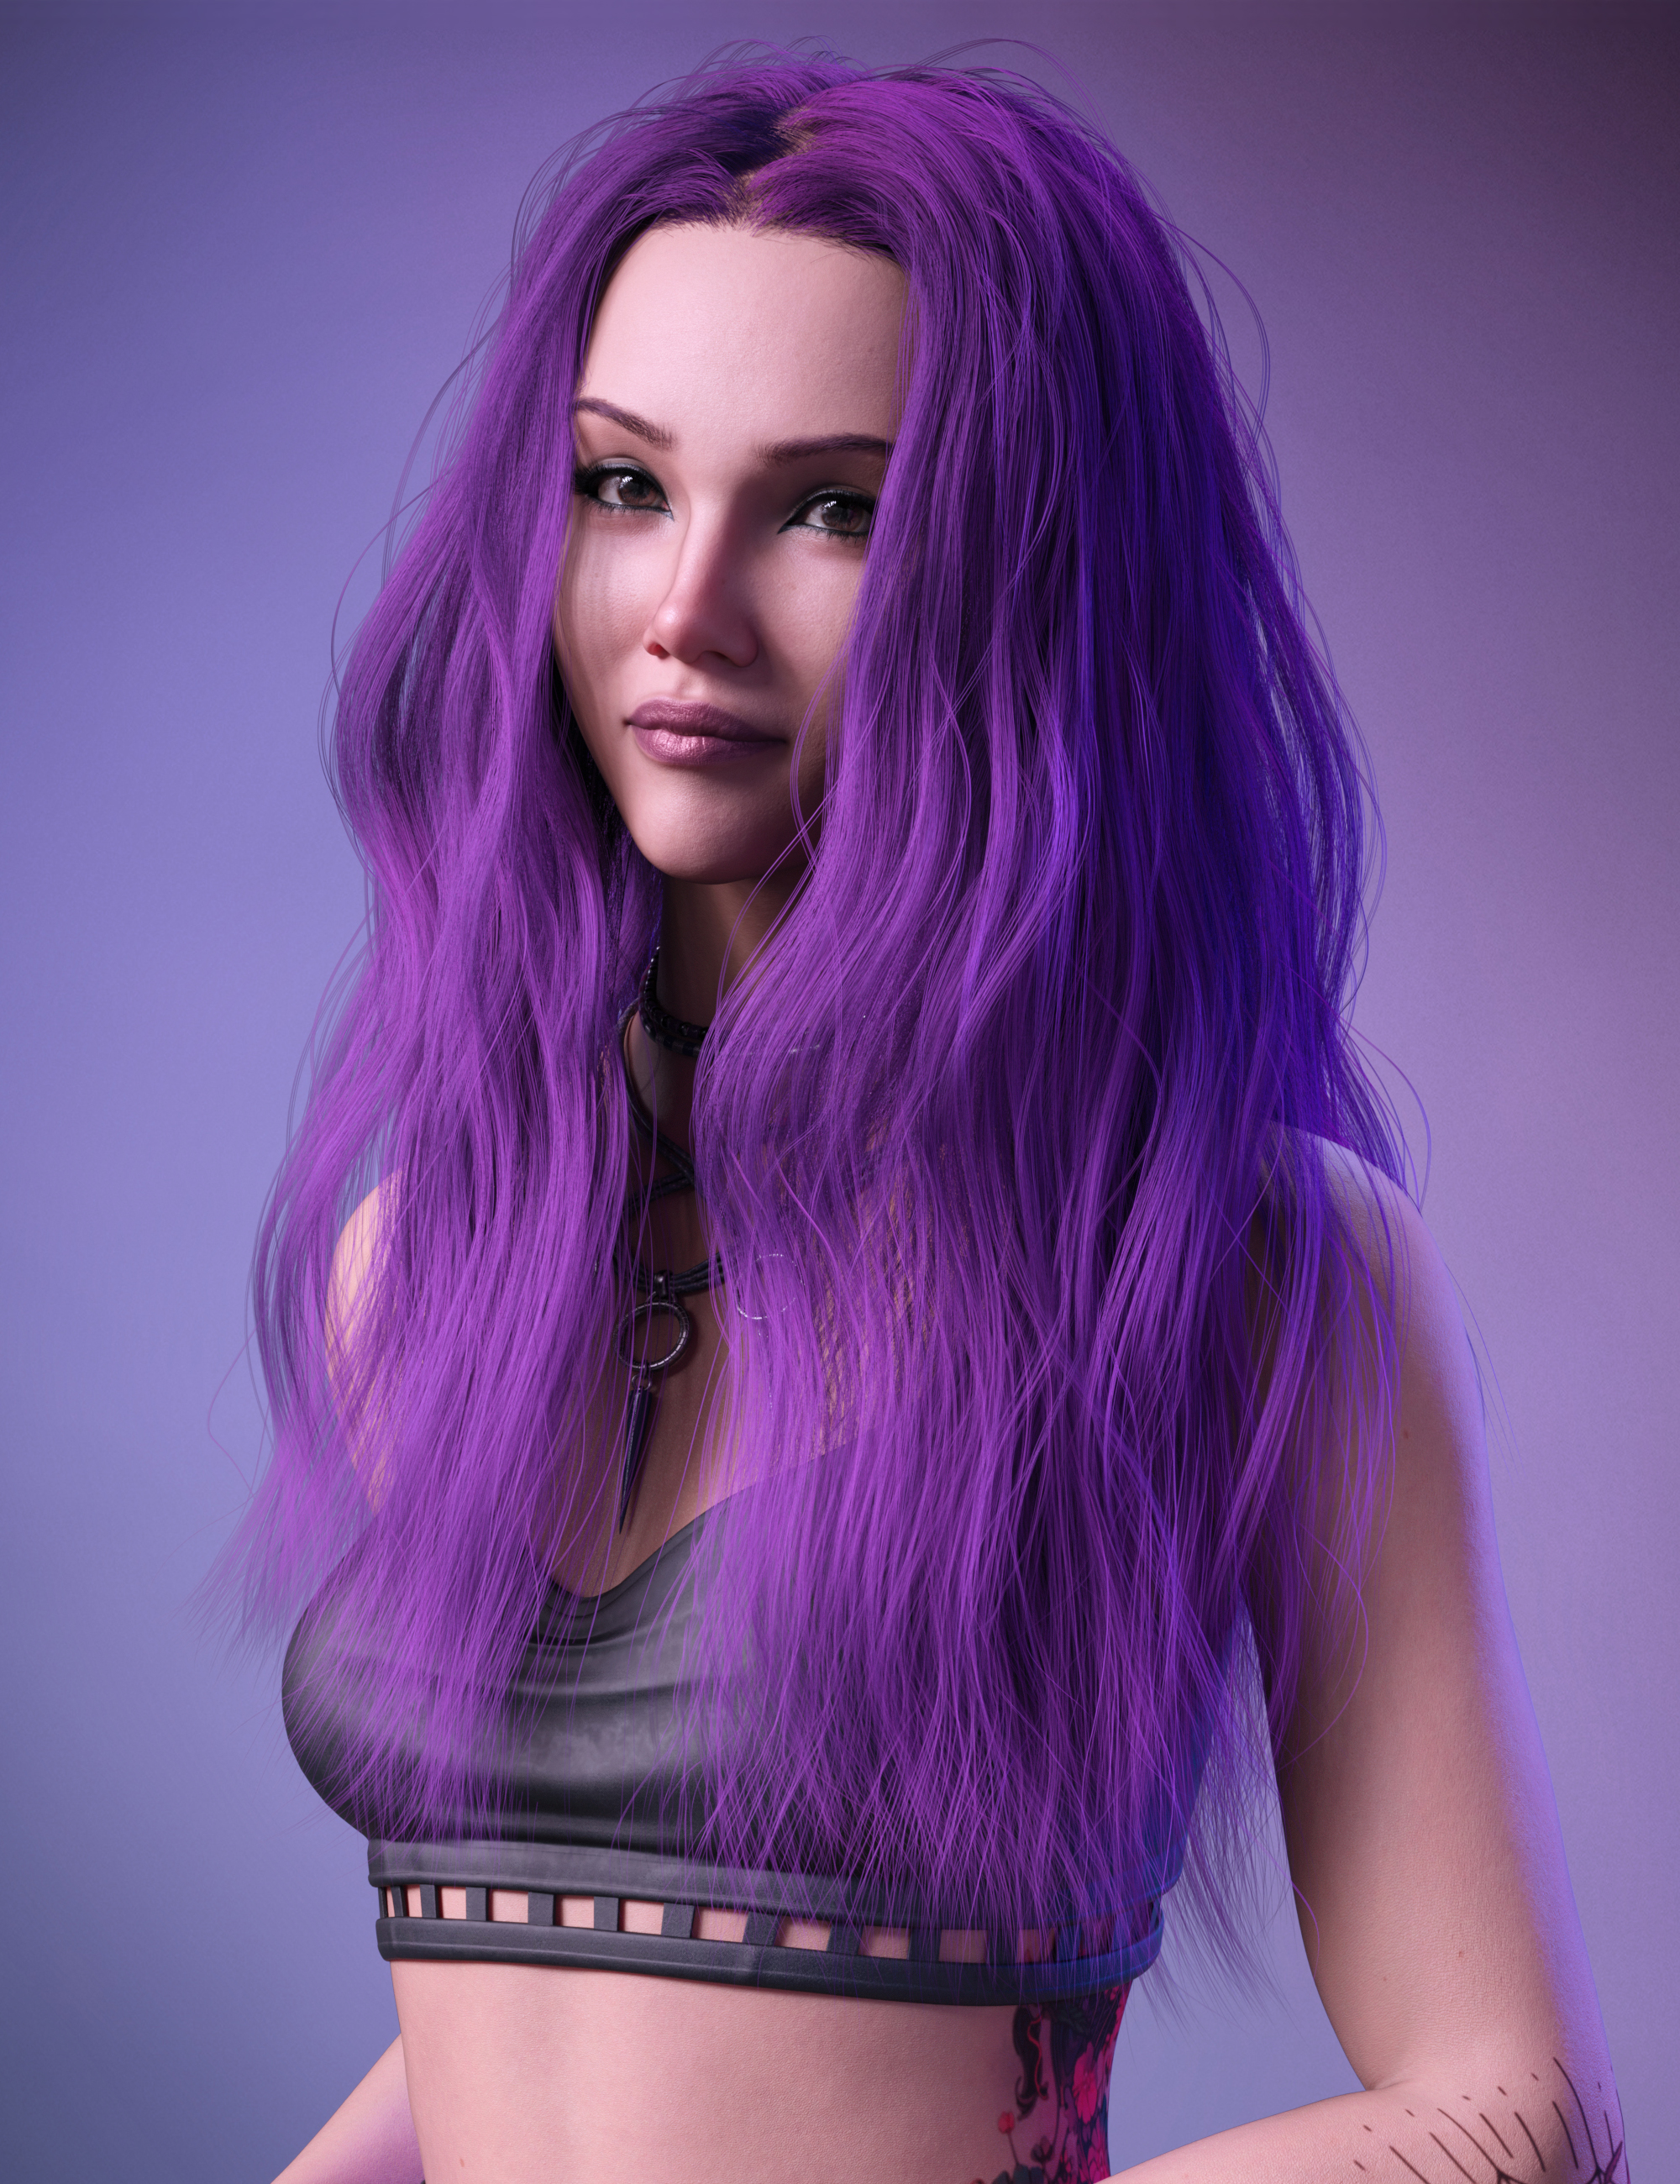
Amelia 9 HDI got the Pro Bundle. I like her, Skin detail is good and somehow different from other (white) characters, I like how she merges with other character morphs. I usually don't use the full character except for this kind of post.May add more renders on the fly. Here we go!
- Full character, 85mm, RomFX Margoth (converted from G8) 20%, lip thin -10. The hairs included are certainly not the best of the pack, but this frizz hair really moves. No edits
- Elder morph 100%, Amelia 75% 85mm. Translucency 0.75. Nathan eyes. Again, lip thin -10. Vellus Hair. How is this not attractive?
-Young adult morph 100%, Amelia 100% 85mm, lip thin -10, Vellus hair.
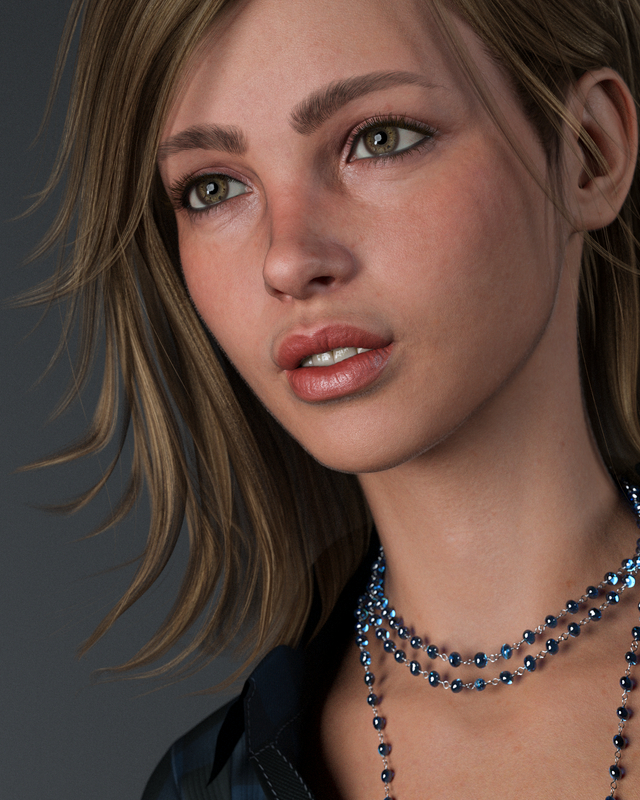
- This one was noooisy. Denoiser took away some detail, but it's just for fun, right?
 Does anyone have a solution for tis annoying problem?
Diomede said:
For Genesis and Genesis 2, it is relatively straightforward to create your own morphs.
Example.
- load default genesis 2 male in Carrara
- select the 'actor' level of the figure in the properties tray
- click the wrench to go to the modeling room
- make sure the box for smoothing is unchecked
- use the modeling tools to shape the eyelashes how you want. If preferred, as Headwax suggests, can move the eyelash meshes inside the head so out of the way. Or, just select the outer loops with smoothing and make smaller
- return to assemble room. Export the G2M (remember, no smoothing!) as an OBJ. Choose the preset for Daz Studio (morph target) from the drop down menu.
- Start that free plugin called Daz Studio. Load default Genesis 2 Male. (Optional - in parameters pane, I set resolution to Base).
- With G2M selected, choose Edit : Object : Morph Loader Pro
- See the menu for Units near top of menu (third line or so). There is a preset for Carrara! How easy is that? If you save the OBJ out of Carrara using the Daz Studio Morph preset, you can use the Carrara preset in Morph Loader Pro
- Use the menu to browse to and load your morph obj. Your morph file name should appear in the big box with an arrow next to it
- Use the little arrow next to the morph name to expand the box menu
- I change the 'make unique' option to 'Deltas Only'. You can also change where your morph will appear in the figure menu if you don't want it in the default morphs/morph loader group. You could select the 'head' for example.
- Double check the morph - find your new morph in the parameters pane (can use search box for name). Will be at 0. Dial it from 0 to 100%. In this case, the right eyelashes change shape.
----
Now follow more general procedure for saving morphs for general use.
.
Then share the morph with us. Well, maybe. Here is a morph sharing tutorial by the awesome Jay.

Nice workflow !!!
Converting G8 Clothing to G9Matt_Castle said:
MelissaGT said:
Wow, that easy huh?
This is a case where there isn't really any "easy and good". The rigging has changed so heavily between G8 and G9, you've either got to let autofit throw it all out and try to copy it from the base figure (or one of its templates - and the G9 templates are pretty good) or let a tool like the RSSY one take its guess at how to convert the original weights.
G3 and G8 were similar enough that keeping the G3 weights was generally better than autofit weights on G8, but that's not the case with G9.
I will admit that I'm not always sold on the fits the RSSY converters give me, so there are some outfits where I've also separately autofitted the item (sometimes using some smoothing to help straighten it out a bit more), then exported that mesh and used Morph Loader to overwrite the conversion morph on the RSSY version (and then save over that so it keeps that shape).
The issue I'm running into is that even G8M clothing is converting over with distinct bewbies. I gather that is because the base G9 mesh does have bewbies, so even after converting the G8M clothing and then putting it on a G9 with a male shape dialed in...the clothing still has bewbies. I like the idea of the unimesh, but it does no favors with using it to create and fit clothing to male figures.
Converting G8 Clothing to G9MelissaGT said:
Wow, that easy huh?
This is a case where there isn't really any "easy and good". The rigging has changed so heavily between G8 and G9, you've either got to let autofit throw it all out and try to copy it from the base figure (or one of its templates - and the G9 templates are pretty good) or let a tool like the RSSY one take its guess at how to convert the original weights.
G3 and G8 were similar enough that keeping the G3 weights was generally better than autofit weights on G8, but that's not the case with G9.
I will admit that I'm not always sold on the fits the RSSY converters give me, so there are some outfits where I've also separately autofitted the item (sometimes using some smoothing to help straighten it out a bit more), then exported that mesh and used Morph Loader to overwrite the conversion morph on the RSSY version (and then save over that so it keeps that shape).
Does anyone have a solution for tis annoying problem?For Genesis and Genesis 2, it is relatively straightforward to create your own morphs.
Example.
- load default genesis 2 male in Carrara
- select the 'actor' level of the figure in the properties tray
- click the wrench to go to the modeling room
- make sure the box for smoothing is unchecked
- use the modeling tools to shape the eyelashes how you want. If preferred, as Headwax suggests, can move the eyelash meshes inside the head so out of the way. Or, just select the outer loops with smoothing and make smaller
- return to assemble room. Export the G2M (remember, no smoothing!) as an OBJ. Choose the preset for Daz Studio (morph target) from the drop down menu.
- Start that free plugin called Daz Studio. Load default Genesis 2 Male. (Optional - in parameters pane, I set resolution to Base).
- With G2M selected, choose Edit : Object : Morph Loader Pro
- See the menu for Units near top of menu (third line or so). There is a preset for Carrara! How easy is that? If you save the OBJ out of Carrara using the Daz Studio Morph preset, you can use the Carrara preset in Morph Loader Pro
- Use the menu to browse to and load your morph obj. Your morph file name should appear in the big box with an arrow next to it
- Use the little arrow next to the morph name to expand the box menu
- I change the 'make unique' option to 'Deltas Only'. You can also change where your morph will appear in the figure menu if you don't want it in the default morphs/morph loader group. You could select the 'head' for example.
- Double check the morph - find your new morph in the parameters pane (can use search box for name). Will be at 0. Dial it from 0 to 100%. In this case, the right eyelashes change shape.
----
Now follow more general procedure for saving morphs for general use.
.
Then share the morph with us. Well, maybe. Here is a morph sharing tutorial by the awesome Jay.
Celebrity Look-a-Likes for 3D figures Part 4Morticia by RazzleDazzle3D at RenderHub looks like the original TV series actress Carloyn Jones
 [solved] Rigging Copyright - Clarification Please
Richard Haseltine said:
As has already been said, you can use a derivative of the rigging as necessary for add-ons. If you want to make a new figure you can rig that from scratch (bone placement, weight maps, and any required corrective morphs) but you cannot derive it from any Genesis figure, diectly or indirectly (or, in general, from any other figure not of your own creation). If it is made to work with the Genesis figures then it is a derivative, even if you manage to do it the long way rather than using the Transfer Utility.
Still not getting it. I don't really see why "use a derivative of the rigging as necessary for add-ons" which seems to be ok to do, and "derive it from any Genesis figure, diectly or indirectly" are all that different. How would I use a derivative of the rigging (of Genesis) without deriving it from any Genesis figure? Btw. I am not really asking about legal advice here, I'd probably ask the daz support in any case then.
That said, I only asked about the armature, the bones, so only the names and where in 3D space those bones are, not jcms, or any mesh, or weight maps, or anything else. That must be "a derivative of the rigging as necessary for add-ons" as far as I can tell because those are part of every figure (aka add-ons) that is being sold on third party sites out there, and to make something thats compatible with genesis 8, I need to have those.
Genesis 9 - Exclude body parts from FBMsDS will automatically make a projected morph in the clothing, if there isn't a dedicated morph for the FBM.
But you can dial the projected morph out of the shoes.
Select the shoes, enable show hidden, and click currently use, and you should see it. And then you can just dial it down.
The PA might have a dedicated morph that dials the feet back to the base.
Request for custom 3D modelI'm not someone who can help you with this request. However, have you tried any products like Face Transfer? They can get you pretty close. Face Transfer Shapes was made to help improve the results for this particular plug-in.
Daz 3D is part of

Connect
DAZ Productions, Inc.
7533 S Center View Ct #4664
West Jordan, UT 84084Licensing Agreement | Terms of Service | Privacy Policy | EULA
© 2026 Daz Productions Inc. All Rights Reserved.