-
AIUTO...CHI CONOSCE L’ITALIANO? PARTE TREDICI
Più che altro non vedo asset per alcuni prodotti:
- DAZ Dragon
- DAZ Horse
- DAZ Big Cats/Dog
- Centaur Male/Female
Li vedo abbandonati a loro stessi.
Gli asset nuovi (vestiti e capelli) sono belli, iper-texturizzati (con texture a 8K) ma privi di funzionalità... li prendi e li fai indossare alla figura e stop. Gli asset vecchi erano molto più modulari e ti permettevano di giocare molto coi morph o i settaggi (e contenevano molte più variazioni di colore), quelli di adesso hanno solo il supporto a Dforce e stop (se vuoi la colorazione diversa è venduta a parte).
Inoltre c'è questo continuo inseguire il fotorealismo.. se vuoi fare qualcosa stile anime/manga/comic, non ci sono moltissimi prodotti (devi usare i vecchi Aiko/Star/Hero per avere figure stilizzate).
L'altro giorno facendomi un giro per lo store ho visto ad esempio che ci sono molti edifici/palazzi ma sono quasi tutti uno più orribile dell'altro, magari avere 4 muri con un tetto decente potrebbe essere utile a qualche artista. Solo gli ambienti stile tunnel/corridoi di astronave sono fatti bene.
Anche figure stile robottoni (che un tempo erano molti) mancano tra le nuove uscite.
O ancora manca un prodotto per l'anatomia che ti aggiunge scheletro e organi interni al tuo G8/G8.1A livello di plugin non capisco perchè non fanno qualcosa di simile a Skin Builder per figure maschili o i G8.1.
Oppure un bell'aggiornamento dell'import da FBX, o aggiornare i plugin bridge (uno più rotto dell'altro).
O ancora un bel nuovo plugin per le animazioni facciali catturate da video/dirette cam o ancora un plugin per creare avatar virtuali per streamer.. sai i soldi che farebbero !PS domani escono i bi weekly-freebie... vedremo se saranno quasi tutti texture (come 2 settimane fa) o ci sarà qualche oggetto utile
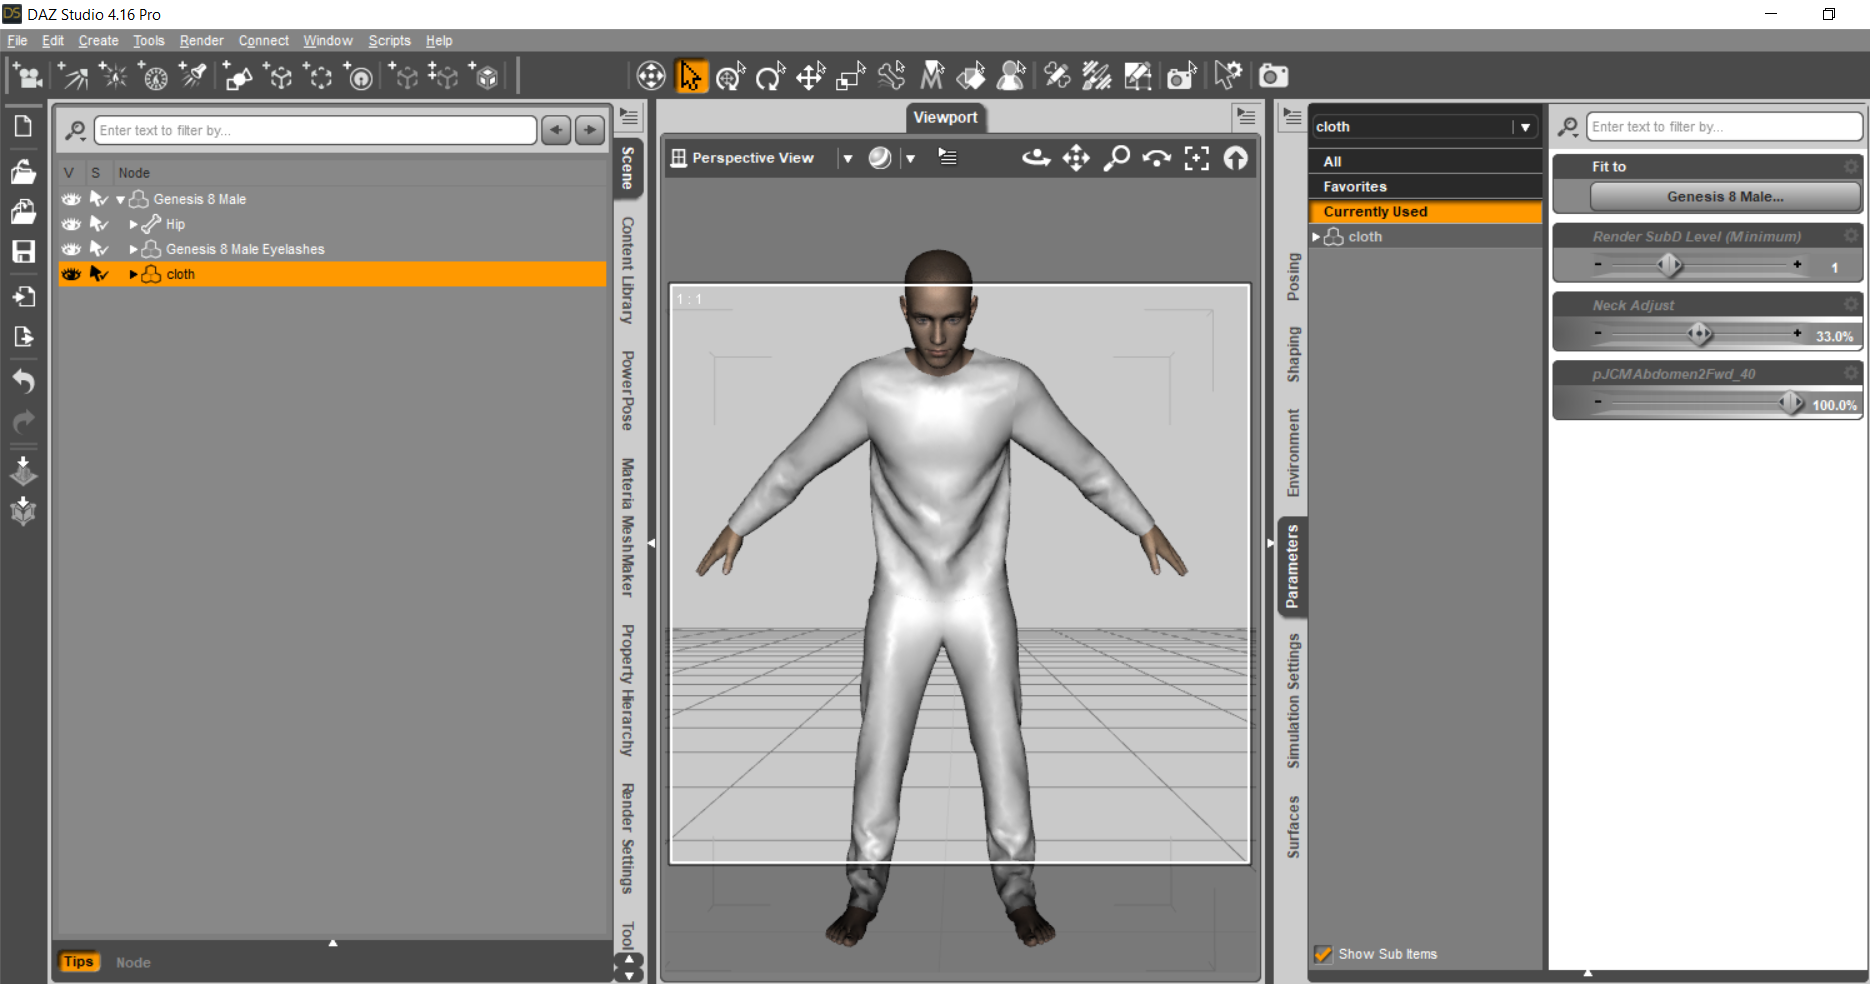
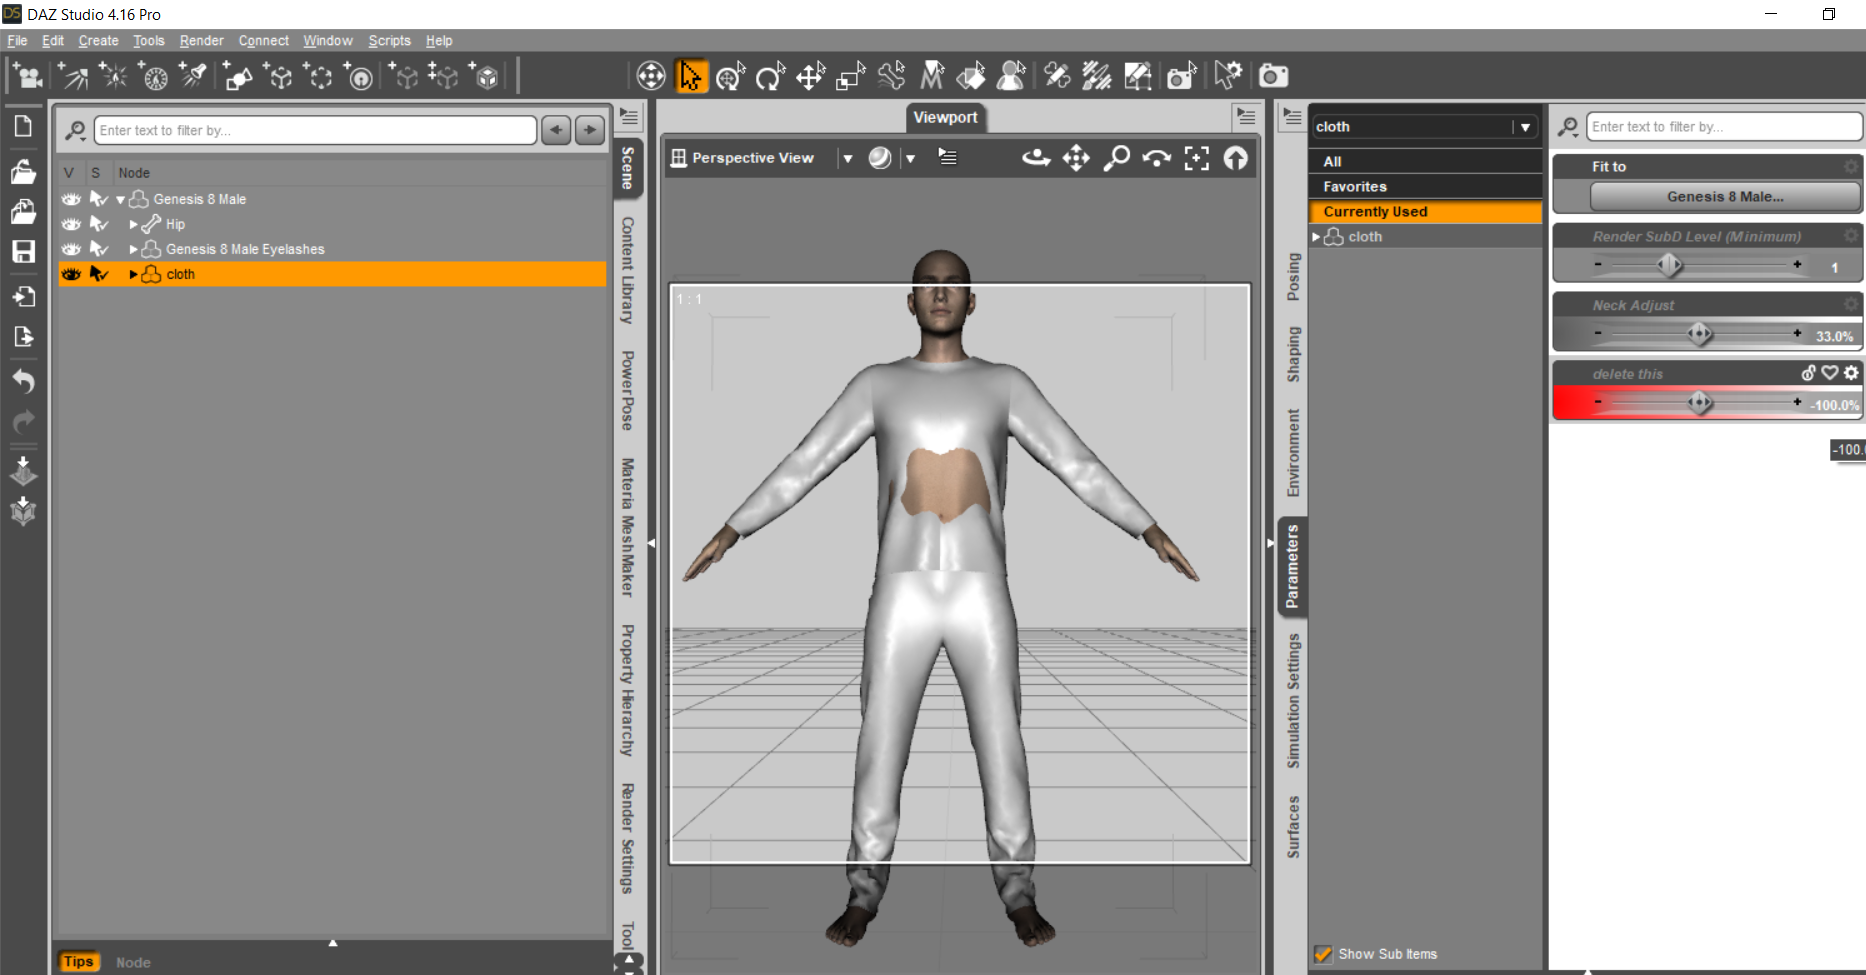
Defect on the joints of the clothesOkay you have the top and pants as one clothing piece. Might be more advantageous to make them as 2 separate pieces.
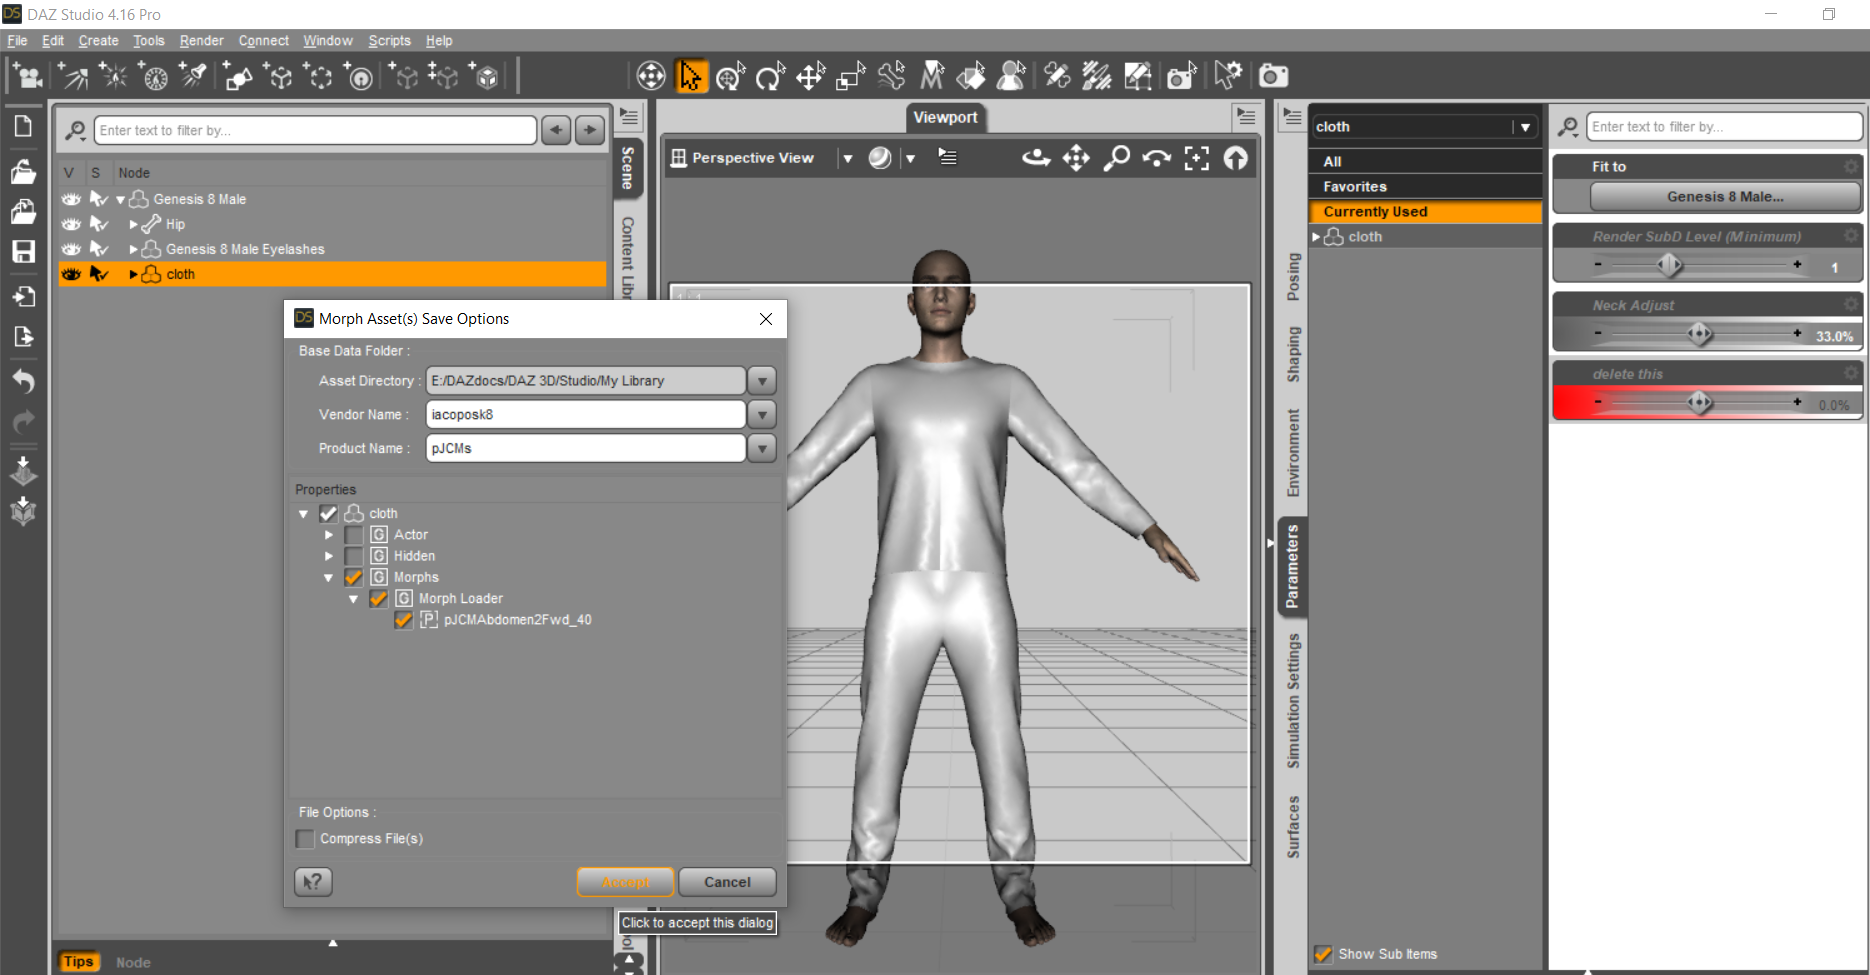
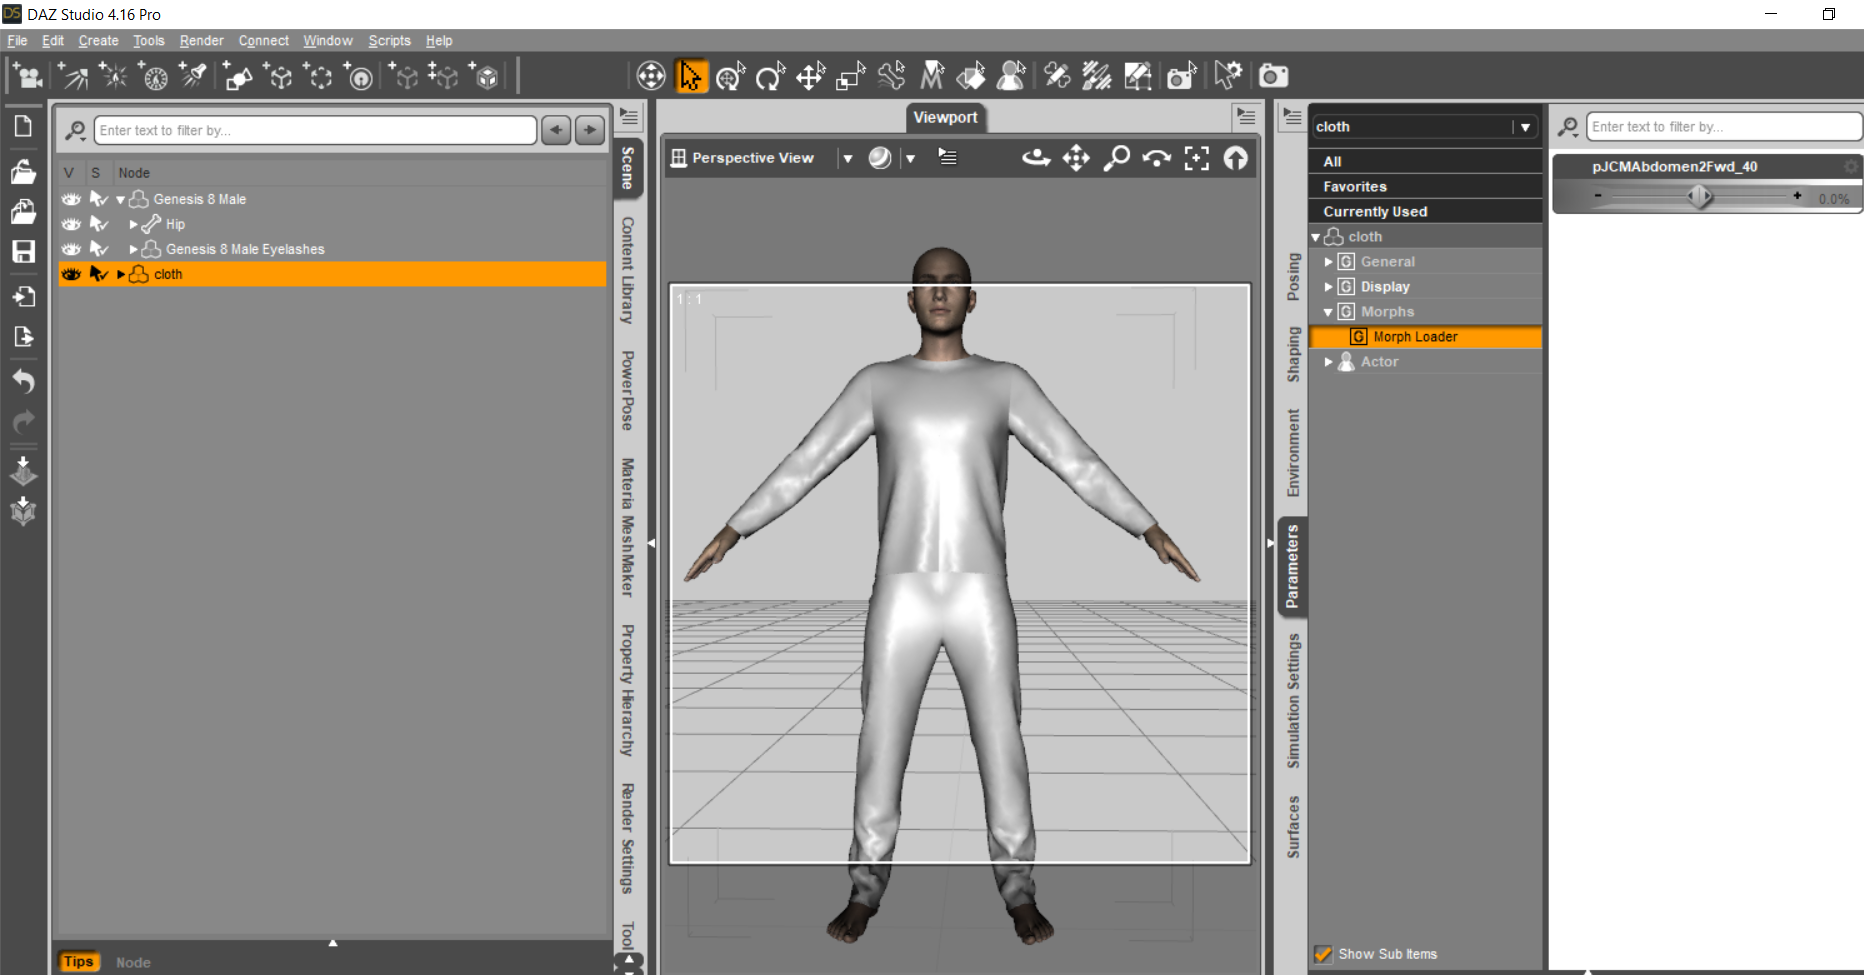
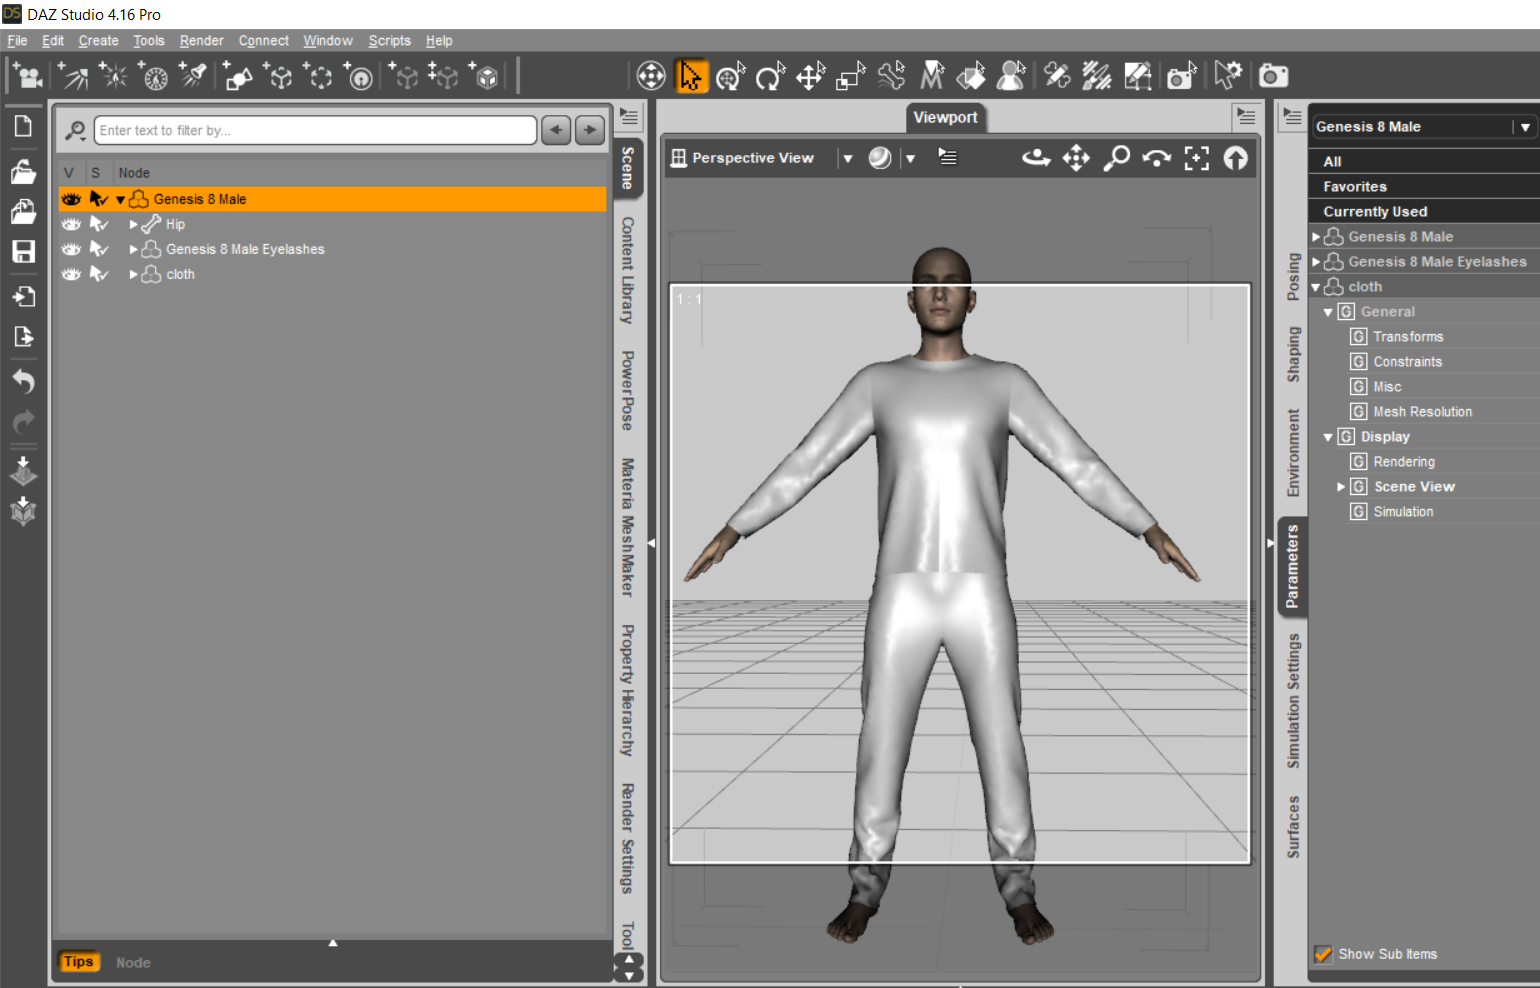
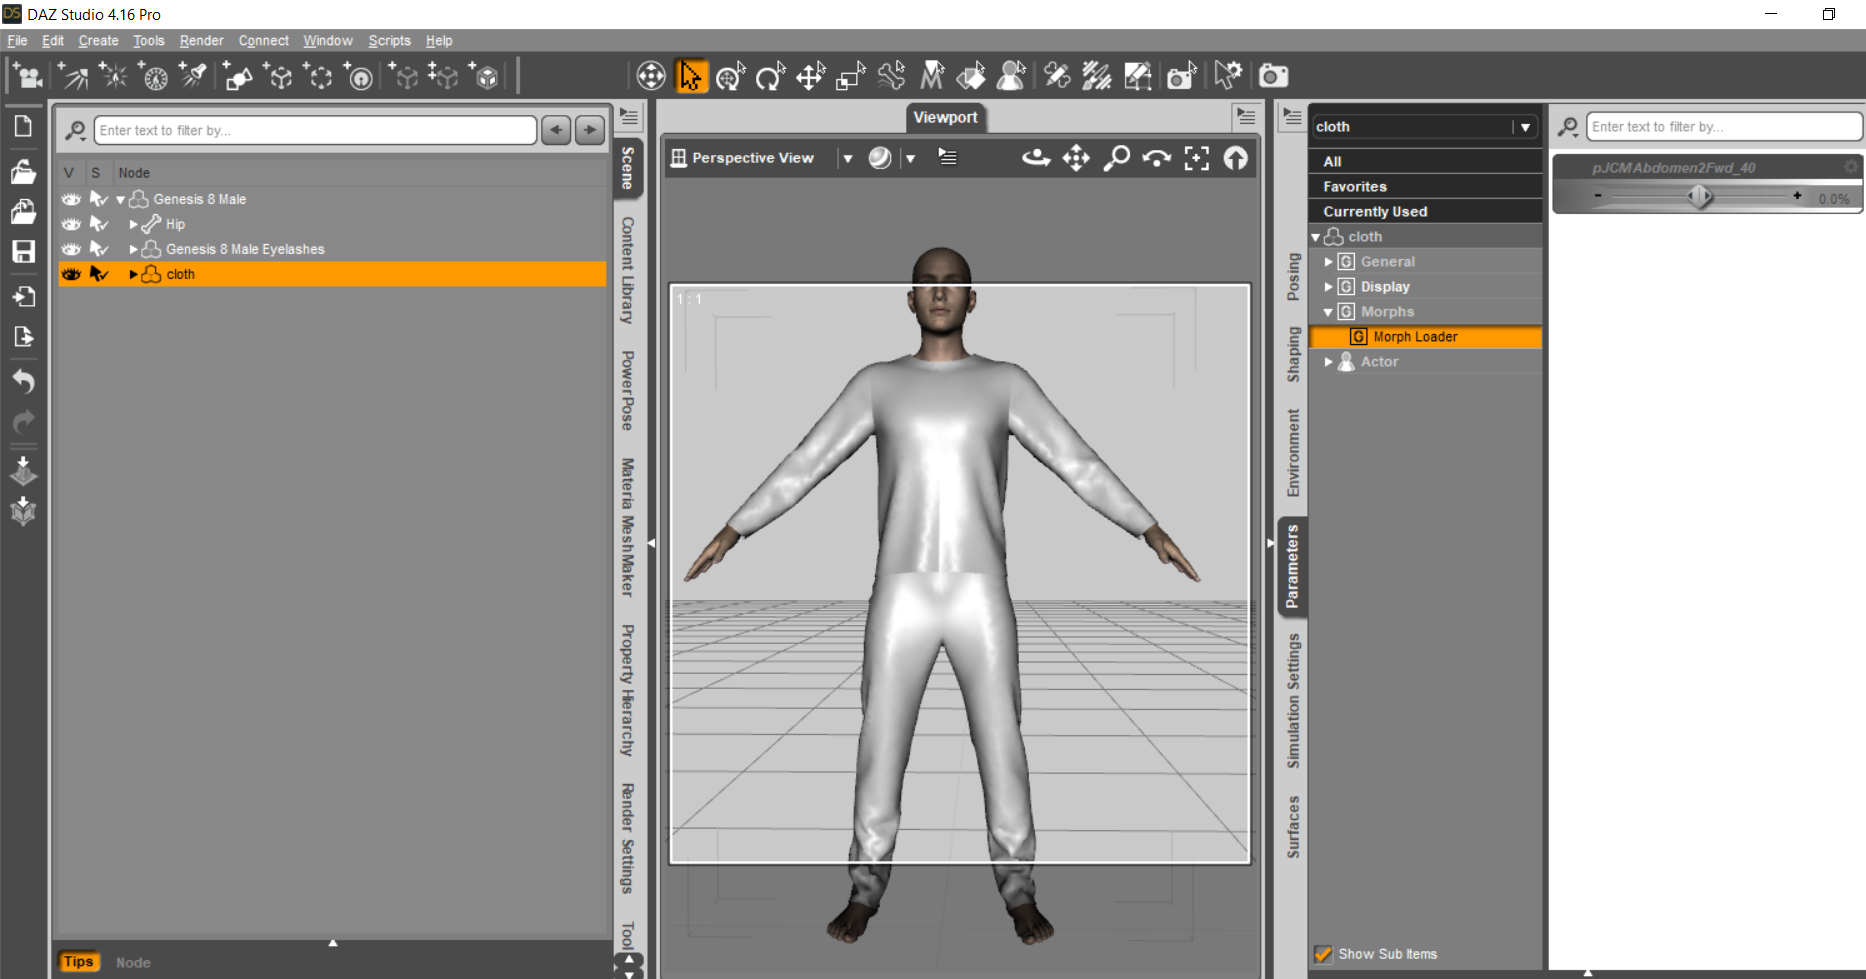
I saved the "cloth" obj as a clothing piece. And then using your morphed .obj made one pJCM. Images attached to post.
I tried to make a couple more BUT the morphed .obj files you have, some of them need to be redone. If you pose the figure, then do a straight import of the morphed .obj file, you will quickly see which ones need to be redone.

 How to print a part (torso) of a character?
TimberWolf said:
Full disclosure - I know nothing about 3D printing but I did do an .stl conversion for a colleague at another company as a favour and it worked perfectly, I'm told.
Export your geometry as an .obj but set the scale to Blender in the options. Import the .obj into Blender (File -> Import -> Wavefront), after first having deleted the default cube, camera and light, and then simply export it (File -> Export -> Stl) as an .stl. If you've used Blender before then you'll know what you're doing but, if not, you can do this with absolutely zero knowledge of how it works.
I'm not exactly sure what you mean by the measurements not being the same as I assume you're not trying to print out a life-size human torso! Do you mean the geometry gets compressed in one or more axes, something like that?
Thanks a lot for these explanations... I will convert with blender...
Yes, I want to print in real size (it's a gift for my wife), the height of the torso is 95 cm on Daz.
On Daz studio, when exporting the file (.obj)
Daz => 1 unit = 1 cm
Blender => 1 unit = 50 cmBut in the software of the 3D printing service (Materialise software) the torso is 95 mm.
How to make the 3D printing service have 95 cm and not 95 mm?
Thanks
How to print a part (torso) of a character?Full disclosure - I know nothing about 3D printing but I did do an .stl conversion for a colleague at another company as a favour and it worked perfectly, I'm told.
Export your geometry as an .obj but set the scale to Blender in the options. Import the .obj into Blender (File -> Import -> Wavefront), after first having deleted the default cube, camera and light, and then simply export it (File -> Export -> Stl) as an .stl. If you've used Blender before then you'll know what you're doing but, if not, you can do this with absolutely zero knowledge of how it works.
I'm not exactly sure what you mean by the measurements not being the same as I assume you're not trying to print out a life-size human torso! Do you mean the geometry gets compressed in one or more axes, something like that?
Downloading OptionsIn what way did it not work to copy things over? For Install Manager or Daz Central to see installed content you need the Manifests folder from the old machine; for the database-driven views (everything except the ... Formats containers in the Content Library, and not the Daz Connect container within those) you need the database from the old machine or to reimport the metadata (having exported the userdata on the old machine if you want your own files to be shown in those views).
Old DSON and file locating system question for DAZ DevsGIWP Media said:
Richard,
I had a couple of questions about your last reply if you don't mind clarifying them for me.
(1) You stated the DUF file is the only one wth real importance as the Cr2 that DSON Importer creates is really just a go-between that lets Poser understand the data in the DUF. I get that and that's exactly what I assumed was happening, but the auto_adapter files and the other locations I'm finding files are inside the Studio directories. So Studio (via the DSON Importer app) is creating these files. And when inside Poser resaving a Cr2 that's been imported, Poser cannot write to a DAZ directory --- so I'm still stuck asking why these files exist to start with. In simpler terms if Studio doesn't need anything but the files we install during product installation (say the files that come with a shirt we buy from DAZ and then install) then Studio isn't using these auto_adapter files for itself. And if DSON Importer is only directing Poser on how to use the original DUF files --- again, what are these other files doing? Surely someone with DAZ has an answer for this. If that person would supply an explanation it would making cleaning up un-needed files much more effective and safe. That's all I'm basically asking. I don't want to start random-deleting files or moving them to see if it crashes anything. If they're all just temp files, great - tell us so we can delete them. If they're needed, then an explanation is really important here.
I thought the topic was the CR2s created by the DSON Importer in the Poser folderstructure (which, as the documents linked above state, are a perfomance aid). Daz Stufio creats files for imported Poser content in the Auto_Adapted folder, again for performance reasons.
(2) You made an addendum there at the last about Poser compatible files which I guess you're talking about the Genesis 1/2 content that had Poser specific versions/addons - but that's not what I'm talking about here. I'm specifically talking about modern, DAZ-only, Genesis 3 and 8 content. I convert it over to make a Cr2 file for Poser. I go to Poser and load it using DSON Importer plugin. I swap it over to Poser format and adjust any missing textures and whatnot, then I resave it via Poser so that I don't have to readjust everything again later to use it. So in a perfect world, Studio should only be making a DUF of the conversion and a Cr2 for Poser. Poser utterly relies on a base OBJECT file(s) and its own Cr2 file (which contains all data it needs including materials as you noted). So where does the auto_adapted directory and the other various treasure troves of files come from? Poser is not making them and putting them in the Studio directories. It cannot write there. It can only write to its own directory unless you manually save something elsewhere. So again, the DSON Importer is creating and scattering files to:
Users / User Name / AppData / Roaming / DAZ3D / Studio4 / temp (which has a Cr2Assets file in it?)
My selected Runtime Directory / Runtime / DSON / auto_adapted (where all the junk accumulates...50+ GB)
These are the fils created by the importer - doing other things to the imported content after import to turn it into native content (if I am following you) has no bearing on that. What I said above was about Genesis and Genesis 2 content because that is all that Daz supports - .it still applies to any other content you export companion files for and load into Poser.
As mentioned, the auto_adapted is the biggest offender location...and we really, really need to know what's going with this so we (as users) can avoid build-up and clutter of our limited hard drives. Please inquire about this to the programmers if possible or whomever might have been on the Importer development team. Surely someone knows what is happening with this. Thanks again for your continued discussion on this and I appreciate your time and efforts.
I apologize if I offended any other users with my insistence on this thread remaining sort of closed to non-DAZ staff. I meant no insult towards anyone - and intended this request only to ensure that misinformation is not inserted or the topic does not veer off and derail the original purpose. As you all know that happens a lot in open forums. In this case the sensitivity of the discussion and topic simply needs to remain focused and informed to prevent bad information from causing users to damage their runtime files and lose data. My only intent was to preserve and protect users from invalid information.
[Released] Turbo Loader Booster Utilities [Commercial]greg_82000392 said:
In my random playing with these wonderful tools I ran into a perplexing issue. I can enable or disable the character HP Uki succesfully in the main G8F manager interface. However if she is disabled and I use the "enable and load" utility it enables some eyelashes but fails to enable the three main files. Every other character I've tried works fine. I think this is the releavant section of the log file:
2022-05-17 23:42:29.403 [DEBUG] :: Turbo Loader Open File START E:/Public Folders/Public Documents/My DAZ 3D Library/Scripts/RiverSoft Art/Turbo Loader/Turbo Loader Open File.dse
2022-05-17 23:42:29.405 [DEBUG] :: Enabling morphs for asset, Uki: L:/DAZ 3D Libraries/Character Library/People/Genesis 8 Female/Characters/Uki.duf
2022-05-17 23:42:29.449 [DEBUG] :: Find Related Morphs Hidden Morphs /data/DAZ%203D/Genesis%208/Female/Morphs/Hinkypunk/HP_PHMLashes.dsf
2022-05-17 23:42:29.449 [DEBUG] :: Morph 0 /data/DAZ 3D/Genesis 8/Female/Morphs/Hinkypunk/HP_PHMLashes.dsf
2022-05-17 23:42:29.452 [DEBUG] :: FRM: E:/Public Folders/Public Documents/My DAZ 3D Library/data/DAZ 3D/Genesis 8/Female/Morphs/Hinkypunk/HP_PHMLashes.tlOff
2022-05-17 23:42:29.453 [DEBUG] :: Hinkypunk 1
2022-05-17 23:42:29.453 [DEBUG] :: FRM: /data/DAZ 3D/Genesis 8/Female/Morphs/Hinkypunk/HP_PHMLashes.tlOff
2022-05-17 23:42:29.530 [DEBUG] :: 0 /data/DAZ 3D/Genesis 8/Female/Morphs/Hinkypunk/HP_PHMLashes.dsf
2022-05-17 23:42:29.530 [INFO] :: HP_PHMLashes
2022-05-17 23:42:29.531 [DEBUG] :: Enabling data/DAZ 3D/Genesis 8/Female/Morphs/Hinkypunk/HP_PHMLashes.dsf
2022-05-17 23:42:29.532 [DEBUG] :: Renamed E:/Public Folders/Public Documents/My DAZ 3D Library/data/DAZ 3D/Genesis 8/Female/Morphs/Hinkypunk/HP_PHMLashes.tlOff to E:/Public Folders/Public Documents/My DAZ 3D Library/data/DAZ 3D/Genesis 8/Female/Morphs/Hinkypunk/HP_PHMLashes.dsf
2022-05-17 23:42:29.533 [DEBUG] :: 1 /data/DAZ 3D/Genesis 8/Female/Morphs/Hinkypunk/HP_PHMLashes.tlOff
2022-05-17 23:42:29.533 [INFO] :: HP_PHMLashes
2022-05-17 23:42:29.533 [DEBUG] :: Enabling data/DAZ 3D/Genesis 8/Female/Morphs/Hinkypunk/HP_PHMLashes.tlOff
2022-05-17 23:42:29.534 [DEBUG] :: data/DAZ 3D/Genesis 8/Female/Morphs/Hinkypunk/HP_PHMLashes.tlOff NOT FOUND.
2022-05-17 23:42:29.581 [DEBUG] :: 2 morphs were searched for
1 Enabled (0 failed to enable)
0 Disabled (0 failed to disable)
1 unchanged
0 skipped
in 179 msecs
Note: Multiple files may exist for a morph if you use Daz Connect
2022-05-17 23:42:29.582 [DEBUG] :: Merging true
2022-05-17 23:42:29.582 [DEBUG] :: Apply Preset L:/DAZ 3D Libraries/Character Library/People/Genesis 8 Female/Characters/Uki.duf
2022-05-17 23:42:29.583 [INFO] :: Prepare asset load (open): /People/Genesis 8 Female/Characters/Uki.duf
2022-05-17 23:42:29.583 [INFO] :: Locking viewport redraw...
2022-05-17 23:42:29.583 [INFO] :: Viewport redraw locked.
2022-05-17 23:42:29.680 [INFO] :: Native format content directories: 5
2022-05-17 23:42:29.680 [INFO] :: Poser format content directories: 3
2022-05-17 23:42:29.680 [INFO] :: Other import format content directories: 0
2022-05-17 23:42:29.680 [INFO] :: Begin asset load (open): /People/Genesis 8 Female/Characters/Uki.duf
2022-05-17 23:42:29.708 [WARNING] :: ..\..\..\..\..\src\sdksource\general\dzundostack.cpp(739): DzUndoStack::clearAll() called with a non-zero hold level. Possible unclosed beginHold().
2022-05-17 23:42:29.713 [INFO] :: *** Scene Cleared ***
2022-05-17 23:42:29.713 [INFO] :: Determining missing assets...
2022-05-17 23:42:29.714 [ERROR] :: Open File Failed - Could not read file: /data/DAZ 3D/Genesis 8/Female/Morphs/Hinkypunk/Uki/Uki.dsf
2022-05-17 23:42:29.790 [WARNING] :: Could not resolve: /data/DAZ 3D/Genesis 8/Female/Morphs/Hinkypunk/Uki/Uki.dsf
Something in Uki.duf is messing the script up I think. The relevant problem is not much is found in that file for some reason, your log states:
2022-05-17 23:42:29.449 [DEBUG] :: Find Related Morphs Hidden Morphs /data/DAZ%203D/Genesis%208/Female/Morphs/Hinkypunk/HP_PHMLashes.dsf
If I run it on something like Angel HD for G8F, I get a lot more morphs found in the original file:
2022-05-18 06:20:45.979 [DEBUG] :: Find Related Morphs Hidden Morphs /data/DAZ%203D/Genesis%208/Female/Morphs/Mousso/Angel/MSO%20Angel%20Lashes.dsf,/data/DAZ%203D/Genesis%208/Female/Morphs/DAZ%203D/Base/PHMMouthRealism_HD_div2.dsf,/data/DAZ%203D/Genesis%208/Female/Morphs/DAZ%203D/Base/PBMNavel.dsf,/data/DAZ%203D/Genesis%208/Female/Morphs/Mousso/Angel/MSO%20Angel.dsf
Please PM me.
[Released] Turbo Loader Booster Utilities [Commercial]In my random playing with these wonderful tools I ran into a perplexing issue. I can enable or disable the character HP Uki succesfully in the main G8F manager interface. However if she is disabled and I use the "enable and load" utility it enables some eyelashes but fails to enable the three main files. Every other character I've tried works fine. I think this is the releavant section of the log file:
2022-05-17 23:42:29.403 [DEBUG] :: Turbo Loader Open File START E:/Public Folders/Public Documents/My DAZ 3D Library/Scripts/RiverSoft Art/Turbo Loader/Turbo Loader Open File.dse
2022-05-17 23:42:29.405 [DEBUG] :: Enabling morphs for asset, Uki: L:/DAZ 3D Libraries/Character Library/People/Genesis 8 Female/Characters/Uki.duf
2022-05-17 23:42:29.449 [DEBUG] :: Find Related Morphs Hidden Morphs /data/DAZ%203D/Genesis%208/Female/Morphs/Hinkypunk/HP_PHMLashes.dsf
2022-05-17 23:42:29.449 [DEBUG] :: Morph 0 /data/DAZ 3D/Genesis 8/Female/Morphs/Hinkypunk/HP_PHMLashes.dsf
2022-05-17 23:42:29.452 [DEBUG] :: FRM: E:/Public Folders/Public Documents/My DAZ 3D Library/data/DAZ 3D/Genesis 8/Female/Morphs/Hinkypunk/HP_PHMLashes.tlOff
2022-05-17 23:42:29.453 [DEBUG] :: Hinkypunk 1
2022-05-17 23:42:29.453 [DEBUG] :: FRM: /data/DAZ 3D/Genesis 8/Female/Morphs/Hinkypunk/HP_PHMLashes.tlOff
2022-05-17 23:42:29.530 [DEBUG] :: 0 /data/DAZ 3D/Genesis 8/Female/Morphs/Hinkypunk/HP_PHMLashes.dsf
2022-05-17 23:42:29.530 [INFO] :: HP_PHMLashes
2022-05-17 23:42:29.531 [DEBUG] :: Enabling data/DAZ 3D/Genesis 8/Female/Morphs/Hinkypunk/HP_PHMLashes.dsf
2022-05-17 23:42:29.532 [DEBUG] :: Renamed E:/Public Folders/Public Documents/My DAZ 3D Library/data/DAZ 3D/Genesis 8/Female/Morphs/Hinkypunk/HP_PHMLashes.tlOff to E:/Public Folders/Public Documents/My DAZ 3D Library/data/DAZ 3D/Genesis 8/Female/Morphs/Hinkypunk/HP_PHMLashes.dsf
2022-05-17 23:42:29.533 [DEBUG] :: 1 /data/DAZ 3D/Genesis 8/Female/Morphs/Hinkypunk/HP_PHMLashes.tlOff
2022-05-17 23:42:29.533 [INFO] :: HP_PHMLashes
2022-05-17 23:42:29.533 [DEBUG] :: Enabling data/DAZ 3D/Genesis 8/Female/Morphs/Hinkypunk/HP_PHMLashes.tlOff
2022-05-17 23:42:29.534 [DEBUG] :: data/DAZ 3D/Genesis 8/Female/Morphs/Hinkypunk/HP_PHMLashes.tlOff NOT FOUND.
2022-05-17 23:42:29.581 [DEBUG] :: 2 morphs were searched for
1 Enabled (0 failed to enable)
0 Disabled (0 failed to disable)
1 unchanged
0 skipped
in 179 msecs
Note: Multiple files may exist for a morph if you use Daz Connect
2022-05-17 23:42:29.582 [DEBUG] :: Merging true
2022-05-17 23:42:29.582 [DEBUG] :: Apply Preset L:/DAZ 3D Libraries/Character Library/People/Genesis 8 Female/Characters/Uki.duf
2022-05-17 23:42:29.583 [INFO] :: Prepare asset load (open): /People/Genesis 8 Female/Characters/Uki.duf
2022-05-17 23:42:29.583 [INFO] :: Locking viewport redraw...
2022-05-17 23:42:29.583 [INFO] :: Viewport redraw locked.
2022-05-17 23:42:29.680 [INFO] :: Native format content directories: 5
2022-05-17 23:42:29.680 [INFO] :: Poser format content directories: 3
2022-05-17 23:42:29.680 [INFO] :: Other import format content directories: 0
2022-05-17 23:42:29.680 [INFO] :: Begin asset load (open): /People/Genesis 8 Female/Characters/Uki.duf
2022-05-17 23:42:29.708 [WARNING] :: ..\..\..\..\..\src\sdksource\general\dzundostack.cpp(739): DzUndoStack::clearAll() called with a non-zero hold level. Possible unclosed beginHold().
2022-05-17 23:42:29.713 [INFO] :: *** Scene Cleared ***
2022-05-17 23:42:29.713 [INFO] :: Determining missing assets...
2022-05-17 23:42:29.714 [ERROR] :: Open File Failed - Could not read file: /data/DAZ 3D/Genesis 8/Female/Morphs/Hinkypunk/Uki/Uki.dsf
2022-05-17 23:42:29.790 [WARNING] :: Could not resolve: /data/DAZ 3D/Genesis 8/Female/Morphs/Hinkypunk/Uki/Uki.dsf
The Marvelous Designer ThreadIs it just me, or is MD's Alembic export garbage? So far, my only recourse has been to export the entire outfit as an OBJ to get the polygon selections, then export the animated outfit as an Alembic, then import both into C4D, copy the polygon selections from the OBJ to the Alembic in order to texture it. There also doesn't appear to be a sensible way to export individual components. I know it's not a problem with how C4D reads Alembic files, because I can export Alembic out of DS using Sagan and get every item separated out with its polygon selections.
FBX morph export rulesI think I'm starting to understand...
i' just trying to import my used morphs into iClone character creator 3.
how did you choose names for those rules? it looks like everything starts with a "." followed by a PAs name or function...well, except i3D, which has an underscore.
only rules i have are;
head. = bake
.CTRLVS = bake
Final Anything = bake
head. is the only one i added so far and i don't known if its doing anything
FBX morph export rules
Like much of DS, there's little to zero useful written documentation on this topic. That being said, it can be decyphered. Eventually. There'll be some needed experimentation depending what you import into.First off, you can export a Posed character, but you'll have much more functionality if you use the Zero pose. I also select and Memorize the figure FIRST; pose and shape and set Mesh Rez on all to Base. Again, no documentation so don't know if I need to do all, but is quick & works.
For characters, I actually make two or three exportings. One, for what I call the expressivs; facial hair, eyebrows, eyelashes, beards, etc. The 2nd for wardrobe, head hair, attatchents such as eyeglasses, rings, ...
Be aware that some items such as complex har (Ponytails and such) add bones to the base heirarchy.
Beyond that, it's mostly setting the rules syntax so you get what you want w/o an excess number you don't want. Morphs are what increase the file size. DS doesn't have a means to to selective specify what morphs specifically for what item get exported, when you have multiple items, other than multiple exports and a different list. Hair can bloat up to over triple its size if you don't, putting it over 2Gb and making it an invalid, unopenable object.
Be very attentative to the syntax. Check your list for every item that you got what you wanted and minimum if any unwanted. A "," instead of a ".", typos (in the product itself), that sort of thing.
Put your Ignores at the top of the list, below the Exports. Lastly, the CSV list you can export is a simple text file.
I'm sure there's more I'm forgetting, that should get you going.
(Don't ya just love th 404 interruptions as your about to post?)
Carrara Challenge #62 "Clowns and Other Circus Stuff" -Philemo_Carrara said:
I've decided to enter this challenge.
Whenever I do, I always try something new and take the opportunity to learn something.
This time, as there is a possibility to submit an animation, my take was to try to build a workflow to import animations from Mixamo. My first tests were disappointing as FBX importer/exporter in Carrara are really out of date. Therefore, I had to use a third party software. It happens I have a nice plugin for Carrara called Daz Studio.
It works up to Genesis 2. G7 and G8 have double articulations for thigh and shoulder and Mixamo has trouble with that.
So, this is how it goes.
- From the latest version of studio, export your base figure (in my case Genesis) as FBX using the latest version of the exporter.
- In Mixamo, upload a new character using this export.
- Apply the animation you want. Tune it the way you want. In Genesis, you can fiddle with the Arm space slider.
- Export it still using the latest version of FBX.
- Back in studio, import the resulting FBX and save it as a scene subset.
- Now, in Carrara, create a new scene and add the scene subset from your content.
- select the figure
- In the NLA tab of this figure, click on "create master clip"
- Drag the resulting clip in the clip tab of the browser
- You're done with this scene, you may close it.
- in your project, drag this saved clip to the clip tab of the project
- drag it from there to the NLA line of your figure in the time line. It's done.
Carrara expects translation to be on the model or on the hip. Mixamo export translation on the figure. So, if you're looping an animation, you have to use the override master clip option. The offset from previous clip part doesn't work.
terrific you are entering, your first half wip is mesmerising !!!! and thank you for that workflow!!
Diffeomorphic DAZ Importer version 1.6.0 released People talking this plugin up like its so much better than that Daz to Blender plugin, yet trying to import a scene with it has been mostly an aggravation for me. As usual, the hype was too good to be true. Apparantly, I'll never stop encountering issues regarding ASCII, whatever the hell that is. Requires some next level geek understanding to resolve it from what little I can find googling it. What the hell is with this error message I keep receiving? I'm better off suffering in silence using my CPU to render a scene using Daz Studio if this is what I have to deal with.
json error while reading ascii file
[Released] Content Wizard [Commercial]watchdog79 said:
RiverSoftArt said:
watchdog79 said:
DoctorJellybean said:
robertswww said:
@watchdog79 If the product says the product will work it Daz Studio, it may just need some tweaks to the Zip file structure, ot it could just mean that you can import the .obj prop(s). If you want to share a screenshot of what the contents of the unzipped (i.e. extracted) zip folder looks like, that might help. Basically, you want CONTENT at the top-level of the folder, and below that your Data, People, Props, Runtime, Vehicles, etc. You could try to format a copy of the extracted zip file that way, and then re-zip it and import it into CW.Also, your screenshot show that the 3rd zip file you added to Content Wizard was the Templates folder. Templates are not for smart content, so never add them. Remove all 3 of your current zip files using the (-) button. Click Save and exit CW (or at the least write down or grab a screenshot of the exact Product Name, Product ID, etc. that you used). Restart CW and import in the newly re-formatted zip file.
You should also replace the default product thumbnail image, with a thumbnail from the actual product, click "Change Product Icon" and browse to a thumbnail on your hard drive for a suitable image.
The problem here is that there are no DAZ Studio format files in that product. It contains a single .cr2 file and some Poser light and camera files.
Create a folder e.g. Prod Creation somewhere on your hard drive and create directories inside that folder with the following structure:
Vehicles/Skycruiser Albatross
and map the root folder e.g. Prod Creation in Studio. Load the item in Studio. With the item selected, click Save As - Support Asset - Figure/Prop Assets. Select the Skycruiser Albatross folder you have just created, give it a name and enter the details. You can uncheck the Metadata options since Content Wizard will create the metadata. Click Accept.
Now add the created Data and Vehicles folders to the original zip (which should be properly structered as robertswww said. Now CW should work with the updated zip.
Sorry, I was sick and I had no energy to deal with this.
I have the directories structure ready, but I struggle with the step to create a .DUF file. I do not seem to be able to load any .OBJ or .CR2 file manually. Daz Studio allows me to Open or Merge only DAZ format files. Edit: Alright, I managed to create a DUF file from the CR2 file by importing it.
Could you, please, explain to me what do you mean by "Prod Creation" and how do I "map the root folder e.g. Prod Creation in Studio"?
You see, I have only been using Smart Content until now and I have no idea how to use any other, advanced methods of content management. Renderosity store may contain some very nice products, but getting them to work is a nightmare for a clueless hobby artist like me.

I am glad you figured it out. It takes awhile to figure out everything in Daz Studio... there are a LOT of features. I am a PA and I probably know only half of DS. I lean on the help of other PAs and the forums a lot

Thanks. I love your products and the fact that you are active on the forums too, so people can reach out to you.
I can use the stock model, which comes with some sliders so stuff actually turns, retracts and such, and the model can be completely repainted with new Iray shaders. Now I basically just need to find out how to get the rotating propellers working for flying scenes.
I have a few more Renderosity products in the queue, so it might take me a while to get everything working. The advice I got in this thread will definitely help me a lot, for example with the files structure reqzured for CW to be able to work with..
You're welcome! Any questions, you know where to find me
Make Blender reveal vertecies assigned to multiple vertex groups [Solved]lukon100 said:
TheMysteryIsThePoint said:
lukon100 said:
TheMysteryIsThePoint said:
lukon100 said:
TheMysteryIsThePoint said:
@lukon100 Sorry, I just now saw this:
import bpy
o = bpy.context.active_object
bpy.ops.object.mode_set(mode = 'EDIT')
bpy.ops.mesh.select_mode(type="VERT")
bpy.ops.mesh.select_all(action = 'DESELECT')
bpy.ops.object.mode_set(mode = 'OBJECT')for vertex in o.data.vertices:
if len( vertex.groups ) > 1:
vertex.select = Truebpy.ops.object.mode_set(mode = 'EDIT')
Thanks, The Mystery.
So I assume this is a script to reveal verticies that belong to more than one vertex group.
I intuit that "len( vertex.groups ) > 1:" is the condition in which a vertex belongs to more than on vertex group.
If so, can another script be made to identify verticies that belong to NO vertex group, by the condition:
"len( vertex.groups ) = 0:" ?
Yes, your intuition is spot on, but it would be with a double equal sign, i.e. "if len( vertex.groups ) == 0:"
Awesome help from you, Mysteryis!
Now I just gotta learn how to run custom scripts in Blender. I've never done that sort of thing before.
- Right click on the bottom boundary of the 3d viewport, and select Horizontal Split. Drag it up a little bit.
- Now go to the drop down on the new window's upper left corner, and select "Text Editor" or hit Shift-F11.
- Click "Open" and navigate to the script.
- Make sure your object is selected, and in object mode.
- Click the triangle pointing to the right to execute the script.
It'll be left in edit mode, with your vertices of interest selected.
Thanks again, TheMysteryIsThePoint.
I got a chance to try the script. The "multiple vertex group" version found no veticies in my model. I guess I had none. But the "no vertex group" version found some, allowing me to fix them. Cool!
Another check in the "win" column for Blender :)
Not Getting Window (Box) to Select Morphs to ExportOK, I'm stumped and am probably doing something stupid but here goes. I am exporting Daz to Blender with Version 2.3.1 (what I belive to be the most current version according to the threads). Anyway. it works fine for posed figures, clothes, envrion and all that. But if I try to export Morphs (specific morphs is the goal). I check my little box like the attachhed picture "one". At no point does any other window open like the one pictured in picture "two"of the "select morphs" menu that I am excpecting to see (I got the pictire from one of the many tutorial videos I have watched on this trying to find a solution). Nothing happens. I have 3 monitors going and I even tried dissconecting all monitors but the main display so that I was only working with one screen to see if the window was going somewhere funky. But I couldn't find a window anywhere....nothing. Then, if I click on "accept" (some of the tutorials suggested that the "select morphs" window will not pop up until after you click "accept"), DAZ immidiately jumps to exporting and apparently tries to export every singe morph I have in Daz. I tried to let it run its course to see what would happen, but both times I did, It goes on forever and eventually makes my computer crash so hard I have to do a cold restart..So I cant even try to import it into Blender, we never make it that far.
Where's my Window? So that I can specify the few morphs I wanna take along for the ride, I have their names all copied to a little text file and everything, all ready to go. LOL
P.S. - Another related question...when I import and export assets to and from Unreal or Unity (or anything else) the highest level of detail through subdivison is Level 0, right? So is it the opposite for Daz Exporter, it seems like Level Two gives youo the most geometry (as oppposed to Level 0 which has the least) or am I just completely wrong and still drunk...?
Thanks.
[Released] Content Wizard [Commercial]RiverSoftArt said:
watchdog79 said:
DoctorJellybean said:
robertswww said:
@watchdog79 If the product says the product will work it Daz Studio, it may just need some tweaks to the Zip file structure, ot it could just mean that you can import the .obj prop(s). If you want to share a screenshot of what the contents of the unzipped (i.e. extracted) zip folder looks like, that might help. Basically, you want CONTENT at the top-level of the folder, and below that your Data, People, Props, Runtime, Vehicles, etc. You could try to format a copy of the extracted zip file that way, and then re-zip it and import it into CW.Also, your screenshot show that the 3rd zip file you added to Content Wizard was the Templates folder. Templates are not for smart content, so never add them. Remove all 3 of your current zip files using the (-) button. Click Save and exit CW (or at the least write down or grab a screenshot of the exact Product Name, Product ID, etc. that you used). Restart CW and import in the newly re-formatted zip file.
You should also replace the default product thumbnail image, with a thumbnail from the actual product, click "Change Product Icon" and browse to a thumbnail on your hard drive for a suitable image.
The problem here is that there are no DAZ Studio format files in that product. It contains a single .cr2 file and some Poser light and camera files.
Create a folder e.g. Prod Creation somewhere on your hard drive and create directories inside that folder with the following structure:
Vehicles/Skycruiser Albatross
and map the root folder e.g. Prod Creation in Studio. Load the item in Studio. With the item selected, click Save As - Support Asset - Figure/Prop Assets. Select the Skycruiser Albatross folder you have just created, give it a name and enter the details. You can uncheck the Metadata options since Content Wizard will create the metadata. Click Accept.
Now add the created Data and Vehicles folders to the original zip (which should be properly structered as robertswww said. Now CW should work with the updated zip.
Sorry, I was sick and I had no energy to deal with this.
I have the directories structure ready, but I struggle with the step to create a .DUF file. I do not seem to be able to load any .OBJ or .CR2 file manually. Daz Studio allows me to Open or Merge only DAZ format files. Edit: Alright, I managed to create a DUF file from the CR2 file by importing it.
Could you, please, explain to me what do you mean by "Prod Creation" and how do I "map the root folder e.g. Prod Creation in Studio"?
You see, I have only been using Smart Content until now and I have no idea how to use any other, advanced methods of content management. Renderosity store may contain some very nice products, but getting them to work is a nightmare for a clueless hobby artist like me.
I am glad you figured it out. It takes awhile to figure out everything in Daz Studio... there are a LOT of features. I am a PA and I probably know only half of DS. I lean on the help of other PAs and the forums a lot
Thanks. I love your products and the fact that you are active on the forums too, so people can reach out to you.
I can use the stock model, which comes with some sliders so stuff actually turns, retracts and such, and the model can be completely repainted with new Iray shaders. Now I basically just need to find out how to get the rotating propellers working for flying scenes.
I have a few more Renderosity products in the queue, so it might take me a while to get everything working. The advice I got in this thread will definitely help me a lot, for example with the files structure reqzured for CW to be able to work with..
Make Blender reveal vertecies assigned to multiple vertex groups [Solved]TheMysteryIsThePoint said:
lukon100 said:
TheMysteryIsThePoint said:
lukon100 said:
TheMysteryIsThePoint said:
@lukon100 Sorry, I just now saw this:
import bpy
o = bpy.context.active_object
bpy.ops.object.mode_set(mode = 'EDIT')
bpy.ops.mesh.select_mode(type="VERT")
bpy.ops.mesh.select_all(action = 'DESELECT')
bpy.ops.object.mode_set(mode = 'OBJECT')for vertex in o.data.vertices:
if len( vertex.groups ) > 1:
vertex.select = Truebpy.ops.object.mode_set(mode = 'EDIT')
Thanks, The Mystery.
So I assume this is a script to reveal verticies that belong to more than one vertex group.
I intuit that "len( vertex.groups ) > 1:" is the condition in which a vertex belongs to more than on vertex group.
If so, can another script be made to identify verticies that belong to NO vertex group, by the condition:
"len( vertex.groups ) = 0:" ?
Yes, your intuition is spot on, but it would be with a double equal sign, i.e. "if len( vertex.groups ) == 0:"
Awesome help from you, Mysteryis!
Now I just gotta learn how to run custom scripts in Blender. I've never done that sort of thing before.
- Right click on the bottom boundary of the 3d viewport, and select Horizontal Split. Drag it up a little bit.
- Now go to the drop down on the new window's upper left corner, and select "Text Editor" or hit Shift-F11.
- Click "Open" and navigate to the script.
- Make sure your object is selected, and in object mode.
- Click the triangle pointing to the right to execute the script.
It'll be left in edit mode, with your vertices of interest selected.
Thanks again, TheMysteryIsThePoint.
I got a chance to try the script. The "multiple vertex group" version found no veticies in my model. I guess I had none. But the "no vertex group" version found some, allowing me to fix them. Cool!
pJCM Poses - For Clothing Creators - Questionspatwojtko said:
Catherine3678ab said:
I put together a .pdf tutorial of how I made some pJCMs.
https://www.daz3d.com/forums/discussion/comment/7332281/#Comment_7332281
Hello,
I followed the tutorial well (and even translated all the text except thanks to Google translation: a text edit would have been welcome.)
So I applied what I could understand.
it still wasn't working.
And then rereading the text and this forum I saw two things.
1/ that it was necessary to put new clothing on the character to erase the settings.
2/ that we had to intervene on the general denomination during the import with "Morph Loader Pro".
here is what I did (but I admit that I don't know exactly what I did!):
And I must say: it works!
So thank you to those who helped me, I don't know if it's the right method.. But I think that the film pJCM Pose deserves to have a PDF complement or a specific additional tutorial.
I got lost in forums and youtube tutorials but you gave me a solution...Is it the right one? Anyway, this one works for me and I'm happy!Merci Catherine3678ab et merci Richard
Patrick
Maybe one day somebody will say I should not do this but 'til then, what I tend to do is:
"Create Control Property" Yes
ERC Type
Use Custom Value: Yes...............
Aside from putting more information into the file, I do not know what difference it makes to "Use Secondary Label." I used to put that when the Poser people were using a previous edition of Poser because this information would then show in Poser. {the first name didn't, at least not in my edition of Poser}.
....................
As I recall, in the making of the new morph, first I had to rename the generated morph {name and label} so that the new morph would be accepted by D/S. Also, had to dial out the generated morph so that "all" of the new morph would be applied.
Reverse Deformations: Yes. {always}
Then to save the new morph - the figure is returned to default pose, the clothing probably looks terrible UNTIL the OLD generated morph is put back to 0. The new morph is at 0. The new morph is then saved {morph asset}.
Then certainly, in deleting the clothing from the scene, and loading on a new garment, the newly saved morph should be there. The old generated morph will be gone.
And then I would work on the next morph.I will use Google Translate and hope it looks understandable. I know some French but not well enough to be a translator.
/////////////////////Peut-être qu'un jour quelqu'un dira que je ne devrais pas faire ça, mais jusque-là, ce que j'ai tendance à faire, c'est :
"Créer une propriété de contrôle" Oui
Type ERC
Utiliser la valeur personnalisée : Oui...............
En plus de mettre plus d'informations dans le fichier, je ne sais pas quelle différence cela fait pour "Utiliser une étiquette secondaire". J'avais l'habitude de mettre cela lorsque les gens de Poser utilisaient une édition précédente de Poser parce que ces informations s'afficheraient alors dans Poser. {le prénom n'a pas, du moins pas dans mon édition de Poser}.
.....................
Si je me souviens bien, lors de la création du nouveau morph, j'ai d'abord dû renommer le morph généré {nom et étiquette} afin que le nouveau morph soit accepté par D/S. De plus, il fallait composer le morph généré pour que "tout" le nouveau morph soit appliqué.
Déformations inversées : Oui. {toujours}
Ensuite, pour enregistrer le nouveau morph - le personnage revient à la pose par défaut, les vêtements ont probablement l'air terribles JUSQU'À ce que l'ANCIEN morph généré soit remis à 0. Le nouveau morph est à 0. Le nouveau morph est alors enregistré {morph asset}.
Alors certainement, en supprimant les vêtements de la scène et en chargeant un nouveau vêtement, la morph nouvellement enregistrée devrait être là. L'ancien morph généré aura disparu.
Et puis je travaillerais sur la prochaine morph.Je vais utiliser Google Translate et j'espère que cela semble compréhensible. Je connais un peu le français mais pas assez bien pour être traducteur.
Blender to Daz3d Axis issueYour import or export options in one of the applications have changed since you last did this - in Daz Studio make sure you use the same preset for both export and import.
Daz 3D is part of

Connect
DAZ Productions, Inc.
7533 S Center View Ct #4664
West Jordan, UT 84084Licensing Agreement | Terms of Service | Privacy Policy | EULA
© 2026 Daz Productions Inc. All Rights Reserved.