-
Contest ~~~ Entry Thread~~~ Because I Said So! (October 2015)
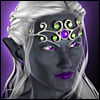
"You want me to do WHAT?" Entry #1
The Central District Subway Station
Crocodilia 1 Alligator and Caiman
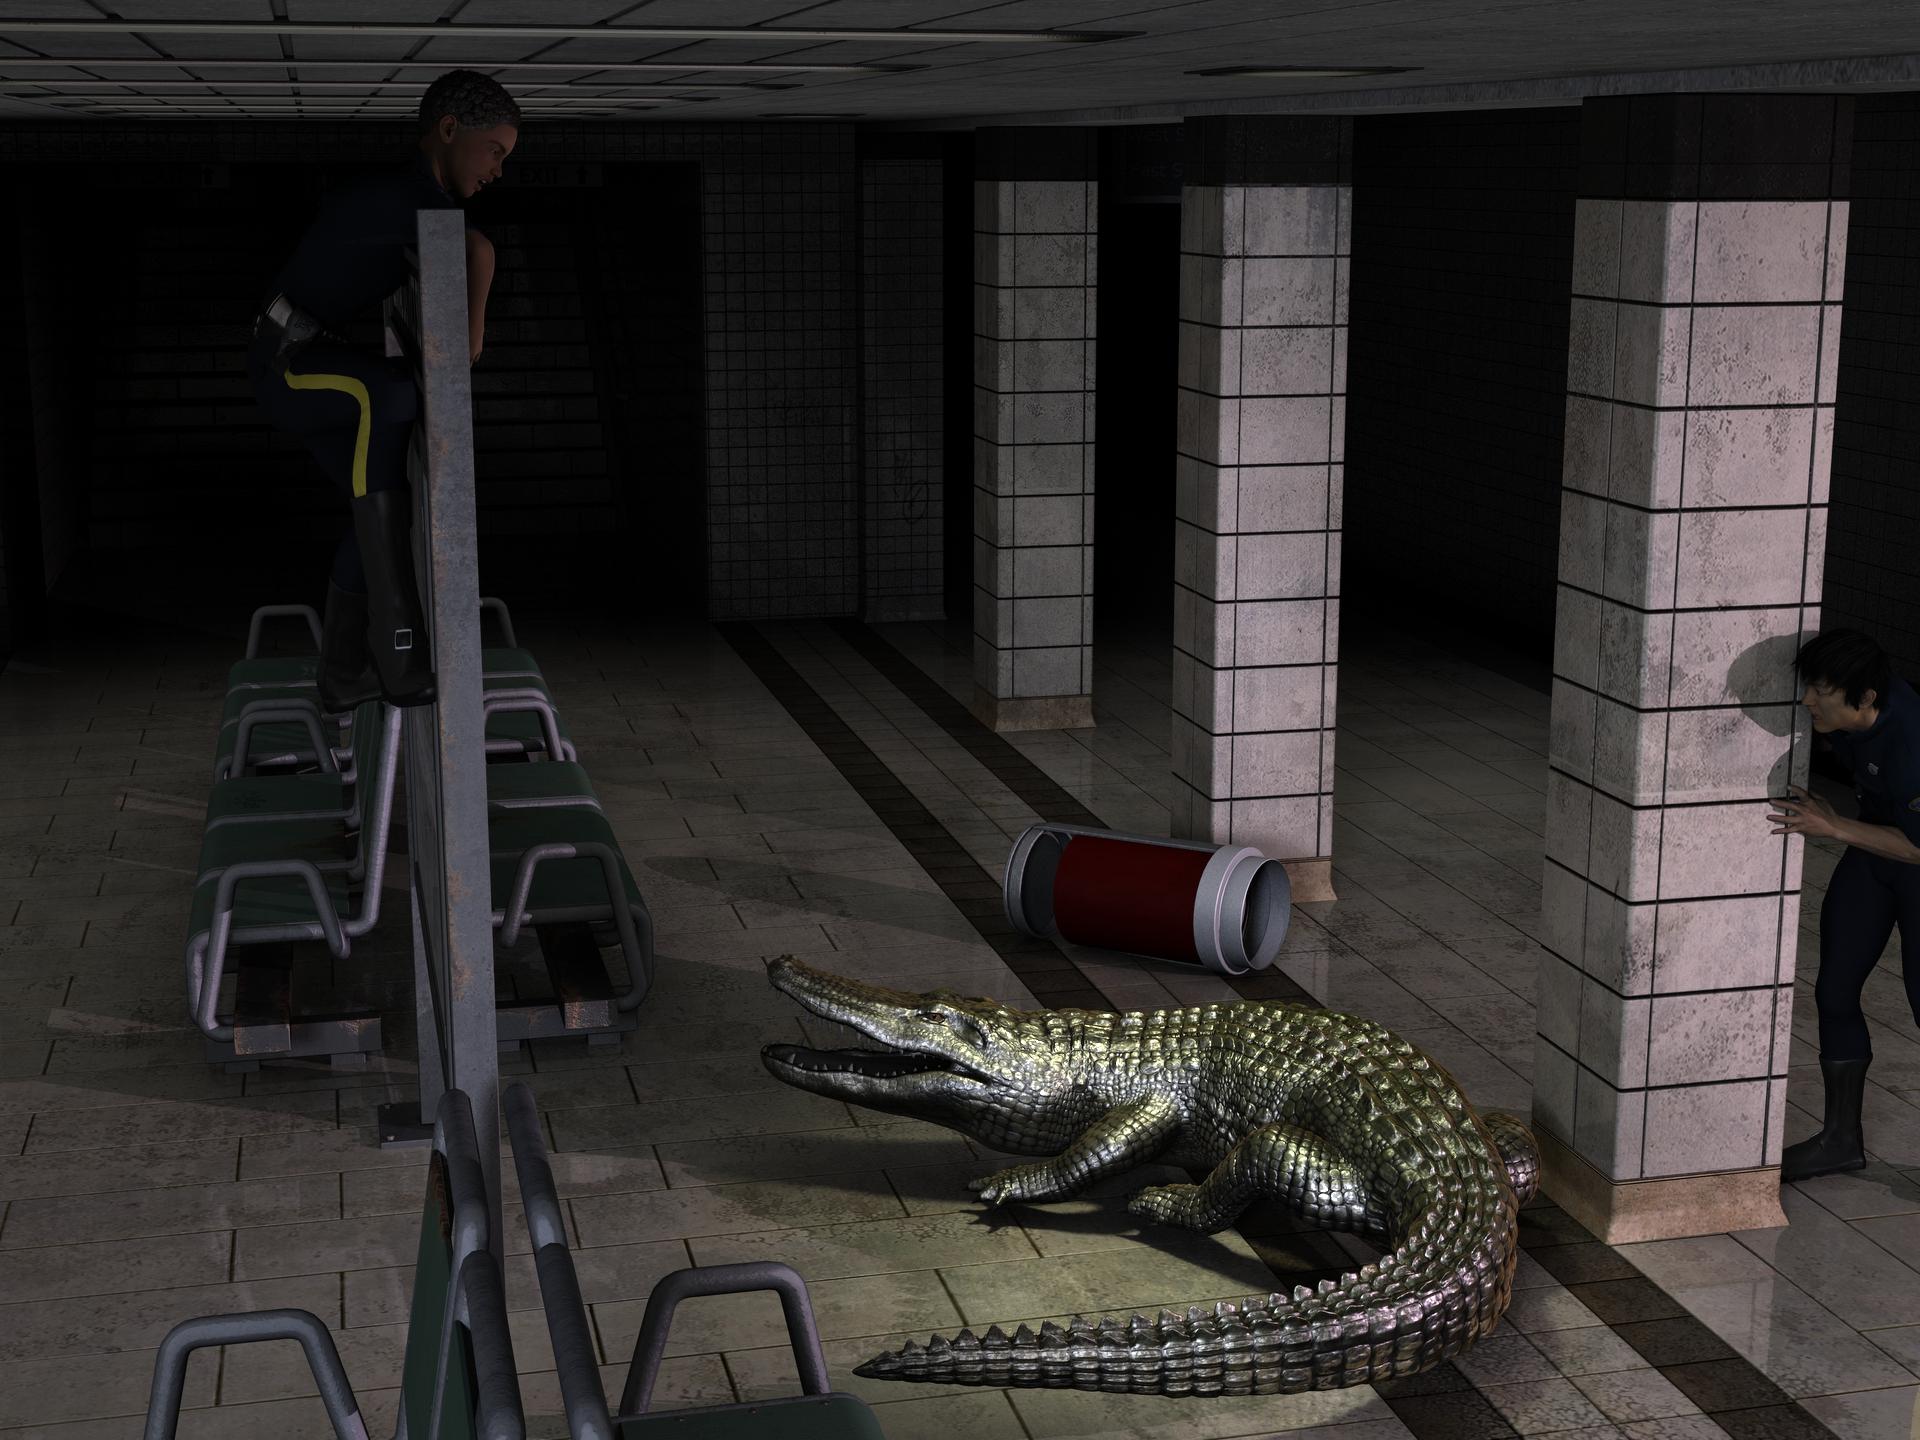
"You grab the tail and I'll jump on its head."
"What kind of a plan is that? YOU grab the tail. Jerk!"Contest ~~~ Because I Said So! (October 2015)I learned something new today. When you said "I'm Florida, and on Central time" I think - WHAT? Florida is Eastern time zone. But sure enough, it stretches into the Central zone. I just always think of Florida as being south and east of where I'm at (SW Ohio), not south and west too.
And, I'm having fun with your contest!
Well, I'm in Pensacola, so in the far West- the time changes over around Tallahassee as folks head east. I have a sister over on the east coast and I always have to remember she is an hour ahead of me. I don't know why we switch times now, I think that happens October 31st where we "fall back."
I have really gotten some chuckles with the renders. And want to thank Totte, who generously has been answering my questions behind the scenes on setting up the voting. Thank you Totte, and hope you get an entry in, yours are always fun! Going on 11pm here (10pm Daz time) so you folks have two more hours.
Contest ~~~ Because I Said So! (October 2015)I learned something new today. When you said "I'm Florida, and on Central time" I think - WHAT? Florida is Eastern time zone. But sure enough, it stretches into the Central zone. I just always think of Florida as being south and east of where I'm at (SW Ohio), not south and west too.
And, I'm having fun with your contest!
Contest ~~~ Because I Said So! (October 2015)Heads up folks, we're ONE DAY AWAY from the first contest ending- tomorrow night at midnight, Daz time. (They're in Utah, so that's Mountain Time. That site will let you know what time it is. (I'm Florida, and on Central time, so I know they are an hour behind me. It's 5:30pm here and they are 4:30pm)
The renders have been AWESOME!
Also, heads up- put on your thinking caps and have some fun- when you vote, you get the opportunity (optional) to suggest a statement for the next contest. Yes, I'm definitely running this again for November! Don't put your statements on this thread, WAIT and do it when you vote please. I'm having fun, I hope everyone participating and viewing the renders are too!
Iray candle flameTwo methods you could use, first is a point light positioned central to the flame, the second is turning the actual flame into an emissive if it's separate to the candle. For this you can iRay uber base the flame then place the flame image in the emissive colour channel in the surfaces tab, reduce the temperature to 0 so it doesn't affect the colour of the emission and play with the lumen settings.Book CoversI'm still working on the Dynamic Clothes tutorials, hopefully I can get the kilt fixed soon, but
Would love a link sounds like fun to watch!
Sorry for the delay, my laptop had a bout with what I thought was a virus, but I uninstalled my anti-virus software because it wasn't stopping anything, when I did that the crap tried to re-write my registery big time. Looks like I'm going to be on the phone to Webroot and giving them a piece of my mind and getting my money back.
But now is the time to jump into HowReRoll on Twitch.tv, they just finished their last campaign on Monday and are starting a brand new one tonight. Any past episodes can be viewed on their YouTube channel. They have all the info on their Twitch page. You can watch without signing up for a free account but to take part in the audience text chat that goes on while they're streaming live you have to have an account. If you have any questions PM me. As long as the laptop cooperates I'll be off and on during the day. Here's the link http://www.twitch.tv/howreroll They start at 7:30 Central time tonight but if you log on early the chat is usually going. I pop in for a few on chat but my son watches it through his Xbox so we have it on the big screen so I usually watch with him on that. Anyway, let me know.
Now I have been working on fun stuff. First I'm really having a hell of a time with the Heart's War cover. I'm trying to apply the suggestions - first Rose's pose and softening her back. It's tougher than I expected plus the render times have suddenly shot through the roof and I'm not sure why. I've tried rendering each element separately but that doesn't help much, and I've tried making the image smaller, that hasn't helped much either. I've checked all of my surfaces and everything is set for Iray and there's plenty of light ( I know low lighting can slow down Iray a lot). The only thing I changed was her pose, I didn't alter the materials or nothing. Anyway, here's a solo render of Bryn by himself, it took forever but I let it complete the render.
Here's a partial render of everything. After an 1 hour and 45 min stuck at 5% I got tired of waiting.

There's other stuff to fix but I'm just concentrating on the pose right now - does her back look better?
And then there's Ronan, I tried a couple of things with him. Here's one that I like except the shadows screwed it up so I cancelled the render.

But I like how the skin was turning out.
I did another one then did some post on it so you could see where I was going with it all.

I hand painted the kilt, and his hair adding some light highlights - not much since the intent is to use atmosphere which is why the background is blue.
So whatchya think so far?
Cheers,
Kath
DM's Stones of Graith QuestionIs the skydome for iRay just a HDR?
Not sure what you mean but it looks like this:
Are you sure that is for iRay and not 3DL? Just that normally sky domes like the one you pictured will not work in iRay because the light from the sun can not pass through the dome. Or is there something I am missing, eg the dome is a half dome?
It is IRay, there are two render options, the one is without skydome but the dome is still there if you choose without. Don't ask me how it works.
Thanks for the info, in the renders I think the skies look really good, which is not always the case with HDR skies, so clearly I am curious as to how it works. Maybe it is using that central light that you pointed out in your second post.
NEW! Novica & Invited Guest Contributors Tips & Product Reviews Pt 6Thanks for the Quinty link jakiblue!
LOL, I'm watching the President's Cup and Phil Mickelson's first golf shot of the day went into a lady's upturned umbrella! She had the tip down into the ground and the ball whooshed right in, between the spokes! (He got a free drop as obviously, it was unplayable.)
This is Greta For Genesis 2 Female(s). Expressions do quite nicely on her. I like the eyebrows, these have a very nice arch and are different from many characters. I do like her natural makeup option.
Casual Wear Overall For Genesis 2 Female(s) I had to go into Scene and the collarbones to get the straps to lower, and you'll probably have to use the cog and uncheck to use the limits so you can put it from -0.50 to -1.46 ish. I fiddled with it some more after this render, as they aren't quite down on the shoulders. If you can't get them on the shoulder, when you get to the collarbones in Scene, scale the straps to 98% and that will help, with Twist of -12.27 I looked at this a couple times and don't think I missed any options. I didnt see a midriff fix either, only "expand all" which is a pain frankly.
First hair is Honey Hair which has been featured before.I did not apply the Iray Uber base- the hair seems a bit shiny- almost like a gel sheen. The second hair is Charlie Hair (Genesis 2 Female) which I really like on her. It is a really fun, modern style. (RENDERING NOW. )
The background uses Mayan 2012 disc, and you can choose gold, silver, bronze.
Using the Longitude & Latitude Lighting and Render Presets for DS Iray. This one is out of the box, Tropic of Cancer/Central America, Wet Season.

 When art takes over your brain
I notice reflections a lot more than I used to, and especially when I frist started back when using raytraced reflections made your renders take a day to complete instead of an hour. I remember riding along the Baltimore–Washington Parkway and marveling at the reflections in the chrome bumper on the car in front of us.. something I'd never paided any attention to before.
As for weather... I did my time in northern California - two seasons: raining all the damn time, and dead and brown. Hated it. Now I'm in upstate New York and I love it here. I did really like central Texas though, but that also has the 4 normal seasons.
Can anyone suggest a tool that resembles Kai's Texture Explorer?Unfortunately, the last version of Kai's plugins... output what by then was low resolution textures.
I figured as much, Gedd. Thanks just the same. Seems I've inadvertently taken a few people back a bit!
To try to reply to nicstt's question of what exactly KTE did, my understanding was there was a little central window that would do something, eg. apply some math to make fractals or 2D distortions to a simple base pattern of stripes or random dots or what have you. I think clicking on the central window gave it a different random "seed" value, but clicking on any one of several "variation effects" or patterns that surrounded the central window would initiate a sort of change or deformation process... this "jumping around" selection process was infinite but you could stop and save to disk whenever you wanted. I don't *exactly* remember what a good result might have been but strange woodgrains, rainbow hues and metal bubbles were common.
Like I said I'm not really surprised that the output back then probably wouldn't make the grade for people who are used to 4096 x 4096 textures... but I was interested as to whether anyone was using a similar technique to generate big stuff in 2D, or if there was any multi-layer 2D action or actual 3-D "texture" or space-filler constructions going on.
October 2015 New User Contest (WIP-THREAD)ok,,this is what my WIP looks like after around 3 hours of rendering.The windows are now a more central part , so I'll look to see if I can find an image or hdri to put in the background to fix that.
I put a spotlight in the backroom and I can't seem to get any light from it.I've set the luminous Flux values ranging from 5k to 200 million so far with no difference in result.So something is blocking the light in that empty room.I'll solve that mystery tomorrow.
I spent a few hours on google looking for poses, but I mostly found page after page of smiling black and white close up face portraits (some where in color) that had nothing to do with full body poses, so I've not made much ground on that yet.Would someone be so kind as to link a few poses that would work for me? Thank you in advance :)
Nice progress icecrmn. So I noticed that I can use Gen 4 poses fairly safely on G2F and thought maybe this set might have something you could use: https://redeyecat.wordpress.com/2014/09/28/halloween-treat-04-haunted-house-poses-m4v4/ I also found this google search to be of interest. Hope this helps.
Waiting for the next WIP.
October 2015 New User Contest (WIP-THREAD)ok,,this is what my WIP looks like after around 3 hours of rendering.The windows are now a more central part , so I'll look to see if I can find an image or hdri to put in the background to fix that.
I put a spotlight in the backroom and I can't seem to get any light from it.I've set the luminous Flux values ranging from 5k to 200 million so far with no difference in result.So something is blocking the light in that empty room.I'll solve that mystery tomorrow.
I spent a few hours on google looking for poses, but I mostly found page after page of smiling black and white close up face portraits (some where in color) that had nothing to do with full body poses, so I've not made much ground on that yet.Would someone be so kind as to link a few poses that would work for me? Thank you in advance :)
The We Are All Prime Numbers Complaint ThreadBack in my wilder days, not really that long ago ... (brief pause for sighs of nostalgia)... I attended a gathering of like minded aging gay leather/motorcycle men many of whom were approaching retirement age. This gathering was in the forests of Pennsylvania. It was a proper camp with cabins and a swimming pool and a central covered but open air gathering place where the beer kegs had been set up. This gathering was an annual event and usually took place in the early fall, (about now actually). As we stood around the beer kegs chatting up and hitting on each other, some of us noticed that the beer spilled on the ground had attracted numerous bees or hornets who seemed to be appreciating the libations as much as we were. Somebody complained about the bees and tried to chase them away but one wise soul spoke up and pointed out that it was fall, the flowers were dead, the bees were out of work and would also soon be dead and were all eunuchs condemmed to a life devoid of sex, so they had every right to share our beer.
 Gurumarra, the Australian Aboriginal: released [Commercial]
That render is cool. Reminds me of my recent trip up to Laura dance festival. Your tree props are very central/western desert. Love the textures on the gum trees. Love the colours in the bark. They look like that all over the country. I am quietly hoping that they have the bits of peeling bark up close. Your job on the gunya (hut) looks great also.
How to change origin axis of figure/prop?Hi,
I've got a room figure that loads somewhere other than the central coordinates of the scene. I'm trying to move the room's x,z center to the scene's x,z center and rotate it to get a different orientation for the room. But all rotations are performed against the scene's center rather than the room's center, which is frustrating. I'd like to know how to make the figure rotate around it's own central axis rather than rotate around the scene's axis. I've been digging around the Studio 4.8 interface trying to figure out how to make that happen, but no success so far. I'm sure it's a simple thing, but I can't figure it out.
Any help would be appreciated.
Who said Blender was hard?There are multiple points brought up here and some have been addressed in the interviening posts. I'll try to put my spin on clarifying some of this and perhaps that will help some.
First, the issue about doing everything from scratch is a bit of a muddled issue. It is true that many of the tutorials are on how to 'build from scratch.' But, following that with the logic that Blender users therefore are focused on making everything from scratch and have no use for premade content, while seamingly logical is, well ... not.
As was mentioned, a lot of people use Blender (or any content creation tool) for modifying, kit bashing (piecing together parts of various models into a new whole,) or filling out a specific niche area like retexturing. So why, one might ask are the tutorials focused on making things from scratch? Good question. Basically, kit bashing is simply a shortcut to modeling from scratch but uses all of the same skillsets so as one learns to build from scratch, one learns to kit bash. The same goes for creating morphs on an object, using proportional editing to put a depression in a couch where someone is sitting or bringing clothing out where it is interesecting with the base model, etc..
The point is, while using Blender to modify existing models is faster then building everything from scratch, the learning process is the same. This also points out why anyone who uses Blender to build from scratch and would 'sneer' at people for kit bashing or any other use of Blender like this is ignorant and simply trying to fluff up their own ego, i.e. ignore them.
If one wants to use Blender to do something specific like morphs, they can focus on tutorials that address sculpting. If using it to do textures, then texturing, etc... It doesn't matter that the tutorial isn't 'how to bring in a DAZ figure and retexture it.' We all end up learning by finding tutorials and piecing together what we need. The start to finish type of learning process will usually only focus in the central track, that is using the tool as it's own environment, and always leave retrofitting type of workflows to the individual to fill in the blanks. There just isn't enough audience to justify custom training on a large scale, especially with how fast everything is changing in this industry now.
Don't get me wrong, I'm not saying one has to master the tool to use it at all, but one does have to get a good understanding of the basics regardless of how they are going to use the tool and then branch off into the specific use-case they have after, and that branching off might be a bit of a hodge podge of fitting together 'what can, where can.'
The blanket scenario you mentioned is a perfect example. To do that, we need to know how to import/export in our desired format, which requires understanding the tradeoffs of various formats and the specific tasks, then it requires understanding the cloth sim features of Blender. If a tutorial covers rendering and we don't plan on doing the rendering, well no one is gluing someones eyes to the tutorial and saying "YOU MUST FINISH THIS TUTORIAL." Just skip to the part we need, go through it, and try to apply it to our test environment. Then, if we have the time and feel generous (or think it might be worth selling,) create a tutorial on what we did, start to finish (import, cloth sim, export, re-import into DAZ Studio) for others.
Finally, most tutorials are broken down into covering some subset of Blender. The concept of having to learn rigging (or any advanced task) if we never plan on rigging in Blender is just a non issue as one specifically has to look for 'Rigging in Blender' types of tutorials.
I think the overlying issue here for many people is that we would like a simple tool optimized for doing speicific tasks and Blender is not that. In fact, there are very few tools like that out there at the moment. Most content creation tools are generalized tools that do many things. The ones that are specialized, like zBrush, are expensive, still complex to learn, are still few/far between, and may not address our specific niche.
In the end, there are shortcuts to workflows, but not so much to the learning process itself right now. Perhaps some future version of Cortona/Siri will build custom education modules for us.
I've tried to follow this thread but I may have lost the point. My main interest in a program like Blender is to do stuff that I can't do in DAZ Studio. So, for example, I export, sculpt and then save it for import back into DAZ Studio. You can probably tell from my mini workflow that I'm restricted to tweaking a few morphs or fixing clothing poke through.
But I get the impression that most serious Bender people would sneer at DAZ Studio and do everything in Blender itself. So I wonder why this particular discussion is going on here. I don't see much talk about what you do with your models once you have learned the interface and the modelling techniques. I don't even touch the modelling tools - I just use the Sculpt menu. Someone pointed to a tutorial about making towels. I'd love to be able to make somethihg simple, like a blanket the conforms to a person on a bed or a couch. I'd like to be able to make that in Blender and use it in DAZ Studio but most of the tutorials I've seen about Blender only describe how to do it all in Blender, right through to the final render. Yet, I am aware that importing an object from Blender is only the first step in getting that object to be what you want it to be in DAZ Studio. Then there is another learning curve for rigging and weight mapping, etc., etc.
In short, Blender doesn't seem to be for the occasional user in the way that Hexagon is for some people (not for me because it crashes on my Mac within a few minutes). So when you ask, who says Blender is hard? Well, I do for one.
Studio. Is there a way to stop a child scaling with a parent?Hi all. I'm creating some props from various .obj files and it makes sense fo loactions and relationships to parent some to others. But if I want to adjust eg the height of a table top by scaling Y all the children scale similarly. I'd like to be able to turn that off if possible. Any clues, or is it so central that it just is.
I work around, is to create a morph for the change wanted, but I'd hoped to use the native functions.
All suggestions welcome. :)
Rayn for G3FThe central 'chest bump' is a constant problem with dialing in any shape which takes the figure from having breasts -to flat chested.
Dial up the 'breasts gone' morphs and I garrentee it will occur on any clothing, that does not have a custom morph in place for that dial.
There is virtually nothing 3DU could have done to avoid that one.
Generally though, its a tricky one, clothing vendors can make custom morphs to support certain figures which they have bought (and are available during development of a clothing set,) but it is impossile to cover ALL the character sets and shapes people create.
I find that its when verts have strayed too far north or south of their orginal location that it really starts to fudge an out fit..
So my personal plea to all character makers would be: when working on the body please, please try to avoid shifting verts up or down along the vertical Axis (Y Axis in DS) as much as possible when sculpting. Espcially keep it minimal around upper chest and neck where most clothing ends And also the the hips, lower abdomen where it can mess up anything that isn't a dress.
I dont know to what extent those who make character shapes, test a selection of outfits on their character shapes. but they must do it on some level, even if its just for promo work.
Like wise there is a rather large list of practices that clothing vendors need to follow, to keep their outfits as flexible and as distortion free as possible.
Captain's Ready Room first in a new series?true, in most hard sci-fi the bridge is in the deepest and most protected portion of the ship, and I completely agree with this approach (also in a lot of instances, there will be a 2nd bridge manned by the XO and a standby crew in another highly protected spot in case the main CIC is lost in battle). But I still see nothing wrong with having a 'main' view screen that the crew is oriented towards, with a captains chair situated centered, raised and behind the row of command consoles for pilots, weps, sensors, shields, etc. The captains chair should also be larger to have extra functionaility built in so the captain (or whoever is standing watch) can virtual monitor any other workstation at will. I hate to admit this because Star Trek isn't one of my favorites, but I'm betting subconsciously the bridge design template from that is probably what informs my perception of what feels 'right' for a cruiser-sized starship. I just wonder why we don't see this design more often in the poser/daz/carrara 'verse.
I recently picked up the UEF Arachnid in the sales, and I've got to admit I very much like it, I just wished it had a full interior (and would have gladly paid through the nose for a similar sized vessel that had full interiors; I know it would be a real project to make!).
Meanwhile, Vanguard is still perhaps my favorite. Shiny!
The smart money for starship designs will always be on a buried CIC in the middle of the ship, with the classic "Bridge" as a sort of observation post during routine operations. If the bridge is interal to the hull, then it becomes possible to shift things around so a high-mount Bridge can be moved to the center as soon as a yellow alert is called, or if you want to be a little more realistic about it, you can use a lift system to drag the crew belowdecks while the computer shut down the Operating Bridge (including enviormental and consoles) and pass control to CIC.
That also means the routine Bridge crew can be shunted off to places where they'll be more useful. To operate a ship of any size in combat, you need four things: Movement, sensors, communications, and brains-- Helmsman, Operations, Comms, and Commander. One Helmsman to do the steering, another to stay on the gauges. One Comms to relay orders, another to monitor enemy comms, and maybe one more to back up the first one if the battle is going badly (or Fleet Broadcast). Operations handles sensors, usually one to handle external reports and track enemy movement, and one that watches the DC/FF sensors and prioritizes Damage Control. You typically only need one Commander, unless the poor bastard has a heart attack somewhere midstream. We already know what that one's job is, although he may keep a Strategist handy.
So at most, eight people for combat. Fire Control, Radio Central and so forth are handled elsewhere, although Radio Central would be close to hand. Fastest way to cripple a combat vessel is to destroy Radio Central, rather than the CIC. Even in today's Navy, ships of every size hang on it in combat. Sound-powered phones work in a pinch, but they're lousy if anyone's diction is the slightest bit awry. or they're either too loud (bad distortion), or too quiet (not enough power to get the message to the other end). If Radio Central is still manned and operating, even an otherwise crippled vessel can still be somewhat effective.
Shape Shift for Genesis 3 (Commercial)Hi. Skin Overlay Merchant Resource gives you more options than the one click preset version as the MR contains a Photoshop psd with layers that the preset version was created from. The preset version was made to be easier to use for users who aren't familiar with Photoshop or Gimp and who prefer automation. With regards to save and share, there is no central hub for it as we just expected people to create their own method of distribution eg via freebie sections of sites etc. With regards to communition, I prefer answering questions on one site rather than all over the place. Makes tracking questions easier. I basically favourite threads to keep track of responses incase my email notification fails.
Daz 3D is part of

Connect
DAZ Productions, Inc.
7533 S Center View Ct #4664
West Jordan, UT 84084Licensing Agreement | Terms of Service | Privacy Policy | EULA
© 2026 Daz Productions Inc. All Rights Reserved.