-
New Blog with Tips and Tricks to Help Get New Members Started!
What coupon is that, and what are you trying to purchase? Is there anything else in the cart?
It was an email from DAZ saying: 'Your Special Gift Just for you, get 5 Free Items. Use coupon code at checkout.' I put Victoria 5, Victoria 8, Underbelly Bundle, Fall wardrobe for Genesis 8 female, casual outfits for genesis 8 male.
Show Us Your Iray Renders. Part VIIMaisie for Victoria 8 and the Orangery with the interior. Just to be aware when the Interior is added the lights are all on by default.
2020-06-06 14:26:08.016 Total Rendering Time: 7 hours 2 minutes 44.75 seconds
Click on image for full size.
2020-06-06 22:57:32.137 Total Rendering Time: 35 minutes 31.16 seconds

Click on image for full size.
Novica & Forum Members Tips & Product Reviews Pt 13Maisie for Victoria 8 and the Orangery with the interior. Just to be aware when the Interior is added the lights are all on by default.
2020-06-06 14:26:08.016 Total Rendering Time: 7 hours 2 minutes 44.75 seconds
Click on image for full size.
2020-06-06 22:57:32.137 Total Rendering Time: 35 minutes 31.16 seconds
Click on image for full size.
My WIPS, renders and animations :)Maisie for Victoria 8 and the Orangery with the interior. Just to be aware when the Interior is added the lights are all on by default.
2020-06-06 14:26:08.016 Total Rendering Time: 7 hours 2 minutes 44.75 seconds
Click on image for full size.
2020-06-06 22:57:32.137 Total Rendering Time: 35 minutes 31.16 seconds
Click on image for full size.
057
Genesis figures viseme map filesi need vieme map files for genesis or victoria 3 for poser 11 or some tutorial to how create.
*Released dforce Sea Salt* Commercialhttps://www.daz3d.com/dforce-sea-salt-for-genesis-3--8-females
YAY for Strand Based Hair!!!
I'd like to include some general information and helpful tips for you to use my new sets in the store :)
What is the difference between strand based hair and fibermesh?
Strand Based Hair is generated inside Daz Studio. Fibermesh is actual mesh generated within Zbrush. Fibermesh can bring even the nicest computers to a painful crawl once it is imported into Daz Studio. Strand Based Hair is so much lighter!! There are a lot less hairs in your viewport, and the rest are generated during the render. I don't know all the magic behind that part, but its really awesome.
SBH ( Strand Based Hair ) is DYNAMIC! - Yes!!!!!!!!!!!!!. As an artist that has been working with Daz Studio and Poser for almost 20 years, this is what I always dreamed of!!!!!! Well I have also dreamed of being a millionaire too, but I'll settle for this
 .
.But what if I don't want to run a simulation? With the ones currently in the store, you do not need to run a simulation unless you want to. There are morphs that will move the hairs around like a traditional hair model too! The coolest part is that you can use the morphs before a simulation, without a simulation, and/ or after a simulation.
How do I use it? Select your figure and load the model like you normally would. Make sure that you do not have the geometry editor tool or the awesome Mesh Grabber Tool selected, pose your figure and render.
How do I use the morphs? These SBH hair models are currently in pieces to add more versatility. Selecting it in the scene tab will make the morphs appear in the parameters tab ( They are parented to the head) . Keep in mid that because these hairs are separate pieces they are grouped. So you will have to expand the options in the scene tab to find the individual pieces. Then just play with the sliders to your liking!
How do I simulate the hair? Welll there are several ways to do this, but the easiest way is to click on the simulate tab and click simulate. No extra settings needed. You can also use a timeline animation, or use the settings provided to use just gravity.
There will be so much versatility!! I have added a ton of separate surfaces so you will be able to easily kitbash these. Shut off certain surfaces to combine them with other SBH hairs orrrr maybe even combine them with some of the regular 3d hair models in the store and make a hybrid!
Technical Stuff:
Line Start With & Line End Width - This is how thick your hair is and how it tapers. I kept mine slightly thicker @ .09. and .03 to keep the amount of generated hairs to a minimum. If you want the hair to be thinner or taper more, you can turn this amount down, but oviously you will have to add more hairs.
Root Radius - This is the mode I have chosen to favor. It doesn't require painted maps or interpolation algorithms ( where hairs can go off in crazy directions for almost no good reason) and it is much more predictable for me when I import my hair from outside programs. With that said, there are no options for the cool stuff like frizz. Sorry guys :(
PS Points (per hair) - for those of you that model this is similar to CVS in a curve. It can control how smooth the hair will look. If you do a simulation and the hair just turns to a straight mess, try turning this down. The lower the setting, the more stiff the hair itself will behave and keep it's shape. Too low and you may end up with some jaggy edges. I feel like 20 to 30 is a good start for these stiffer styles.
PS Hairs (Per guide)- This is fairly self explanatory. If you want a fuller look, you can try adding more hairs. More hairs will probably require more computing power. But feel free to play with the setting.
PS Hair Tip Separation - This is a clumping option. Positive direction moves the hair away from the tip. Negative direction forms a clump at the tip.
Bias and Gain - This also has to do with clumping.
Bias is where along the hair shaft the clumping/non clumping starts. The lower the number the higher up the hair shaft the tip separation starts and vice versa.
Gain is how the bias transitions along the hair shaft.
I don't bother messing with these too much, but feel free to play with them.
PS Hairs and PR Hairs - PS hairs are supposed to be more accurate when simming than PR hairs. Also, I have found that PS hairs have a more delicate, natural look to them. PR hairs are great for adding a little extra bulk or frizz depending on how you use it. To get hair more dense looking, you can add PR hairs one or two at a time. I like to think of PR hairs as a multiplier, so you don't need to add a whole lot. If you want to make the hair appear a little more frizzy, you can play with the distribution radius and the tip separation for the PR hairs.
More Technical Questions * This will be added to as questions come up so all info can be placed in one convenient place
I want a certain section of my hair to drape more. Is there a way to do that? Yes! There are a few options you can use to adjust the draping so it suits your particular scene better. You can adjust the PS Points on the surface you select to something higher. The double dutch braids in particular are kept fairly low around 20. This keeps the whole hairstyle fairly stiff. I would start fairly high at maybe 60 and see what results you get and what you are exactly looking for. If it drapes better but its lost too much of your shape you can adjust other options as well.
You can also adjust the Local Shape Constraint Stiffness. Turning this down lower will also make the hair drape more while keeping the shape of the hair more in tact.
You can also adjust the tips of the hair with Local Shape Constraint Tip Stiffness. This will loosen up how the tips drape more. A lower number will spread those tips out more during a simulation.
All of this is a process of trial and error and what exactly you are looking for in an end result.
I want to simulate hair on a figure that is on a floor. When I sim the hair it makes an explosive mess. Help! This wasn't a question posed here yet but I know it's on the way :) You have a few options to handle this situation. If you are on an older computer that doesn't do so well with simulations, try keeping the model's head height as the same level the default figure loads in. I hope that makes sense. When a simulation is going it is essentially pulling those hairs to the end pose. Further away from default equals more pulling.
If you have a decent computer and you don't have an issue with simulations then you can simply change the simulation settings - Pose Transition Time to something higher than 1. The promos I did with Victoria on the floor all had a pose transition time of 3 - but I believe 2 probably would have done just fine.
Now go have some fun and be creative already!
I will be here checking this thread as often as I can to help, should you get stuck, have questions, or just wanna show off pretty pictures :
New tips for load Genesis and manage categoriesbecause of this post:
https://www.daz3d.com/forums/discussion/413721/genesis-8-occupies-5-8gb-of-ram1. I would like to propose to DAZ programmers, if in the new version of the program, when you double-click on a Genesis character, the program asks you if you want to load only the figure, or even just the basic morphs (head morph, body morph and morph expression if you bought them) the basic characters (Victoria 8, Gia 8, etc.) or all the morphs in the Morph folder ..... if you have dozens.
It could be very useful if you have to use many characters in the scene and you have little RAM in the PC.2. Also, if you can create a drag and drop tool to move clothes, hair, accessories, etc. on customized categories.
At the moment, you have to do one by one, instead it would be very useful to have two modules to copy the contents from the directories on HD into the categories of the database. (a bit like placing two explorers side by side and moving files)
Now I have casual clothes, fantasy clothes, uniforms all in the same folder of clothesWhat do you think? with a new version or an update.
How do I create the scripts? with what language? maybe I can do the forms.
Tagan
Genesis 8 occupies 5,8GB of RAMfor the moment in this way, I have renamed the Morphs folder to Morphs_tmp, created a new Morphs in which I have inserted only the basic morphs of Gia, London, Victoria etc.
Now it loads in about 3 minutes and does not exceed 800 MB.
then I create the scene, save it with textures for the skin and then move the morph that interests me to the right folder and apply the morph.For the moment, it's better, then I'll make a new MyLibrary2 with a little more criteria. I also find it difficult to find clothes by category.
Thank you all
The older generation: Victoria 2/3, Michael 2/3 and their children rendersThank you Kerya. Kerwyn does really good work and his puppies are the best. So I have been rendering some images of freebies and discovered that something that helps poke through on the older generation models is to apply smoothing to them as well as the clothing. Oh the tricks we have to noodle out to make things look good. Here is one of the freebies I was working on. V2 in Strapless Leotard by Specs2. Cyberpunk: BabyJane for Anastasia by Cybrea. Updo Hair SR1 by Kozaburo. V2 Character Morphs by Kimber E's Sasha V2 by Ecstasy. I made an iRay mat using those textures and Creating Victoria 2 iRay Material Files by LJStudios.
 exporting issues Little help
hello, guys today i was "exporting some characters to unreal to make some tests when i noticed which they are not being "exported" in the right wayt, i means when i do apply a "moprh" to the figure" that change is not being exported the character is being exported as "base character" for exemple if i apply the bodybuilder morph, the character remain "not bodybuilder" and is not "because of the unreal" this is happen to the fbx file too, i've tested for exemple open it on maya or blender and indeed the character being exported is on the "base body", anyone know what can be the problem???
edit: ok after make some tests i've noticed which the only "morphs it's accepting are the "characters one like, victoria and bla bla bla any morph like "make breast big or small. or pregnance or bodybuild and others is being "ignored in the "export process.
edit2: i've made new tests and somehow it's seens which my daz is only "saving" the morphs which i'm applying to the character if i "lock it", i've never needed it before, the program aways accepted export the character with any change without need to "click in lock" to save the morph change, any help here?
Product question with legacy UV'sWould this product https://www.daz3d.com/legacy-uvs-for-genesis-8-victoria-5 let you take textures for Genesis characters and put them on Genesis 8 or does it specifically have to be a V5 character?
Same question for https://www.daz3d.com/legacy-uvs-for-genesis-8-victoria-6 with Victoria 6 / Genesis 2
Thanks
Genesis 8 occupies 5,8GB of RAMNooooooooo ........It is a disaster. A real disaster. I have 3 TBytes of files starting from Victoria 3 up to Genesis 8
I prefer to buy a new pc ....
Novica & Forum Members Tips & Product Reviews Pt 13Amy-Lee (Victoria 8) dForce Flounce Bikini (G8F) dForce Bristol Hair
Note I'm not doing dForce on either of these two, just trying to get the characters rendered so I'm not using extreme poses. This is a character I wasn't sure about, and I don't like the baked on blush. That is not natural, and I wish vendors would have that option. So for me, this isn't a closeup character I will be using.
Okay, so far as not seeing hair in the viewport, about that tessalation thing-with Bristol Hair be sure and open the bones in Scene to select BristolHairDF and not the main label. I went in to Parameters and then increased the Line Tesselation under General. In case you're interested, here's two threads on that issue. One and this one.
I did a lot of work with the lips, too. They are very dry but I think it's the lighting as I'm seeing it characters rendered with this light. I changed the glossy color to 217 / 211 / 183 to a dull yellow gray, instead of almost white. Added Metallic Flakes Weight to .040, the Density to 1.40, the Thin Film 232.37 (I have no idea what that does?) I turned the Reflectivity up to .90.
 getting my v4 morphs ++ to work
Victoria 4 does not auto-load morphs the way the Genesis figures do. The simplest way is to have the PowerLoader files for the figure and the morphs installed, then when you load the figure you will get a dialogue from which you can select which morphs to load. Do note that both the base Victoria 4 and the morphs must be installed to the same content directory.
Genesis 8 occupies 5,8GB of RAMHi. I have a big problem with Genesis 8 female. I state that I have a QX9650 3GHz, 8GB RAM, Windows 7 PRO and a GTX750TI 2GB.
when I load Genesis 8 female, the PC takes about 8 minutes to load, but the worst thing is that dazstudio.exe occupies 5.8 GB of RAM, with Genesis 8 naked, I cannot load even one shoe or I saturate the RAM memory. I tried to remove all textures, bump and normal, but to no avail.
I believe, 99%, that the problem is all the preloaded morphs of the various characters (Victoria 8, Gia8, all the DAZ and Renderosity characters that I purchased).
Is there no way to download all morphs? The only thing I would like is a Genesis 8 with HeadMorph, BodyMorph and ExpressionMorph preloaded for both male and female.
Also, when I clean up the scene, the PurgeMemory script brings me 5.8 to 2.3 GB of RAM instead of 240 MB as it should be.
How do I solve? i can't buy NASA computer !!!In addition, Genesis 3 female, takes 3 minutes and occupies 1.6GB of RAM.
The PurgeMemory from 1.6GB to 740MB of RAM when I clear the scene.
Genesis 3 also has the problem of "duplicate formulas found in file" which I will solve later.At the moment with Genesis 8 I can't do anything!
Thanks I hope you can help me.
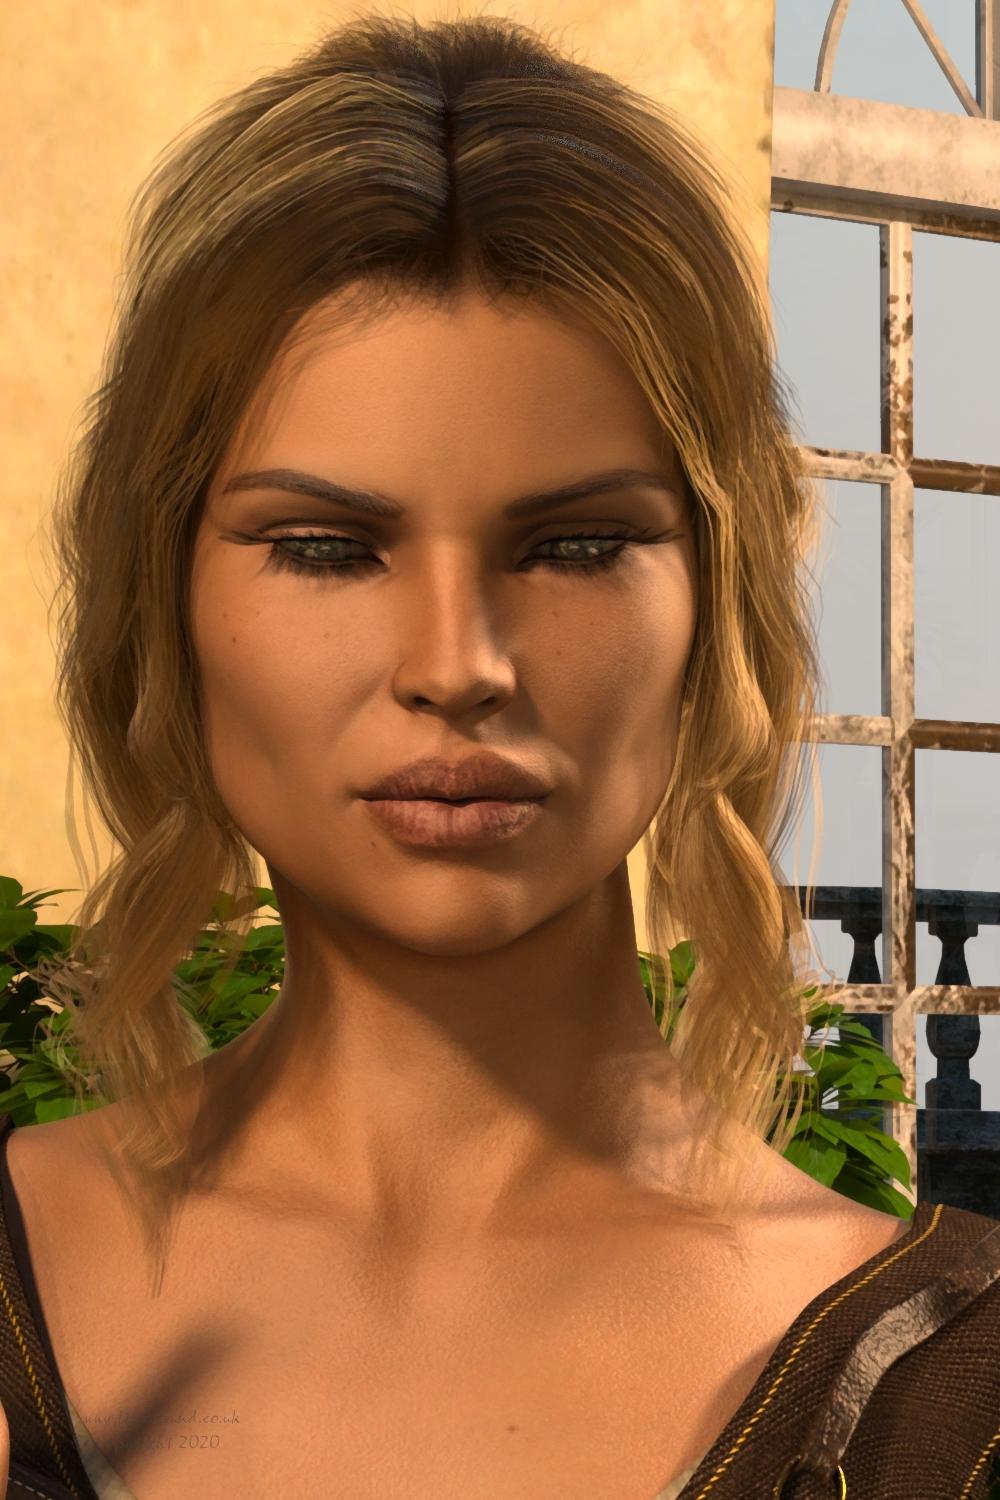
TaganGina Carano Character look-alike?Hi,
Matching a skin tone exactly can be really difficult as this depends so much on the light conditions (and in regard to a real person also on how much sunshine he/she has seen recently).
Maybe Rozy by Emris might be a choice ( https://www.daz3d.com/rozy-hd-for-genesis-8-female ). Once the Gina morph is available I could do some test renders for comparison.
P.S. Thanks for commissioning the morph creation. I'm definitely curious how the morph will turn out.
[EDIT] After some testing I believe Victoria 8 seems to be closer to Gina. I have attached the renders I made.
CJ 8 ( https://www.daz3d.com/cj-8 ) seems interesting in that regard, too. Unfortunately she's not part of my DAZ collection (yet).
Victoria 4 skin to GF8this should do the trick https://www.daz3d.com/legacy-uvs-for-genesis-8-victoria-4
About PA's Sales and RevenueThey're not going to directly tell you that but you can figure out the highest selling genre of items in the last 1000 products (they are numberically given consecutive larger product numbers) by getting a product listing and calculating the ratio of the different genres. Examples:
a) Genesis 8 Female Characters & Morphs of all sorts
b) Genesis 8 Male Characters & Morphs of All Sorts
c) Genesis 8 Female Clothing of All Sorts
d) Genesis 8 Male Clothing of All Sorts
e) Genesis 8 Female Hair of All Sorts
f) Genesis 8 Male Hair of All Sorts
g) Vehicles of all Sorts
h) Natural Environments of All Sorts
i) Architectural Environments of All Sorts
j) Architectural Props of All Sorts (eg furniture, ...)
k) Genesis 8 Female Poses
l) Genesis 8 Male Poses
m) Non-wearable Props of All Sorts
n) Animations of All Sorts
j) DAZ Studio Scripts and Plugins of All Sorts
Get the Product Number of Victoria 8 (the 1st Genesis 8 Female) and then use that to get a product listing of all products released after that and categorize them of above or using the categorization check boxes in the product menu listing with is roughly equivalent. Count the number of released products in those categories and that would almost surely be the most popular product genre (it's going to be Genesis 8 Female characters I can tell you but maybe you have better talents in other generes than sculpting females)
You can sort by "Most Popular" or "Trending" too but doing that won't really help as much as counting the total number of individual products released in the product genres. Don't count bundles as you'll be double counting some products.
Victoria 4 skin to GF8Does [a way to apply Victoria 4 skin to GF8]it exist? Or did I miss it somewhere? Can I get pointed in the right direction please? I want to convert my V4 skin textures to use on the G8Female.
Thanks all
IRAY Photorealism?Okay, now that I tested some more. I know why getting photoreal images with daz is so complicated. The thing is there is a HUGE problem with the default lights, enviroment setup and the tonemapper. The characters skins are all dark. Them, I guess, what Daz team did was to cranck up the lightning all they way. So you can't have normal objects with Daz characters because the light explodes on the normal objects. Making it impossible to make photoreal scenes, unless you put everything on the same page.
So the first thing I did was to set a white ball. Yes, the ball is actually 255,255,255 white whithout any translucency. Them set the light to illuminate and not blow up. Cahnged the enviroment intensity and tonemapper settings. And this is what I got: A dark character.
So translucency makes the character too dark, or it has been setup that way because of the strong lights, making it impossible to fine tune, every change you do to the translucency on strong lights change the whole appereance of the character.
Now that you have the lights correct, you need to "light" the skin, having the white ball as a reference. I took the translucency out of the character, making it from 0.9 to 0.2. And that left the character pale. Unfortunately, you lose a lot of the saturation. But know the light will scatter and behaves correctly and is going to be predictiable and easier to get a photoreal look.
Rhis is victoria 8 whithout any changes to texture, just the translucency drop. She is pale, and whithout saturation. But look how on the pale close up you can cleary see the detail of the mouth and the pores bumps, while on the super translucent version the details are all washed out.
Well I hope thats been helpful for someone who wants to light thing like they should be.
Please don't post nude renders - either apply some clothes or zoom in on the ehad, as in the remaining images.
Daz 3D is part of

Connect
DAZ Productions, Inc.
7533 S Center View Ct #4664
West Jordan, UT 84084Licensing Agreement | Terms of Service | Privacy Policy | EULA
© 2026 Daz Productions Inc. All Rights Reserved.