-
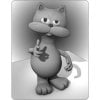
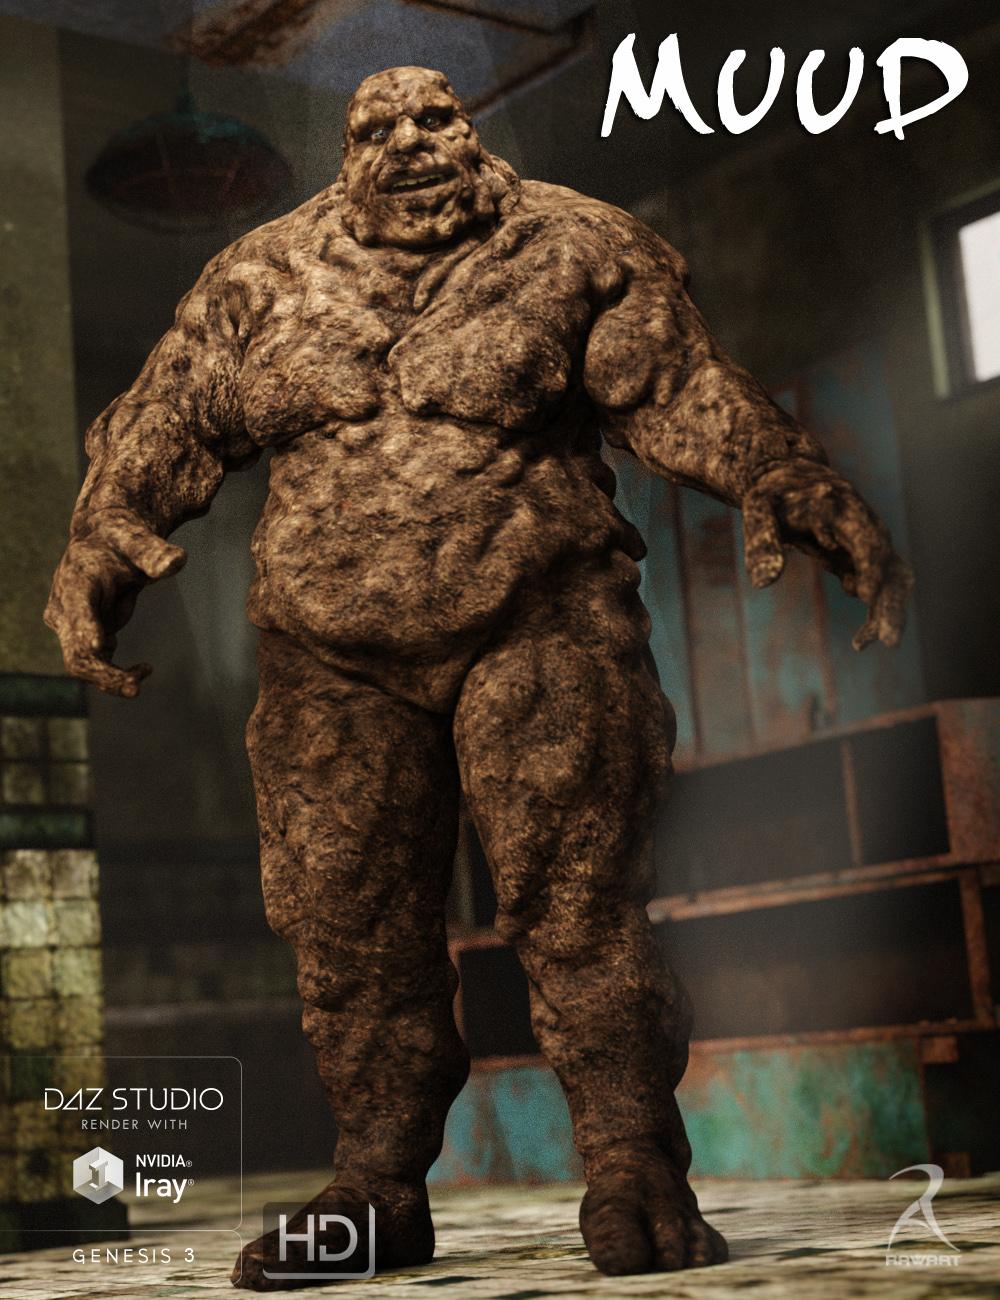
MUUD for G3M [commercial]
Muud!
http://www.daz3d.com/muud-for-genesis-3-male
He is a real man of the earth, who loves long walks in the rain and jumping in puddles. But he is not all soft and gushy, when he dries out he is hard as brick.
Comes with a loose mud texture and a dried out cracked version.
The set comes complete with custom crafted High Definition Morphs, and a highly detailed texture set, suitable for Iray and 3DL
Product Includes:
• One Muud Character Preset
• One Muud Morph Preset
• Two Muud Full Material Presets
• Two Eye Material Presets
• Also includes IRAY and 3DL MAT files
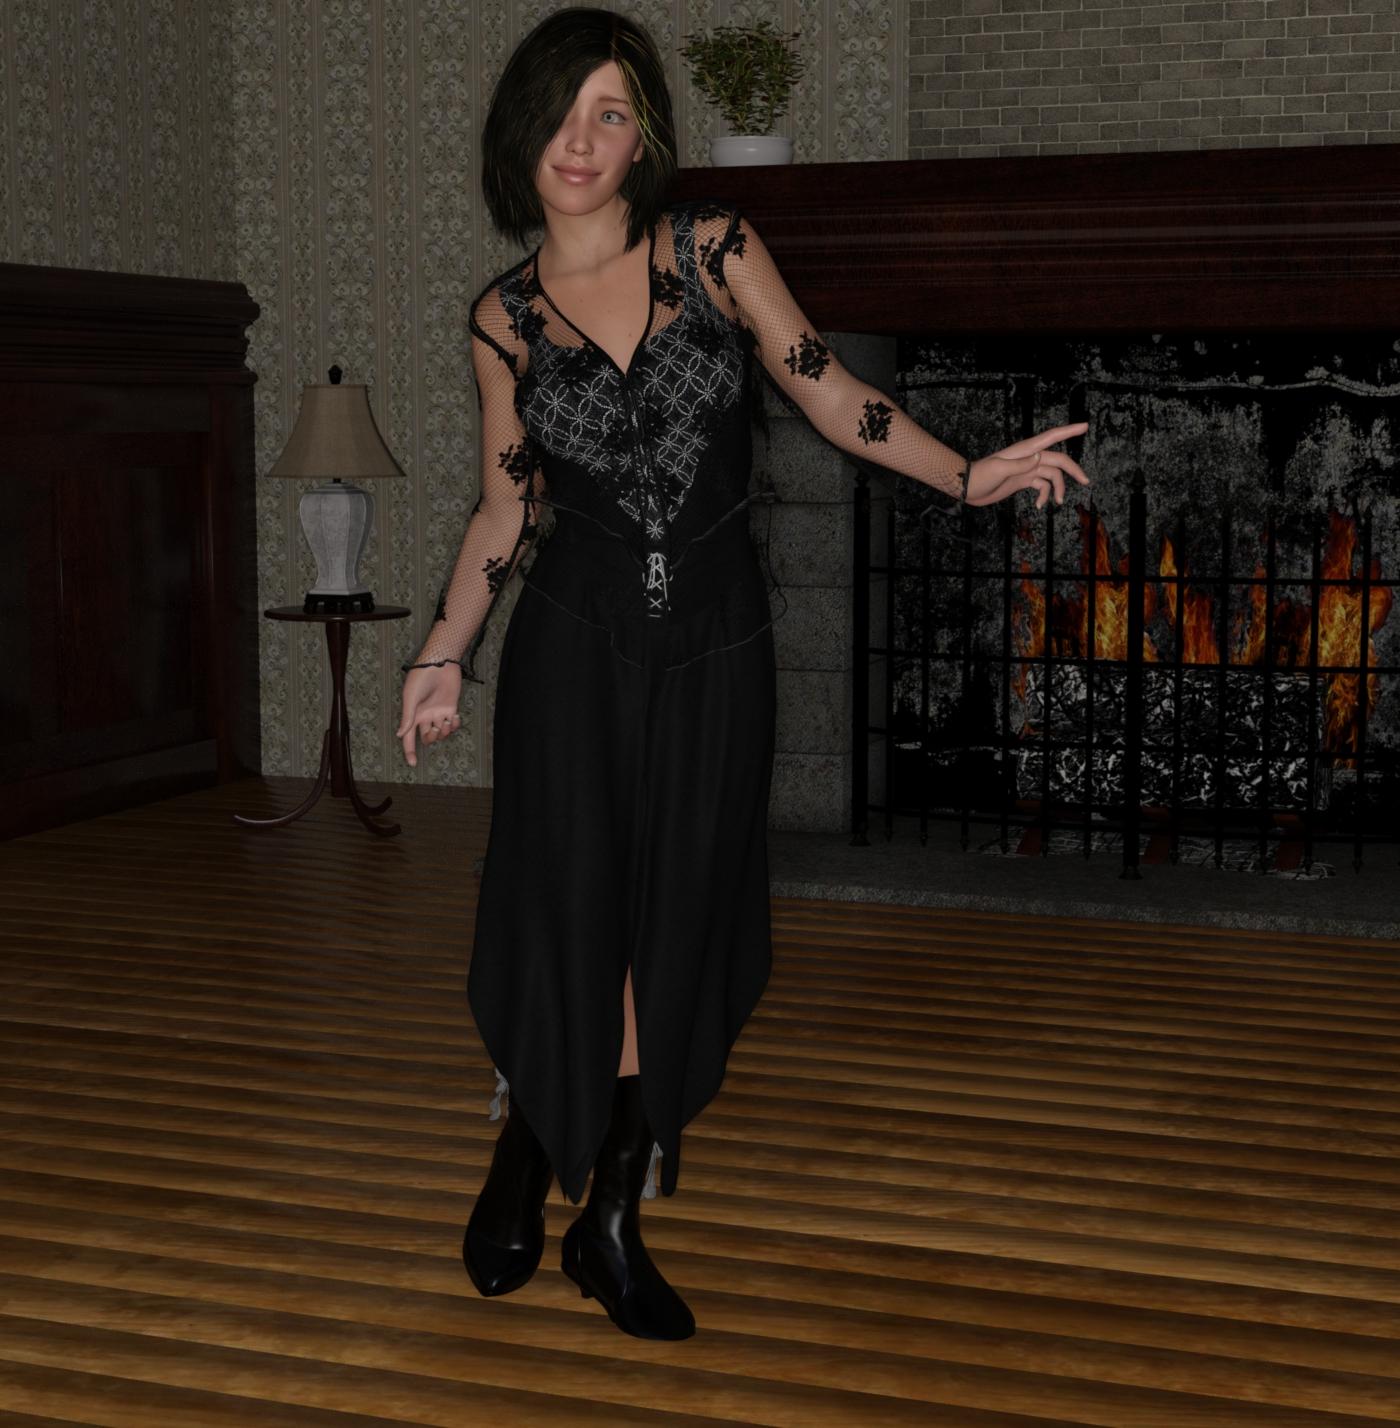
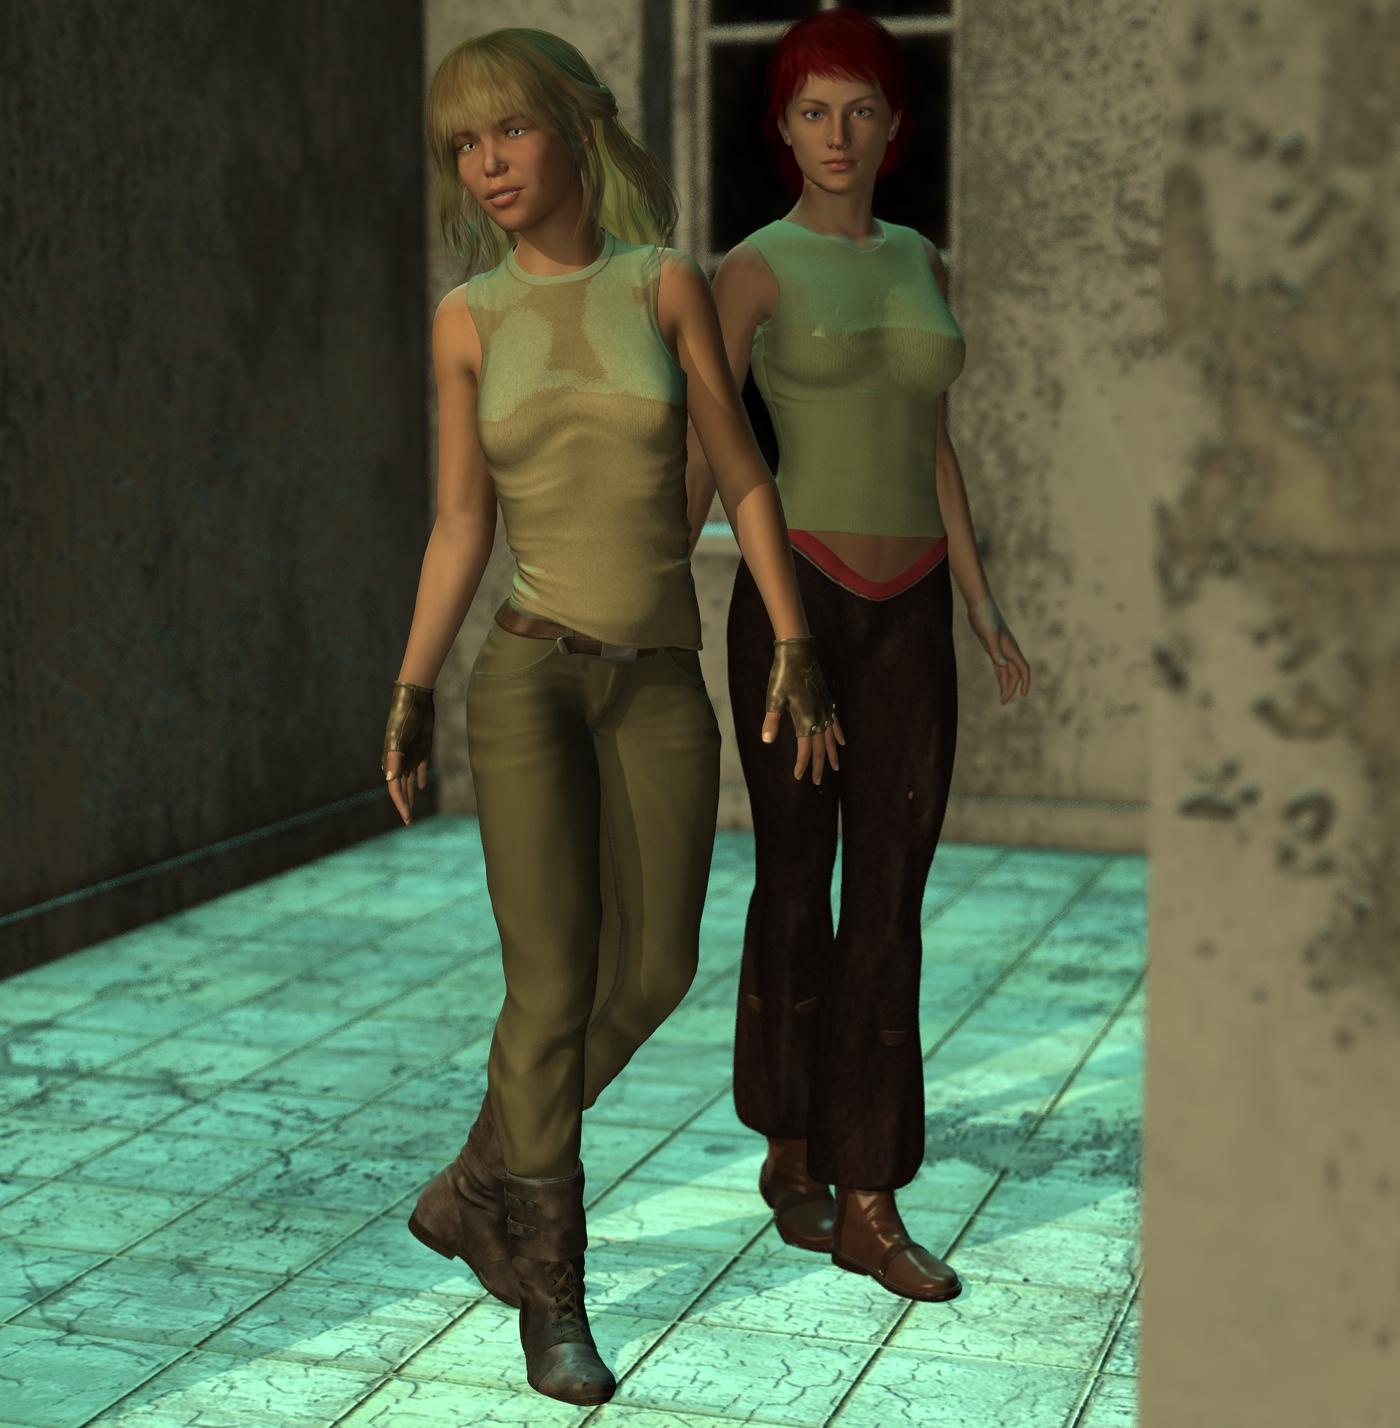
 My Renders, Now I can go to bed
was not going to post it, but I do like sharing
I think the scene used here would had been better in 3DL,
the one thing I see that is tougher with G3F, is dialiing in the Height. I used the morph dials I bought, but had to use one from growing up as well, to get the height down to 5'6". may not be so tough if I didn't dial in longer legs
just another new G3F dialed in on the new machine, untill I get all the morphs loaded, I'm holding off transfering the saved ones from the old machine
was trying a different face shape look
 ZDG random Daz Studio discoveries and questions.
Subdivision and HD morphs go hand in hand...
The simple tests I was doing with the cube does indicate that there is a difference.
Now, one possible way it matters...
Since 3Delight does NOT support Catmark subdivision, there has to be some sort of translation occuring. My guess is that Studio is simply fully tesselating the mesh and writing it out as a polygon mesh, not a subdivision surface (and yes, that is a very important distinction to the renderer). Without an HD morph 'on' there are no deltas to figure out and then write. But with the morph on, there are now hundreds of thousands of deltas to calculate (being split several times from a few thousand intial ones) and then write as mesh data.
And since we don't have access to creating our own HD morphs...there is no way to test it.
Also the small difference, when going with the process above would definitely be compounded. (for that matter...one possible way of doing the conversion...once for each level of subdivision applied. That would also mean an SSS precompute for each new 'mesh'...)*
*Just thinking of possible methods of making the translation to something 3Delight understands...and none of them are coming up with a 'quick' way of doing it.
That is a very curious idea, however there is a simple test to do (I already did it many, many times) to see if the 'Precompute delay' after all the maps are optimized, actually has anything to do with mesh density conversion (would that honestly take over half an hour for the "Face Plant Time"?). Drop the daz default shader on the figure with just diffuse, specular/glossiness, and a tad bit of ambient to replace SSS. If mesh conversion is causing it, then Face plant goddess should still take bloody ages without any SSS.
Now I confess, after three minutes of sitting here twiddling my thumbs, I cancel the spot render and drop on the Daz default shader so I can get something done today (some times I don't wait past 60 seconds), lol. Half an hour reduced to under three seconds is a tad much to blame it all on just mesh conversion. And if it was just mesh density, I think that 32 sides and 32 segment cylinder at subD of seven would take days to get out of Face Plant Time. At a SubD of 2, G3F is only 68,000 vertices vs that cylinder with 274,434 at subD of 4 (What is 1,058 vertices or 1,088 faces at a subD of 7?). There should be a 'Drastic' difference on all my test so far between subD1 and subD4.
Now, I may still have the wrong mesh type on this Studio primitive, and you may be correct. I still have a few more tests to doo before I attempt to rig up this 'overgrown soup can'.
BTW, Velvet may possibly add a second to Omni's Face Plant Time (possibly), and absolutely nothing to AoA. Total render time is also rather insignificant. That may possibly change with a map (I'm thinking simple checkerboard or "something simple" like that). Bump is also a possibility, I have experienced bump drag down with reflection, and it may possibly do the same to SSS "Face Plant Time", possibly.
mcjTeleBlender:Daz Studio scenes/animations w/Blender's Cycles Enginelets re-acquaint ourselves with the lib_ trick
1 - in Daz Studio, we create a cylinder
2 - we run mcjTeleBlender and send this scene over to Blender
3 - we modify the cylinder material , so it looks real special,
a material we could not get from a simple material exported from daz studio,
and i named, the anisotropic shader node
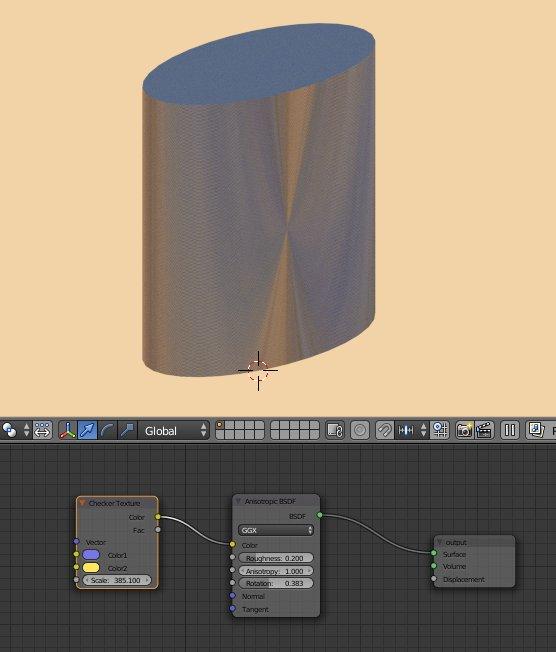
4 - i rename this material "lib_ReallySpecial"
5 - i save this blender scene in my I:\z\ folder under the name lib_ReallySpecial.blend
6 - i render the cylinder, and save the image in my i:\z\ folder under the name lib_ReallySpecial.jpg
7 - i close blender
8 - in Daz Studio, i apply the image i:\z\lib_ReallySpecial.jpg to the diffuse color channel of the cylinder
9 - i make sure mcjTeleBlender's "Collect Maps" option is OFF
else the images would end up in a Maps folder instead of the i:\z folder,
and mcjBlendBot would not be able to know where to find lib_ReallySpecial.blend
10 - i transfer the scene over to Blender
and . . .
and ...
as expected it didnt work ... because ... Blender 2.76b changes ( i think )
so !
11 - close blender
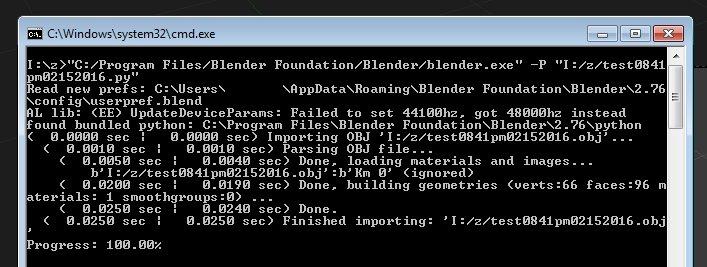
12 - launch blender and our scene using the batch file that was created in step 10 ... in my case test0841pm02152016.bat
why? because this way we get access to Blender's "Console"
As Asphdubrov was saying, there are no Error messages from Blender, just normal warnings about the sound card and a log of what the obj importer did
the lib_ action should be happening in C:\Program Files\Blender Foundation\Blender\2.76\scripts\modules\mcjMatsFromFilename.py ( blender python script )
my main suspects are hiding at line 81
            if( bLinked ):
                bpy.ops.wm.link( directory=matLib + "/Material/", files=matNamesList )
            else:
                bpy.ops.wm.append( directory=matLib + "/Material/", files=matNamesList )
at line 79 i insert
print("we got one of them lib_ tricks materials " + matlib )re-launching Blender .... yes ! we do get there, i mean, when importing the scene mcjBlendBot detects our lib_ image map ()

now in late 2015 we did make changes to the way the "use mat-lib" function was pulling materials from blend files
maybe we forgot to do the same thing about the "lib_ trick"
here is how the UseMatLib script does it
    if( bLinked ):
        bpy.ops.wm.link( directory=matLib + "/Material", files=matNamesList )
    else:
        bpy.ops.wm.append( directory=matLib + "/Material", files=matNamesList )
AH HA!
see the trailing slash character after the word "/Material" ?
no you dont
Solved !
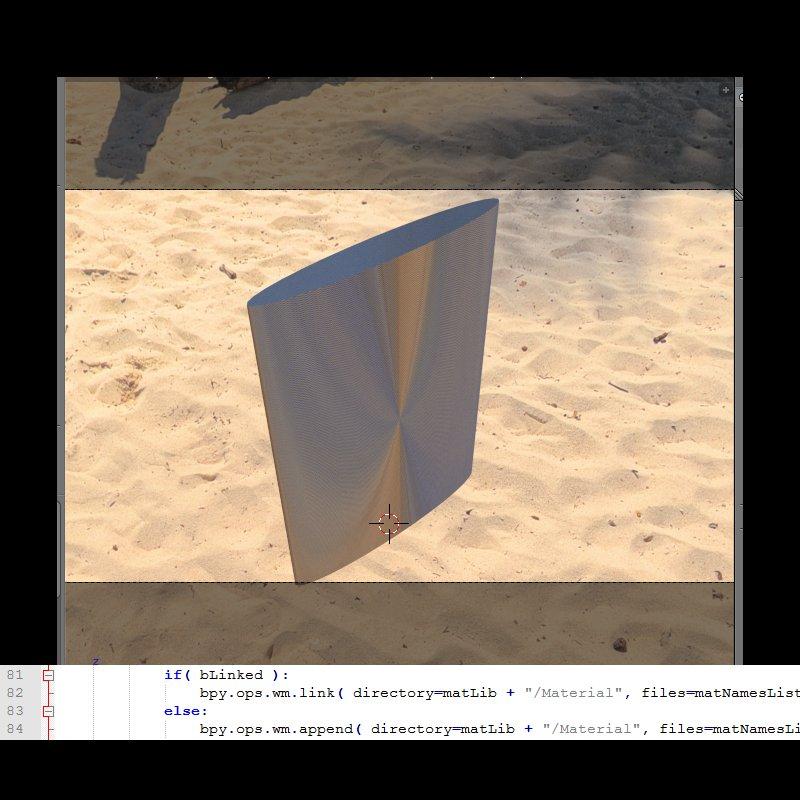
so we had to change "/Material/" for "/Material" in mcjMatsFromFilename.py
else Blender is unable to locate our lib_ material in the blend file's sub-section named Material
=====================
i'll make sure i had/have the same version as everyone, fix the code and post the updated mcjBlendBot!
========================
You've been heard. Response re: 4.9 and Encryption“How Can You Not Love This?” DAZ asks me sweetly on the store page.
"DRM, my dear," I reply, reluctant but determined.
Temptation is very strong, what with the Victoria7 Pro bundle at 80% off, and Eva (my fav G3 clone) at 60%. I could love it even more and get Eva at a ridiculous price, what with $10 off and combining the Valentines 50% off G3 items with the G3 female morph sets. I've even hatched a plan with the 7% Gift Card offer and a 3 month PC+ membership to save (spend) even more (whilst shopping in the PC+ dept at 50% off (and the rest)).
But no. Not with DRM on the cards. I won't risk investing in the G3 line part ways through when the rest of it may be encrypted / controlled.
It could have been a cracking weekend affair. But instead it looks like it might soon be all over between us.
 Can't isolate an object to rotate it
OK - so it is one object, but separate meshes - this makes it a lot easier:) You will need to this one button at a time. To isolate a button, select as many of the facets as you can without selecting any part of the coat, then hold down shift and hit the plus key on the number pad - keep hitting it until it is all selected. This will select only the button - you can then move and rotate it - use the universal manipulator, not the tweak tool.
The tweak tool is also not the correct one to use to morph the coat - rather use the universal manipulator with soft select on.
Did you close down either Hex or Studio during this process at all? If so, the bridge connection was broken and Hex took this as sending a new object to Studio. Normally morphing is done as a single-session operation. If you are in a situation where you need to close one or both down, you will have to export from Hex as an .obj before closing. Then reopen Studio, send to Hex, delete from Hex and load the morphed .obj back in then send it back to Studio.
I am rather surprised that you have to make a morph to open the coat - normally these types of clothing would have extra bones, or handles, or morphs ready built into them to control that type of behavior. Just be aware that, if you intend to animate the coat opening, morphing will not work satisfactorily, because morphs move in a straight line from one position to another, so will not animate correctly. This would be OK for a still posed shot.
Good luck with your project:)
Whoops, this was sitting in draft and I forgot to send it.
Thanks for your advice. It was very late when I had to stop morphing, and I needed to learn how to move the buttons. I did have a copy of the coat with the morphs in Daz Studio - it was loaded onto the character in the pose. That's how I checked the fit. I was going back and forth between Daz Studio and Hexagon.
This morph is for a posed shot, and I don't plan on using it for anything else. It's an extreme pose and the character has been modified. So the morphs that come with the coat wouldn't work.
I had read about changing the pivot point, but the options just wouldn't come up when I had the button selected. So I used a combination of the Universal Manipulator and the Rotate tool.
It worked quite well for a couple of buttons, then the 4th one would not show up when I loaded the morphed coat onto the character. I tried a few more times, and then decided that most of the showing buttons were positioned the way I like and I could remove the floating buttons. Darn things gave me fits. The fabric morphing over the character's leg is what I wanted and that worked. I'll fix a couple of errant buttons in Photoshop... I just ran out of patience for it.
My Renders, Now I can go to bedjust finished getting Genesis2 Staarter essintials loaded, so Added G2F to the scene
This is sooooooOOOooo cool, that render, on the old machine, if it didn't crash . . would had taken 5-6 hours to render, on this machine 54secs
oh and this was 3DL render
I only have a couple morph dials for Genesis 2, and none are loaded yet, so that's just a plain G2F added
 Becoming a Published Artist
Right. So far this is done with a set of morph packages--all of which can be "bundled" via Resource Kit compatible licensing, so shipping them without the "overhead" purchasing those morph sets should be fine. However, I realize there's only so far "a bunch of dials" can be taken...but Zbrush (and friends) are farther away from me than the 9th planet at present. Trying to start small.
Have you tried Blender? Its free! and a lot less scary than it used to be. There are a lot of tutorials floating around here for it
Anime Base for Genesis series?Hi, everybody, I know that DAZ and Poser has been used for anime style works in the past using Hiro, Aiko, Hitomi, and now Keiko for Genesis 2 but the issue I see is that none of them ever look quite right and always look more realistic than truly anime style, even with toon shaders. Looking at modern video games and 3D anime shows, the head is usually bigger and the bodies are more rounded overall and overall softer in terms of detail. I've read previous threads for anime characters and the consensus is that the proper proportions don't line up with the overall base Genesis figure, particularly in terms of eyeball size to head ratio. Figures like ChibiBel have gotten this look just about right but have seemingly lost all support for compatibility with modern content, as well as a lack of a male counterpart, and it hasn't been adapted to Genesis at all. My proposal for DAZ or third party content creator is to make a brand new base model and morph set based on the Genesis system that is compatible with current DAZ content, granted that some may not work depending on fitting, and that would be aimed strictly at making anime style figures and morphs. The morphs don't have to be compatible between regular Genesis series morphs but the content should be compatible as there already is a great deal of anime style clothing and props on the market. Imagine having a morph set for everything from small animated chibi characters to Studio Ghibli-esque figures as well as more traditional anime character types. I can imagine that textures and eyes would have to be different based on size and UV issues but since the anime look is more or less single color skin tone with shading, it shouldn't be too big of a deal. Another inspiration is the 3D characters from the Manga Maker Comipo program, if those figures could just be exported as OBJs then it would be a lot easier to get anime style characters but as it is it's just for 2D work.
ZDG random Daz Studio discoveries and questions.Subdivision and HD morphs go hand in hand...
The simple tests I was doing with the cube does indicate that there is a difference.
Now, one possible way it matters...
Since 3Delight does NOT support Catmark subdivision, there has to be some sort of translation occuring. My guess is that Studio is simply fully tesselating the mesh and writing it out as a polygon mesh, not a subdivision surface (and yes, that is a very important distinction to the renderer). Without an HD morph 'on' there are no deltas to figure out and then write. But with the morph on, there are now hundreds of thousands of deltas to calculate (being split several times from a few thousand intial ones) and then write as mesh data.
And since we don't have access to creating our own HD morphs...there is no way to test it.
Also the small difference, when going with the process above would definitely be compounded. (for that matter...one possible way of doing the conversion...once for each level of subdivision applied. That would also mean an SSS precompute for each new 'mesh'...)*
*Just thinking of possible methods of making the translation to something 3Delight understands...and none of them are coming up with a 'quick' way of doing it.
SimTenero Randomizer OMG!!Finally, I got a chance to try this out. I bought it the first day and am just now getting to play with it. I needed some Asian males for a gift render for the Sensei who is head of my sons' karate organization. I mixed in a lot of my morphs like Shape Shift for G2 males, Big Boys for G2 males, Zev0's Aging Morphs, Muscularity Morphs and all of the Asian morphs that I have and came up with some great characters. In all, I got about 16 really good characters. All of them regular not in great shape, but healthy older Asian gentleman to put in the render. I didn't really need that many, but I was having such a great time that I just couldn't seem to stop. I actually got one that would be great for a sumo wrestler. He was definitely a keeper! Just need a sumo outfit now. I can see that I'm going to have lots of fun with this one.
I'm glad you're enjoying it! I don't have some of those morph packs, so it's good to know they are producing good results for you. Of course, I never met a morph pack I didn't like

If my current gift render for the Sensei ever finishes, I'll run a render of some of the best of the Asian males I made. Looks like another day of rendering as it is poster size and taking longer than I expected to get it done.
I think the resulting characters were very realistic. And yes, gotta love those morphs. I collect them like crazy and as much as I love spin dialing a character, using your Randomizing gave me much quicker results with some great characters.
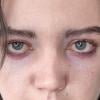
Becoming a Published ArtistThe image you showed looked very washed out and could not really see the texture details.
Yeah. Sorry about that. I'm still working on the best set of settings for the machine I used for the rendering. The texture is a "stock" one. I've got more to learn in that area...and pondering that, sticking with "body shapes" (vs. characters) might be a better alternative for the moment.
It seemed like the morphs were made from spinning dials of existing sets, and required the purchase of shaping sets to work. While this is not a problem per-ce, it is something that makes a set less interesting. Making something custom and unique is more interesting.
Right. So far this is done with a set of morph packages--all of which can be "bundled" via Resource Kit compatible licensing, so shipping them without the "overhead" purchasing those morph sets should be fine. However, I realize there's only so far "a bunch of dials" can be taken...but Zbrush (and friends) are farther away from me than the 9th planet at present. Trying to start small.
Pose sets are also a market that is pretty heavily saturated, and making good realistic poses is not easy...and in general pose sets are not big sellers.
Good input, thanks! The poses I'd like to make (for myself or others) are go-to poses for existing environments ('cause I'm making them anyway) and poses (and body shapes) from art work of yester year--as my the "fine" art I hope to make with these figures is conceptually based on some of these. We'll see...I guess...
What you really have to do is find your own unique niche of things you like to do and try to become the best at it. Make something that is better than what can already be found in the shop....then that is where you start
Yeah. Feeling that out now, so thanks for the confirmation! ^_^
SimTenero Randomizer OMG!!Finally, I got a chance to try this out. I bought it the first day and am just now getting to play with it. I needed some Asian males for a gift render for the Sensei who is head of my sons' karate organization. I mixed in a lot of my morphs like Shape Shift for G2 males, Big Boys for G2 males, Zev0's Aging Morphs, Muscularity Morphs and all of the Asian morphs that I have and came up with some great characters. In all, I got about 16 really good characters. All of them regular not in great shape, but healthy older Asian gentleman to put in the render. I didn't really need that many, but I was having such a great time that I just couldn't seem to stop. I actually got one that would be great for a sumo wrestler. He was definitely a keeper! Just need a sumo outfit now. I can see that I'm going to have lots of fun with this one.
I'm glad you're enjoying it! I don't have some of those morph packs, so it's good to know they are producing good results for you. Of course, I never met a morph pack I didn't like
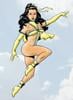
ISO ranged projectile wrist weaponI just went through pages and searches all day yesterday because Aime (I think that's how you spell it) had a wrist rope-gun that I was going to share the link to. Had a nice dart with a morph to retract/extract the blades on the dart and different rope movements and flip-down display. All you would have to do is hide the rope from the dart. Unfortunately I could not find it :(
The one Charlie linked to I didn't see either :( Nice find and I will be getting that one as well :)
*edit*
here it is :)
http://www.sharecg.com/v/37928/browse/11/Poser/hand-rope-gun
*edit #2*
just found this one as well
http://www.sharecg.com/v/77599/browse/21/DAZ-Studio/Hidden-Blades
What is a 'loosen morph' exactly?I see it listed on quite a few items in the daz store- specifically clothing. What do these morph-types do?
TUTORIAL - Creating a Genesis series Full Body Morph for DAZ Studio Pro 4.10 by RKane_1It happens in both Poser and DS so it's not just in one program...I've done my morph for both programs. My understanding is that normally poses are based from the hip not the body...so it makes sense to me that if the hip has moved down due to scaling that when you apply a pose made for the original that moves the hip down, then it's still going to move it the same amount and as it starts lower that the the hip is going to end up lower then the original. Sorry if this is confused started back at work today after a week off being sick and my brain is dead...
Can't isolate an object to rotate itOK - so it is one object, but separate meshes - this makes it a lot easier:) You will need to this one button at a time. To isolate a button, select as many of the facets as you can without selecting any part of the coat, then hold down shift and hit the plus key on the number pad - keep hitting it until it is all selected. This will select only the button - you can then move and rotate it - use the universal manipulator, not the tweak tool.
The tweak tool is also not the correct one to use to morph the coat - rather use the universal manipulator with soft select on.
Did you close down either Hex or Studio during this process at all? If so, the bridge connection was broken and Hex took this as sending a new object to Studio. Normally morphing is done as a single-session operation. If you are in a situation where you need to close one or both down, you will have to export from Hex as an .obj before closing. Then reopen Studio, send to Hex, delete from Hex and load the morphed .obj back in then send it back to Studio.
I am rather surprised that you have to make a morph to open the coat - normally these types of clothing would have extra bones, or handles, or morphs ready built into them to control that type of behaviour. Just be aware that, if you intend to animate the coat opening, morphing will not work satisfactorily, because morphs move in a straight line from one position to another, so will not animate correctly. This would be OK for a still posed shot.
Good luck with your project:)
Can't isolate an object to rotate itNow, I'm confused. I made some additional morphs to the coat. Now when I choose Send to Daz Studio (when I have D/S open with the Captain and his coat loaded), Hexagon opens a new copy of D/S, and the morph loader does not come up. The coat just appears. When I merged in the scene with the captain, then click on the morphed coat, there isn't even a Fit To option. I can parent the new coat, but nothing happens.
What did I do wrong? Why is Hexagon treating the coat as a separate object and not a morph of an existing one?
I upgraded from 4.8 (64 bit) to 4.9 (64 bit)And I am no longer able to see some of the content I had previously, V4, Morph ++, software packages that had been in place and in use previously. I've looked in both Poser and DAZ folder trees, and used the search function. I've reinstalled the packages (unzip them into a blank temp directory and copy the unzipped folders into the DAZ folder tree) just like with 4.8, but nothing is working.
Did 4.9 stop supporting Poser fomats?
Content Directory Manager IssueOk, there goes that idea.
But, I did notice that on some of Dario's morphs the card icon is too big. I wonder if 4.9 is enforcing tighter limits...
I've been away from my computer for a while, but today I did a little poking around, and the missing morphs (at least the ones that I'm aware of) were truly missing from My Library. I reinstalled them, and they're showing up in the Shaping tab now. I'm not sure why they disappeared after installing 4.9. I'm going to go over my purchases from the other sites, and see what else needs to be reinstalled, but it looks like I've found a solution to my morph problem. I still have to install a lot of DAZ content that had been installed before, but I can do that as I have the time.
Daz 3D is part of

Connect
DAZ Productions, Inc.
7533 S Center View Ct #4664
West Jordan, UT 84084Licensing Agreement | Terms of Service | Privacy Policy | EULA
© 2026 Daz Productions Inc. All Rights Reserved.