-
Are G2 items still selling?
I don't bother with the converters for clothes, If I can't make something fit in Daz, then I export the outfit as an obj and import into Blender (use to be Hexagon) to make it fit the required avatar I want it to fit, then delete the model and export the clothing item and import to Daz as a morph preset, then you can keep the rigging and morphs it comes with. Of course it's a problem if there are major differences between models, but there are ways around that as well.
The only thing I can't do this with is footwear, since each model has something different that messes with the mesh if you try to fit to a different model. In this case I simply do the export thing and when I bring it back to Daz, I redo the whole rigging and such and save as a new item(have a folder for these things so as not to forget who actually made them).
One reason I also like the older products is because their texture sizes don't run in the thousands, the majority are 1024 x 1024 and smaller, not 4000 and up, which makes them lighter on the computer and easier to render and animate.
LOL was just about to go on a rant about texture sizes, but you are safe, I stopped myself in time lol
Mesh and Texture Stretching, a way to fix?I wasn't able to put some time into trying this out until today.. putting noob hat back on head (although I never really took it off heh). I feel pretty comfortable in DS, but something this simple kinda defeated me.. after about two hours I gave up.
I did manage to get the Daz to Blender bridge to work but it wouldn't ever let me just send the skirt to Blender, it kept sending the actor and everything. I wasn't able to get the deformation to occur without the skirt being fit-to an actor and the moment I remove the actor from the scene the skirt reverts back to normal, so at the very least I had to have an actor present. This is probably just due to my lack of experience with these sorts of things, as I did feel like I was blindly stumbling around to get this to work in the first place. The only real way I was able to get it into Blender was to export it as a wavefront from DS and then import it normally into Blender, but then ran into other issues that are already commonly reported about the forum (such as loss of textures, etc). I smoothed it out and then exported it as a wavefront from Blender and tried to bring it back into DS but then got lost as to how to make it a corrective morph heh. Since I already have the textures, it wasn't a big deal that they were lost during the transfer, I could always put those back on... I'll look up some more tutorials on creating morphs to try to advance past this part, it's been a while since I made or converted anything into one.
I tried this in Hexagon also, and ended up with some weird results, lol. But I don't have any problems importing and exporting things that way either, so figured it was worth a shot.
Anyway, I'll try at this periodically as my understanding of things improves over time, until I eventually get it right. :)
In the meantime, I found a rather simple workaround.. adding smoothing to the object in DS, and then applying smoothing, will also work.. at least for this item it does. I'm certain this is not the best method of going about it, and I can't say if it'll work with everything I have that stretches out like that--but if anyone finds themselves in a similar situation as me it might work for you as well.
Simple smoothing in DS method:
- Select desired object in Scene tab
- Navigate to Edit on the menubar
- Object submenu
- Geometry submenu
- Choose Add Smoothing Modifier
- With object still selected in Scene, navigate to Parameters window pane
- If skirt is not selected, use dropdown menu to select it
- Click All to show all parameters
- Find Enable Smoothing, tick to "On" if it is not already
- Increase Smoothing Iterations until desired effect is acquired (check for changes in Iray preview mode if nothing is occurring and I can't guarantee this method will work for everything)
Most clothes already come with smoothing modifiers, but I have had to add them to clothing items before for poke-through problems. Check to make sure your clothing item doesn't already have it added first (in parameters), although I don't really think adding a smoothing modifier to something that already has it will harm anything. The higher smoothing and collison iterations you use, the more time to calculate such things is required, and can cause lag in DS when you're trying to work with the model (posing, translating, etc).
@crosswind has the best solution, and if you're able to you should use their posted method.
The right way to export Victoria 4 into, and out of Daz?crosswind said:
Oh... how does that result came from.. by importing a morph or sth. ?
As for Blender / "No delta" issue, I'm sorry that I forgot to mention..., AFAIK, you have to first of all convert V4 to Weight Mapping - General Weight. Then when exporting V4 to OBJ, uncheck "Ignore Invisible Nodes" as there's a hidden node "eyeBrow" on V4 (or unhide it)... otherwise you'll get geometry mismatch error when importing OBJ from Blender to V4 with MLP...
Sorry I haven't replied sooner.
I did that... And it didn't work.
I'm just flabbergasted, and fed up with this. I've got to the point where I've had to leave it, because there's other things that I want to work on.
I do have some good news. A friend got an older version of this morph working in Poser, but the mesh needs correcting (plus, I'll have to pay them to do renders).
Plus, after going through this, I'm not going to become a V4 content creator anytime soon (especially where Daz Studio is concerned).
Thanks a lot for the help though

 Can I block expressions for G8.1 ?
Making the G8 base expressions (and any expressions that are using them) work on G8.1 requires removing dummy/placeholder expressions that are installed to G8.1 morph folders - These dummy/placeholder expression files have no other function than to prevent the base G8 expressions from loading.
The dummy/placeholder files are located in;
...\Data\DAZ 3D\Genesis 8\Female 8_1\Morphs\Daz 3D\Base Pose Head\ (255 files, can be more if you have additional DAZ expression packs)
...\Data\DAZ 3D\Genesis 8\Female 8_1\Morphs\Daz 3D\Expressions\ (24 files, can be more if you have additional DAZ expression packs)
...\Data\DAZ 3D\Genesis 8\Male 8_1\Morphs\Daz 3D\Base Pose Head\ (255 files, can be more if you have additional DAZ expression packs)
...\Data\DAZ 3D\Genesis 8\Male 8_1\Morphs\Daz 3D\Expressions\ (24 files, can be more if you have additional DAZ expression packs)Please make sure you are removing the files from G8.1 morph folders and not G8 morph folders.
Note 1; If you are logging in to DS and letting DAZ Connect (within DS) to install/update your content, you may have these also in an other location that has "\Data\Cloud\" in it's path
Note 2; Do not remove any files from "FACS" or "FACSExpressions" foldersStrand based hairjohara45 said:
It is an intel i9 10900k , Asus Maximus XII Formula, 64gb 3600 Mhz Ram, and an Nvidia RTX 3090ti.
That system seems good on paper and you can expect Daz to work fine with it.
Anytime I load the character with the hair the system takes forever to load the character and editing takes even longer.
Does "load the character with the hair takes forever" mean that when you load each independently they load quickly, but together it is slow?
Loading a character into the scene takes a while if you have many morph products installed. Likewise, loading a heavy hair product can take a while to load into the scene, especially if you have made a very complex hairstyle with many strands (it's unclear if that's the case in your case).
If instead, you mean that the viewport is slow when they are both in the same scene file, for example, if rotating the camera around in the viewport is slow, it could be because the settings are wrong. Ensure Edit>Preferences>Display Optimisation is set to "Best". I think you should expect the viewport to be quite smooth with only a character and hair in the scene.
Also check which Draw Settings you are using in the viewport. The Nvidia preview is slower than the other viewport modes.
Posing a character with many fitted objects will be slow. So it is best to finalise pose before adding hair, clothing, etc.
Posing a character with high Viewport Subdivision (SubD) can be slow also. You can see the SubD level in Paramaters. So best to change Resolution to Base and only use HIgh Resolution after finished editing.
I been wanting to learn more about Dforce but after watching some videos on youtube step by step, for some reason I can't apply all that is being covered. Some of the processes that is being done is just not working as I'm running through it. I may just give up using this program all together as it seems it may not be optimized atleast to work on my computer. Other programs seems to run pretty quickly. Video coverters, VamX and freecad most of which has not been reinstalled after reloading my entire Operating System.
Thanks for you help!
It might pay to be more specific about the problem encountered.
AIUTO...CHI CONOSCE L’ITALIANO? PARTE QUATTORDICIHo visto che Anngun farà Maria Maddalena, in Jesus Christ Superstar a Milano. Speriamo si ispirino a lei per l'omonimo morph :DAIUTO...CHI CONOSCE L’ITALIANO? PARTE QUATTORDICIGeni del marketing, a Natale faranno i morph di Giuseppe, Maria e del bambinello.
Però, devo spezzare una lancia a favore della DAZ, visto che in USA ci sono molti cristiano con confessioni quasi estremiste, magari qualcuno lo compra giusto per fare render a sfondo religioso. Non dimentichiamoci che in USA esiste il supereroe biblico
Daz to 3ds Max Update 1.1Richard Haseltine said:
This week Daz released an update to the Daz to Cinema 4D Update update. Here are the items in the update. Enjoy!
- Fix export issue when for face morphs with changes to Daz Studio in 4.14
- Genesis 8.1 Facs Morph Support. Please note that characters must be selected to export the morphs.
- Now Supports 8.1 Characters
What about 3ds max 2024/2025? I noticed that the last check-in for code was done many years ago. Please continue to support 3ds max for all the versions of Genesis.
x4 PCIe 4.0 bottleneck for RTX A4000, how relevant is it?I agree with TimberWolf 100%.
Something else to keep in mind in regards to file transfers: even the fastest lane takes a while to transfer lots of smaller files. Textures are large, but a scene is usually composed of many other smaller files too (light objects, geometry etc) so you'll never get that onto the GPU in under 10 seconds, regardless of architecture. Even a sphere without textures takes a few seconds to get going.
Marahzen's Musings on Creating Characters (and other matters)While Face Transfer/Face Transfer Shapes resolved some issues I had been facing, it introduced a big new one, which has already been mentioned (and seen!) in these ramblings: ugly relics on the resulting texture files. FaceGen produces much cleaner texture files than does Face Transfer Unlimited; and what I began to refer to as "Face Transfer stains", stretches and washouts now stared at me front and center.
For reasons that were (and, frankly, still are) unclear to me, my Altern8 hack seemingly helped minimize the problem a bit, but on a closer look, most of my new characters had stains on the side of the face ...
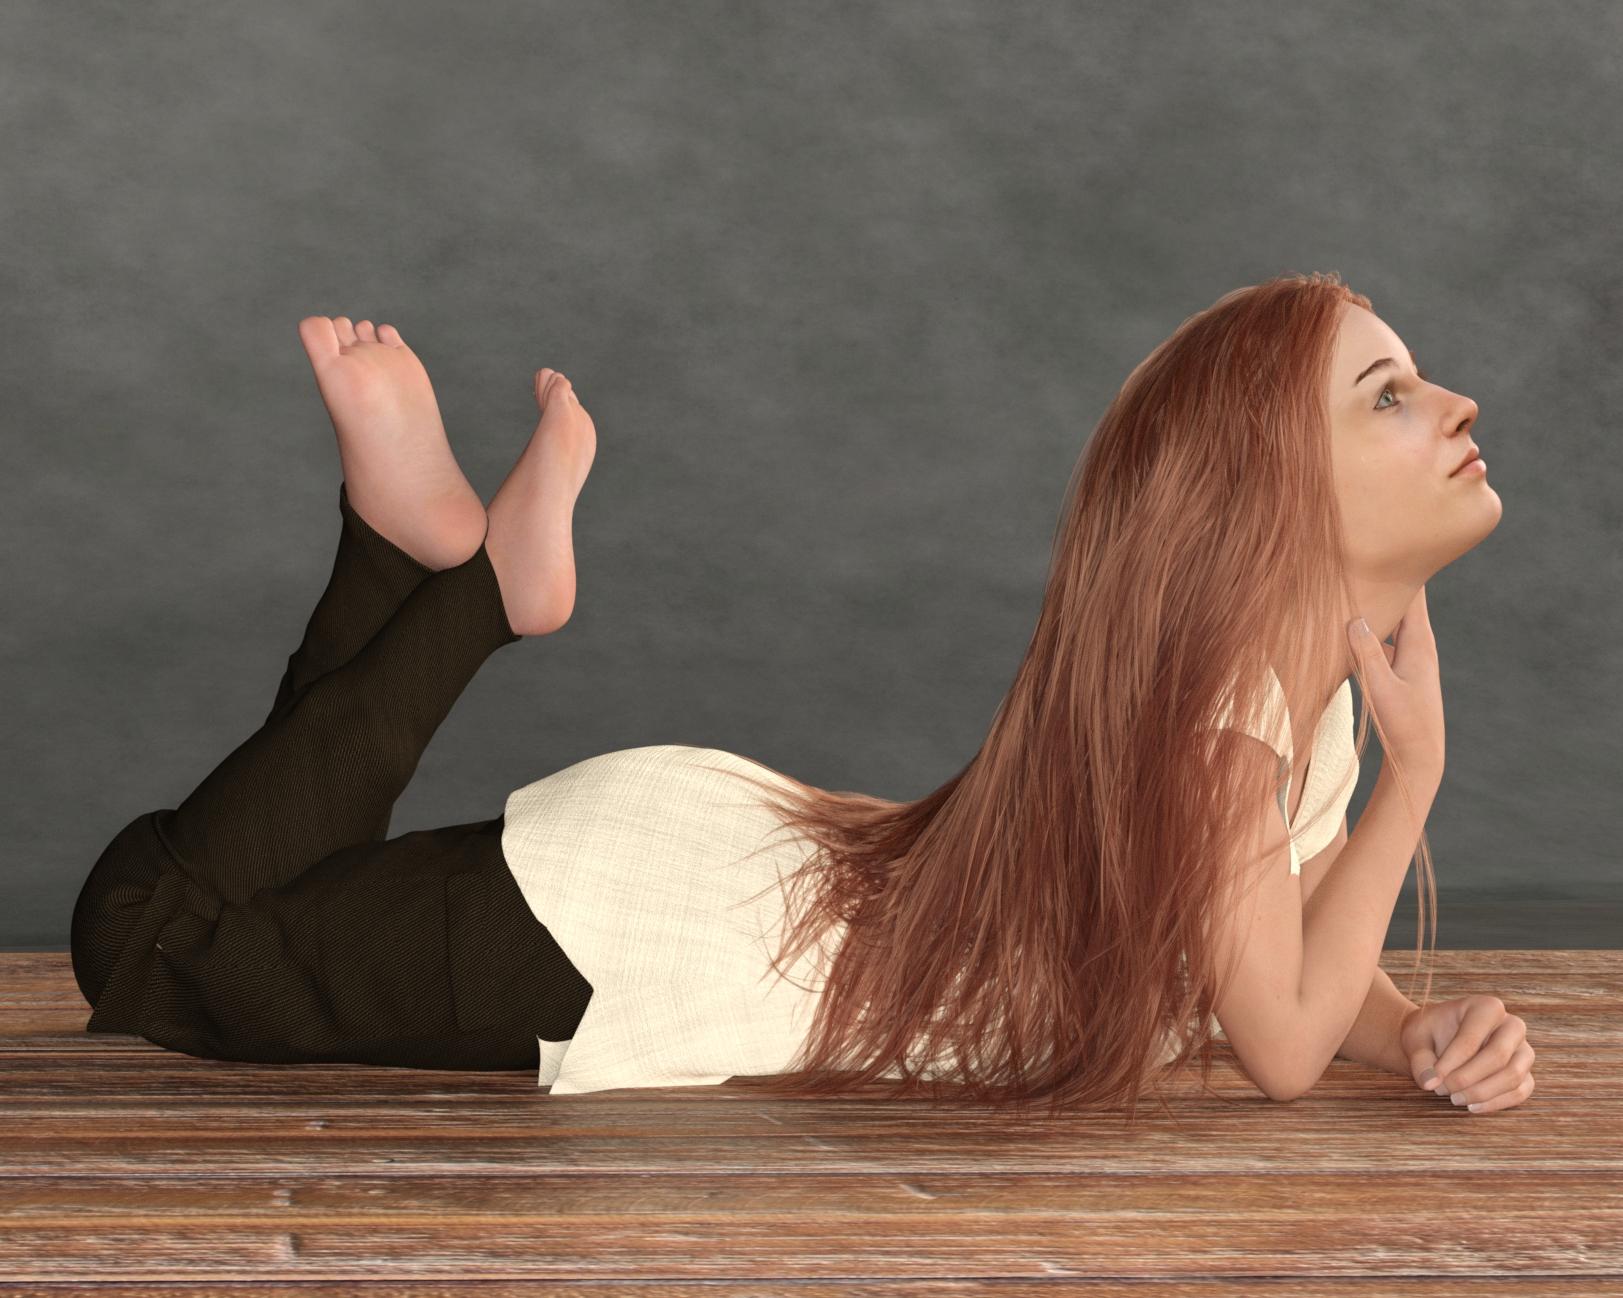
... or obnoxious light/white areas ... (the white around her eyes and cheeks)
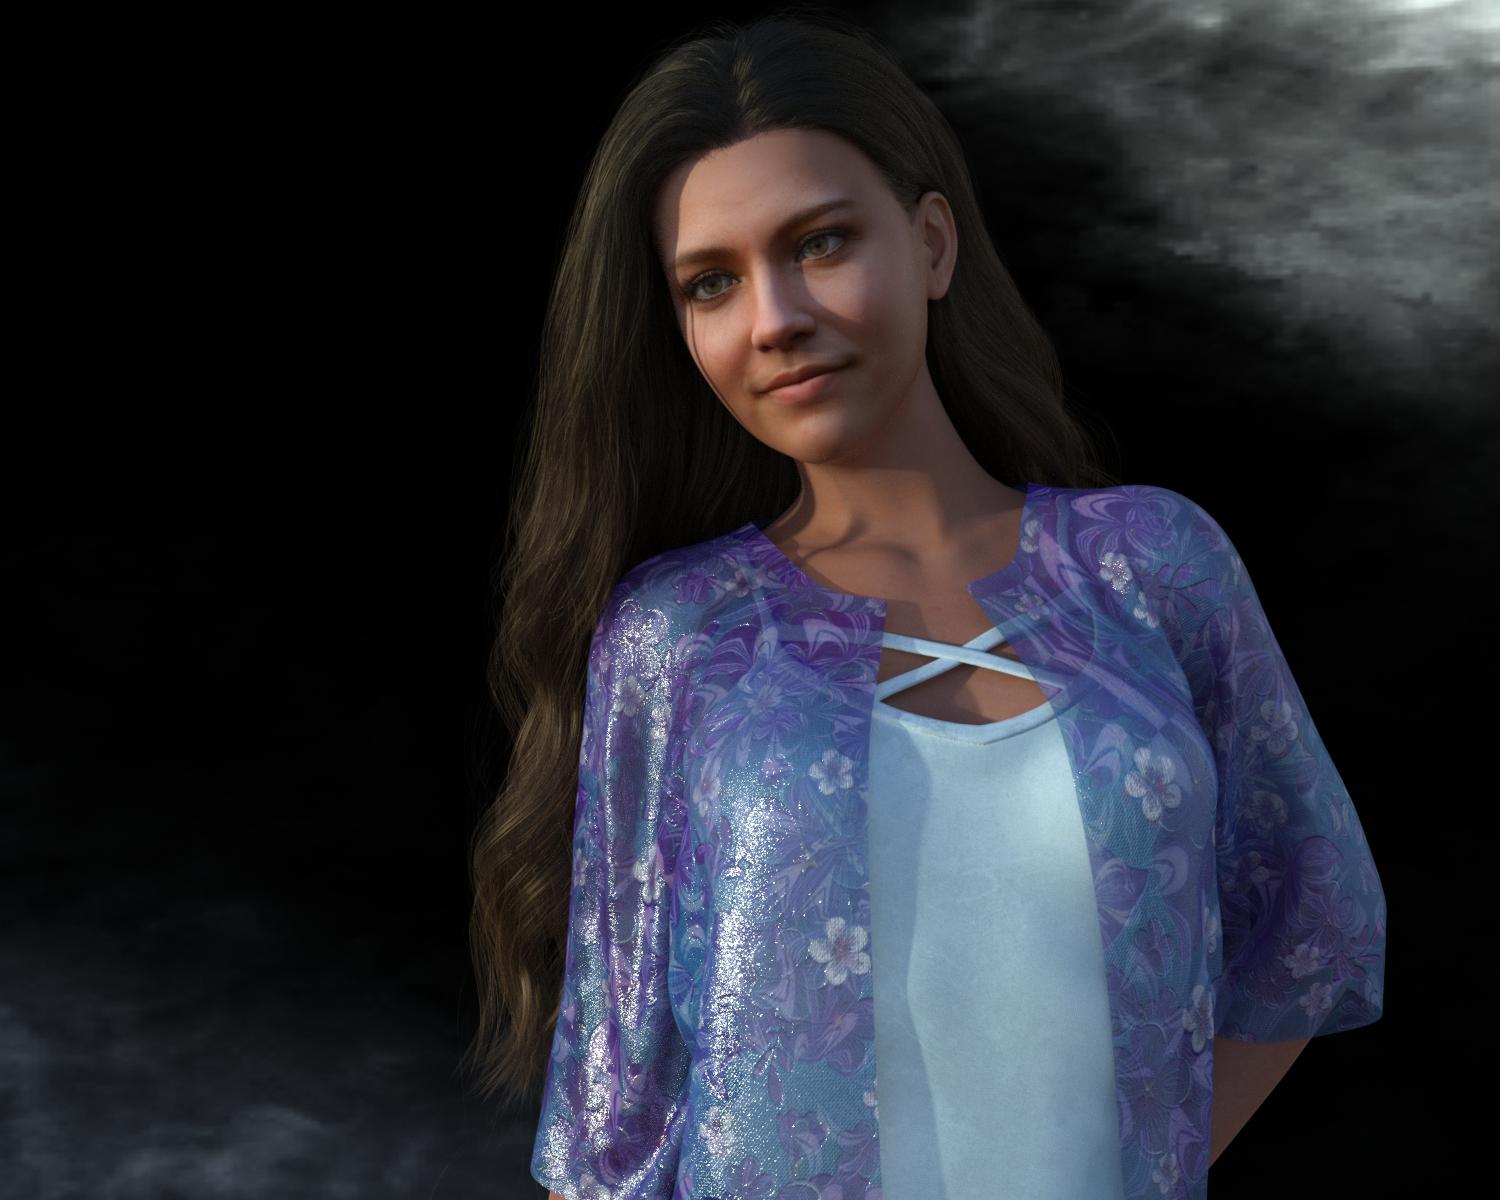
... or stretch marks. (you'll see literal stretch marks in various places on the side of his face)
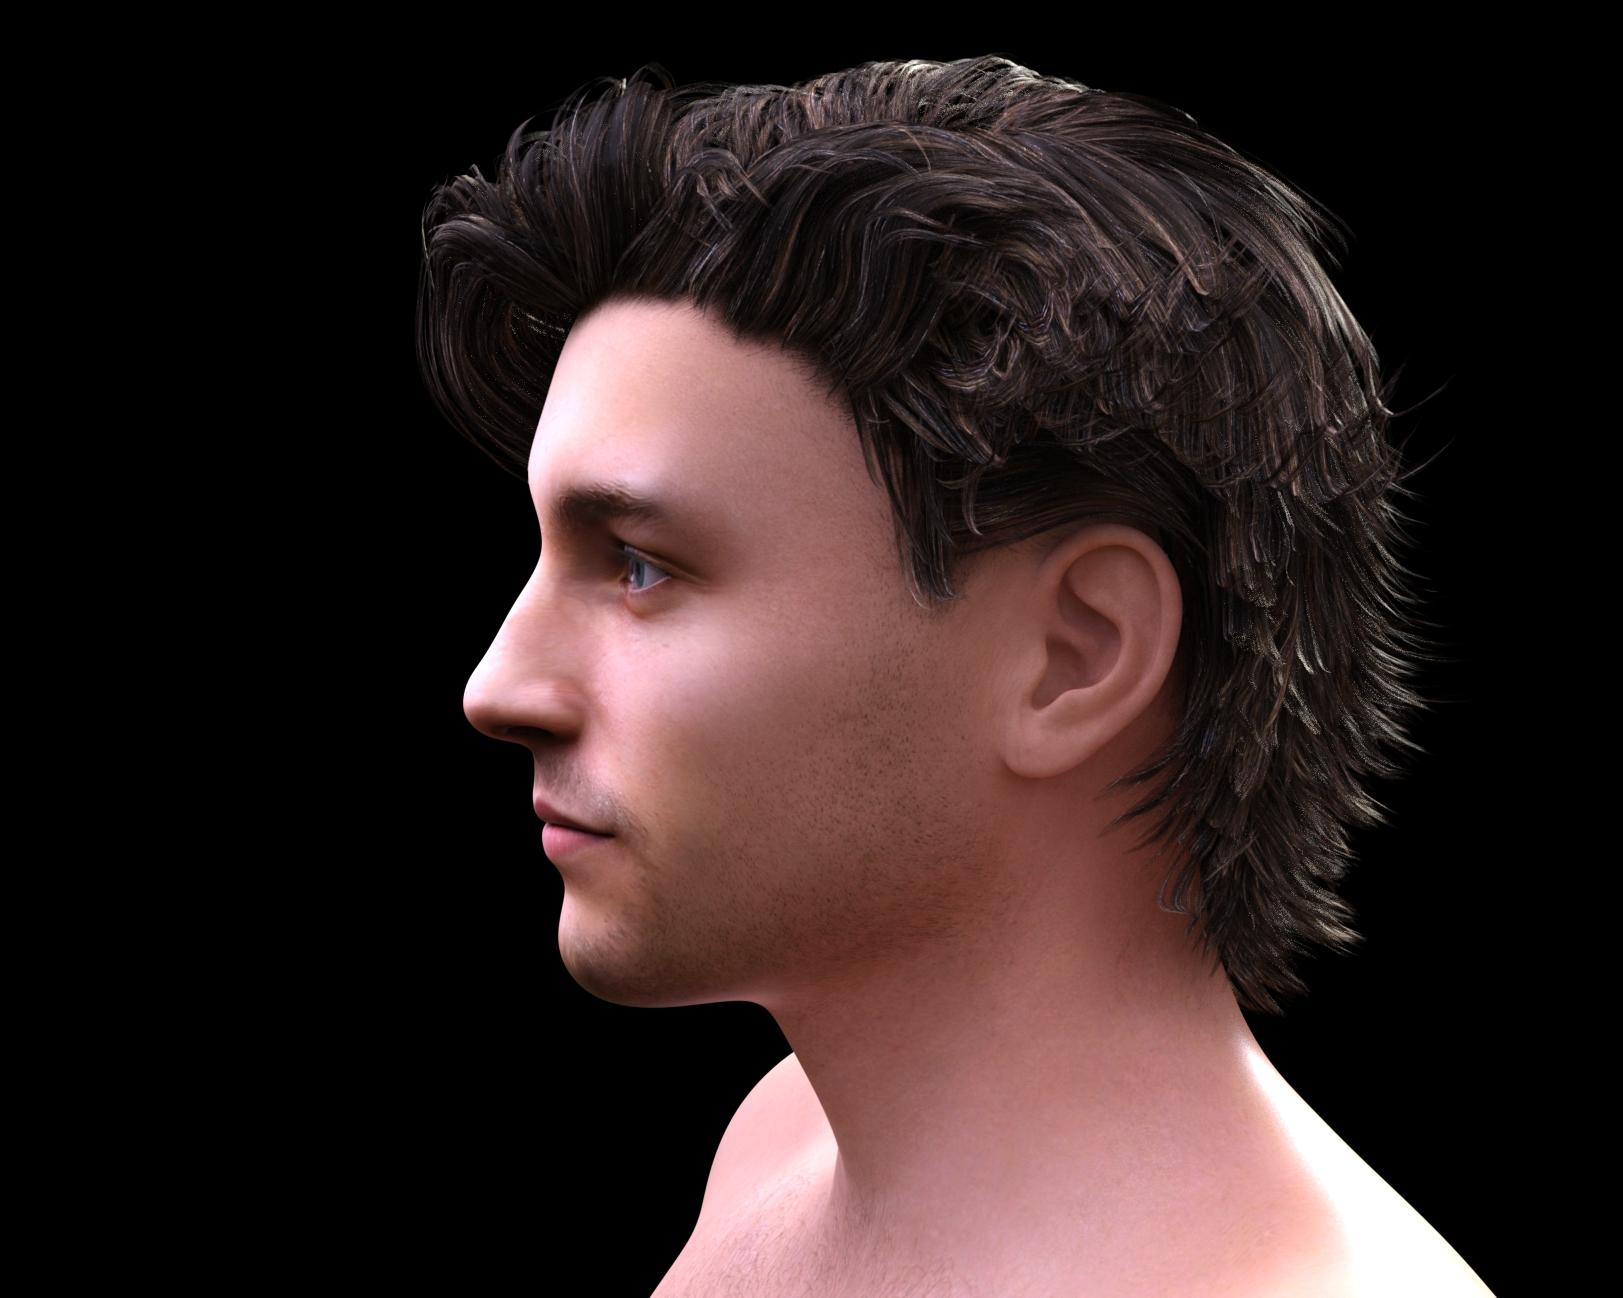
These are relics from the source image and the transfer process. The stains, most commonly on the lower half of the side of the face, are from shadows on the source image and the white areas are from highlights. These are normally present on any image that looks like a natural photo - it looks weird without them, in fact. The stretches seem to represent transfer issues from the edges of the source, often areas that are a bit out-of-focus or hazy.
On top of those predictable trouble spots, the original Face Transfer was very finicky on what it could handle. Remember my snarky comment way back about getting a source image? In fact, I had to do a bunch of updating of some of my original source images from 2020 to make them more FT-friendly. To create a starter set of textures from a source image with the original Face Transfer, you have to start with a head-on image, with a neutral expression, the right kind of lighting, and no glasses, no long hair, no facial hair ... nothing that gets in the way of the basic face that you wouldn't want as a permanent part of the textures.
I started off with rudimentary skill at best with Photoshop, and thanks to the University of Google, spent a lot of time reviewing training videos to teach myself how to use the various tools, to create masks, and perform various other Photoshop wizardry. If anyone cares, maybe one day I'll illustrate my favorite Photoshop tips and tricks that any total amateur* can do but as a general comment, I'll just say that I've done my time of fixing source images and the resulting textures. [*I was and still am a total Photoshop amateur. I'm hoping that one day I'll cross paths with someone who isn't, who can teach me how to properly fix these things.]
Marahzen's Musings on Creating Characters (and other matters)So ... FaceGen. That singular thing that literally brought me here and sustained me through five months of newbie fumblings, allowing me to learn Daz while using my characters, not someone else's characters, just like I wanted.
Mostly, I broke up with FaceGen because Face Transfer - once I figured out the Face Transfer Shapes thing - produced a better starter character for me. At the time I still had no idea how to fix a stock G8 character simply updated with FaceGen textures - which looked like it had been staked out in the desert for six months. When my hacky Altern8 workaround fell out of the sky within days of revisiting Face Transfer, I took that chance new pairing and ran with it. I'm always looking for newer or better ways to do something, and if I find one, I move on, with no hard feelings about yesterday's "new better."
But to be honest, I also left FaceGen because there was another problem that was starting to bug me.
I am the kind of person who is glad to rave about things I love; who is happy to talk about what works for me. What I don't want to do, especially in context of a hobby that is supposed to be fun, is clutter it up with the negative energy of complaint or of being unhappy with things. If I don't like something, I'd rather turn my back and walk away than linger and be unhappy with it.
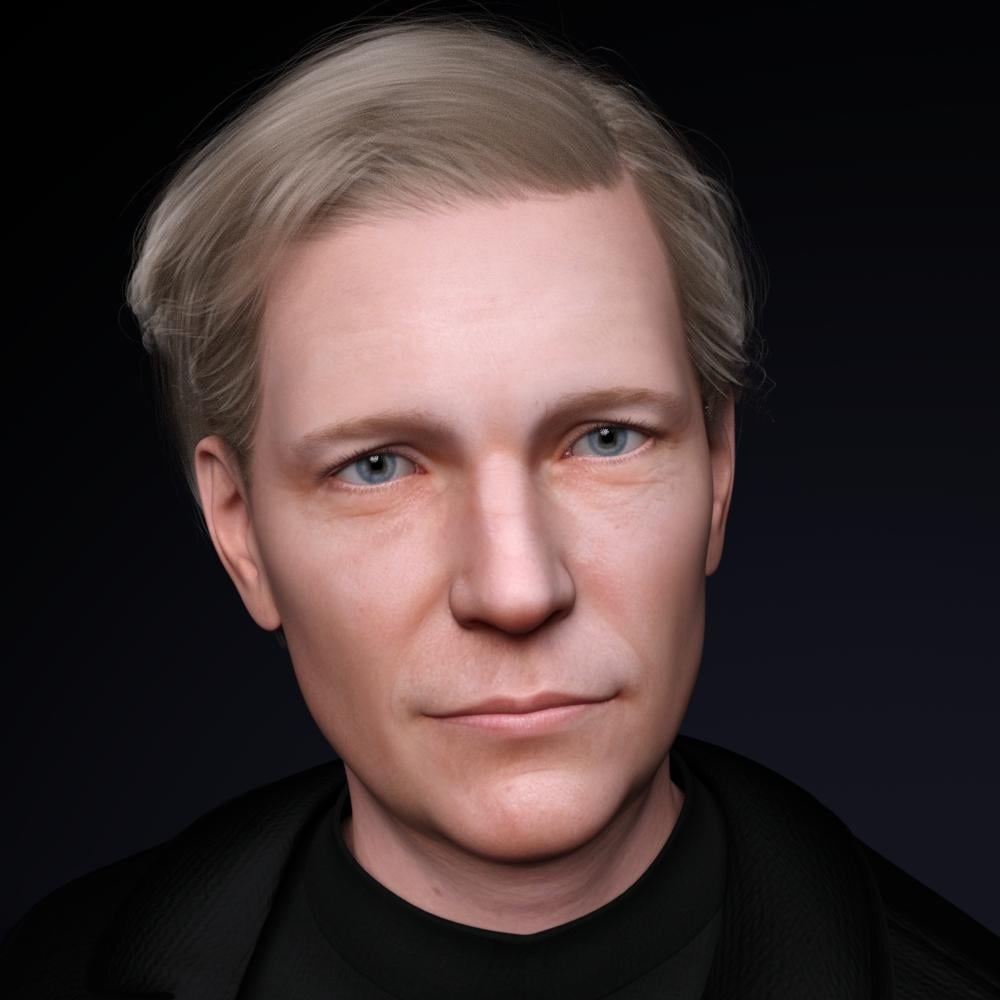
So that said, here it is: FaceGen creates wide squirrel cheeks and sometimes long faces/noses, and as time went by, I ran across more and more characters that just looked terrible as FaceGen characters. At a certain point, I finally squirmed and edged away from blaming all of it on my newbieness. Some of them were fine; in fact, some of them I like better in some ways than their subsequent FT/FTS version.
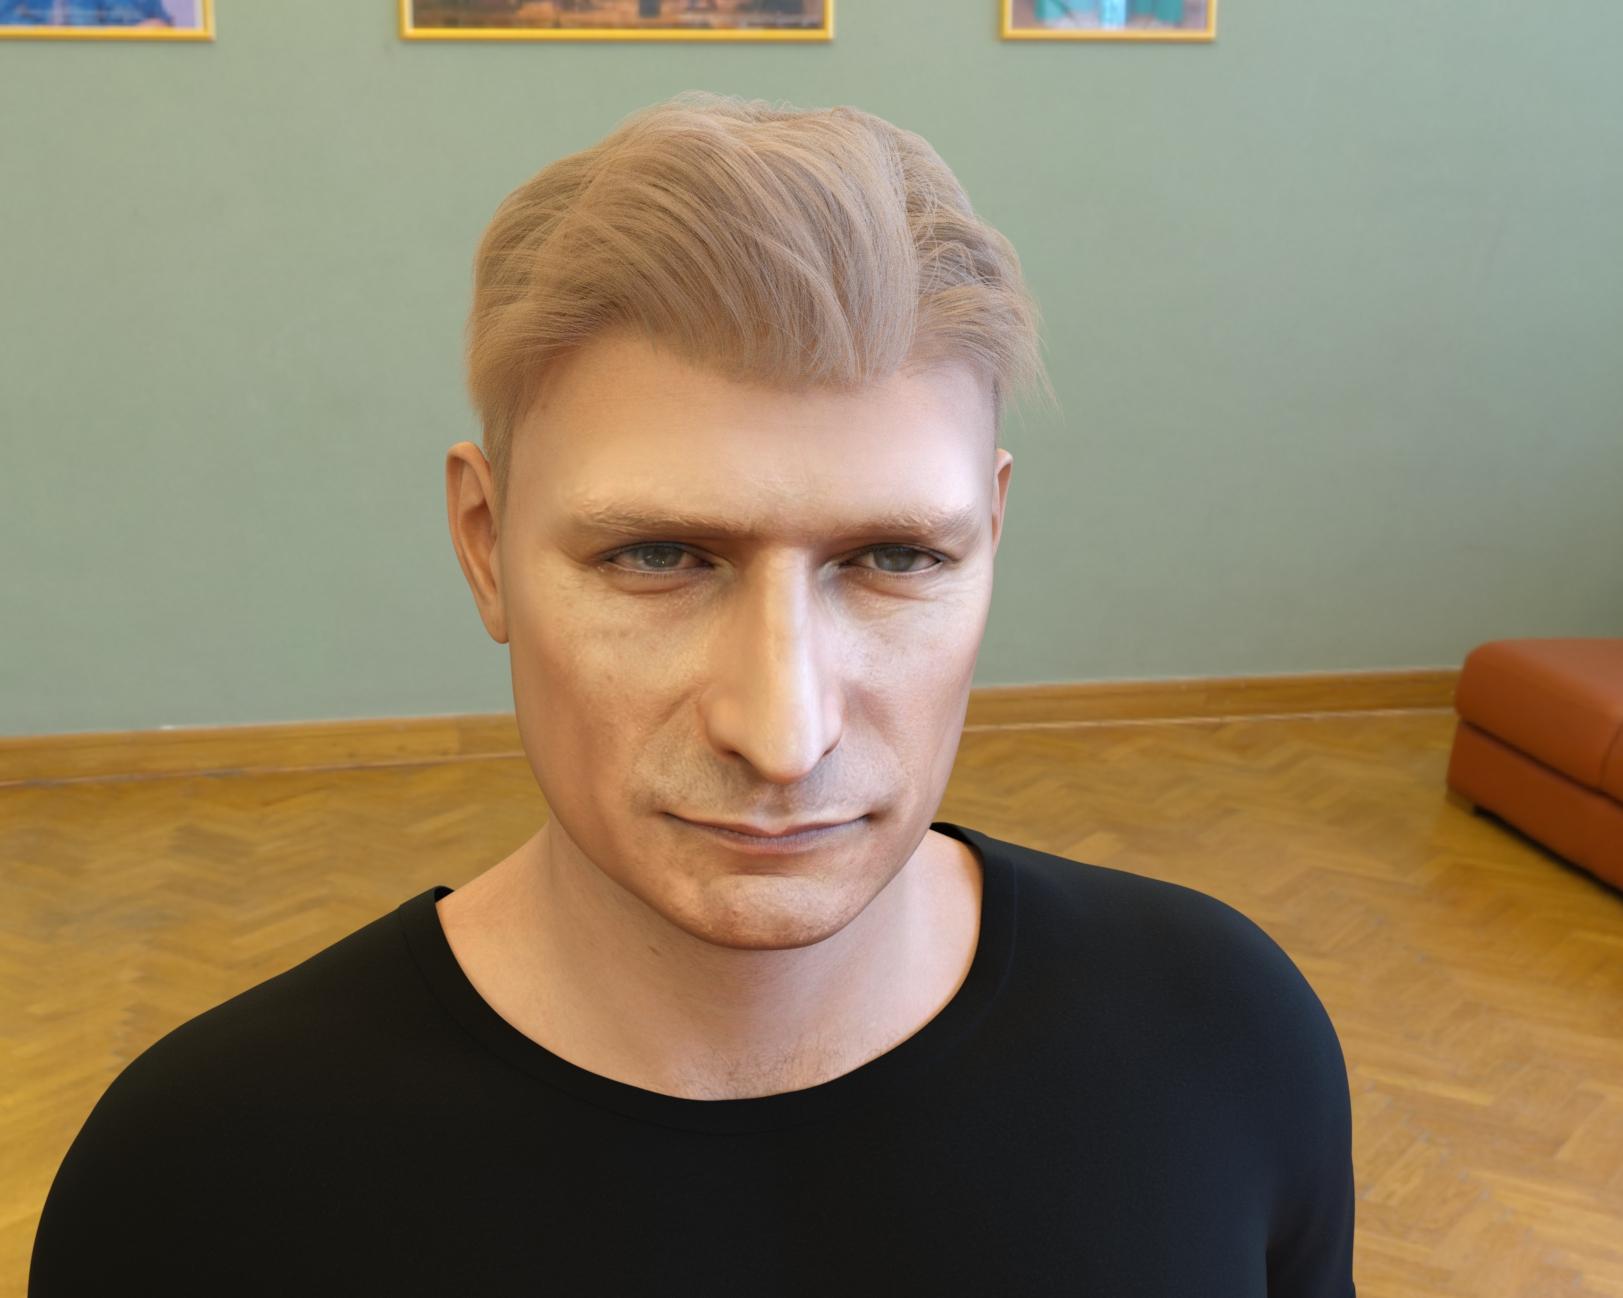
And then, some of them looked like this one.
That just wasn't going to do.
So I moved on to FT/FTS/Altern8 and produced a version of him (and most of the others) that I could live with.
 x4 PCIe 4.0 bottleneck for RTX A4000, how relevant is it?
PCIE 4 can transfer a theoretical maximum of 2GB/s per lane. I doubt you'd see that maximum in everyday work but it won't be too far off. A 14GB scene transferred via your slowest lane (4X) would take less than 2 seconds to be pushed from RAM to VRAM. Even if you had a PCIE 3 board it would be under 4 or 5 seconds. If you only used one card on the 16X lane the transfer would be almost instantaneous but I doubt you'll miss 2 seconds!
You will notice essentially zero difference using a second card in a slower lane, or even a previous gen. motherboard. Unless you are a droid; in which case all bets are off.
The better your processor the faster the scene will be assembled in system memory before it's drop-kicked over to the GPU. That's where you'll see a performance increase which will more than negate the eye-blink time loss of adding another card.
Just be aware that although the A-series cards operate at lower temperatures than their gaming equivalents the blowers do need good airflow and can't be butted right up against each other. Check your motherboard slots have clearance to allow a case fan to blow through them. Yours are single slot cards so this hopefully shouldn't be an issue - ours are dual slot and it took a while to pin down a motherboard that would work.
how to load a morph for v4?John 9!tsroemi said:
Elor said:
tsroemi said:
Also, it looks to me like we're not getting any real body shape included with the character itself anymore - ? Just something like the base masculine shape. So, no HD, no body shape ...
Maybe Daz added it since your message, but the main page of John 9 lists a 'John 9 Full Body Shape' morph.
Thanks, what I meant was that the included body shape seems very generic to me and very 'doughy'.
It's not chiselled, but its got some nice details for a more average bod, and to my eyes better proportioned that the couple of other average bodies we've had in the core figures. Little details like the shoulder blades, neck muscles, and hands, all seem to pose better than expected. The pectoral muscles seem to deform well when I tried the yoga pose set. I like the shape of his arms and legs. Shoulders look a bit strange when posed with arms overhead, but that's pretty much universal with all the figures.
So, for me, the body ended up being a bonus. :)
Ha, OrangeFalcon. That was my first thought when I saw the bundle.
dortybassa - Michael 9 mixed with Julius 9 was always my Oscar Issac go to. I do love me a bearded Oscar tho.

I hope everyone has some fun with him over Easter and can post some renders.
how to load a morph for v4?thanks crosswind
I meant the latter, with morph loader pro
Why are G8 nails messed up?PerttiA said:
MelanieL said:
Richard Haseltine said:
lou_harper said:
I did it with a G8 base figure loaded into the scene, no pose, nothing. I'm lost. But I realized I have too many G8 figures and I'm uninstalling a bunch.
A base figure isn't necessarily zeroed - if shapes ar saved with non-zero default values they will be applied but, because they are at their defaults, they will not show in Currently Used (I wish therte was a way to show non-zero values, which is what would help here)
Is it possible to write a script to find non-zero morph values? If it is, then it would be a great kindness if someone who knew their way round DS scripting could make and post one.
Zeroing the figure makes those non-zero defaults also change their value to zero, and then they can be seen in "Currently used" with the value of 0 shown in white.
To fix any ill-behaving (non-zero default value) morphs, do as follows;
1. Open DS and load "Genesis 8 Basic Female" (to an empty scene)
2. Right Click at Parameters Tab->Preferences->Choose "Show Hidden Properties" (part 3 zeroes only 'visible' dials)
3. Right Click at Parameters Tab->Zero->Zero Figure (Zeroes the value of all the 'visible' dials)
4. Right Click at Parameters Tab->Memorize->Memorize Figure (Sets the current value of all the dials as their default value)
5. Edit->Save As->Support Asset->Save Modified Assets (Writes the changed default value to the morph files that were changed)When saving "Modified Assets" DS shows a dialog and asks for confirmation;
"The following file(s) will be permanently modified:" - "Accept/Cancel" - Choose "Accept"Okay, that seems to have done it. Step 3 took 7 minutes. Step 5 should be File, not edit. ;)
Thank you!!! I will save this for future reference.
Why are G8 nails messed up?MelanieL said:
Richard Haseltine said:
lou_harper said:
I did it with a G8 base figure loaded into the scene, no pose, nothing. I'm lost. But I realized I have too many G8 figures and I'm uninstalling a bunch.
A base figure isn't necessarily zeroed - if shapes ar saved with non-zero default values they will be applied but, because they are at their defaults, they will not show in Currently Used (I wish therte was a way to show non-zero values, which is what would help here)
Is it possible to write a script to find non-zero morph values? If it is, then it would be a great kindness if someone who knew their way round DS scripting could make and post one.
Zeroing the figure makes those non-zero defaults also change their value to zero, and then they can be seen in "Currently used" with the value of 0 shown in white.
To fix any ill-behaving (non-zero default value) morphs, do as follows;
1. Open DS and load "Genesis 8 Basic Female" (to an empty scene)
2. Right Click at Parameters Tab->Preferences->Choose "Show Hidden Properties" (part 3 zeroes only 'visible' dials)
3. Right Click at Parameters Tab->Zero->Zero Figure (Zeroes the value of all the 'visible' dials)
4. Right Click at Parameters Tab->Memorize->Memorize Figure (Sets the current value of all the dials as their default value)
5. Edit->Save As->Support Asset->Save Modified Assets (Writes the changed default value to the morph files that were changed)When saving "Modified Assets" DS shows a dialog and asks for confirmation;
"The following file(s) will be permanently modified:" - "Accept/Cancel" - Choose "Accept"Why are G8 nails messed up?MelanieL said:
Richard Haseltine said:
lou_harper said:
I did it with a G8 base figure loaded into the scene, no pose, nothing. I'm lost. But I realized I have too many G8 figures and I'm uninstalling a bunch.
A base figure isn't necessarily zeroed - if shapes ar saved with non-zero default values they will be applied but, because they are at their defaults, they will not show in Currently Used (I wish therte was a way to show non-zero values, which is what would help here)
Is it possible to write a script to find non-zero morph values? If it is, then it would be a great kindness if someone who knew their way round DS scripting could make and post one.
It's on my (not so) little list. Edit: I think this would do the heavy lifting (heavy listing?) http://docs.daz3d.com/doku.php/public/software/dazstudio/4/referenceguide/scripting/api_reference/samples/properties/node_properties/start - it would just need a filter at the output stage to get the current value and list it only if it was non-zero.
How to rig cloth to a shaped character?You need to set the Source Shape to Current, or to the morph used if it is just one, then check Reverse Source Shape from Target in the additional options. The process will then adjust the model to fit the base, rig that, and project the morph(s) into the result to make it follow the figure shape.
It is better to make the outfit around the base shape, then mape new shapes for each morph used and load them as new morphs via Morph Loader - that way you are not relying on any auto-adjustments or projections.
How to rig cloth to a shaped character?All the tutorial are makeing cloth for the default G9/8 figures, using the Transfer Utility to convert it in to a duf asset, but who will do that in the production? Of cause I want the garment to fit my customed character first and foremost (I mean I am not using the defaut G9/8 figure), and than I will consider to transform it into a duf cloth asset and use it on other characters.
And when I tried to use the transfer Utility tool on a deformed character, things will go wrong. (http://docs.daz3d.com/doku.php/public/software/dazstudio/4/userguide/creating_content/rigging/tutorials/transfer_utility/start) Because the figure is not in default shape. I guess that it's because DAZ restore the figure to the default shape and rig the static cloth and then revert to the shape I manually disigned. So the cloth will be definitly warped.
Can anyone tell me if there is some setting that I missed? That could rig the .obj cloth on a non-default G9 figure?
Daz 3D is part of

Connect
DAZ Productions, Inc.
7533 S Center View Ct #4664
West Jordan, UT 84084Licensing Agreement | Terms of Service | Privacy Policy | EULA
© 2026 Daz Productions Inc. All Rights Reserved.