-
Quick question about SubD and detail maps.
1/ HD Morph
A Published Artist exports as obj the Genesis with some subdivisions. Adds details with Blender or ZBrush without modifying the polygon count. Import that as an HD morph. That's the most basic thing : HD detailing.
2/ Displacement Map
You got that right. A 2D image (displacement or height map) will affect 3D vertices. An image = pixels. 3D = vertices. If pixels are 50% gray, nothing happens. If pixels are black 100%, vertices are pushed down to the max. If pixels are white 100%, pixels are pulled up to the maximum. The more Surface Tab > My_Object > Geometry > SubD Displacement Level is a high number, the more your vertices will look like the pixels.
3/ Normal Map.
In Normal Maps (I answer quickly anyway) each 2D color means a direction in the X,Y,Z environment/space of a 3D model. My Lion has many polygons going in multiple directions. Those directions (aka normal of the polygon) are recorded (baked) onto an image and become colors. And that image, once applied on anything, will have color info about the orientation of all polygons from the sculpted object. Orientation that Iray or any other path/ray tracing engine, or real-time game engine, can use to fake the light hitting on objects... that are not there. Fooling our brains.
The brilliant John Carmak that I had the chance to work for a while ago, revolutionized 3D forever, with Doom 3 around 2003. Since then, Normal Maps are widely used in all 3D games and movies... because it's such an amazingly powerful technique, for skin pores, the weft of a fabric, small rocks on the ground, etc. and tons of other macro and micro detailing of surfaces without the need to add any geometry.
Romans were using the "trompe l'oeil" technique in their walls paintings. 3D artists use Normal Maps. Similar concept, except Normals catch light sources, create ultra believable details that don't exist, and can be seen from any angle. That's pure genius.
I'm gonna stop there. I never know how much people know before answering. My advice kindly is : if you love 3D, forget Daz for a few months. Install Blender and learn the basics of a 3D workflow :
3D blockout > 3D modeling / sculpting > 3D retopology > Defining UV Seams > Unwrapping > Baking > 3D hand painting / procedural texturing.
There are many steps in a 3D modeling workflow nowadays and if you practice them a bit (avoid the terrible f@$%king donut tutorial...) they will make you see Daz on a whole new level. If you don't spend that time learning the behind the scenes of how assets in Daz are made, you're gonna end up drowning in tons of blurred technical info and wrong interpretations. Better to invest time learning, than loose time trying to figure out things without the necessary keys to understand them.
Cheers. I really gotta go back to work ;)
P.S : Polycount Wiki is getting old. But it still has a lot of well explained info about all those technical 3D words.
Diffeomorphic HD helpCan you import correctly my test scene ? Or can you import correctly the G9 female with the standard textures ? If yes then it may be an issue with a specific figure you can try another figure to check it, then upload a test scene in duf format as simple as possible with the steps to reproduce the issue.
OT - 'cause some of us need a little breakThese videos may help some.
As using conversion methods for shoes tends to miss the mark, one can export out the shoes as .obj. In a modeller do any resizing work required for the target figure, then import the .obj back into D/S. Rig it for the target figure.
Rigging high heeled shoes :-)

Over the years I have noticed that a number of customers really want their purchases to look like the promos. So this next one is a basic camera 101 tip: Use a camera and set the focal length appropriately.
Rigging with a donor rig:

If using the lovely product, UltraSceneryXT, in the Render Settings, the optimization setting must be set to "memory." Long story short, if one sets it to speed one is not likely to get a render.
Looking for handbra and breastfeeding poses for G8FRichard Haseltine said:
So, to be sure you hae the poses installed correctly go to the Content Library pane>Daz Studio Formats>The Content directory you installed to>People>Genesis 8 Female>Poses>ChestnutP>G8F Hand Bra. If the files are theer you can apply them by double-click as usual
Yep, THAT works just fine. Glory hallelujah, this has been puzzling me for almost three full days. Merci.
Why, then, do the files not show up when I use the search bar? Does this also require adding the files to the database? Or does it have something to do with what I said above about the file name seemingly not being what is actually being searched?
Content Library option menu, the lined/"hamburger" button in the top corner or right-click the tab, select Content DB Maintenance, and check reimport metadata, then check the iems you want to add in the next dialogue
I got to the Import Metadata menu, but neither this product nor Saxa's one are there. I painstakingly scrolled thorugh every item available (since they are not in alphabetical order), and they are not there. Why might that be? Going by the Daz Studio Formats the files are in the correct place (two of the correct places, in fact).
One odd thing is that although the poses seem to work, when I double click them I get a dialog which I've attached a screenshot of below. I feel like I'm getting the same result whichever option I pick, and again it doesn't appear to be causing a problem for the poses working properly, so I'm mainly wondering why this is coming up.
Looking for handbra and breastfeeding poses for G8FBoth Smart Content and the Products (and Categories) containers in the Content Library (and also all the Presets tabs in property panes) depend on the files' having been added to the database. The daz installers do that for you, some other content will come with the necessary metadata but it will have to be imported first (Content Library option menu, the lined/"hamburger" button in the top corner or right-click the tab, select Content DB Maintenance, and check reimport metadata, then check the iems you want to add in the next dialogue - this has nothing to do with installing the files, it's for accessing the installed files through the databse). The three ... Formats containers in the Content Library do show the actual files on disc, except for the first entry, Daz Connect, which is for files installed through Daz Studio itself and is dependeent on the database.
So, to be sure you hae the poses installed correctly go to the Content Library pane>Daz Studio Formats>The Content directory you installed to>People>Genesis 8 Female>Poses>ChestnutP>G8F Hand Bra. If the files are theer you can apply them by double-click as usual
Animation issueSo, since 5h hours now i'm trying to export an animation to unreal and.. nothing.
If i use the daz to unreal plugin i only got an "animation" which is more a pose of a frame of the original animation.
If i do a simple export (wich animation checked) and import i've the skel mesh but no animation at all.
What do i miss? My animation is is the timeline, it's even saved in my library so why, oh please tell me why it isn't working ?EULA Update & Editorial Licenses Coming to DazArtAngel said:
...Aside from simply complaining that I think it is a poor idea to use the editorial licence at all (and I still think this is poor naming, as other sites use the same name to mean "must meet fair use criteria", where Daz instead means "non-commercial use only"), I feel all of the following changes are necessary to make this licence "safe" for users:
- Much more obvious notifications about the editorial licence on the store, such as an clear flag on these products in the cart, and a reminder that has to be actively dismissed on checkout.
- An option to hide all editorial licence products from the store entirely.
- A means of flagging products in Daz Studio metadata as having restricted usage (and which is clear when loading from either the Content Library or Smart Content), such that it is also obvious after purchase that a product cannot be used commercially.I totally agree. And would certainly use "- An option to hide all editorial licence products from the store entirely." It's a great idea. I hope your suggestion sees the light of day and pans out.
I think all three things are quite important. A hide option wouldn't be vital if there were an "are you sure" option on checkout, but I'm certain some people will want/need to avoid the licence entirely, and Daz should really implement an option to avoid inconveniencing or annoying those customers.
The last one I think is particularly important from Daz's perspective, because this increases the potential sales. I *like* the Retro Props, and right now 99% of my renders are non-commercial, so the licence wouldn't be a major issue if I had a reminder of that in future. However, I cannot justify "poisoning" my library while I cannot filter restricted use products out of it, and I have to keep my library clean so that if I do commercial renders in future I can trust that whichever prop my library has shown me is safe.
It is not viable or reasonable to expect every user to have to manually check the licence of every product and prop they use in a render (certainly not after years of simplicity), so if Daz are implementing a wider range of licences, they also need to implement a filter into the program to help comply with that.
EULA Update & Editorial Licenses Coming to DazTaoz said:
According to Jack is was DAZs decision - because the vendor is in some sort of unfortunate situation right now they chose this solution instead of asking him to redo the objects in question. So who knows, maybe there will be an update later at some point so it can go commercial.
I get that but I wonder if sales might not have been suburb had they simply omitted the appliances, knocked a buck off and then had him redo those as an add-on. I can't see how an editorial only sale would not be crippling the products true sales potential. I truly believe this experience has tainted an item that could have been another mega star like West Park, because it really has the seventies vibe and it is an amazing product. Such a shame. But kudos to the artist. He did a great job.
RyadHollow said:
The editorial license statement hides and shows depending on whether "Hide 'Optional License Add-Ons' section on product pages" is checked or unchecked, respectively. There also is no notice while the product is in the cart, on the checkout screen, or the confirmation page after purchase. Additionally, it does not show when in portrait mode on mobile, but does in landscape or after switching to "desktop site" as others have said.
I never hide those not that it helped me in this particular case. Guess I expected it to be in the license add on in big red letters because it certainly could lead to more work for the support desk and refunds the way it is presented now.
...Aside from simply complaining that I think it is a poor idea to use the editorial licence at all (and I still think this is poor naming, as other sites use the same name to mean "must meet fair use criteria", where Daz instead means "non-commercial use only"), I feel all of the following changes are necessary to make this licence "safe" for users:
- Much more obvious notifications about the editorial licence on the store, such as an clear flag on these products in the cart, and a reminder that has to be actively dismissed on checkout.
- An option to hide all editorial licence products from the store entirely.
- A means of flagging products in Daz Studio metadata as having restricted usage (and which is clear when loading from either the Content Library or Smart Content), such that it is also obvious after purchase that a product cannot be used commercially.I totally agree. And would certainly use "- An option to hide all editorial licence products from the store entirely." It's a great idea. I hope your suggestion sees the light of day and pans out.
Edit: Who said that last bit? The bit with the really good suggestions? It was:
Matt_Castle said:
I've put in a ticket to complain about this, but I'll say my piece here as well.
The notice about what is a very different licence is easily missed as part of the block containing product compatibility. I looked at the products that apparently have this licence more than once as possible future purchases, and still only noticed the new licence had been used at all on seeing this thread.
And whether or not it's visible on the page, it's not visible anywhere else at all. I'm sure many of us have added a new Daz+ product that we didn't particularly need to a cart because it counted as a new item to trigger a sales deal, but where we've just quickly picked whichever one looks like it might possibly be useful down the line. It's entirely possible to add these products to the cart, purchase and use them without ever seeing any notification that there's a restricted licence. No warning that I can see is given in the cart, even up to the very moment before clicking the final purchase button.
Aside from simply complaining that I think it is a poor idea to use the editorial licence at all (and I still think this is poor naming, as other sites use the same name to mean "must meet fair use criteria", where Daz instead means "non-commercial use only"), I feel all of the following changes are necessary to make this licence "safe" for users:
- Much more obvious notifications about the editorial licence on the store, such as an clear flag on these products in the cart, and a reminder that has to be actively dismissed on checkout.
- An option to hide all editorial licence products from the store entirely.
- A means of flagging products in Daz Studio metadata as having restricted usage (and which is clear when loading from either the Content Library or Smart Content), such that it is also obvious after purchase that a product cannot be used commercially.As for the Cyber-Racer.
kyoto kid said:
Serene Night said:
Man, I own cyber racer, and now I can't use it. I bought it in October and I can't return it.
...had the Cyber Racer on the Wishlist, just removed it. I need to submit a refund ticket for the Retro Apartment Props 2. This keeps up and they'll have to hire more CS personnel to handle the increased load.
Currently the cyber-Racer has a product Cyber Liveries, an add-on to the Cyber-Racer. Cyber Liveries comes with a commercial license. Or at least it does right now as I write this, and did when I bought it.
EULA Update & Editorial Licenses Coming to DazImago said:
Luckily I don't own those products and I will NEVER biy them. But threre's a priblem: they arent really marked as Editorial beside that small note... A separate page or a filter would help more avoid that stuff.
I am 100% for such a filter in the shop interface, 20% for such a filter in the product library web interface, and 200% within DAZ Studio. It may still show the items, but disabled/grey. Since i will always also be amining at computer games, some of which will need some 3D, (even if i tried for relief only), licensing is crucial, in terms of knowing what licenses an item has, and of course a selection or inspection is necessary for efficiency.
Currently i am building a simple tool to process orders, and later scrape official web pages for both what should be contained, and the actual licenses available (without login, just manually saved orders html and shop pages, and yes, daz3d.com had me at "xhtml"). So i have my own little database, and maybe i'll have to implement my own little selection dialog(s) for DAZ Studio itself. Plans are to have license and metadata accounting working between applications (DAZ Studio, Blender, ..., ... godot-engine? ...), not aiming at selling plugins/scripts (There is alternative selection dialog like from ManFriday, and while some aspects are very good, it doesn't do some things i need, and also isn't a virtual view, so it will sometimes display nothing, if there are too many items. Maybe, once i am into it enough, i may also try to suggest/improve that/such plugins, or offer cooperation. But i might as well fool around with basic rendering and very basic exporting tests for quite a while, initially.)
That being said, i think the editorial license makes sense, and it will rather be few items. (E.g. for public media/places... memes, depicting something for comparison of epoch, sometimes artists publish something for free, and some don't want it to be used commercially, AND also think of showcasing something that comes in a larger package, then with commercial license).
Those who are after interactive licenses in general, will have to read the licensing section anyway, though admittedly it should have a thick colored border or something, if it's not the standard license, and filtering for licenses absolutely makes sense everywhere. Unfortunately hardly any marketplace implements such, and much worse, even with standard and interactive/extended licenses, they allow restrictions on the licensing to be put just anywhere in the description text. Which kind of makes it necessary to have a database containing the item with the full description text, if you buy such a restricted item, with the intention to just use it for rendering, while you also use the interactive/extended and standard licensing for other items a lot.
EULA Update & Editorial Licenses Coming to DazI've put in a ticket to complain about this, but I'll say my piece here as well.
The notice about what is a very different licence is easily missed as part of the block containing product compatibility. I looked at the products that apparently have this licence more than once as possible future purchases, and still only noticed the new licence had been used at all on seeing this thread.
And whether or not it's visible on the page, it's not visible anywhere else at all. I'm sure many of us have added a new Daz+ product that we didn't particularly need to a cart because it counted as a new item to trigger a sales deal, but where we've just quickly picked whichever one looks like it might possibly be useful down the line. It's entirely possible to add these products to the cart, purchase and use them without ever seeing any notification that there's a restricted licence. No warning that I can see is given in the cart, even up to the very moment before clicking the final purchase button.
Aside from simply complaining that I think it is a poor idea to use the editorial licence at all (and I still think this is poor naming, as other sites use the same name to mean "must meet fair use criteria", where Daz instead means "non-commercial use only"), I feel all of the following changes are necessary to make this licence "safe" for users:
- Much more obvious notifications about the editorial licence on the store, such as an clear flag on these products in the cart, and a reminder that has to be actively dismissed on checkout.
- An option to hide all editorial licence products from the store entirely.
- A means of flagging products in Daz Studio metadata as having restricted usage (and which is clear when loading from either the Content Library or Smart Content), such that it is also obvious after purchase that a product cannot be used commercially.Has anyone tried to render DAZ3D models in Lumion?Do you need the latest Lumion version 12.5 ?
We have been working with Lumion for a long time, we recommend Lumion 10 Pro.
See if you can get a used license.The engine of Lumion 11 and 12 is the same as Lumion 10, see the result no differences.
Be smart and save money... a lot of money
Lumion2023 is coming out soon, we're excited.

@ Wait what? You just export and it automagically builds the materials using the texture maps from the daz library?
Hello,
Yes, you export the DAZ figure into the format *.obj
and import this into Lumion. All textures will be imported. It can happen that one or two textures are not taken over, just assign them. We edit the hair in Photoshop and make an alpha mask._____________________________________________________________________________________
@How long does it take the process of moving the scene from Daz to lumion?
And is it really without any further touch up or set up?Hello,
Importing a DAZ figure into Lumion takes a few seconds.
You can then position the figure as you like in real time and change all the textures.
Almost nothing has been improved on the pictures shown here, there is still a lot of room for improvement. We are concentrating on building the worlds, the figures are only a secondary matter for the time being.Everything was built with DAZ 3D Hexagon. We want to inspire people to create models themselves.
It doesn't always have to be Blender. ^^https://www.daz3d.com/hexagon-2-5-download-version

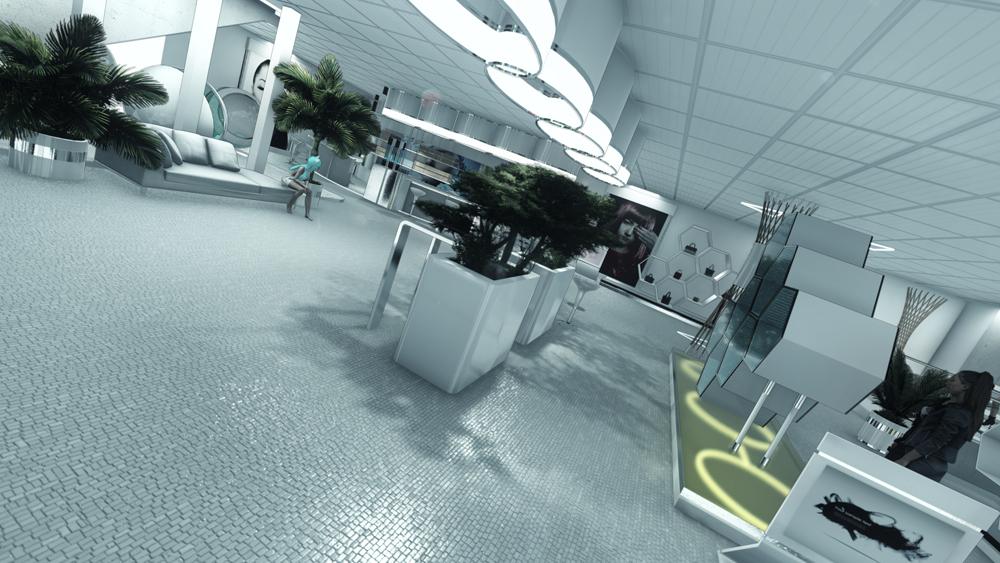
Rendertime 9 seconds
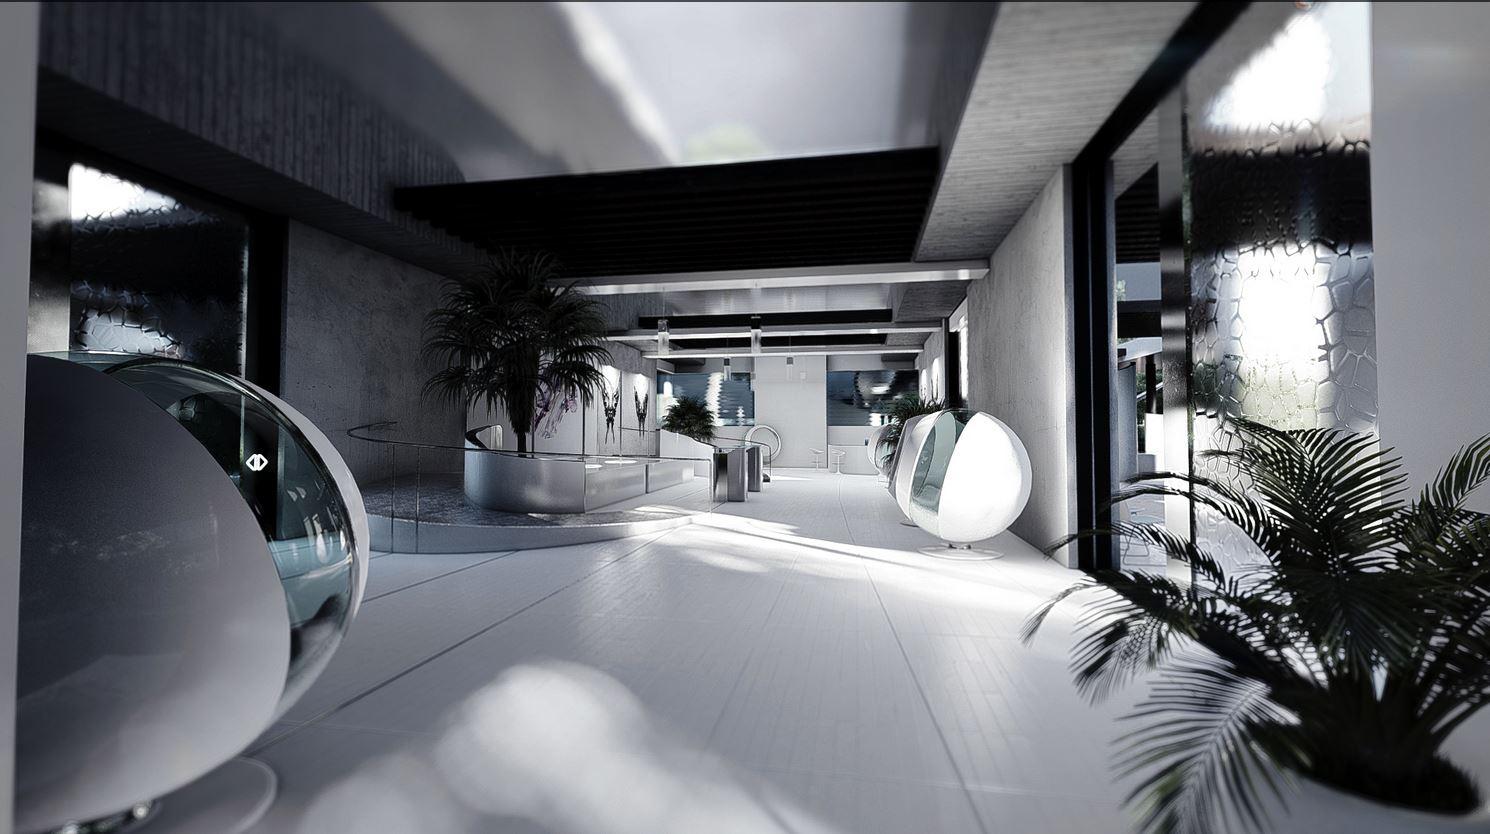
Believe us, it's so much more fun to build models yourself and bring them to life in Lumion.
Then you can fill this world with DAZ characters and tell stories.
The focus should never be on making money, but on passion and joy.Be creative!
Force Feeding G9mazinkaiserzero said:
Also, to finish, one little thing I just remembered. There is also the issue that if the HD details for characters will be now included in the same base character morph, you won't be able to use them partially for your own characters.
Anyway, the point is that Daz is starting to make more stuff only possible if you can import HD morphs, which is still only a PA tool.
You are believing wrong.
The V9 and M9 shapes do NOT included HD details. They each have their own seperate HD detail morphs that can be dialed in as you please. What is different from G8 is that the HD morphs will come with a characters instead of being sold seperataly. For those characters that will end up with them.
The end user, who is just rendering images and animations does NOT require the HD import tool in order to use HD morphs inside Daz Studio. V9, M9, Josie and all the other characters to come are all modeled on the low res base shape and imported at base resolution.
Is it possible to use only the head of G8F for morph loader?Is it possible to use only the head of G8F for morph loader?
So export the head, change it, import it back.
G9 surfaces dilemmaI've notice that the new Genesis 9 models don't come with separated lips but instead the lips are attached to the head. Is it possible to separate the lips from the head like Genesis 8 models had?
I will give an example of what I'm talking about here:
1)In the first picture I have the Josie model loaded into another program and her lips seems to be attached to the head making it imposible to add lip gloss.
2) In the second picture I used a Genesis 8 model and the lips seem to be dettached from the head making it perfect for adding gloss.
3) In the 3rd picture I used as an example a custom model who has lips attached to the head but the gloss is separated and I was wondering if its possible to have this mesh/effect in daz even if I want to import the model in another 3d program?
PS: I already tried the methods above but the head is still attached to the lips...
Diffeomorphic HD helpPadone said:
You have to use the multires version that will use the same materials as the base mesh. The "hd uv" option is for true HD that doesn't work with geografts. Be aware that multires is limited to the HD shape though, to import HD jcms and morphs it is necessary the HD addon by Xin and requires a lot of manual work.
Personally I tend to avoid HD whenever possible, or just use multires for the HD shape when I have to.
Thanks for the quick response!
Yeah i never used to use HD with 8.1 but now certain chest features dont show without HD on G9. I only ever need the mesh with uv's and the make hair tool. I can then append my own mats and i dont need to pose or animate (although pose can be handy sometimes).
The HD would just the nipple area and maybe a bit of a full character detail morph. would i still need to use the addon by Xin or is there a simpler way, even without gens if thats the sticking point?
Diffeomorphic HD helpYou have to use the multires version that will use the same materials as the base mesh. The "hd uv" option is for true HD that doesn't work with geografts. Be aware that multires is limited to the HD shape though, to import HD jcms and morphs it is necessary the HD addon by Xin and requires a lot of manual work.
Personally I tend to avoid HD whenever possible, or just use multires for the HD shape when I have to.
Force Feeding G9mazinkaiserzero said:
At first I wasn't convinced. I definitely liked it being one unified base and adore the higher density mesh, but wasn't sure if it was enough to say goodbye to all the G8 textures and morphs I've bought. I saw the solution released for the textures, and I got to say I'm not convinced about that one. Don't like the idea of having to rely on grafts for most of the characters I want to make, not only it might get in the way of some other grafts but I'd bet it will get weird shapes with some morphs it doesn't like or at the very least there is the issue that it won't copy HD morphs. So HD lips details? Gone.
Saw the solution for transfering morphs. It doesn't work if, say, you only want to transfer the head morphs. You have to disable the g8 clone morph because it's waay taller than G9 base, so your head morph will look different. And there is the issue that some will get wonky eyes.
Having said all that, I got the Josie 9 bundle because it had a really good sale during Black Friday, and I also got the Essentials, the Daz morphs for G9 and Shape Shift, all together thanks to the punch card discount accumulated with other discounts. So I tested G9 and I got to admit...
... It just felt... good.
I'm also not particularly happy that the lip surface is no longer separated from the face hence having to hope the one face spec map does a good job at having enough shine for the lips. I don't know, maybe PAs will start including LIE spec options for the lips. But even then, I enjoyed making a character with it. Honestly, I'd just need Breast Control and the 200+ G9 head morph versions of zev0s, which I'm assuming are in the works, maaaybe Killer Legs for G9, and I'd be fine. I could just get extra stuff like hairs and clothes only if I reeeally like them and just convert the g8 stuff.
Except for the skin textures... that is definitely still a problem in my book. It's just way too much down the drain and even now I'm not sure it's worth the change. At the very least I know I would become waaaaay pickier than I was with G8.
Also, to finish, one little thing I just remembered. There is also the issue that if the HD details for characters will be now included in the same base character morph, you won't be able to use them partially for your own characters. You will lose the HD details and maybe even get weird shapes. Of course, this is if you do the process of creating one morph for your character after mixing all the morphs you want, but come on... that is the civilized way to do it

Anyway, the point is that Daz is starting to make more stuff only possible if you can import HD morphs, which is still only a PA tool. Same thing with navels and nipples. I won't get into tinfoil hat conspiracies that it's intended to get more sales, it might be for the better but then just release the tool for the public. I mean, just having it doesn't mean HD morphs will become unnecessary, the same way that (in theory) anyone here could paint their textures if they wanted but still buy them here. One thing is being able to do it, another is being able to do it well.
And those were my two...scrambled cents... about G9 xD
Yeah, this is an issue if you like combining characters. The only solution that I've come up with is to use the G8 clone and combine the characters so that they total 100% (e.g., I can combine 4 previous G8 characters dialed in to 25%), otherwise it gets seriously wonky. Then the body can be changed up using G9 morphs. It works pretty well using the clone if you just want to use one character's head without combining it with other character heads though.
Re: textures..I'm really hoping that RiverSoft Art releases a character converter like the ones for previous generations. The current solution requires you to pretty much convert every texture on your own, save it out and then you can use it. Not difficult obviously, but if you have a lot of textures it would take awhile and you're still left with using grafts.
Diffeomorphic HD helpBeen using diffeo for a while now but this is my first time trying to import HD meshes (thanks g9). Im following the documentation on bitbucket and exporting with geometry tool enabled and both with and without geografts, export with and without hd uv, but evey time i just get fingernail textures all over the mesh and nothing else. Im not very good with UVs in blender so ive always trusted diffeo to sort them. Was always ok with materials but now i get seven material zones (all fingernails and one mouth texture) and appending materials and adding them seems to not work.
Force Feeding G9At first I wasn't convinced. I definitely liked it being one unified base and adore the higher density mesh, but wasn't sure if it was enough to say goodbye to all the G8 textures and morphs I've bought. I saw the solution released for the textures, and I got to say I'm not convinced about that one. Don't like the idea of having to rely on grafts for most of the characters I want to make, not only it might get in the way of some other grafts but I'd bet it will get weird shapes with some morphs it doesn't like or at the very least there is the issue that it won't copy HD morphs. So HD lips details? Gone.
Saw the solution for transfering morphs. It doesn't work if, say, you only want to transfer the head morphs. You have to disable the g8 clone morph because it's waay taller than G9 base, so your head morph will look different. And there is the issue that some will get wonky eyes.
Having said all that, I got the Josie 9 bundle because it had a really good sale during Black Friday, and I also got the Essentials, the Daz morphs for G9 and Shape Shift, all together thanks to the punch card discount accumulated with other discounts. So I tested G9 and I got to admit...
... It just felt... good.
I'm also not particularly happy that the lip surface is no longer separated from the face hence having to hope the one face spec map does a good job at having enough shine for the lips. I don't know, maybe PAs will start including LIE spec options for the lips. But even then, I enjoyed making a character with it. Honestly, I'd just need Breast Control and the 200+ G9 head morph versions of zev0s, which I'm assuming are in the works, maaaybe Killer Legs for G9, and I'd be fine. I could just get extra stuff like hairs and clothes only if I reeeally like them and just convert the g8 stuff.
Except for the skin textures... that is definitely still a problem in my book. It's just way too much down the drain and even now I'm not sure it's worth the change. At the very least I know I would become waaaaay pickier than I was with G8.
Also, to finish, one little thing I just remembered. There is also the issue that if the HD details for characters will be now included in the same base character morph, you won't be able to use them partially for your own characters. You will lose the HD details and maybe even get weird shapes. Of course, this is if you do the process of creating one morph for your character after mixing all the morphs you want, but come on... that is the civilized way to do it
Anyway, the point is that Daz is starting to make more stuff only possible if you can import HD morphs, which is still only a PA tool. Same thing with navels and nipples. I won't get into tinfoil hat conspiracies that it's intended to get more sales, it might be for the better but then just release the tool for the public. I mean, just having it doesn't mean HD morphs will become unnecessary, the same way that (in theory) anyone here could paint their textures if they wanted but still buy them here. One thing is being able to do it, another is being able to do it well.
And those were my two...scrambled cents... about G9 xD
Genesis 9 anatomical elements gone after updateFor those that did not know here is a quicker way to reimport metadata without even opening Daz Studio.
Go to the Daz Install Manager and select the Installed Tab.
Tick the items you wish to reimport the metadata for.
Right click on the hamburger icon (found under sort order at the top of the page). You can click anywhere on the page but I find right clicking the hamburger icon prevents misclicking.
You can then left click on re-import metadata and select the asset (if reimporting one, all selected, or all missing). This will then re-import the metadata you select without impacting your abilty to keep using Daz Studio.
Hope this tip is helpful - David
Daz 3D is part of

Connect
DAZ Productions, Inc.
7533 S Center View Ct #4664
West Jordan, UT 84084Licensing Agreement | Terms of Service | Privacy Policy | EULA
© 2026 Daz Productions Inc. All Rights Reserved.