-
Started working on adding my files from Daz to DS
Aiko 4 like the other generation 4 characters (Victoria 4, Michael 4, Kids 4, etc...) uses a morph system that can't be installed through Connect. They install through DIM or manual install. Something about how they have to have all morphs in the same runtime to work properly...
Are we going to get the Creature Creator morphs for Genesis 3?I was disappointed with the Genesis 2 versions, too many of the heads had the mouth partially open. I used GenX to transfer the original Genesis version (mostly successfully) so I am impatiently waiting for GenX3.
A new UHD line of characters with 800'000+ vertices at base resolution?I am now doing SubD 3 on export out of DAZ and maybe SubD 1 in Octane....that is over 8 million polys and I see detail now in addition to my own.
Also you can preview the HD morph by setting the subdivision level on the figure, but that will slow your display to a crawl. I mentioned several times that you have to create your low poly morph first then do the details because of the morph projection issue. If you go straight to the high def morph and not do a lowpoly morph to help out, no clothes would fit as the clothing would go to the morph that can project to clothing. For example, if I didn't do a low poly base for my Jesse body shape, clothing would conform to the G3M base, making the clothing fit inside the area of the shape not on it because jesse is wider and shorter. The projection morph would give the rest of the information on how to fit that shape into clothing.
Great info! I don't know what I was thinking, but I thought there was a SubD level 2 limit in DS. I guess I was wrong because you can simply change that to higher SubD levels. The HD morphs out there look pretty good at the higher SubD levels in both DS and Octane. I usually use bump maps for small pore detail etc. In Octane you can only use 1 map (bump, normal, or displacement maps) at a time. I think the DS to Octane plugin may have gotten around that. The HD morph ability obviously has its own limits and challenges so there is no perfect fix for getting the end result....physcially correct characters with details down to the pore and skin scale level to create ultra realistic digital people. One day low poly figures with 8k or 16k resolution displacement maps scanned from real life may rule the day....until then the battle goes on.
Pikachu pose suggestionHow about a "look both ways before crossing the road" pose set.
And a tail morph so 'ee kin be used as a brushtail 'possum.
GENESIS 3 Iray Smart Converter And Advanced Managers (Commercial)Ok more and more strange, I now close and open DS, reload Dave, its torso for genitalia, then genitalia iray mats. The mismatch is still here, but not as strong as before. Can you tell me if you see a mismatch initially too? But then if I use the converter and the anatomy transfer, then I have "the same" mismatch as when I just load it. Not less but not more.
It is werid. I got a noticible line there, but tested it out a few more times and did not. It seems to be working now though.
Ok fine that it works.
I am having trouble with the Generation 4 converter. I installed it with Daz Connect, and it isn't working at all. I know this isn't the right thread, but I can't find a thread on Generation 4 converter. I get this in my log file:
Loading script: D:/DAZ 3D/Studio/Daz Connect Data/data/cloud/1_22869/people/generation 4/materials/v3digitimes iray converter for generation 4/g4t !apply iray materials on generation 4.dse<br /> WARNING: Script Error: Line 90<br /> WARNING: TypeError: Result of expression 'oObject' [null] is not an object.<br /> WARNING: Stack Trace:<br /> <anonymous>()@D:/DAZ 3D/Studio/Daz Connect Data/data/cloud/1_22869/people/generation 4/materials/v3digitimes iray converter for generation 4/g4t !apply iray materials on generation 4.dse:90<br /> Error in script execution: D:/DAZ 3D/Studio/Daz Connect Data/data/cloud/1_22869/people/generation 4/materials/v3digitimes iray converter for generation 4/g4t !apply iray materials on generation 4.dseOf course I did not have it as a Daz Connect script on my computer. I'm gonna have a look at what is happening, so far people had no issue but I don't know if they were using Daz connect or not.
Ok done. On my side, no issue with daz connect the conversion script works.
Maybe your figure was parented to something no? In this case try to unparent before applying. Please can we go on in the right topic to see what is happening?
About your issue : http://www.daz3d.com/forums/discussion/comment/1035737/#Comment_1035737
GENESIS 3 Iray Smart Converter And Advanced Managers (Commercial)Ok more and more strange, I now close and open DS, reload Dave, its torso for genitalia, then genitalia iray mats. The mismatch is still here, but not as strong as before. Can you tell me if you see a mismatch initially too? But then if I use the converter and the anatomy transfer, then I have "the same" mismatch as when I just load it. Not less but not more.
It is werid. I got a noticible line there, but tested it out a few more times and did not. It seems to be working now though.
Novica & Forum Members Tips & Product Reviews Pt 7Making good on my promise to showcase items bought in the 90% off sale that Daz_Steve so generously put back on the site. Starting with Nabila. (got her for under $3)
Rating: Recommend Nabila morphs, Be Pacific swimsuit (TEN materials!), and Elite Ponytail Hair- however it needs bangs morphs IMO. Very limited with what you can do with the bangs which are swept up onto the forehead/crown.
Try Nabila for a unique face- she has an interesting nose. I tweaked the slope of it and the nose tip slightly (and the lips.) There are FOUR HEADS to choose from. The first render is Gingersnap's skin with Nabila tweaked morphs, the second one uses her skin with a slightly different mouth. you can play with the skin materials to lighten or darken, this is out of the box.
The Nabila morph will provide an interesting nose on other characters. I picked her up during the 90% off and got her for under $3. You'll find her under FWPixAnson in Content Library under the G2F characters.
The Elite Ponytail Hair did not have bangs controls, only Hair Forehead Height. Any of the wind morphs that blew the bangs, blew the entire hair. It appears there are 10 morphs for the ponytail, but I just couldn't find any for bangs. I broke it down in scene and also did Parameter>Actor>Pose. If anyone finds bangs, I will change the review.
The Be Pacific Swimsuit is a lot of fun with many material options. TEN! Highly recommend for a family friendly one piece swimsuit! It loaded correctly, no tweaks needed. You can even raise the neckline if you want to, which is nice. (I didn't.)
HUGE render (1200 pixels tall) CLICK TO ENLARGE, click again.
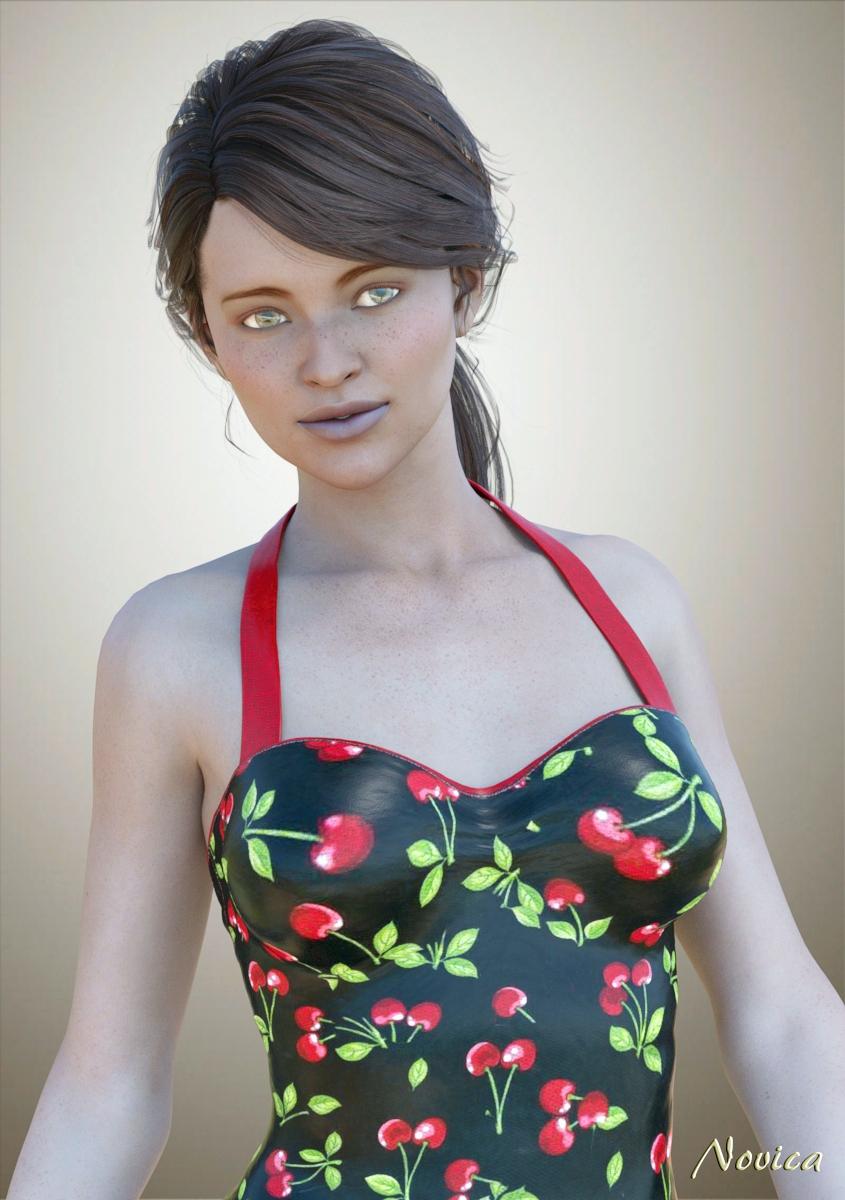
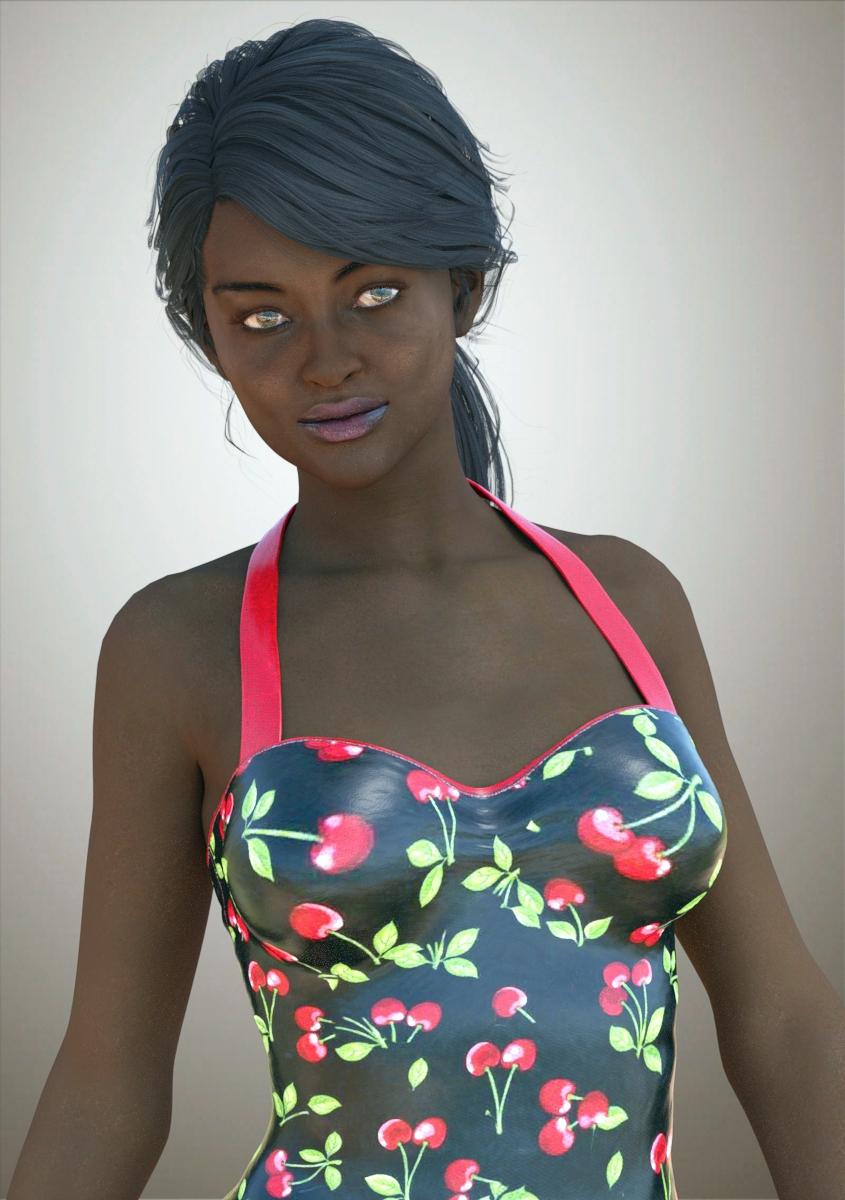
Nabila morphs were put on Gingersnap's materials. The lips are extremely shiny. Here's the fix if you want a bit more matte.
For the gooey lips, to reduce the shine on these, the two numbers represent the original setting and the new one. You can also change colors; I stuck to the original and only focused on the shine.
Bump Noise Strength 0 / 4.8 (more bumps, less shine) Specular Glossiness 93 / 78.3 Specular Noise Density 70 / 73.70 (do that one in small increments)
Specular 2 Glossiness 65 / 61.8 Velvet Roughness 20 / 21.5The background is one of the five free ones SereneNight posted for us.
LIGHTING: Using Malibu Overlook from HDR Labs.
I have some questions. Looking at these settings: Dome Only, Infinite Sphere, Draw Dome Off, Environment Intensity 1.53, Environment Map 1.10, Dome Y Orientation 110
1. If I have Dome Only, that means Scene isn't active and Scene is spotlights, distant lights, etc, correct?
2. So if I have Dome Only, and Draw Dome Off, it's still lighting the scene but the image on the dome doesn't show up?
3. What is the difference in Environment Intensity (I assume how strong the light is?) vs Environment Map increases? (Does that make the image itself brighter?
4. If I have Dome Off, does Dome Orientation Y still make a difference so far as the program reading the map and doing the light?
A new UHD line of characters with 800'000+ vertices at base resolution?Excellent info on the HD tool Male-M3dia! The HD details would only show up at render time so if I render outside of DS in Octane I wouldnt get the benfits of the HD morphs anyway? Just curious because I bought the HD morphs for my characters. I can't seem to get my Normal or Displacements to show up in Octane for some reason. Bump maps show up just fine.
Thanks!
If the plugin is set up correctly, the HD detail should be passed to the renderer in octane. As far as displacements, you probably would have to increase subdivisions for your details to show in octane as well as the render doesn't subdivde like 3delight or firefly does. You have to increase subdivisions for iray and i believe luxrender as well.
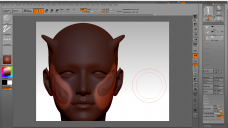
I export with a SubD level of 2 out of DS and I add another SubD level in Octane. I don't use the DS Octane plugin just the standalone. I tested the normal map and displacement map using just a gloss or diffuse material and it shows up. Since I use a specular material for my skin shader seems like only that material doesnt work correctly. On another note I find adding detail like laugh lines to the face of G3 with just morphing the low rez polys in Zbrush you have to really exaggerate the morphs and get used to bringing polys closer together to make a deeper cut morph so it looks correct....takes a bit of getting used to. Using dynamic SubD in Zbrush helps you get a better idea of what a low rez morph will look like.
Exaggerating morphs is one of the low poly tricks for detail since subdivisions will smooth out detail so you have to pull out mesh a bit more. You can check the parameter dial for a HD morph to see what subd level it was created at. Some HD morphs are a 1 and some are at 3.
Good point I will have to check that to see if all HD morphs show up. I usually dial in SubD level 2, but I can move that up to 3 and see. Once I get the Normal and Displacement map figured out in Octane I should be on my way. Problem is I like using bump maps for fine detail like skin scales and pores and Normal/Displacement for better details that are not possible to model. In Octane you cannot use a combo only 1 map at a time (bump, normal map, displacement map).
A new UHD line of characters with 800'000+ vertices at base resolution?Part of the issue seems to be that HD morphs seem only suitable for fine details, but if the mesh is too light to support a proper base morph then the HD aren't much use. I can get decently visible forehead wrinkles on Genesis and Genesis 2, but the only forehead wrinkle morph for G3F is an HD one with no base morph to give it any real visibility. (Even after turning up subdivision to the highest for both preview and rendering it's barely noticeable. Though oddly doesn't slow my display much at all. A little but not a crawl. Maybe there's a setting I'm missing?)
A new UHD line of characters with 800'000+ vertices at base resolution?Excellent info on the HD tool Male-M3dia! The HD details would only show up at render time so if I render outside of DS in Octane I wouldnt get the benfits of the HD morphs anyway? Just curious because I bought the HD morphs for my characters. I can't seem to get my Normal or Displacements to show up in Octane for some reason. Bump maps show up just fine.
Thanks!
If the plugin is set up correctly, the HD detail should be passed to the renderer in octane. As far as displacements, you probably would have to increase subdivisions for your details to show in octane as well as the render doesn't subdivde like 3delight or firefly does. You have to increase subdivisions for iray and i believe luxrender as well.
I export with a SubD level of 2 out of DS and I add another SubD level in Octane. I don't use the DS Octane plugin just the standalone. I tested the normal map and displacement map using just a gloss or diffuse material and it shows up. Since I use a specular material for my skin shader seems like only that material doesnt work correctly. On another note I find adding detail like laugh lines to the face of G3 with just morphing the low rez polys in Zbrush you have to really exaggerate the morphs and get used to bringing polys closer together to make a deeper cut morph so it looks correct....takes a bit of getting used to. Using dynamic SubD in Zbrush helps you get a better idea of what a low rez morph will look like.
Exaggerating morphs is one of the low poly tricks for detail since subdivisions will smooth out detail so you have to pull out mesh a bit more. You can check the parameter dial for a HD morph to see what subd level it was created at. Some HD morphs are a 1 and some are at 3.
A new UHD line of characters with 800'000+ vertices at base resolution?Excellent info on the HD tool Male-M3dia! The HD details would only show up at render time so if I render outside of DS in Octane I wouldnt get the benfits of the HD morphs anyway? Just curious because I bought the HD morphs for my characters. I can't seem to get my Normal or Displacements to show up in Octane for some reason. Bump maps show up just fine.
Thanks!
If the plugin is set up correctly, the HD detail should be passed to the renderer in octane. As far as displacements, you probably would have to increase subdivisions for your details to show in octane as well as the render doesn't subdivde like 3delight or firefly does. You have to increase subdivisions for iray and i believe luxrender as well.
I export with a SubD level of 2 out of DS and I add another SubD level in Octane. I don't use the DS Octane plugin just the standalone. I tested the normal map and displacement map using just a gloss or diffuse material and it shows up. Since I use a specular material for my skin shader seems like only that material doesnt work correctly. On another note I find adding detail like laugh lines to the face of G3 with just morphing the low rez polys in Zbrush you have to really exaggerate the morphs and get used to bringing polys closer together to make a deeper cut morph so it looks correct....takes a bit of getting used to. Using dynamic SubD in Zbrush helps you get a better idea of what a low rez morph will look like.
A new UHD line of characters with 800'000+ vertices at base resolution?Also you can preview the HD morph by setting the subdivision level on the figure, but that will slow your display to a crawl. I mentioned several times that you have to create your low poly morph first then do the details because of the morph projection issue. If you go straight to the high def morph and not do a lowpoly morph to help out, no clothes would fit as the clothing would go to the morph that can project to clothing. For example, if I didn't do a low poly base for my Jesse body shape, clothing would conform to the G3M base, making the clothing fit inside the area of the shape not on it because jesse is wider and shorter. The projection morph would give the rest of the information on how to fit that shape into clothing.
Deleting unwanted morphsHi,
In the middle of fixing some FBMs, I saw that the chest morphs that I did on the first try for the shirt, now deleted, cause I had JCMs issue and decided to modify the topology and start again, they have appeared on this one!, but empty, so when I dial that morph (more exactly all breast shapes from 01 to 08) on G3F, Daz searchs for the "fixed by me" ones, wich are as I said, empty, they just make the breast poke through totally. I tried to fix them, but I cant, Daz shows something completely different from what I sculpt on Zbrush, so, I've tried to delete them with no avail.
I enter edit mode, delete all of them, resave the real morphed ones again, and in that screen, they're not there and either on the parameters tab, but as soon as I reload Daz, they are appear again, but still empty, so I have the same issue over and over again. How can I delete unwanted morph once and for all??
Ribbon FingersWhat do you mean? Is the mesh getting compressed even before posing, or is this the issue with bends stretching the mesh out weirdly? The latter should not be an issue with purchased morph sets as the bones have beena djusted to work with them - unless you are spawning new morphs rather than using them directly.
Auto-Fit Collisions - Hands on Hip Breaking MeshYeah, bodysuits are a great way around a lot of this.
('this' being autofit problems generally)
Another tip: if you add a tiny bit of a dial on the figure, the dial will appear on clothing (you will have to Show Hidden). Then you can dial it in MORE, to create a different effect.
This is one way I try to get around the 'shrink wrap boobs' effect -- put Flatten or Breast gone morph a tiny bit, do it more on the body suit, then scale the body suit as appropriate, then fit clothing to the body suit.
I like this idea. Which bodysuit do you recommend having the best setup for doing this?
Are we going to get the Creature Creator morphs for Genesis 3?I know I am also waiting for the release to this....so I'm holding back on my spending until I get these little items because that's how DAZ rolls, throws out all kinds of sales at you and then wham hits you with a needy morph package. Leaving you to eat ramen noodles until next payday if you're lucky :) I think you can find the product for G2 in their Product Index and it will show the date it was released to give you an idea.But to navigate the index you need the product code to find it.
Tutorial: Converting Textures from Gen2 to Gen3A little update to questions - in general, Blender texture conversions work very well, but i found 2 main problems - the first is the genital texture maps, which cannot be converted via Blender baking, because there is no clones for Genesis 3 and Genesis 2 gens yet.
Ok, so on the gens converting. While there isn't specifically a clone for gens, if you export them while fitted to the character with the clone active, you will at least get the seams to line up. The interior topology is vastly different, so you'd have to do that by hand. The Map Transfer utility in DS won't work because you need to have both UVs available to transfer between on a single model.
The second is material and shader presets (DUF material files), where amount of surfaces and reference links to texture maps differ very much. But they need to be converted too to keep the desired look of character skins. How do you manage with all that?
I make new utility maps. Otherwise, you have to convert each type of map set one at a time. I've done that as well, and it's not so bad once you have the base figures set up.
For gens, as I found, there exist a way of Map Transfer within DAZ Studio, but the only tutorial about this way I found on DeviantArt is a bit unclear for noobs - is there any illustrated or video tuts about DAZ Map transfer? Or there is any simpler way how to create gens texture in Photoshop etc? I made several attempts, but Hip surface on the torso and the gens don't fit (visible seams and color mismatching). I guess Seam Guides for Genesis 2 gens (Male and Female) would help, because a simple white template doesn't help much. Are there Seam Guides for Genesis 2 genitals?
There might be, but I doubt it. The genitals don't come with the base figures, only with the Pro packs for the adult morphs (Victoria, Michael, etc).
As for ther second problem with DUF, it is not easier too, because DUF files are very hard to edit manually in any text editor - they contain shader info and a great bunch of reference links to maps, and these links mismatch too (G3 Eye Socket should be replaced with Lacrimals and EyeMoisture with EyeReflection - at least, these are best counterparts I could find or I am mistaken?) Is Dimension 3D DSON Editor capable to make such replacing surfaces faster and easier, or there is any other easier way, aside from struggling with text editors? What do you do with such mismatching surfaces, especially for eyes? I tested Genesis 3 Native Eyes with replaced G3M converted textures for irises - but on G3M with all shaders and presets eyes look much better.
Notepad++ is what I'd recommend for editing duf files in a text editor. I am not real familiar with Dimension 3D's editor, so I can't speak to its capabilities. I have my own shader presets that I've set up within DS, so I just use those.
And the third problem is textures made specially for IRAY - diffuse and bump maps look the same as for 3Delight, but specular maps look strange as if inverted and SSS maps sometimes gray. I don't use Iray and now switched to Reality 4, but sometimes it needs adjusting native 3Delight maps. Do I need to convert Specular and SSS maps too via Blender or I'd better to remake them by myself from Diffuse? Are such Iray maps usable in Reality or 3Delight?
No idea about Reality. For 3Delight it just depends on how your shader is set up. You can convert the maps or make new ones. If you want things to look exactly as they are from the other model, convert every set of maps, copy over the shader.
Fiddling with Iray skin settings...@nonesuch00 -> try the orginal cornea morph with 200 - 210%... this comes closest whitout a lot of fiddling...
however - it IS possible to come very close to a real eye.. without a concave iris (which looks great from the front but not from the sideview)..
Image sideview... FLAT but correct modeled iris and cornea on the upper eyeGreat information Andy,
I agree with you that the eyes are Daz's greatest weakness at the moment, including the carncule. I am still very new as a PA (only one product coming out soon), but it seems like a worthwhile undertaking to try to create more realistic eyes. Thanks for all your research into this thus far.
-The Philosopher
A new UHD line of characters with 800'000+ vertices at base resolution?Thank you all in sharing information and explaining.
I was not aware that the current limitations with the weight mapping on high resolution models go that far.
@ vertices count
The reason I prefer to use the term vertices when speaking about mesh sizes is that polygons could be either quads (4 edge points) or tris ( 3 edge points).
The number displayed by default in zbrush is points = vertices.
Richard allready explained how the vertices and polygon numbers are related.
- - -
@ the 4'357'308 vertices remark
The reason why I mention 4'357'308 vertices that often is because that would be the next reasonable quality jump that also does fit into VRAM by using 1888 MB for geometry.
Currently most high resolution morph products in the DAZ store may have been sculpted at 1'090'700 vertices.
- - -
@ why did I start this thread?
Every year I spend some weeks to catch up with new workflows in Zbrush.
I figured out that I can use the "project all" button to transfer any kind of detail from one mesh to the other.
The key is to mask those areas that should not be affected by the projection in order to prevent some random distortions.
What I now wanted to do is bring those details at 4'357'308 vertices back as morphs so I could animate them and use them for other figures as well.
But when I clicked GoZ I realized that only the details captured at the lowest subdivision level of 17'418 vertices is brought back.
Using maps is not a solution when trying to animate.
I also wanted to save the morphs so I can dial them in fully or only partially for other Genesis 3 figures.
Therefore I was looking for another way to transfer the high resolution details of the morphs back into DAZ Studio.
That is when the question started: Why not work with more high resolution figures so you can bring morphs back at the original resolution level?
- - -
With the now available information I realize that at the current point in time with the available technology high vertice count figures will not solve enough issues to be considered an alternative.
The situation as a whole remains frustrating for those users who do have access to Zbrush and would like to use other more versatile workflows.
Hopefully in a not so far away future some new technologies will it make possible that we can work in more flexible ways with the licensed DAZ3D content in a DAZ Studio to Zbrush workflow.
- - -
I think the thing that also confuses people about HD is that you are still working with the low poly figure, and those details are added to the figure at render time... just like if you were using normal and displacement maps. When you render a frame for animation, all your maps, including the detail, will be displayed as the final render in the frame. Same thing happens with HD, which is why I say you still need to learn how to learn low poly sculping techniques. You have to have the low poly morph and the HD works in conjunction with that. Also using HD requires knowldege of another DAZ technology.. projection morphs. HD does not project into cloth so you need to learn how to make those morphs to work in conjunction. It's not just make a HD morph and you're set. You have to learn to use both, which is another reason why this tool isn't in the wild.
GENESIS 3 Iray Smart Converter And Advanced Managers (Commercial)Thanks for checking it out. I found your method improved the mismatch I was getting on the anatomical elements and I think it looks much better than it did with using the transfer tool properly. I found I also had to apply that other texture with the gens to to the torso area. Initially it looked pretty bad, but this looks better. Thanks,
Oh, yes if you are not using the other texture set, then it is uggly. So the right steps are :
- Load Dave, apply the Iray torso material for anatomy
- Load the anatomy, apply the iray material for anatomy
- Convert or customize Dave skin using my product
- Once done, if necessary, use the transfer anatomy (normally it should work I just reproduced all the steps for warm and cold skin tone).
Let me know if it is enough for you Serene Night, or if you want me to work more on the subject (I have to be out for the evening, so tomorrow).
Daz 3D is part of

Connect
DAZ Productions, Inc.
7533 S Center View Ct #4664
West Jordan, UT 84084Licensing Agreement | Terms of Service | Privacy Policy | EULA
© 2026 Daz Productions Inc. All Rights Reserved.