-
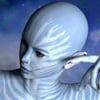
MEC4D PBS shaders vol.2 -Released- [Commercial]
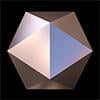
Here some little preview of physically based skin that does not use any texture maps as we usual do .. and all you see is generated by colors only ..no photos
The layers are constructed the way it works in real world for comparison fragment of a skin photo just from different part of the body
I did not finished yet with the skin but you can also see the little hair on the edges (fuzz ) and of course it is big scale of a rough skin
also now when you have scar build in the model morph or normal it will looks like a scar depends of how deep it get how more it will be prominent and the same for wrinkles
of course human skin has different texture on different areas , so all it will be controlled by normal maps that in this case need to be perfect and the best 3D normal maps and not just converted from photos
anyway I am on my way cracking the rest of the codes .. hehe
Zombie Huntress for G2F (Poser CFs included)Nice morph...
 Best IRAY / HD Male Figure
Thanks—the skin is Colin for G2M (the character morph is quite a mixture). Intended as a teen character but the skin is well usable for a younger male adult (which the photos used for texturing would have been of in any case). I used various HD morphs as usual. I now always use V2Digitimes' Iray Smart Converters with G2, which I used on this.
From Marvelous Designer to DAZ anno 2016 – I pay for helpMake your clothes in MD.
Change the mesh to Quad in MD.
Export as Obj - make sure it's welded otherwise it may fall apart.
Import into Daz and use the transfer utility to rig.
You will not get dynamic clothing though.
This is the best short summary. I use Blender and Zbrush to clean up geometry and material zones (NOTHING is better than Zbrush's remesher when it comes to making clean quads), but you don't HAVE to do that.
After that, though:
Transfer utility will rig to the legs. No matter how you move the figure, the skirt will stick to the legs. You may want to use a template or delete the leg bones from the clothing afterward to create your own "skirting" bones in the Joint Editor, or just leave everything painted to the pelvis and only move it with morphs (a lot of work, but doable).
So for example, after you've started up TU, used G3 as your source and the clothing as your target:
1. Go to Joint Editor tool. It looks sort of like a bone with a bandaid across it.
2. Right-click on each leg bone all the way down to all the toes and choose delete. This will take a few minutes to finish.
3. Right-click again and memorize--memorize figure rigging.
4. File--Save As--Scene Assets--Figure/Prop Asset.
5. Give it your vendor name and a product name here. This defines the names of your data files.
Now for Part 2, the morphs:
Delete from the scene, reload from the library, and conform to G3.
Pose G3 sitting or taking one step forward, etc.
Hide G3 by turning off the eye next to it in Scene tab.
Export the clothing. Then hide the clothing and export G3 separately.
Import G3 to MD as an avatar.
Import the clothing as a garment.
Sim the clothing against the posed G3. You may also need to import a primitive plane from DS to use for collision.
Export the simmed clothing to obj (give it a name that explains what pose it's for) and load the obj as a morph. Change its group to Actor/Movement instead of Morph/Morph Loader Pro. You have now created a single pose morph.
Repeat a jillion times for all the poses you want to enable. Save them using File--Save As-Scene Assets--Morph Asset (I think, it's not in front of me right now).
How to Fit a Hat Over Hair?There are three ways of doing it...creating a fit morph in an external modeller, using Deformers on the hair or using this
http://www.daz3d.com/hat-and-hair-helper-genesis-2 (not sure if she is doing a Genesis 3 version...which you found).
The external modeller requires exporting the figure, the hat and the hair and tweaking the hair.
Deformers...I'm not very good with them, so I'm not much help there.
Possible. Even if I don't, though, the G2 version still works on G3, just autofit it and then fit the hair to the Helper.
From Marvelous Designer to DAZ anno 2016 – I pay for helpMake your clothes in MD.
Change the mesh to Quad in MD.
Export as Obj - make sure it's welded otherwise it may fall apart.
Import into Daz and use the transfer utility to rig.
You will not get dynamic clothing though.
Changing morph typesit should work,, if you change type as pose,, you must find the property when you try to save as pose,,(though you need to select root node,,to find the pose controller (because it is morph assgined with root node) in pose tab,,
But to save and use the pose preset,, you must need to save the morph file which you change type,,. because,, your tweaking about morph is temp,, not saved as data. then when you apply the pose preset,, for new figure,, there is no pose controller,, which you modified any more.
And it is not recommended to overwrite product morph, (when it up-dated , all your modify has gone away too)...
Then,, I may prefer,, change morph name,, (and labell,, to easy find it)
then change type as pose,,,, then save it as new morph..
eg,, original = shape morph1 to My_porse controller 1.. after that save it as different morph assets,.
now you have two same morph, one is tyepd as shape (product original) ,, and one is pose with diffrent name..(you copied) .
after that you can use new pose controller, and save it as pose preset,, safety.. (keep original file without modify,,and not see duplicate ID erroer)
*SOLVED * Genesis 3 Female finger issueDial up morphs one by one and check if the bones follow the shape. Eg dial them up with bones visible. If not, that is the morph that isn't rigged, and will cause conflicts with rigging if a specific morph does not have bones that follow.
I applied Rigging to Shape, before. However, it doesn't save the character that way. So, I will try this solution.
G3F Load Error [Solved]have you tried loading G3m?
if he throws the same error the dsf file may have gotten corrupted.
Another thing to consider is if you've added any characters/morph packs/ etc before the error started.
Might be simply needing to reinstall the g3m base.
one last thing, are your assets installed on a LAN or local machine.
In my case my file server decided to have a coniption fit about file permissions this week while i was adding in a new server.
Had to manually change all the folder and file permissions.
*SOLVED * Genesis 3 Female finger issueDial up morphs one by one and check if the bones follow the shape. Eg dial them up with bones visible. If not, that is the morph that isn't rigged, and will cause conflicts with rigging if a specific morph does not have bones that follow.
Updated Meshes for Pet Cats and DogsThis has probably been suggested before, but is there anyway it is viable for the Millenium Cat and Dog to be updated? Compared to the Genesis figures, the bends on these models are sadly outmoded. The Horse and the Big Cat were improved (though I think the feet of both cats and dogs would need a bit more attention paid to them) but our domestic best friends were left for dead or so it seems. I'd also love to see a detailed rat model too, it can morph into other rodents and its feet could be posable.
Get the noggins rat and make a SubD version out of it and you have a really great looking rat
GenX: Converting G2 to G1Sorry, I just started reading over the links but didn't fully read them. As I said, GoogleFuu.
Well, there is a really good tutorial in German language, ( http://www.daz3d.com/forums/discussion/comment/688993/#Comment_688993 ) but I'm not sure that's useful to you.
Here's some basic tutorial, G1 to G2: http://www.daz3d.com/forums/viewthread/48881/
Here's a translation of the German post regarding transfer of G2 to G1, but I recommend that you go for the basic tutorial mentioned above first:
To transfer the character, select the values as shown in the image:
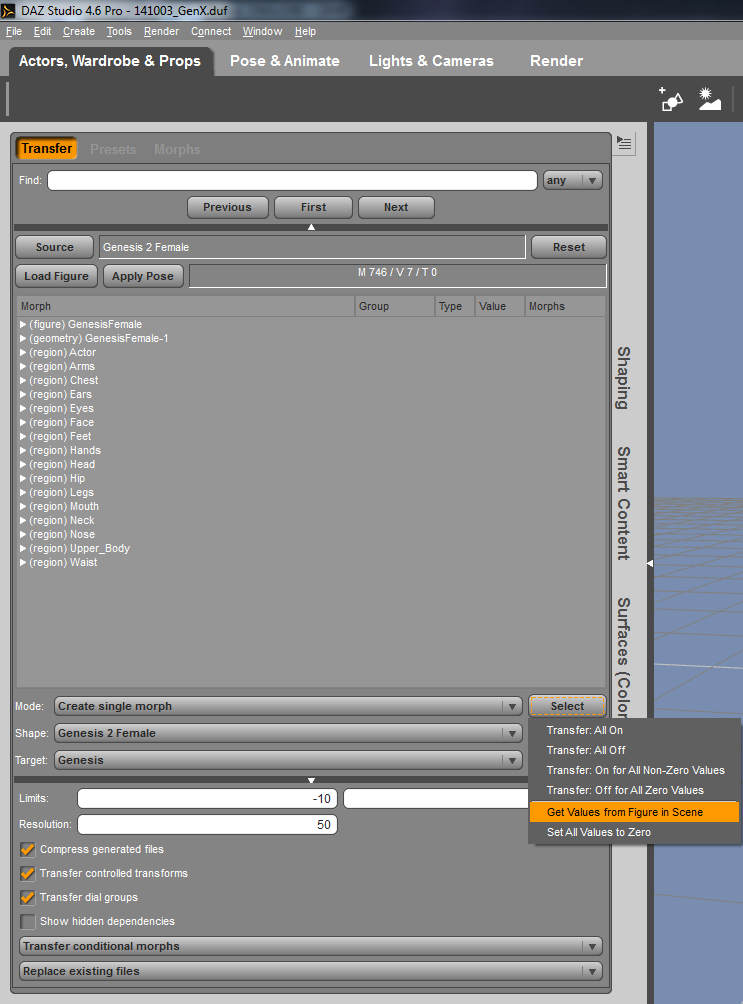
Genesis 2 Female was selected by clicking on Source.
Mode: Create Single Morph -> creates a single morph
Shape: Genesis 2 Female
Target: Genesis -> selects the target, in this case, G1Use the button Select to chose the entry Get Values from Figure in Scene . It will select the values of each morph of G2F in the recent morphlist of G2F and transfer them to GenX2.
After the values are transferred, clict Select again and chose the option Transfer: On for All Non-Zero Values for all required morphs.
Click on the button Transfer to start conversion.
A window pops up where you have to enter the name of the morph. The field Identifier should remain empty.
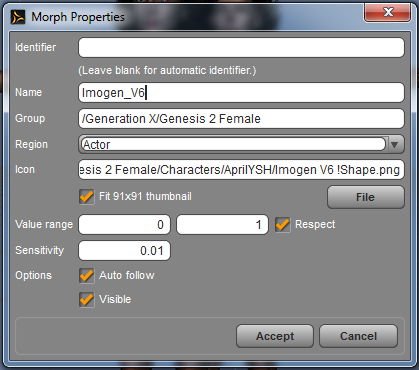
GenX2 doesn't make a suggestion in the field Icon in this example. Through the button File you can add the path to the respective image.
Click on the button Accept to complete conversion.
If you reload G1, you can see the new shape in Shaping , the Clone Shape Genesis 2 Female for Genesis1 at
Genesis -> Actor -> Generation X -> **People**
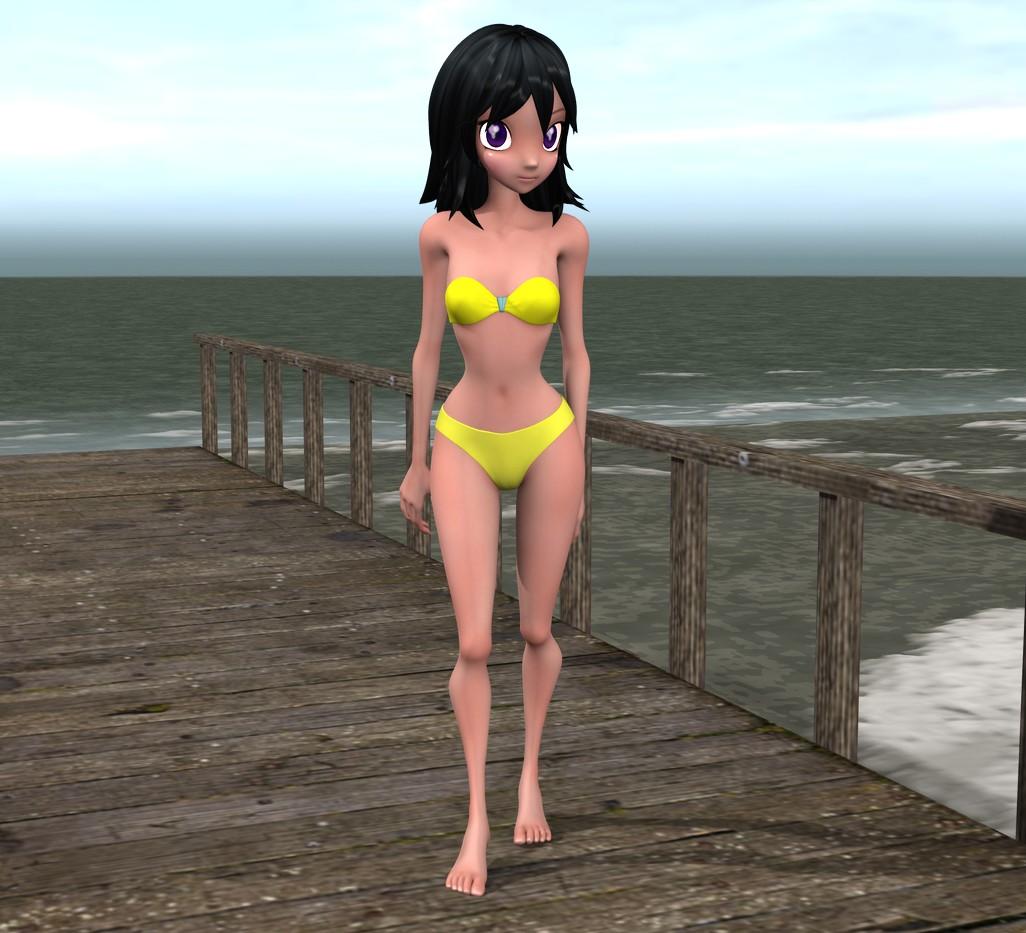
and Imogen_V6 at Genesis -> Actor -> Generation X -> Genesis 2 FemaleStar!She's nice, just think her legs are to long and thin. Any morphs out there to "normalize" them a bit?
There's a set of OOT morphs at rendo. There's another set of morphs too that has some leg morphs, but I forget where I got those. I think they were at RDNA called Nether Morphs for Star!. Maybe they'll show up at DAZ eventually?
Well I realized I actually have the Nether Morphs myself and they do have some body morph presets. Here's the one called "Anime Short" which has some more normal leg proportions:
 Star!
Star!I decided to buy her too, she's cute. I also noticed some of the other products for Star are on sale again so I think I'm gonna pick up a few. Has anyone been able to get the Star V4 UV to work? I tried but get wierd results. Anyway here is my first render with Star.
Who's the boyfriend? :)
Comet, the male morph?
 GenX: Converting G2 to G1
Thanks for the link, but that thread appears to be devoted to converting G2 to G1 without using GenX Generations.
Presumably somebody out there has used GenX Generations to convert V6 or M6 or Mei Lin to Genesis. If so, please tell me how.
(Or even how to simply transfer a G2 head morph onto G1 using GenX. I could always approximate the body by spinning dials.)
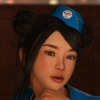
My Projects in 3D Digital RenderingThis is a rehash of some ideas from this old post on another blog called DailySketchies. This time some experimentation is done in digital 3D format using DAZ3D. Renderosity in the case of the asian figure. The hair is Stalker Girlfriend or some such thing and the glasses were purchased over on turbosquid.com. I had to export them from Hexagon and set the heirarchy and joint pivots, but they worked out pretty nicely.
One question that I have to work out is how to control the specularity. It is too much in this image. This is a G3F figure and as I didn't have the handy G2F IRay Material shader for this figure, I used the default IRay Uber shader.
Also, I could have post-finessed some things like the hairline, but I just wanted to do what I could purely in Daz at the moment. I could however do some further detailing. That Stalker Girlfriend hair was not made specifically for the G3F, so that could be some of it...
I have to say that one of the first things a person has to do to make their renders more interesting is to NOT use the default V6, or whatever character defaults. It becomes so recognizeable in everyone's work. It is important to begin to develop your characters by purchasing some morphs that can be adjusted to give yourself some randomeness and individuality to your figures. Whether it is strictly face morphs, or age morphs too. The more you can vary from the mean average symetrical settings and average concept of beauty, the more interesting you can make your characters. I myself need to work on this some more. It is the worst in my mind of a character's face looks like the G2M or Michael 4 right our of the box. Variation is the spice! There also can be purchased on DAZ and elsewhere for a very economical price some variations. Those can be further tweaked with morph tool settings.
For instance, I just bought one for a render that is close to my subject, but out of the box it looks a little too much like Johnny Dep. I need to tweak on that to get it to where I want it. I will post that soon.
Another point: I am not at all sensitive about building my own characters myself. I mean by this, that when I draw a person with a pencil, I do not create the person, or the subject. I just arrange lighting, textures, outfits, correograph, etc. I can sometimes create variations myself, but my machines and software gives me some limitations. So, most of my characters I buy and tweak, and Mashup. Cool things can be achieved by knowing how to mix and match packages well.
 How to Fit a Hat Over Hair?
There are three ways of doing it...creating a fit morph in an external modeller, using Deformers on the hair or using this
http://www.daz3d.com/hat-and-hair-helper-genesis-2 (not sure if she is doing a Genesis 3 version...which you found).
The external modeller requires exporting the figure, the hat and the hair and tweaking the hair.
Deformers...I'm not very good with them, so I'm not much help there.
Custom Categories - Now I am really upsetAlso just tried right clicking on the folder under poser formats-figures- pookie bear (don't judge me lol) and clicked on create a category - from this folder with subcategories - and created it under people- kids4-toys. It put the category right where it should go but did not transfer the actual item to the category.
Zombie Huntress for G2F (Poser CFs included)Thank you ThespiSis! A very nice morph.
Daz Studio 4.8 to 4.9I'm just wondering if all of my custom content will be automatically transferred to 4.9. I have a lot of files that I downloaded from renderosity and sharecg and other places like that, I'm just wondering if I'll have to manually transfer them or if it will transfer by itself. Thanks!
Daz 3D is part of

Connect
DAZ Productions, Inc.
7533 S Center View Ct #4664
West Jordan, UT 84084Licensing Agreement | Terms of Service | Privacy Policy | EULA
© 2026 Daz Productions Inc. All Rights Reserved.