-
Ice Dragon Art WIP's
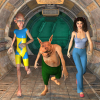
Looking great! Didn't even notice the other two figures at first, eye is really drawn to the central character with the lighting style you've done
The "Complaints 'R' Us, complaint thread"Complaint: I needed the air-conditioner again last night and especially this morning. Already at 8:00 AM it's 70F outside in the shade, my bedroom is upstairs, in the sun, and much warmer. I guess I need to get my a** in gear and unpile all those boxes off the top of my air-conditioner, eat my Wheaties, put on my knee guards and back brace and then muscle that machine up 6 inches and back 2 feet into the window. This used to be a lot easier 20 years ago.

So glad we have central AC/heating! Trying not to turn mine on yet, though. But, it's 90f out there right now!!!
 Fortunately, I'm not out there. But the thermostat says it's 80 in here. If I left my computer running all day, like I used to, I'd have no choice but to start up the AC. But I like the "Sleep" feature in Windows. Starts right back up where you left off, in a couple seconds. I guess I can't wait too much longer to turn it on, though. Temperatures will drop after Friday, a cold front coming through with rain. At least a 10 degree drop is expected. That will help delay the inevitable.
Dana
Convert a camera to a virtual camera?Couple things, figured I ask first before making a product request.
Sometimes I want to convert a camera into the virtual viewport...viewer...the default viewing port that exists BEFORE you make a camera. Does that make sense?
So instead of choosing to create a new camera from the current view, I want to do the opposite and change a Camera into the default viewer.
------------------
Related as I wonder if it's possible to create a script that moves the active port a certain distance from an object. In your camera control doo-hickey you can press the [+] sort of thing and get a better focus on an object in the scene. BUT! If I want to jump large distances, I'd like to be able to select an object in the scene and run this script and have THE DEFAULT VIEWER move a certain distance (of the scripts choosing) from the object. Maybe with orientation presets. A certain distance from its central axis. Or always floor level pointing up...
-----------
Or a script that can CREATE A NEW CAMERA pointing at an object, and also a certain distance away from that object.
I know I can make a camera myself and use the align tools to move it about and then look through that camera, but I want to move the Daz default viwer about.
Any ideas?
Wanderer's OasisOkay, so I went dark for a bit while working on this or that challenge or contest. And then I had to deal with the guilt of winning. But I'm back and I will attempt to document here my attempts at improving my skill and my art for the sake of those who come after--and also because I tend to forget how or why I did this or that after a while. Anyway, enough of all that.
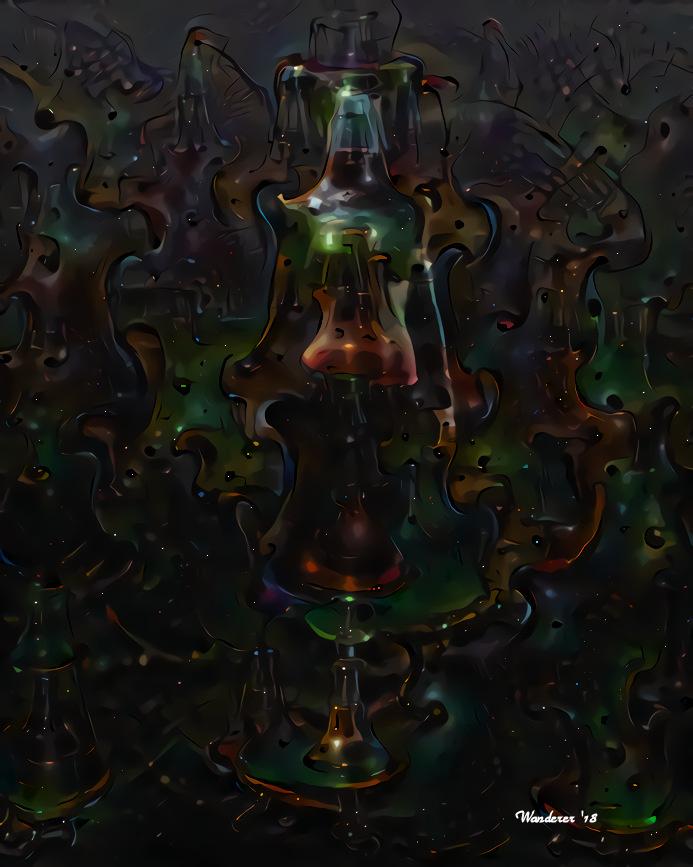
First, I want to share an image I did with a little post-work. I posted it over in the Sci-Fi Celebration thread, but the crickets over there let me know they are the same crickets who hang out at the RRRR contest. ::wink:: That's about as funny as I get. Anyway. I still like it. I've considered sharing the how of this, but since it doesn't seem to be very well liked, it might not be worth doing. Several who see it probably know exactly what I did anyway.
Visitration
I'm going to copy my post from the second place winner of the Riversoft Art contest to elaborate a bit upon my technique because it occurs to me that some might not be familiar with what I did, or why.
The Dance
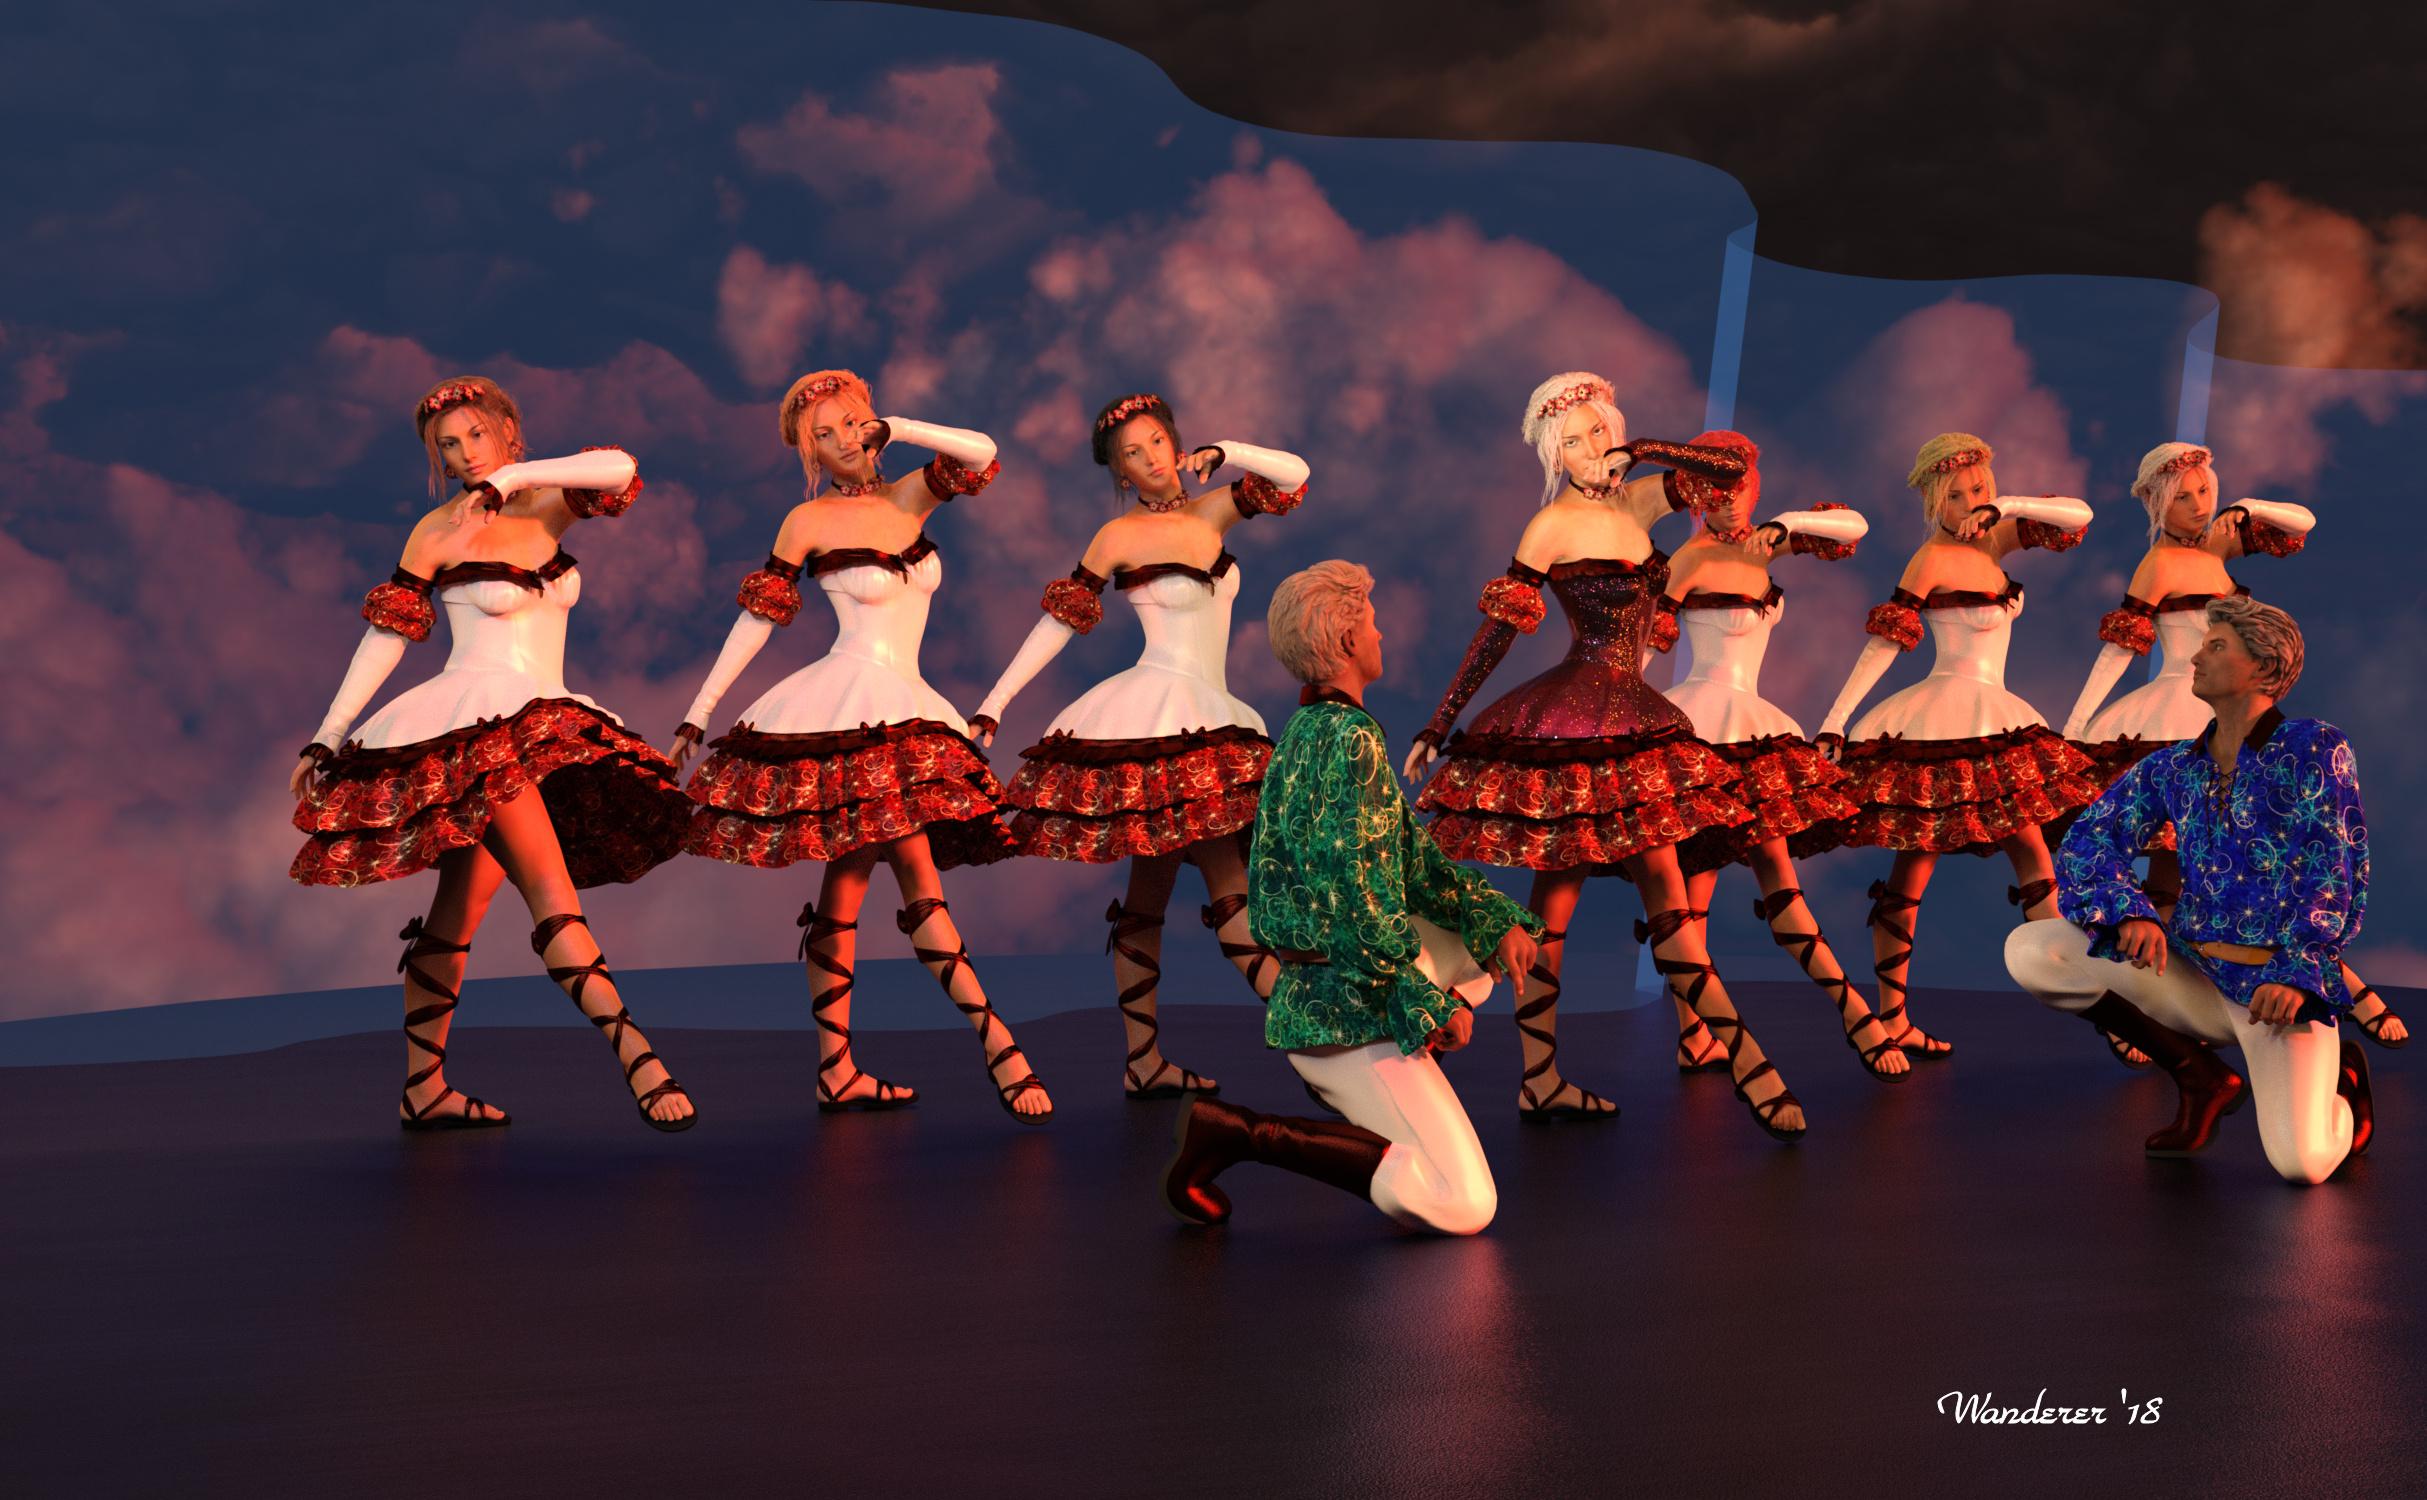
Riversoft Art Product Used: Pose Randomizer
Accompanying Text (the winning factor):
When Pose Randomizer (hereafter refered to as PR) was first released, I saw the potential in such a great product and purchased it immediately. Even though I'm still very noobish, I knew right away how and why I would use it, and here I've demonstrated that use in my entry. When doing any sort of dance scene, nothing suggests failure to my eye faster than a group of dancers all posed perfectly in sync without realistic variations. Just look at the images in this link from the March New User Posing Challenge, but doing all that posing is hard, tedious work. After 4 or 5 meticulous figure posings, time becomes a serious limiting factor, as can system resources on one's computer. PR to the rescue!
I've had a scene like this in my head for some time, but I was working toward having enough knowledge and skill to do it some justice. PR enabled me to focus on everything but the minutia of attempting to pose so many dancers with just enough variation to approach verisimilitude. In putting my entry together for this contest, I deliberately chose to minimize my resources to highlight the way Riversoft's product really shines. So, apart from cameras, lighting, and stage, inspired partly by this image, I've really only used two outfits (Hanami Outfit and Troubadour), two hairs (Fraser for G2M and Anjou for G3F), and two figures (G2M and G3F), with different textures to help make the illusion a little more believable. I think it turned out great, and Riversoft Art made it achievable with a lot less time and labor--and, I think to a much better end, than would otherwise have been possible.
After creating my first female character with base pose, clothing, and hair, I duplicated node hierarchies to make seven identical ladies. Since I needed variety across the forms, I couldn't simply use instancing. I then used another merchant's product to randomize the morphs for each figure to help them look more like individuals. I changed textures for the clothing and hair, and carefully crafted some variety into the hair strands. I went to my first lady, brought up the PR script to vary her pose, selected a lower percentage, and applied. At this point, my old computer was moving more slowly with so many figures on stage at once. Rather than needing to play with each body part on every figure over a long and painful process, it was as simple as point and click. Check the preview before applying. Approve. Wait only a moment. Choose next figure. Point and click. I did the same thing with the males and applied variation in pose for each figure after using shift-y to mirror the original pose. In the end, I only needed to make a very few adjustments to compensate for places where limbs clipped clothes or the stage slightly. The only alteration I made to any pose after hair and slight post-pose corrections was to aim the lead ballerina's eyes at the camera.
I'm convinced that this tool saved me a great deal of production time and resulted in greater organic fluidity than I'd likely have achieved myself. Just look at the lead's toes and compare them across all seven ladies (okay, sorry, a few are hidden). That is the kind of subtle difference that arose spontaneously out of using PR. The kind of loving, careful craft required to manually massage that sort of detail out of seven roughly identical figures is highly time dependent and labor intensive, and honestly wears on one's passion for the project. Imagine now doing a scene with 15 or 20 such figures. I can, thanks to Riversoft Art and Pose Randomizer.
Thank you for reading and looking at my work.
Okay, one of the parts that readers might not be familiar with is the duplicate node hierarchies command in Daz Studio. If you want to duplicate an object or figure in your scene without having to go and create something new again, you can go up under edit, go to duplicate, then choose node(s). But if you have a figure with hair, clothes, pose already applied, and you don't want to fool with instancing because you need to alter a few details, you can go below the previous menu item to duplicate node hierarchies, and that will make an exact copy of whatever figure and parented items you have selected in scene. I'm sure there are things about it that I don't know, but I learned how to do this last month while working on the new user challenge. I was able to put this technique to good use in this scene for the reasons I stated above.
Red Gold Blue: The Purification of Old Town
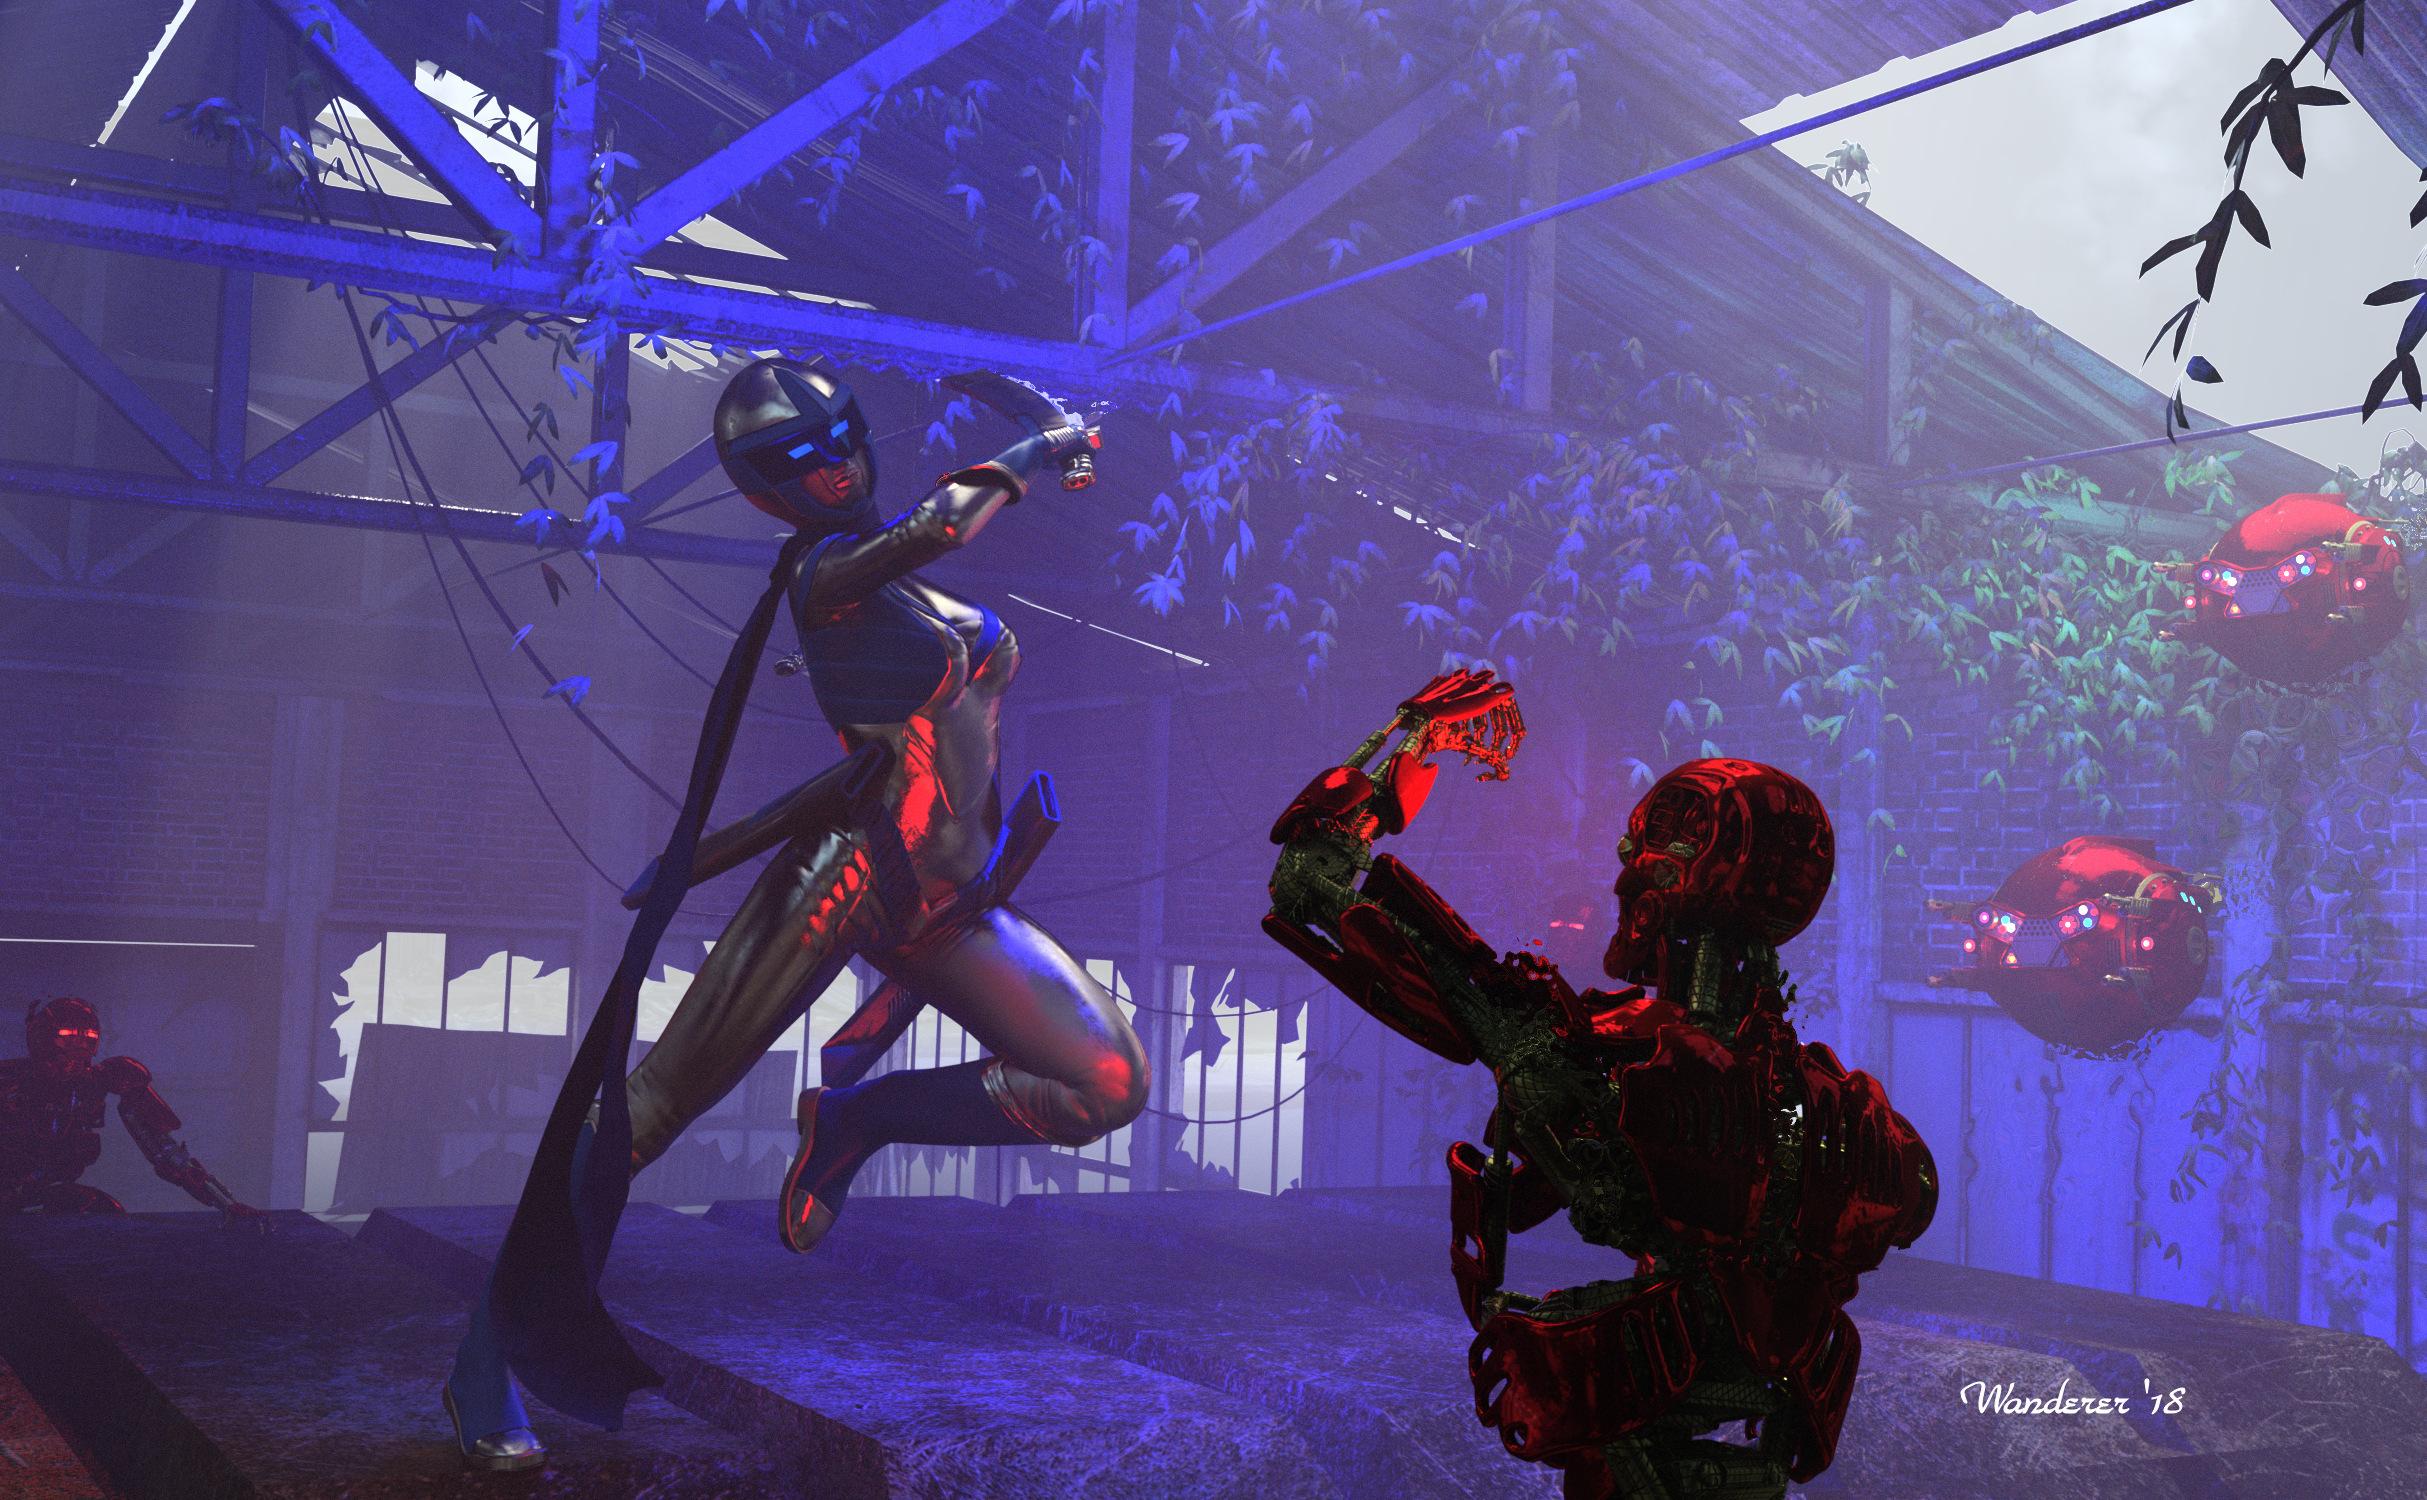
My final version of my first image entered in the April new user challenge. I've gone toward a more unrealistic lighting for a specific reason/inspiration. I'm proud of the heat shimmer effect I achieved on this in Photoshop post-work. I'm glad that @IceDragonArt has encouraged me to do more to familiarize myself with those tools. There are so many really good images this month. It's really humbling to be compared to such great artists as those .
Winter Gives Way to Spring
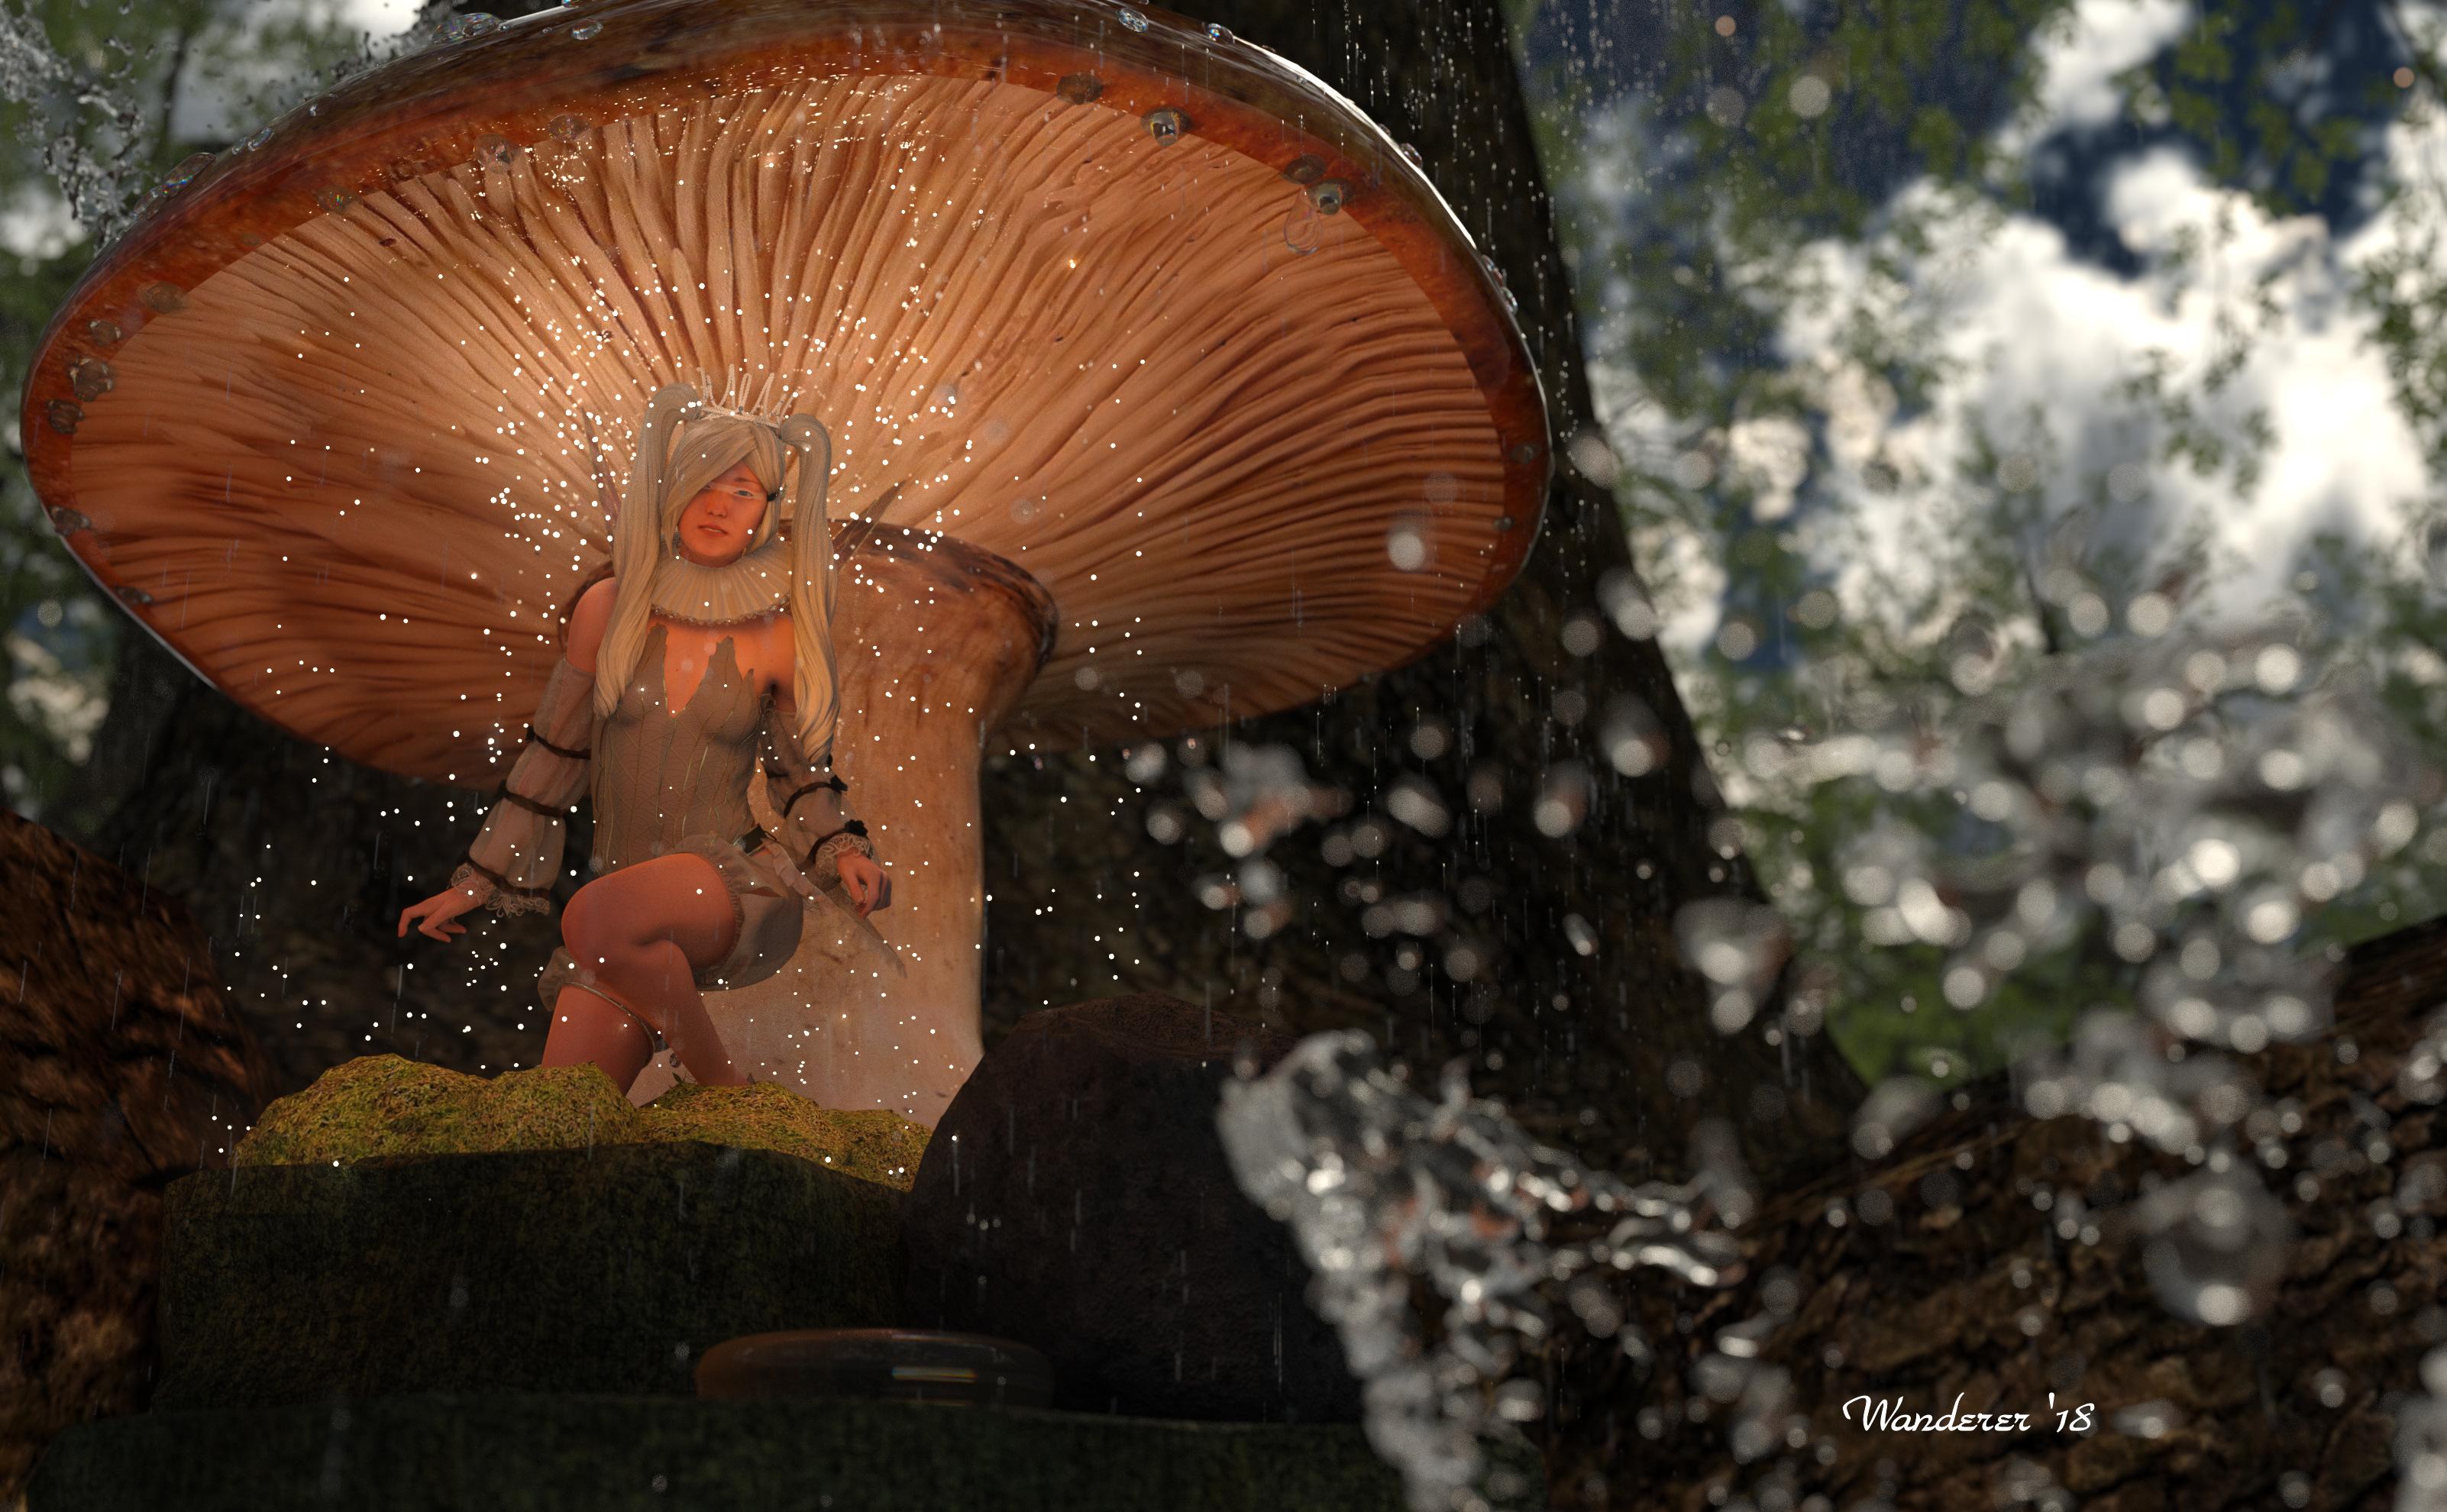
My final version of the second image I did for the new user challenge. I was very much inspired by the works of @IceDragonArt to create this.
My 2 Freebie Entries for the "April Showers Bring... " Challenge:
Entry 1:
Risk of Romance
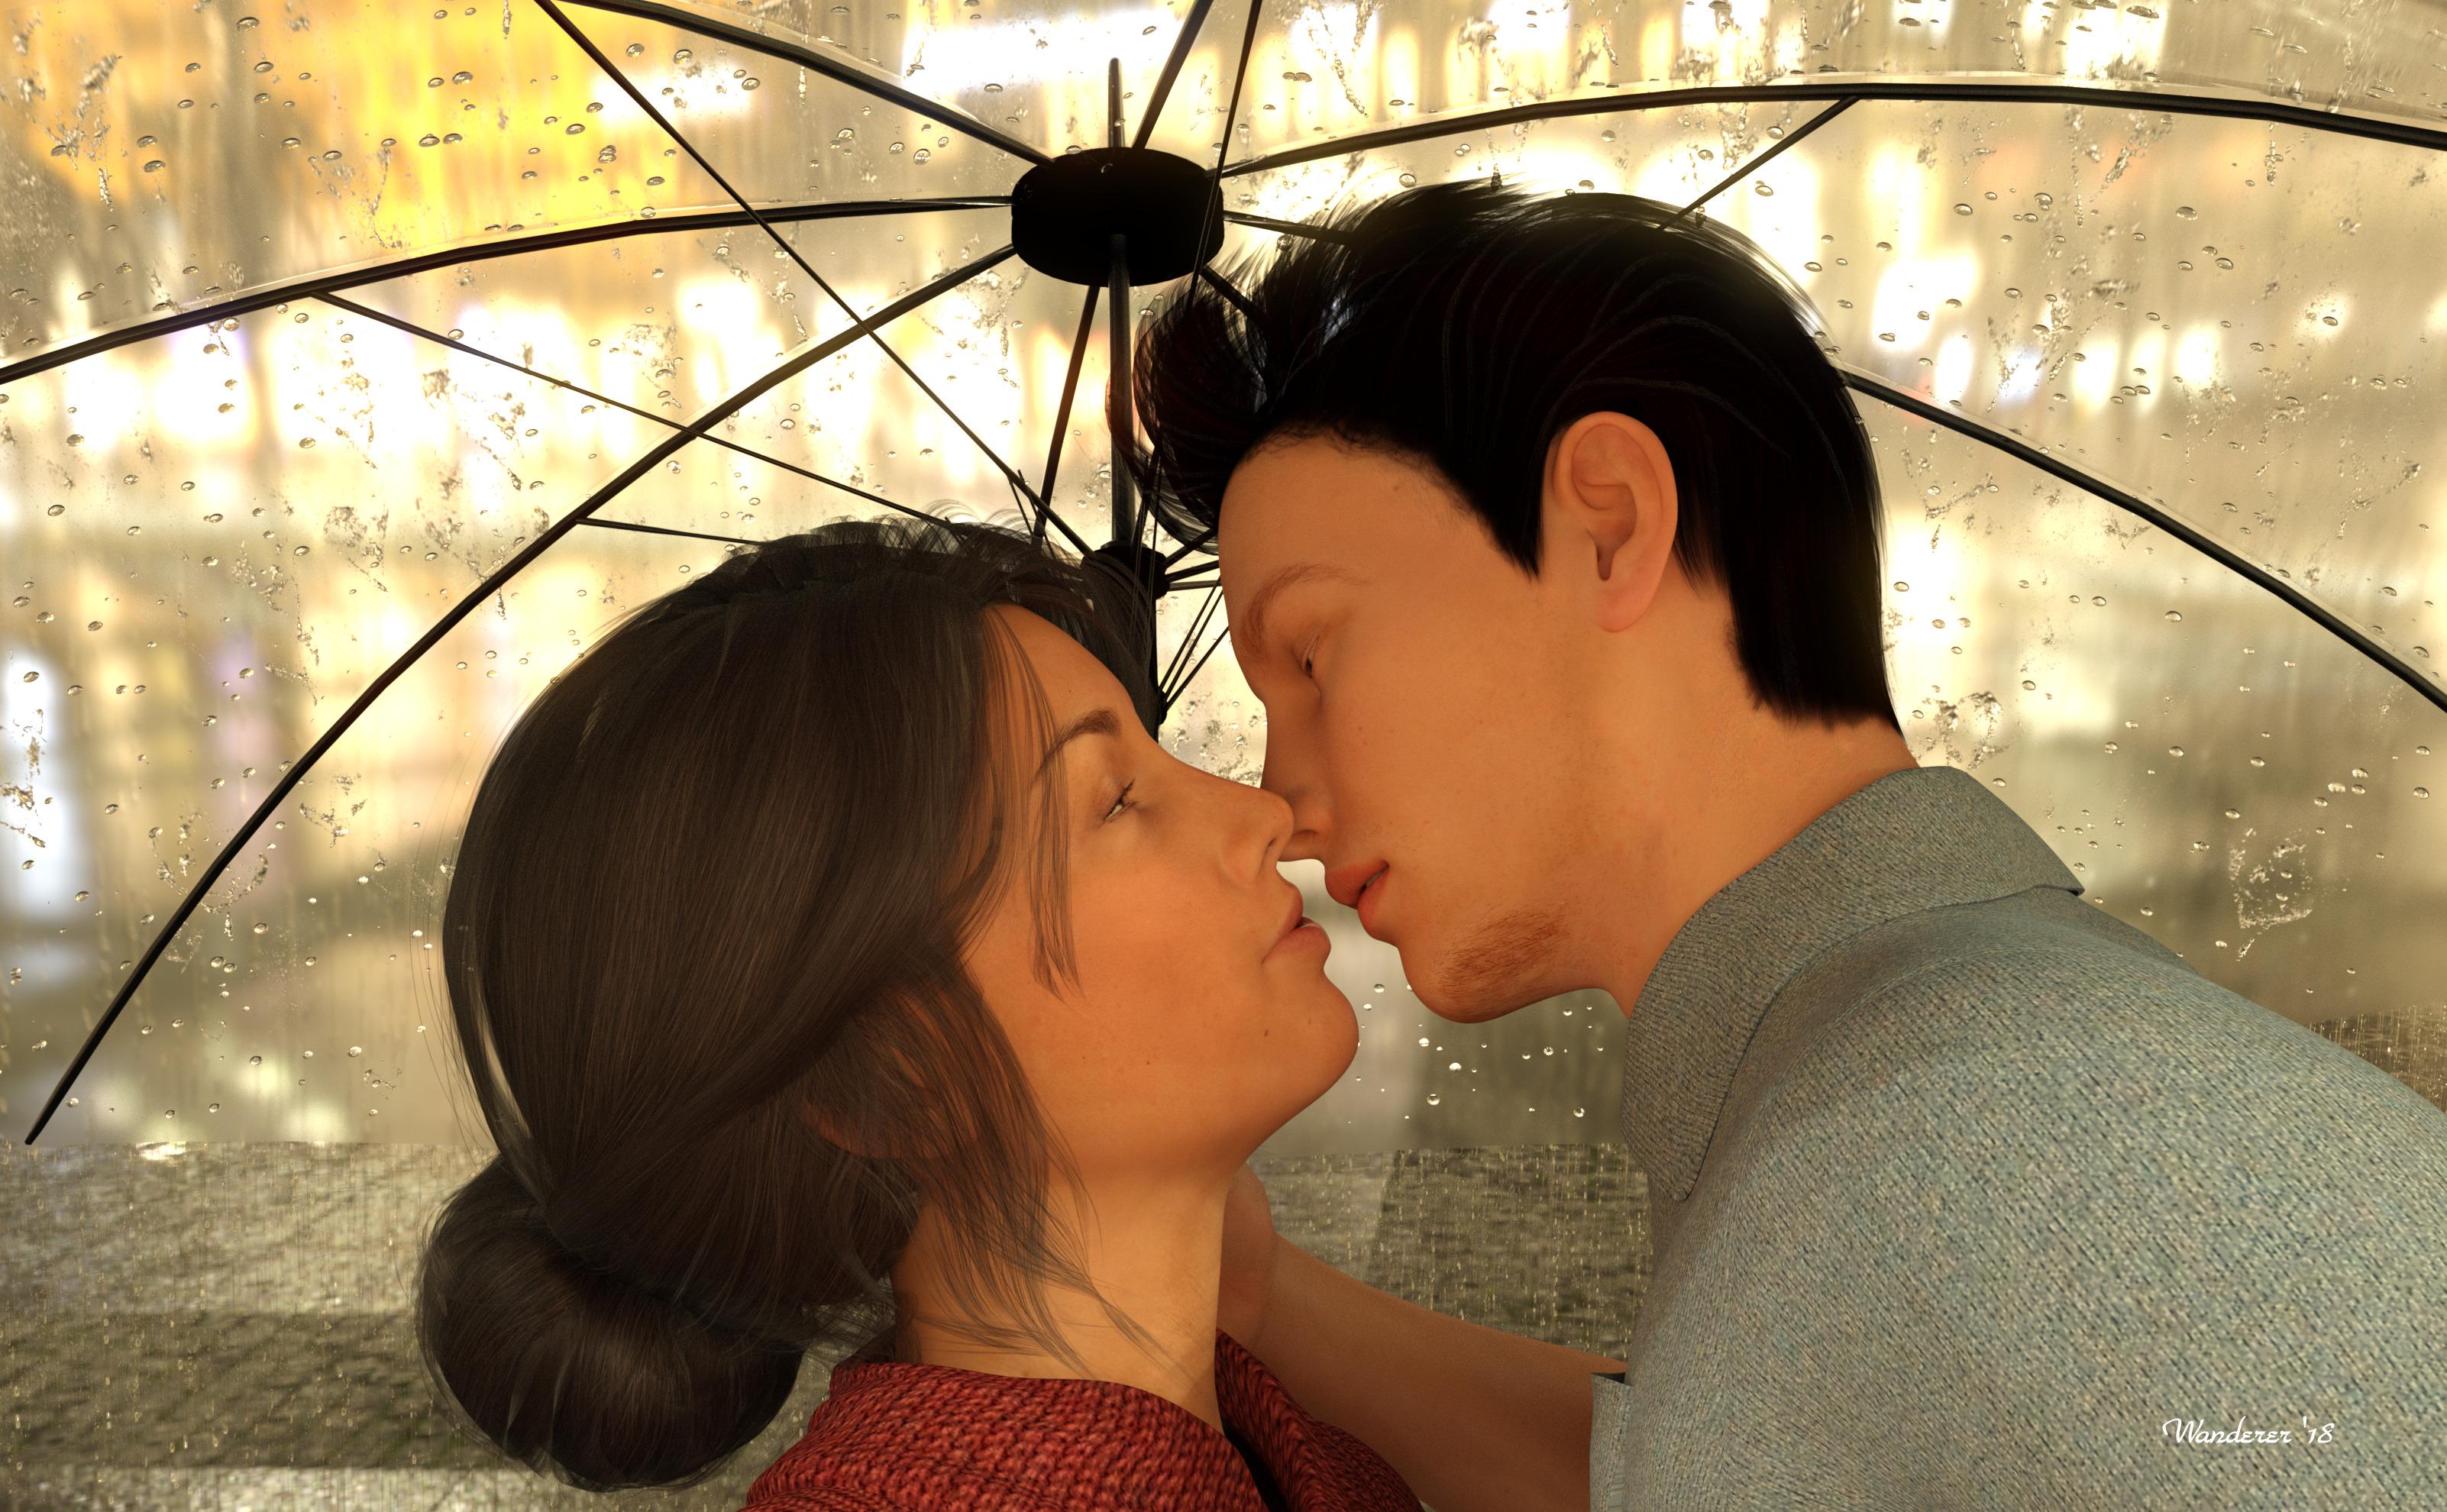
Free List:
1. HDRI Rathaus
2. Gwennili Hair for G3F by kayleyss (color altered by me in shader settings)
3. Translucent White Plastic Shader (applied to outside surface of umbrella with settings tweaked by me. Translucency Weight: 1/Glossy Roughness .09/Refraction Weight: 1/Refraction Index: 1.06)
6. Armani Hair for G3M from Genesis 3 Starter Essentials.
Paid:
1.Umbrella: Yamaki Victory Lane (uber shader conversion and clear plastic shader in free item list)2. i13 Romance & Rescue Pose Collection couple poses used as a base with several modifications
3. Creative Water 3d Splashes by OoT
4. Ultrascatter Advanced Instancing by HowieFarkes (used to apply 2000 instances of water droplets modeled by me and almost 600 splashes from the Out of Touch resource listed)
5. Iray Rain by KindredArts Rain and puddle system which worked spectacularly with the HDRI's from the resourse listed above, but some HDRI's are better than others for this.
No Count:
G3F (Uber Iray Base conversion with settings tweaked slightly by me)
G3M (Uber Iray Base conversion with settings tweaked slightly by me)
Water Drops modeled by me in Anim8or (shader applied from OoT water asset above)
Uber Iray Shader (applied to both characters and umbrella)
Primitive Cylinder (used to patch the place in the umbrella where the ribs did not come together at central pole)
Primitive Plane (used to create lighting enhancement using Uber Iray Base shader with settings tweaked by me)And my second entry:
Lovecraftian Horror
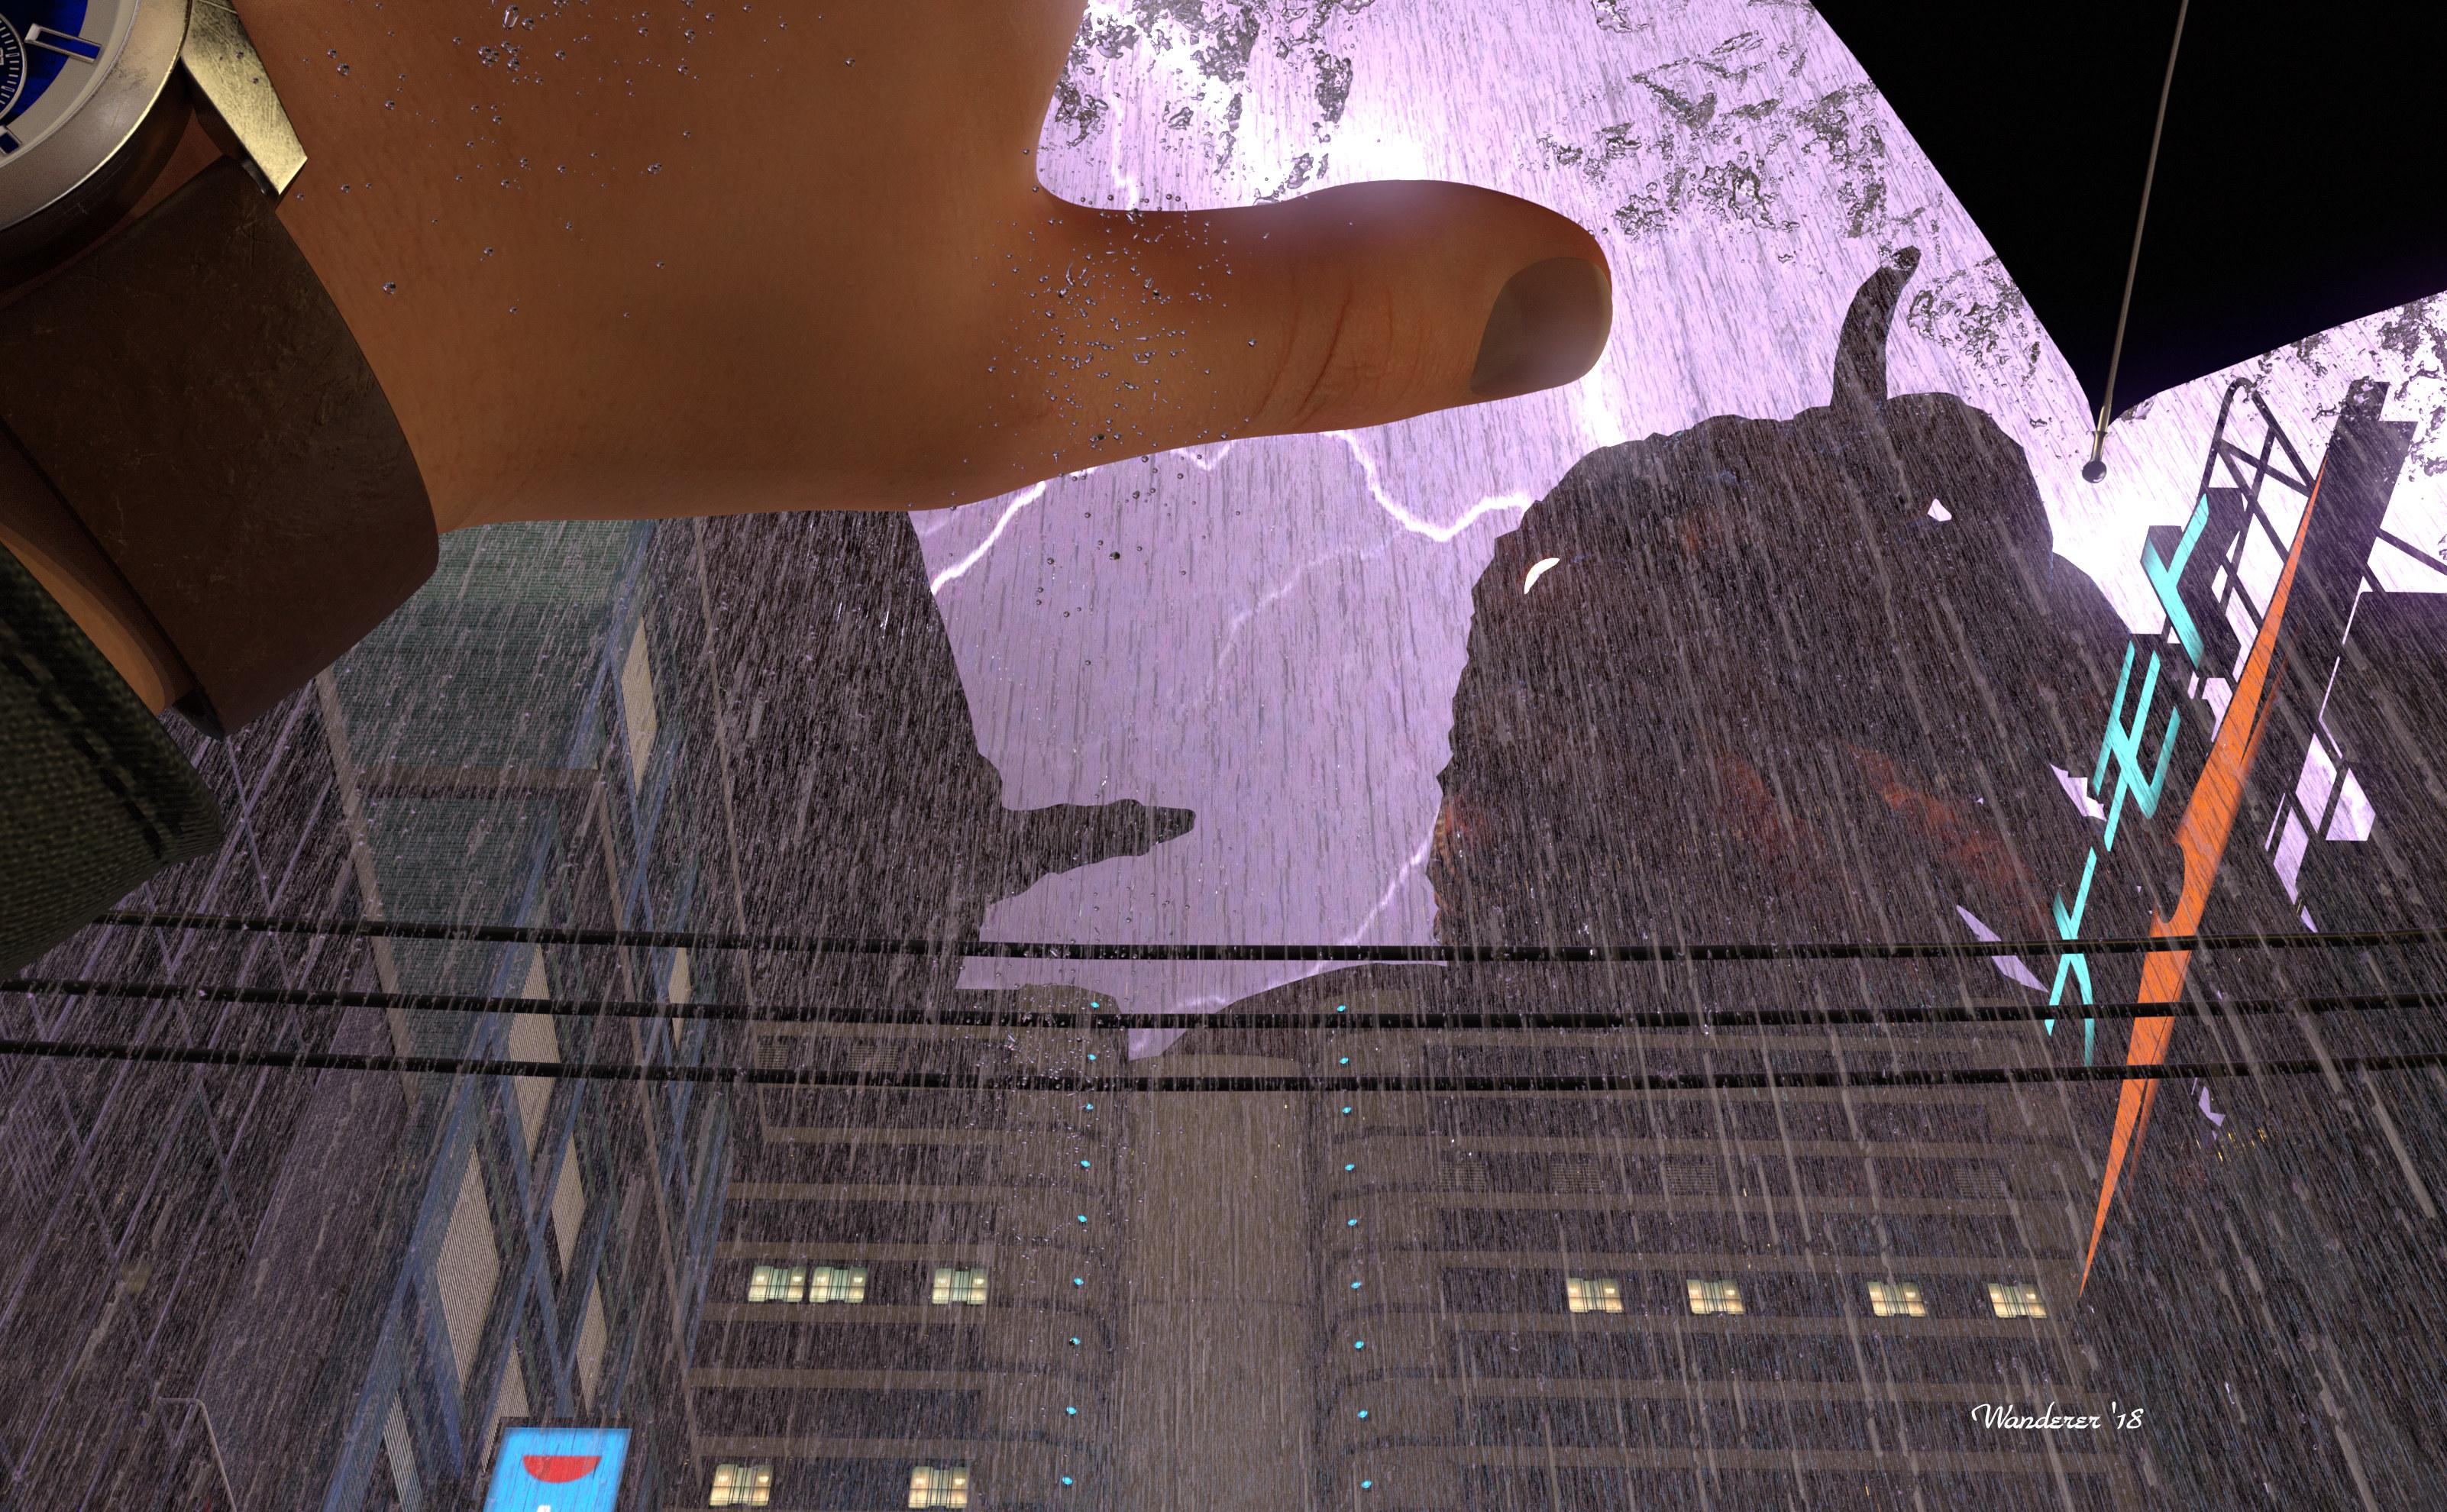
Free:
1: Urban Streets of Tomorrow by sfman here.
2. HDRI Zwinger Night from HDRIHaven: (environment intensity turned way down)
3. Lightning Bolt JPG (applied to plane with emissive output)
4. His Shirt (DSC Shirt) - From DS Creative Magazine, v 24, p 23.
5. Wristwatch Prop.
6. UmbrellaPaid:
Cthulhu by Luthbel
Iray Rain by KindredArts
Ultrascatter
Creative Water 3D Watersplashes
Mec4D PBS Shaders V2 for Iray (shaders for watch and umbrella)No Count:
G3M
Water drop on tip of umbrella spoke modeled by me in Anim8or with shader applied from OOT's resource aboveI wanted to talk about my process in some of these, but I actually was so far behind that now I've said all this, I'm not sure anyone would still be reading at this point anyway. Oh well. If anyone has any suggestions about how I might improve any of these, while it's too late for the challenges, I'd still love to hear the opinions of others. If you did read all of that, thank you.
No one asked me - Diomede screenshots on whatever - Warning AI Discussion OKAnother Plant Modeler Reminder - Using Ramified and Hybrid Tree Shapes
I keep forgetting how to control the advanced tree shapes so I am repeating it here. In the plant modeler expert tab, the default tree shape is "centered", which has a central vertical trunk. The options for ramifed and hybrid allow the ability to split the trunk for a more spread tree. By default, the number of generations of sub branches is very small and does not respond to just increasing the number of generations. To get the additional generations of sub branches, you also have to go to the tree shape tab, where the drop down menu is disabled. Increase the ramified threshold to get the additional generations of sub branches. If the plant modeling room display doesn't show you the changes, check the display to see if it is set to show you all the branches and full detal mesh.
3D Art Freebie Challenge-April 2018-Winners Announced"April Showers Bring...." -Entries Thread OnlyMy first entry (time will tell if I am able to submit more):
"April Showers Bring... "
Risk of Romance
Free List:
1. HDRI Rathaus
2. Gwennili Hair for G3F by kayleyss (color altered by me in shader settings)
3. Translucent White Plastic Shader (applied to outside surface of umbrella with settings tweaked by me. Translucency Weight: 1/Glossy Roughness .09/Refraction Weight: 1/Refraction Index: 1.06)
6. Armani Hair for G3M from Genesis 3 Starter Essentials.
Paid:
1.Umbrella: Yamaki Victory Lane (uber shader conversion and clear plastic shader in free item list)2. i13 Romance & Rescue Pose Collection couple poses used as a base with several modifications
3. Creative Water 3d Splashes by OoT
4. Ultrascatter Advanced Instancing by HowieFarkes (used to apply 2000 instances of water droplets modeled by me and almost 600 splashes from the Out of Touch resource listed)
5. Iray Rain by KindredArts Rain and puddle system which worked spectacularly with the HDRI's from the resourse listed above, but some HDRI's are better than others for this.
No Count:
G3F (Uber Iray Base conversion with settings tweaked slightly by me)
G3M (Uber Iray Base conversion with settings tweaked slightly by me)
Water Drops modeled by me in Anim8or (shader applied from OoT water asset above)
Uber Iray Shader (applied to both characters and umbrella)
Primitive Cylinder (used to patch the place in the umbrella where the ribs did not come together at central pole)
Primitive Plane (used to create lighting enhancement using Uber Iray Base shader with settings tweaked by me)3D Art Freebie Challenge-April 2018-"April Showers Bring....." -Main Thread OnlyMy first entry (time will tell if I am able to submit more):
"April Showers Bring... "
Risk of Romance
Free List:
1. HDRI Rathaus
2. Gwennili Hair for G3F by kayleyss (color altered by me in shader settings)
3. Translucent White Plastic Shader (applied to outside surface of umbrella with settings tweaked by me. Translucency Weight: 1/Glossy Roughness .09/Refraction Weight: 1/Refraction Index: 1.06)
6. Armani Hair for G3M from Genesis 3 Starter Essentials.
Paid:
1.Umbrella: Yamaki Victory Lane (uber shader conversion and clear plastic shader in free item list)2. i13 Romance & Rescue Pose Collection couple poses used as a base with several modifications
3. Creative Water 3d Splashes by OoT
4. Ultrascatter Advanced Instancing by HowieFarkes (used to apply 2000 instances of water droplets modeled by me and almost 600 splashes from the Out of Touch resource listed)
5. Iray Rain by KindredArts Rain and puddle system which worked spectacularly with the HDRI's from the resourse listed above, but some HDRI's are better than others for this.
No Count:
G3F (Uber Iray Base conversion with settings tweaked slightly by me)
G3M (Uber Iray Base conversion with settings tweaked slightly by me)
Water Drops modeled by me in Anim8or (shader applied from OoT water asset above)
Uber Iray Shader (applied to both characters and umbrella)
Primitive Cylinder (used to patch the place in the umbrella where the ribs did not come together at central pole)
Primitive Plane (used to create lighting enhancement using Uber Iray Base shader with settings tweaked by me)butting in here to help Saphirewild a bit, as she's busy with RL in the moment
All Links Checked Out Plz Move To Entries Thread
Can DForce 'Gravitate' In A Different Direction?To expand on what nonesuch00 said, you can set gravity to zero so the material floats in mid-air, then use a gentle wind to push it toward the wall.
Or if you like making things too difficult, set gravity to zero, rotate the room around a central point, then inertia will 'push' the dforce objects toward the wall as the room rotates around the center point. Kind of like those space stations that rotate to simulate gravity in sci-fi movies.
Or just turn the room sideways.
3D Art Freebie Challenge-April 2018-"April Showers Bring....." -Main Thread OnlyMy first entry (time will tell if I am able to submit more):
"April Showers Bring... "
Risk of Romance
Free List:
1. HDRI Rathaus
2. Gwennili Hair for G3F by kayleyss (color altered by me in shader settings)
3. Translucent White Plastic Shader (applied to outside surface of umbrella with settings tweaked by me. Translucency Weight: 1/Glossy Roughness .09/Refraction Weight: 1/Refraction Index: 1.06)
6. Armani Hair for G3M from Genesis 3 Starter Essentials.
Paid:
1.Umbrella: Yamaki Victory Lane (uber shader conversion and clear plastic shader in free item list)2. i13 Romance & Rescue Pose Collection couple poses used as a base with several modifications
3. Creative Water 3d Splashes by OoT
4. Ultrascatter Advanced Instancing by HowieFarkes (used to apply 2000 instances of water droplets modeled by me and almost 600 splashes from the Out of Touch resource listed)
5. Iray Rain by KindredArts Rain and puddle system which worked spectacularly with the HDRI's from the resourse listed above, but some HDRI's are better than others for this.
No Count:
G3F (Uber Iray Base conversion with settings tweaked slightly by me)
G3M (Uber Iray Base conversion with settings tweaked slightly by me)
Water Drops modeled by me in Anim8or (shader applied from OoT water asset above)
Uber Iray Shader (applied to both characters and umbrella)
Primitive Cylinder (used to patch the place in the umbrella where the ribs did not come together at central pole)
Primitive Plane (used to create lighting enhancement using Uber Iray Base shader with settings tweaked by me)Do You Have the Time - Carrara Challenge #39 WiPs ThreadAnother from me - its two renders combined - the first was mainly caustic lighting and I threw in a Primivol fog. The central kid was in a big glass speher and I shaded that with Digital Carvers' glass shaders but it wasn't showing the kid clearly enough, so I rendered him out again and used Fenric's tree duplicate to get another two kids...
Lots of post-work and I used an object pass to isolate the three kids so I could work on them. Used Ron's brushes and a cloud pic I took.
Love the image Head Wax, very interesting colour palet.
Selinathank you Selina - the orange working with the blue is one we often fall into :)
From 18 year ago, "oh my God"Jamahoney,
I agree and I have plans for what I call some "still life" images using Bryce. Slowly, I am getting back into creating CG imagery again but one thing I have to do first is arrange an extra cooling setup for my desktop because it is going to start getting very hot out here in the desert soon, and I don't want my desktop computer to burn out while rendering.
In this new dump I am living in there is only a swamp cooler and no central air conditioning which I had at my last place. One of my cousins lives south of me, near the Salton Sea in Southern California, and it has reached 119 degrees there in the summer.
The "Complaints 'R' Us, complaint thread"On the other side of the U.S., right here, right now, it's only 41f. And since it's 4:00 pm, I doubt it will get any warmer. At least it isn't snowing.
Although, snow was expected in the western and central part of the state.Dana
Daz Studio and LinuxYou should not use the drivers from Nvidia directly. Compiling them is tricky at best (and has to be redone every time Ubuntu delivers a fresh kernel version). Since you are using plain Ubuntu, you should instead use the Nvidia drivers from the Ubuntu repositories. (Which you did using apt-get, so that should work fine. 390.xx is also the most current driver, so that should also work fine.)
That's a general point actually. While most Windows users are 'trained' to find and DL their software and drivers from many sources, on Linux it's usually wiser to use the repositories for your distribution. The software there is already fine tuned to your particular flavor of Linux (if such a thing is necessary) and updates come from a central source in a timely fashion.
If you need newer versions of a software, it's usually better to see if there are 3rd party repositories you trust that provide them for your distrbution. (Pretty common for Ubuntu/Debian.)I've no idea however how well Ubuntu (and Linux in general) handles the presence of video cards (and drivers) from both Nvidia and AMD. If it detects one card is 'unused' it might well be it keeps it inactive. OTOH I know people have been able to use the the integrated graphics from their Intel CPU's for their screens in order to free the Nvidia for rendering, so it should be possible to have both working.
Nvidia Utils should have installed automatically with your driver, but it won't hurt to check. You might wish to install nvidia-settings and see what it says.
Do You Have the Time - Carrara Challenge #39 WiPs Thread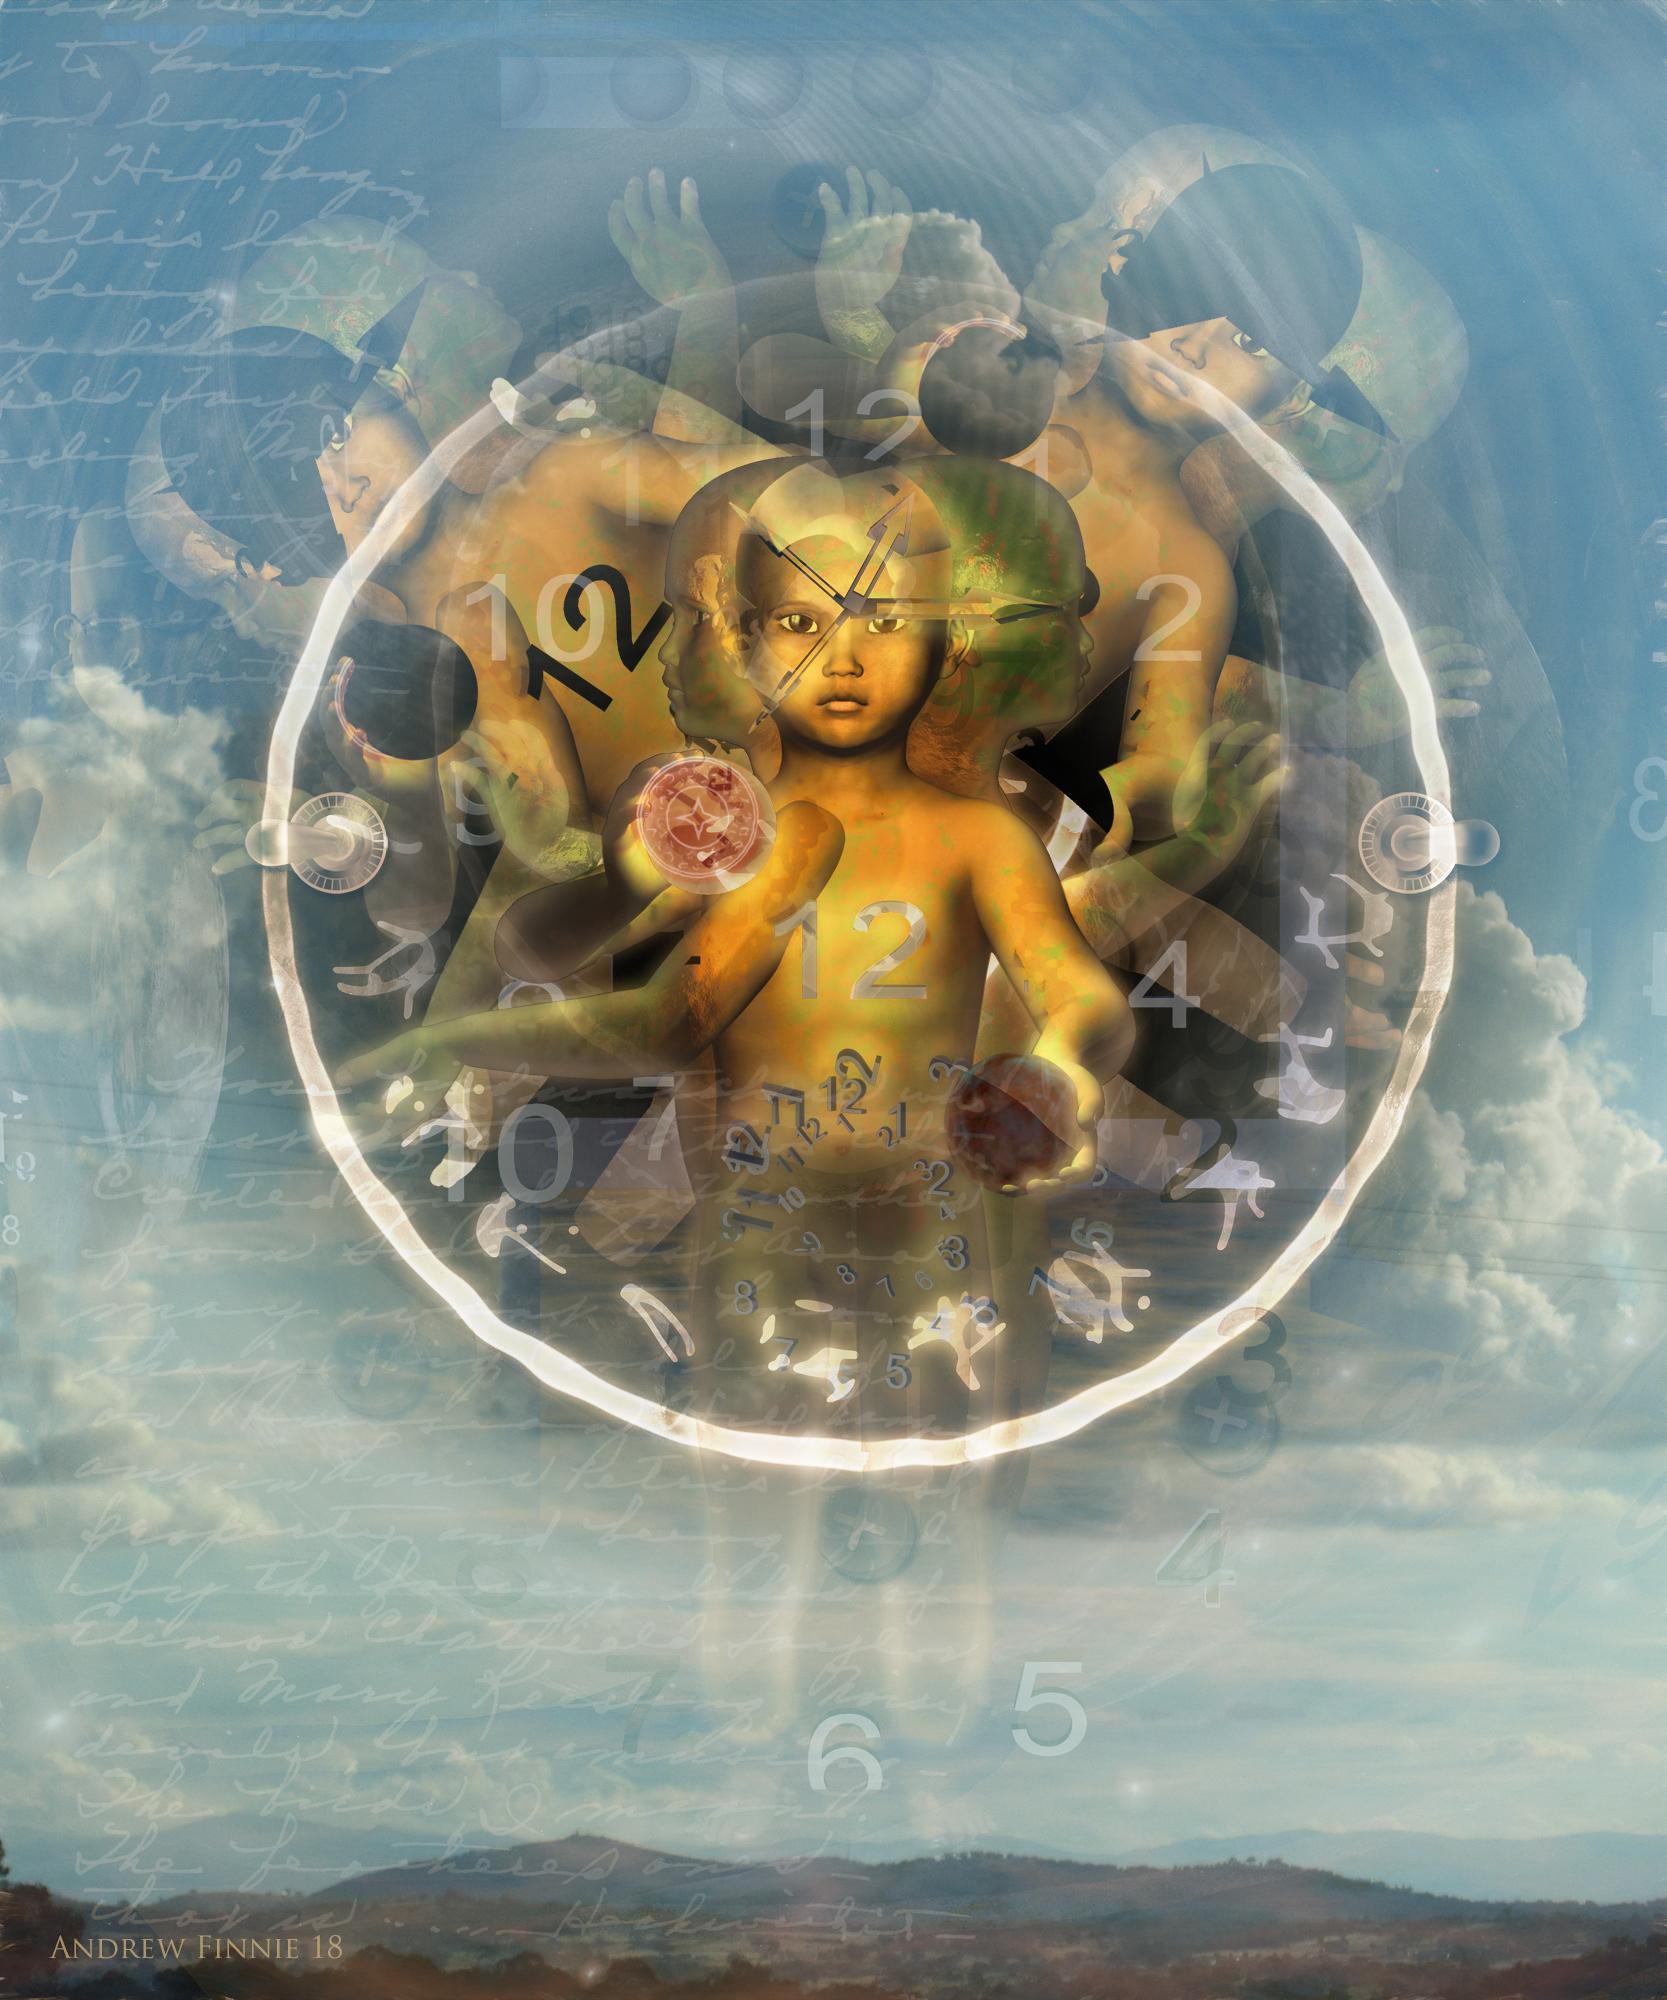
Another ho-hum work of genius.
:)
Thanks for all of those details.
ha ha thanks, sorry about all the typos - I think I was rushing somewhere ... sounds like my life... :)
Very imaginative, Namtar! Great setting. Always glad to see you entering.
Thank you very much!
sorry to be not around, I've been spending all my days in the painting studio
hjere's another from me - its two renders combined - the first was mainly lighting by cuastic and I threw a Primovol fog in - the central kid was in a big glass speher and I shaded that with Digital Carvers glass shaders but it wasn't showing the kid clearny enough so I rendered hm out again and used Fenric;s tree duplicate to get another two kids ....
lots of post work I used an object pass to isolate the three kids so I could work on them in post, used Ron's brushes and a cloud pic I took
A very complex and beautiful work!
thank you very much Namtar3d :)
sorry to be not around, I've been spending all my days in the painting studio
hjere's another from me - its two renders combined - the first was mainly lighting by cuastic and I threw a Primovol fog in - the central kid was in a big glass speher and I shaded that with Digital Carvers glass shaders but it wasn't showing the kid clearny enough so I rendered hm out again and used Fenric;s tree duplicate to get another two kids ....
lots of post work I used an object pass to isolate the three kids so I could work on them in post, used Ron's brushes and a cloud pic I took
Every time I see your work I'm bowled over. Just true art, man, and I say that as someone who has no appreciation or understanding of real art (lol, I guess that may denote any compliments from me aren't worth much). I've been trying to play forum catch up and just watched the video of your methodology that you posted over in the renders thread, wow now I know what headwax looks and sounds like (he has a slight Australian accent for those who don't know :) ) I'll finally have an actual voice to put to the dry sardonic wit that I appreciate so much in the forums. Really impressed by the depth of your knowledge of classical artists that I admit I've never heard of (which says nothing about those artists reputations, as I still think Michelangelo, Donatello, Rafael and Leonardo are Ninja Turtles). Beautiful colors and entrancing theme, very eye catching, great work!
thanks so much, that's very kind!! :) I learnt that if I am going to speak about a work I really need to know what it's called - eg "The Luncheon The Grass by Manet" sounds much better than: 'err, you know the one, that Manet painting with the naked chick and the two bloked in suites sitting in the grass having a petite something" Unfortunately I forgot I Had an ugly side while doing the interview ;)
Do You Have the Time - Carrara Challenge #39 WiPs ThreadVery imaginative, Namtar! Great setting. Always glad to see you entering.
Thank you very much!
sorry to be not around, I've been spending all my days in the painting studio
hjere's another from me - its two renders combined - the first was mainly lighting by cuastic and I threw a Primovol fog in - the central kid was in a big glass speher and I shaded that with Digital Carvers glass shaders but it wasn't showing the kid clearny enough so I rendered hm out again and used Fenric;s tree duplicate to get another two kids ....
lots of post work I used an object pass to isolate the three kids so I could work on them in post, used Ron's brushes and a cloud pic I took
A very complex and beautiful work!
Do You Have the Time - Carrara Challenge #39 WiPs Threadsorry to be not around, I've been spending all my days in the painting studio
hjere's another from me - its two renders combined - the first was mainly lighting by cuastic and I threw a Primovol fog in - the central kid was in a big glass speher and I shaded that with Digital Carvers glass shaders but it wasn't showing the kid clearny enough so I rendered hm out again and used Fenric;s tree duplicate to get another two kids ....
lots of post work I used an object pass to isolate the three kids so I could work on them in post, used Ron's brushes and a cloud pic I took
Every time I see your work I'm bowled over. Just true art, man, and I say that as someone who has no appreciation or understanding of real art (lol, I guess that may denote any compliments from me aren't worth much). I've been trying to play forum catch up and just watched the video of your methodology that you posted over in the renders thread, wow now I know what headwax looks and sounds like (he has a slight Australian accent for those who don't know :) ) I'll finally have an actual voice to put to the dry sardonic wit that I appreciate so much in the forums. Really impressed by the depth of your knowledge of classical artists that I admit I've never heard of (which says nothing about those artists reputations, as I still think Michelangelo, Donatello, Rafael and Leonardo are Ninja Turtles). Beautiful colors and entrancing theme, very eye catching, great work!
im looking for someone to build a poser figure for me
Sometimes, you just gotta' get inventive.
I assembled this Kaled mutant using DarkSeal's "Pet Slime" as the main body, the eyes (yes, plural, as in 2) froma human mesh, the D*Z Brain prop, and several EasPose rigged tentacle figures. Then I applied a custom procedual material to blend the separate component.
I used DarkSeal's Slime monster because it has one larger ocular socket and a secomd smaller one a bit lower as well as a mishapened mouth with webbed tendrils. You see, a lot of casual viewers mistook the creature to be a cylops with one central eye. True, the Human/Kaled fusion of Dalek Sec had a centrally positioned single eye, but that was not the intent when the puppet for the episode "Dalek" was created. While not easily discernable with the washed out lighting when the creature revealed itself, it did have a kind of "face". The right eye was wide opened, it DID have a left eye, or rather, a squinted shut eyelid positioned much lower and a bit smaller. It also had a mouth, the left side severely drooped as though suffering a troke. The idea is that this pitiful "thing" is the descendent of a humanoid species and there is still the faint remnants of that form. The "Slime" figure has all these elements allowing for a bit more screen accurate assembly.
Sincerely,
Bill
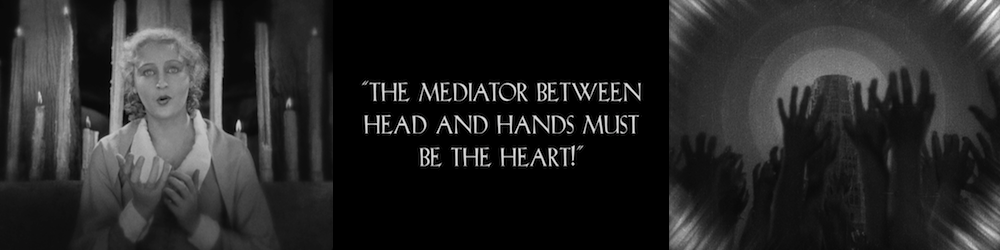
Diomede's Notepad, Sketchpad, and Chilling PadThanks, HW. Might be even more dangerous to be an American symbol of the nineteenth century industrial workingman. I think I need his axe included. Thoughts on a missing heart?
One of the reasons I've returned to this project is because the missing heart is such a central feature of both Metropolis and The Wizard of Oz.
 Do You Have the Time - Carrara Challenge #39 WiPs Thread
sorry to be not around, I've been spending all my days in the painting studio
hjere's another from me - its two renders combined - the first was mainly lighting by cuastic and I threw a Primovol fog in - the central kid was in a big glass speher and I shaded that with Digital Carvers glass shaders but it wasn't showing the kid clearny enough so I rendered hm out again and used Fenric;s tree duplicate to get another two kids ....
lots of post work I used an object pass to isolate the three kids so I could work on them in post, used Ron's brushes and a cloud pic I took
Dragon Wraith Tomb {here} (commercial)David and I present,
The Dragon Wraith Tomb.
A stunning, highly detailed Tomb Environment, made with the Dragon Wraith in mind. It comes complete with 1 Central Chamber, 7 additional smaller burial chambers, and 1 entrance. Each chamber, entrance and core load in individually. To add a little 'naturalist' flare, a rock formations prop has been included too.
Full DAZ Studio Iray/3Delight support as standard, with Basic Poser support.https://www.daz3d.com/dragon-wraith-tomb
Anna & David
Daz 3D is part of

Connect
DAZ Productions, Inc.
7533 S Center View Ct #4664
West Jordan, UT 84084Licensing Agreement | Terms of Service | Privacy Policy | EULA
© 2026 Daz Productions Inc. All Rights Reserved.