-
Bigender Genesis vs Gender Bias
The reason its more difficult to make stuff for Genesis is because of all the tech under the hood that makes it work for both genders. Basically stuff can get in the way of other stuff working right on specific shapes. Also, fewer gender specific clothing was made due to the base not looking female or male.
As a user, I prefer the gender split because I found Genesis so over crowded with morphs and shapes that I could not find anything and could not always remember if the morph I was dialing in was male or female.
Bigender Genesis vs Gender Biasgenesis was faster in setting up characters because of the lack of gender, BUT it also lacked in detail from what we now have with gender specific meshes. I also remember reading alot of threads on how vendors preferred the specific genders since it was less work and they could focus on attention to detail more. When it comes to clothing, texture and morph support these days, I think back when I used V4 and there were so few options compared to what we have now.
I was a huge genesis 1 supporter and was a bit crushed with genesis 2 came out, but I LOVE working with genesis 3 and when I see both side by side I can see a huge difference and can't imagine going backwards. I reload lots of my old genesis 1 scenes and rework them with genesis 3 and iray now.
Question about Hair for Gianni 7Hello all! I recently purchased "Gianni 7" and "Ragnar Gianni 7" but I realized that it didn't include the hair that I was looking for in one of the pictures.
I searched for it separately but I can't find it. Do I need to purchase a head morph? Or does anyone know where can I find this style of hair? Thank you! :) GenX2 Update / Genesis 3 Add-On [Commercial]
Dimension3D - checked the morph file in the text editior and it says modifier/shape . It's still not appearing in genX though or in the shaping tab.
Animated Shapes Separate MorphsWhenever there has been complaints about the lack of the separate head and body morphs the explanation is often that the shapes are so radical that the neck would not flow smoothly if done separately.
And in this package of highly stylized Characters, this is exactly the case.
So? Dosen't stop the major stylized icons like Girl, Aiko, and Hiro, which have been able to do that since Gen 4. Even 3D Universe's Genesis characters had separate morphs. Also, that's why most character artists bring the neck along in the head morph process, to make the transition between styles smoother.
Rigging a clothing item for Genesis 3 - How to reduce or remove the Shrink-Wrap effect?Automatic geenration of morphs is always going to be subject to that sort of effect to some extent. You might try adding a Smoothing Modifier (Edit>Figure>Geometry>Add Smoothing Modifier) but the ultimate fix is to make a custom morph.
Black Is Beautiful IIA custom morph I did wearing RecieCup's Nique skin (free).
Totally in love with this render! I wish the skin was still available. On Rendo, it says it isn't. Haven't found it free anywhere but will keep looking.
Rigging a clothing item for Genesis 3 - How to reduce or remove the Shrink-Wrap effect?I picked up Starship Crew, a Genesis 2 clothing item to use with my Genesis 3 males. Auto-fit really mangles up the mesh, so I thought I would give re-rigging for Genesis 3 a go.
I exported to an OBJ, fitted to base Genesis 3, then re-imported. Then used the Transfer Utility to transfer following the directions and it all appears good.
Start up a new scene, load up Genesis 3, add the jacket and it looks great. I load up Michael 7 HD, add the jacket and it gets the super shrink-wrap effect. The M7 pictured is with the jacket at SubD (1 or 2) and smoothing modifier (5). The Transfer Utility was done with morphs checked, I seemed to get less distortion in the mesh. Without, more distortion, the cloth holding the jacket on his right shoulder got really distorted. This iteration it isn't too bad.
Main figure HD Morphs, or, The lost manJust on the odd fantasy that this might happen: is there anyone Daz related/affiliated/PA'd/whatevered who could/is allowed to shed some light on how it's decided which characters get HD morphs and when? More specifically: what's going on with Kimo?
I'm just baffled because The Guy and Kenji, two toon/anime guys who positively absolutely Do Not Need HD morphs -- enhanced realism kind of flies in the face of what they're designed to do -- get HD morphs ahead of Kimo, a realistic character who could benefit from them.
The current release pace has the HD morph following one to two weeks after the main character. Kimo was released on April 24, according to his readme. Two months and counting.
Kalea has an HD morph, so why wouldn't her release partner? He is, quite literally, the only major figure in Generation 7 that doesn't have a main HD morph. So ... what's going on? Did he get taken back into the shop for a rework once they saw what was possible with Ivan's HD morph? (Seriously, that's freakin' amazing work. But I digress.) Is he wandering in a post-apocalyptic wilderness, crying out to be found? Inquiring minds want to know!
While I personally agree that HD morphs (imo) aren't needed for "toon" characters, they are probably helpful for add on characters to give a bit more realism. Many of the toon type characters have support characters that really are more reality type than toon type (like Sasori for Kenji and Snowflake for Aiko), and those probably benefit from the HD morphs.
Extend3D Renamon 2.2Don't take this personally, I mean I'm just a dude that uses poser in his free time, but I kinda wish there was more detail to it like teeth, muscle, more fur around the neck. I feel like the head is a little to wide as well. Like I said, don't take it personally, i just wish there was a little more to it.
Absolutely not, the fact is that Renamon is a character WIP, but with the passage of time we lost in the street the person who created the morph and rigging, and we can not find someone to help us continue development.
Indeed, I take this opportunity to publicly ask if there is someone who wants to help us to continue the development.
Main figure HD Morphs, or, The lost manJust on the odd fantasy that this might happen: is there anyone Daz related/affiliated/PA'd/whatevered who could/is allowed to shed some light on how it's decided which characters get HD morphs and when? More specifically: what's going on with Kimo?
I'm just baffled because The Guy and Kenji, two toon/anime guys who positively absolutely Do Not Need HD morphs -- enhanced realism kind of flies in the face of what they're designed to do -- get HD morphs ahead of Kimo, a realistic character who could benefit from them.
The current release pace has the HD morph following one to two weeks after the main character. Kimo was released on April 24, according to his readme. Two months and counting.
Kalea has an HD morph, so why wouldn't her release partner? He is, quite literally, the only major figure in Generation 7 that doesn't have a main HD morph. So ... what's going on? Did he get taken back into the shop for a rework once they saw what was possible with Ivan's HD morph? (Seriously, that's freakin' amazing work. But I digress.) Is he wandering in a post-apocalyptic wilderness, crying out to be found? Inquiring minds want to know!
Zero my Hero question.Hey, shadowhawk1, one thing I've found is that Zero seems to work well with G2M too! I've been playing a bit with it (on G2F) and found that JoeQuick's done a great job with the material zones so that it can work with multiple designs, not just the Pink Ranger look that it automatically loads up as.
G3F clothes don't transfer to G2M (that I've found; if anyone has a more direct link, please feel free to share), but if you save the G2F file, you can use G2F files to transfer to G2M. Re-conform the suit, gloves, boots, and belt (it took me a few tries because I left DS really confused), then bring over the helmet and scarf separately as props.
The belt looks a bit like a crazy codpiece on G2M, but it could probably be swapped out for a different belt.
OK not sure how to save the files like that, moving over from Poser so there is still a lot I am learning about Studio. Can you direct me to a link? I also want to thank you, your taking the time to answer my questions has sold me on this set.
So, is there a Carrara 9 coming at all?This is a beneficial overview:

Keep in mind that HitFilm 4 Express is Free and is a great way to get started into all of this.
Also, if you don't need masks, we can composite new renders directly over previous renders in Carrara using either (or both) Background and/or Backdrop in the Scene properties. I used to render Orcs running toward the camera, starting with a few in the distance. Then, with that file still open in Carrara, load that new animation into the Backdrop, switch around the positions of the Orcs and give a few quick tweaks to their morph dials, zoom in slightly, and render again, and repeat.
The huge advantage to doing this in HitFilm, Fusion, or some other compositor, is that we can get real-time feedback as we set things up, add additional elements and effects like blurs and/or particles, etc., Both HitFilm and Fusion have excellent particles, blurs, and a bazillion other wonderful effects!
Black Is Beautiful IIForgot about Children of the World. It's meant to go with Rascals, according to the description.
Elsewhere: Click the link below for a larger image with more information. I used Map Transfer to create the bald guy in the middle, using the Dark Beauty G3F merchant resource.
That nice. How much RAM does your PC have? Is that iRay or 3DL? Or do you have one of those high-end nVidea cards?
Thanks. 32GB RAM. And it has a LOW-end nVidia card. I thought it was more powerful than it is when I bought it, but it turns out that Cuda cores matter as much as VRAM, or maybe more, and it's got way too few. That's a CPU render, because the computer is unusable if I do anything else.
That image took 28GB RAM at render time. I checked because it was taking so long to get started. No idea how long it took to render; I set it to go and then went to bed. Couldn't have been more than four hours, because that was one of the limits, either 99% convergence, 8000 samples, or 4 hours. It could have reached convergence, although that's not likely, and it certainly didn't reach 8000 samples, so the time limit is most likely.
Cool, thanks. It's those sort of scenes I would like to make. So it looks like I was right to try and save to buy or built a computer that can upgrade to 64GB or even 128GB RAM. So far I have only found upto 64GB and those are few and far between unless you self-built a PC. LOL, I'll have to spread out buying the RAM stick by stick.
Black Is Beautiful IIForgot about Children of the World. It's meant to go with Rascals, according to the description.
Elsewhere: Click the link below for a larger image with more information. I used Map Transfer to create the bald guy in the middle, using the Dark Beauty G3F merchant resource.
That nice. How much RAM does your PC have? Is that iRay or 3DL? Or do you have one of those high-end nVidea cards?
Thanks. 32GB RAM. And it has a LOW-end nVidia card. I thought it was more powerful than it is when I bought it, but it turns out that Cuda cores matter as much as VRAM, or maybe more, and it's got way too few. That's a CPU render, because the computer is unusable if I do anything else.
That image took 28GB RAM at render time. I checked because it was taking so long to get started. No idea how long it took to render; I set it to go and then went to bed. Couldn't have been more than four hours, because that was one of the limits, either 99% convergence, 8000 samples, or 4 hours. It could have reached convergence, although that's not likely, and it certainly didn't reach 8000 samples, so the time limit is most likely.
Black Is Beautiful IIForgot about Children of the World. It's meant to go with Rascals, according to the description.
Elsewhere: Click the link below for a larger image with more information. I used Map Transfer to create the bald guy in the middle, using the Dark Beauty G3F merchant resource.
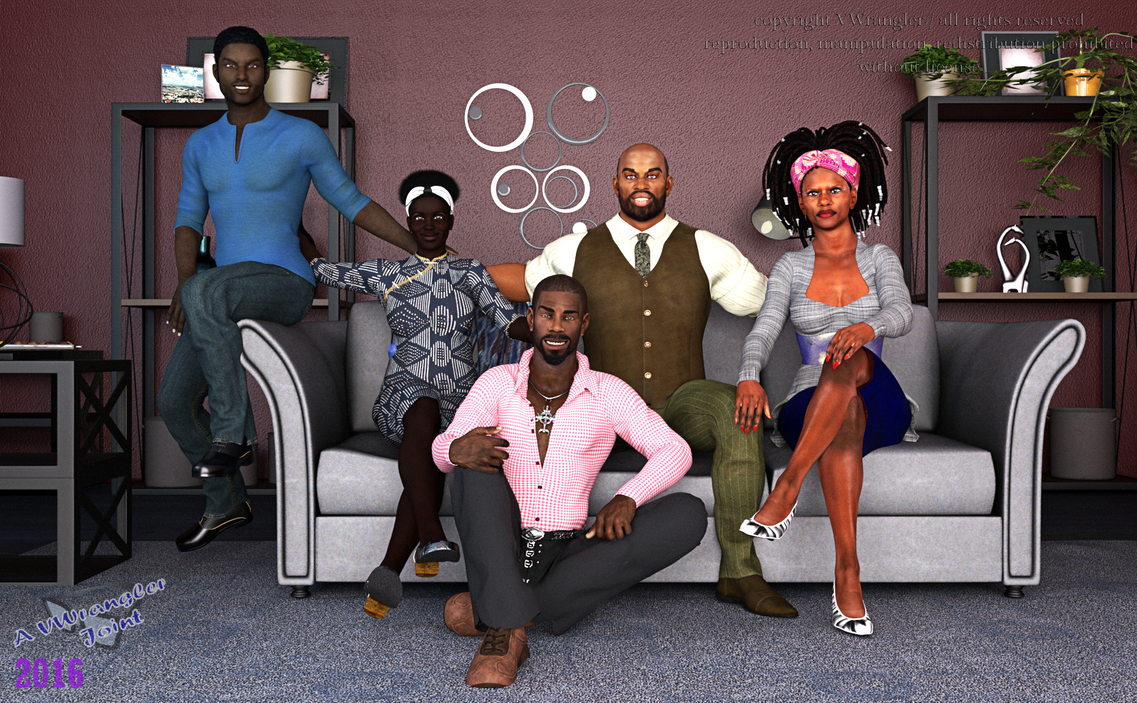
Family Portrait: The Grand Family
That nice. How much RAM does your PC have? Is that iRay or 3DL? Or do you have one of those high-end nVidea cards?
Black Is Beautiful IIForgot about Children of the World. It's meant to go with Rascals, according to the description.
Elsewhere: Click the link below for a larger image with more information. I used Map Transfer to create the bald guy in the middle, using the Dark Beauty G3F merchant resource.
Family Portrait: The Grand Family
SimTenero Randomizer Characters Showcase Thread Everyone WelcomeEr...I think it's a false alarm. I was playing with that randomizer, trying and undoing so many times, that I'm not sure where I ended up. I think I ended up using this model for my render. G2F, and I think it's the FWF Janna head morph.
I was interested in starting with one of the morphs, and making random changes from there. I was hoping that I could zero out the changes and return to the morph I started with. Instead zeroing out went all the way back to the base figure. So...I tried generating one random morph at a time, then hitting undo to return to the Janna features. But I kept getting very close to the same thing every time.
Sometimes that's the way it is with random number generators. You get the same sequence over and over unless there's a way to seed the starting point.
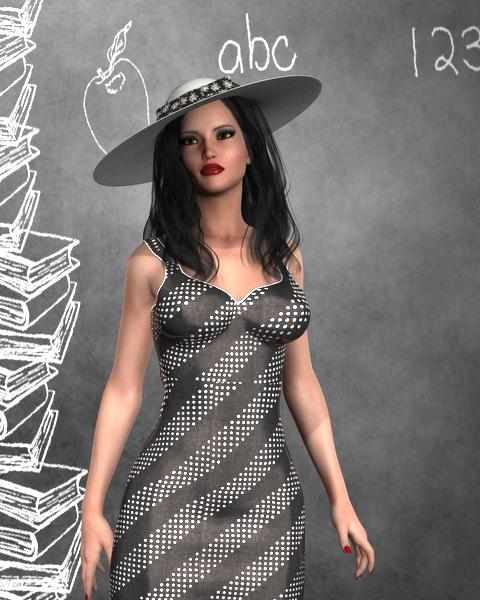
In any case, this is the lady under the hat in the Speak Easy.
And whattdya know! It's Miss McGillicuddy about 60 years ago!! She was such a sweet young thing back then, but when she got jilted by her fiance on the way back from Key Largo, she swore off men forever!.
Now you know why she never smiles...

 *How to Put a Morph (ERC) Dial on a Pose*
I think this will be a trend as ERC dials are something that the community wants by-and-large. I personally wonder if it's possible to do ERC dials with poses...
If you mean making dials for existing poses, sure, at least *.duf poses.
Load, say, G3F, and apply the pose. G3F should be selected for next steps.
Click with right mouse button of the parameters tab (on the letters Parameters) to get a menu and from the menu select Edit Mode. You will get a P next to parameters.
Click with right mouse button on any of the parameters to get a menu and from menu pick ERC Freeze.
In ERC Freeze Options window, click on "Create New..." button.
Now, in Create New Property window, I usually just type in the name and hit "Create" button. But you might take a time to fill in name, label, path (thats the menu dials will be in parameters tab; if you wish to make a new menu just type it manually or add to existing ones, like Actor/Pose Dials) and Type, like Modifier/Pose. Once done, click "Create" and in ERC Freeze Options window you should have your "new property name" in the Property field. Click on the "Accept" button and you should now have a dial for that pose in whatever menu you decided to put it in, dialed already to 100%.
Dial it to 0, apply next pose to the G3F and repeat the procedure (with different name for the new property). :)
You can save the dials with File - Save As - Support Asset - Morph Asset(s)...
To exit/deactivate Edit mode, click with right mouse button on the parameters tab and in the menu click again on Edit Mode.
Here, I just mixed first 10 G3F poses. :D
Thank you so much, and God bless you!
My Renders, Now I can go to bedG2F . .Iray, Scene only . . 3 spots (1 for back light),1 distance, 1 Point, Still not right, but getting sleepy.
I was getting closer to what I was wanting . . I recall or think I recall, there was a way to not show shadows from every light in Iray, too tired to search right now'
I don't have any morph dials for G2F, but I do have a couple freebie character dials , so she's a mix of them
In the spot
Where did you get the feebie dials for this charactor?? It looks amazing btw :D as do all you creations I hope my creations ge to be as great as yours someday :D!!
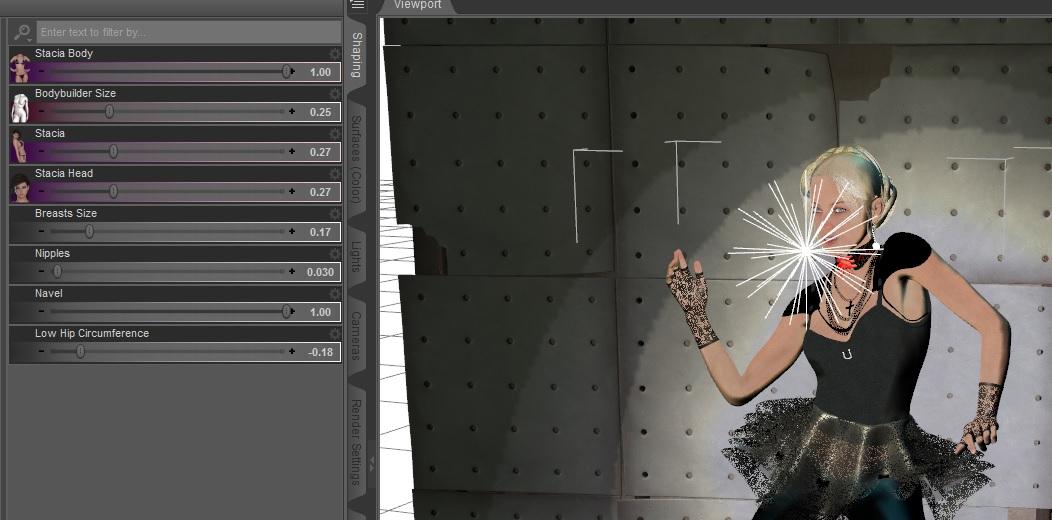
I thought I had used more then just one character, I only have 3 to choose from, but clicked on the Currently used tab, and it's just one. Character used was FWSA Stacia for Victoria 6, I couldn't find the store page, might not be available any more, there was a time she was free, might had been a promotional thing or something, so she might not be free any more
hair was Thalia Hair
Daz 3D is part of

Connect
DAZ Productions, Inc.
7533 S Center View Ct #4664
West Jordan, UT 84084Licensing Agreement | Terms of Service | Privacy Policy | EULA
© 2026 Daz Productions Inc. All Rights Reserved.