-
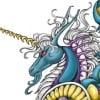
TerraDome3 NOT a rumor anymore! Live in store! Whoot!!!
Wonderland, don't load any of the preset scenes. Start with a blank scene, load up the A Zone, morph it a bit, apply a texture to it, then hit render. This should take no more than 3-4GB max to render, at least it does on my box, and like yourself I have 32GB, however my machine is a Windows box, not a Mac.
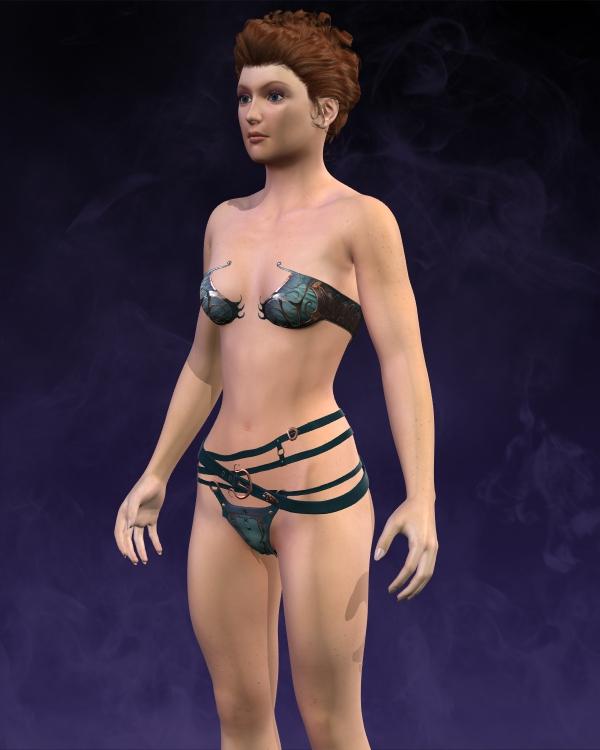
Dracorn's Render ThreadOK - Here we go with the body morphs.
The selection of morphs for the body are limited and do not contain any individual muscle morphs. That's where you can really customize a body. So I decided to go for an athletic look and see what we can do.
With body morphs, sometimes you have to move the slider around and rotate your figure until you can see where the morph is affecting. That's especially true with the muscle morphs if you are not familiar with the scientific names of muscles. Also keep in mind that negative values will give you the opposite results of the morph name.
Forgot to mention last time, but experiment with the sliders in both directions to see how they work.
BODY
backbone undefined -0.41
bladebone define 0.62 does the same thing and works with the one above
chest small X 0.17, chest diameter not the breasts
hip small 0.65 athletic girls tend to have narrower hips
Hip up -0.35 this is good for short or long waisted
Hip wide -0.25
[Didn't like Hollow Back because it pushed the stomach forward]
Navel hor 0.89 some of the navel morphs distorted her belly.
neck scale X 0.40 for a thinner neck
neck scale Z 0.15 go easy on this one.
Pelvis define 0.64 gave her the nice hip bones
Wasp waist 0.33 narrowed her waistFULL BODY
Athletic 1.00 It's important not to take the values above 1.00 because it begins to distort the body - unless that's what you want.
[The Distort morphs would have to be used VERY sparingly unless you want someone very deformed. Probably great for a zombie or something].BREAST
The areola morphs would be hidden under clothes, so don't bother if you want to post the render on DAZ. Same with nipple morphs in other packages. You have to keep in mind that your are molding a breast that is in a bra or swimsuit, and that is a different look from a naked breast. So unless all your gals are freezing, it's best to keep the nipple area smooth or you may find you have nipple bulges in a steel breastplate (yup, seriously). I see that you can use some of these breast morphs for movement, and they are asymmetrical so both breasts don't go up when you raise only one arm.Breast Big left 0.061 I used this one for asymmetry. Women have one breast that's slightly larger than the other, but use this sparingly or you'll have some funny-looking results.
Breast Diameter 0.10 I didn't increase this much as most athletic women typically have smaller bust lines. Take a look at pictures of professional athletes and you'll see what I mean. The lower the body fat and more cut the muscles are, that also reduces the size of the breast because there is less fat tissue. That doesn't mean that you can't have a busty athletic woman, just that the majority are not. So when you decide to go for a larger bust size, keep in mind that an athletic/muscular woman with larger than a D cup won't look as natural.
Breast Look up 0.050
breast move inside 0.10 the cleavage creator
Breast move up 0.25 for perkinessEXTREMITY
Nails long 1.5 Any longer than that and there was a weird warping of one of the nails.
I didn't like the huge quads on the thighs, so i tried to tame that down.
Thigh Full -0.36
Thigh inner contour -0.16
Thigh Wide -0.40Completed Heather
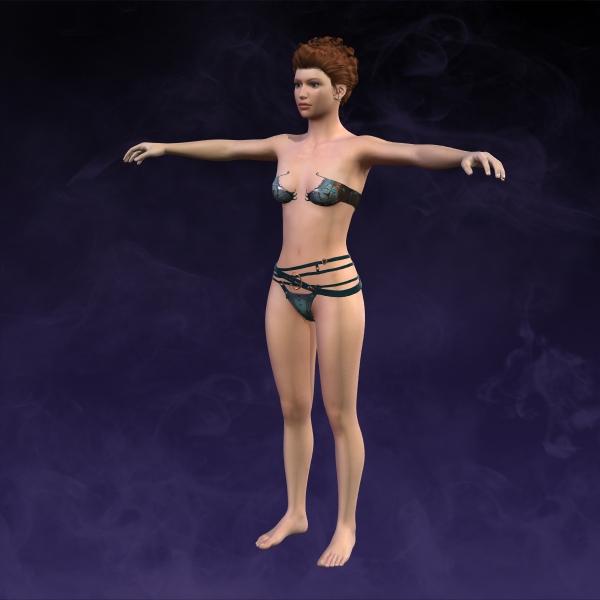
Original
 Sept 2016 New User Contest "Depth of Field" (WIP Thread)
Getting rid of that pole certainly opened up the view for the better. Well done!
Three things you might want to consider:
1. The charging skeleton's shield looks old (which is good) but it also looks unnused. If you could add marks and scratches to the shield's surface or otherwise make it look more used, it would improve the look and help making the skeleton warrior look more like a threat.
2. Switch position on the archer skeleton and the skeleton next to it. Right now the skeleton to the right is nothing else than a cheerleeder and the archer seems to be blocking its way to get to the hero archer. Switching their position gives the skeleton warrior free access to the hero archer, adding an additional threat to her.
3. You got rid of that post in the middle of the image. You might as well get rid of the rest that was above it. That wooden beam sticking out in the air now is kind of distracting.
4. On second thought, make that four things to consider. To me it looks a bit like the charging skeleton is smiling, which makes it look friendly rather than threatening. But I don't know how much, if anything, can be done about that, depending on how morphable and poseable the skull is. Also, I think deleting the eyes would be for the better. Empty eye sockets are scarier than two wide eyes, which makes it lean a bit towards the toony side. But that of course might be a good thing, if that is what your intentions are.
As always, this is just suggestions so please feel free to ignore them.

Thank you @isidorn! These are great suggestions. I can do 2) switch skeleton positions; 3) hide the post holder thingy on the top right; and part of 4) hide the eyes because there is a morph for that. There are no head morphs/expressions that affect the mouth, but I agree with you that it looks like the skeleton is smiling.
Regarding #1, I don't know how to make the surface appear marked/scratched either in Daz Studio or in Gimp yet. The brushes I've found in the Daz store are either for Carrara or Photoshop, and I don't have those applications.
GIMP can use abr brushes. I have a lot of Ron's brushes.
Negative Morphs unsupported in UnityI am exporting to Unity. And everything is fine, except when it comes to negative morphs. I could ignore these morphs but a few are very important such as Side to side eye movements which in DAZ you set a negative value to move right. Unity does not and never will support negative morph values. So the only answer is to create two morphs. But I don't see any painless way to do this in DAZ or hexagon. My theory is to pose the character with the negative morph pose and then "diff" with a zero'd character to create a morph. But I do not want to have to go into a modeling tool to do this. Isn't there an easy way to simply create a "morph" in DAZ? Deformation is no good for things such as eyes.
Or is there a way to create a morph based on mirroring (reverse) the original morph?
Show Us Your Iray Renders. Part VI really like the rugby outfit set that I bought with my DAZ Original Discount this month. It was actually a 300MB download! As far as this render goes I like it but maybe because I like rugby. I like the way the caricature feels 'almost 3D' against the background. Of course I didn't do that on purpose, that's just the way the render turned out.
In the future I am going to try my hand at creating caricatures of old baseball stars. I've tried to already create some caricatures from old black & white photos but it hasn't worked too well yet. I may need to combine technical SW with my own eyesight and morph dials to get something that is a good likeness. Even though I'm not old enough to have seen the really big baseball stars play, oddly enough they are more recognizable to me and most people than the modern stars. I collected baseball cards as a boy for a few years but stopped when it became too expensive like comic books became too expensive.
Sept 2016 New User Contest "Depth of Field" (WIP Thread)Getting rid of that pole certainly opened up the view for the better. Well done!
Three things you might want to consider:
1. The charging skeleton's shield looks old (which is good) but it also looks unnused. If you could add marks and scratches to the shield's surface or otherwise make it look more used, it would improve the look and help making the skeleton warrior look more like a threat.
2. Switch position on the archer skeleton and the skeleton next to it. Right now the skeleton to the right is nothing else than a cheerleeder and the archer seems to be blocking its way to get to the hero archer. Switching their position gives the skeleton warrior free access to the hero archer, adding an additional threat to her.
3. You got rid of that post in the middle of the image. You might as well get rid of the rest that was above it. That wooden beam sticking out in the air now is kind of distracting.
4. On second thought, make that four things to consider. To me it looks a bit like the charging skeleton is smiling, which makes it look friendly rather than threatening. But I don't know how much, if anything, can be done about that, depending on how morphable and poseable the skull is. Also, I think deleting the eyes would be for the better. Empty eye sockets are scarier than two wide eyes, which makes it lean a bit towards the toony side. But that of course might be a good thing, if that is what your intentions are.
As always, this is just suggestions so please feel free to ignore them.
Thank you @isidorn! These are great suggestions. I can do 2) switch skeleton positions; 3) hide the post holder thingy on the top right; and part of 4) hide the eyes because there is a morph for that. There are no head morphs/expressions that affect the mouth, but I agree with you that it looks like the skeleton is smiling.
Regarding #1, I don't know how to make the surface appear marked/scratched either in Daz Studio or in Gimp yet. The brushes I've found in the Daz store are either for Carrara or Photoshop, and I don't have those applications.
Solved: Split Morph between Left and RightThis method works, but it is no longer my recommendation as 4.9.2.20+ makes it much easier.
The Geometry Editor Tool now has a "Clear Selected Deltas From Favorites" when in vertex mode which will remove deletas from the selected vertices on all favorited morphs.
Also Morph Loader Pro now has the ability to use a wieght map or selection set to remove deltas on load. One can make a weight map and load the morph twice, once for the left and once for the right.
Genesis 3 - Which file references to the JCMsThe details of the ERC links are stored in the morph file, or in one of the morph files when it's a link between two morphs. Those are in the \Morphs subfolder of the figure's folder in the Data folder.
Solved: Split Morph between Left and RightAnother helpful tutorial, still works in DS4.9! :) Thanks CJones, it really helped me out!
I saved time deleting a ton of morphs in Step #7 by adding the morph to favorites, and then just selecting favorites in step #12.
School Uniforms for Tween Ryan and JulieThose are the two uniforms by Dogz which I mentioned. They are very nice, however I have two concerns. First, skirts and dresses very seldom transfer well. Sickleyield has some utilities which can help with that, but my budget is already strained. Second, they have morphs for loosening the collar and tie, untucking the shirt, and opening the jacket. I would lose all of these when they are autofitted. I can't afford $57+ for items that will sort of work. That's why I am requesting that a PA consider making school uniforms for G3F and G3M tweens.
Heard a rumor about V8Well Morph 3D doesn't make sense for DAZ Studio users with a DAZ Studio Game Development license for a long time hobbyist or professional but like those extra expensive candy bars and pops at the check out counters Morph 3D products make sense in the Unity 3D Asset Store. Utlimately for the typical Unity hobbyist that picks and the engine for a phrase and then moves on to other things in life Morph3D models or a long list of free 3D models available in the Unity Asset Store make more sense really.
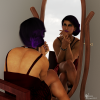
Any similar morphs like this lady for G2F?LOL...all it is is a mixture of a few different Daz heads (I think I have one Raiya head morph in there....just a smidge), and the skin is Gia 6's Tiziana skin.
The breakdown is as follows:
Gia Head: 100%, Hannah head: 50% (Raiya), SC_Norma: .25, Vicky 6: .25, Vicky 6 HD morph: 100%.
Eyelids bottom define: .30, Eyelids lower height: .25, Eyes angle: -.10, Eyes Height: -0.050, and some other, minor changes to the Philantrum width and mouth shape. That's it. Didn't take more than a few minutes. What took forever was the lighting. LOL.
Laurie
Edit: I forgot to mention I also made a mask for the eyebrows so that I could delete them from the translucency of the rest of the skin. I'm so tired of the orange eyebrow thing ;).
Any similar morphs like this lady for G2F?Maybe with a bit of mixing? Some things are going to be difficult...her brows are very close to her eyes and not sure you can get them that close in G2 without taking the brows off an existing map and moving them down. I did this morph by mixing some of the head morphs from G2...a lot of Gia, a little Vicky 6, Hannah from Raiya and some other heads. Took a few minutes.
Laurie
Just wow!!!
Agreed, i would go back to GF2 for that morph and skin.
Any similar morphs like this lady for G2F?Isn't that Jacquelyn Smith from Charlie's Angels?
If you are using Poser then the frontal portrait that you post looks good enough to use the Face Room in Poser to make a likeness of her. Now the hair there is bound to be something similar with such a popular hairstyle if you search at CP / DAZ Store / etc. The skin is typical untanned Northern European and Poser has several skin texture sets that would approximate it but you'd need to do the make and eyelashes and eyebrows yourself. At any rate she seems to be wearing minimal makeup.
I think her name is Emily Swallow
and I'm not sure if Face Room works on Genesis 2?
And so Emily Swallow it is...wow, does she look like Jaclyn Smith, especially from the front.
You said you were in Poser. You make in the face in poser using Poser Model in Face Room and use the Morph Transfer Brush to transfer the face shape to G2F you export from DAZ Studio to Poser in poser format. If you google the Poser Morph Transfer Brush Tutorial then in the old Runtime DNA forums there is a good tutorial on how to do that.
Non-SM models don't work in the Poser Face Room :).
Laurie
End of G3F/M development....soon?First, let me say that I'm (mostly) happy with the G3 development shedule. It has been fast and rich. But considering that previous generation development was 2 years AND that we have almost all chars covered yet, I'm wondering if we are close to the end of this generation development and/or close to the next one.
Lets go back to numbers and facts.
DAZ 3D Generation 7's Figures: 19 figures :
Victoria 7
Arabella 7
Bethany 7
Eva 7
Gia 7
Karen 7
Olympia 7
Teen Josie 7
The Girl 7
Michael 7
Gianni 7
Leo 7
The Guy 7
Izabella 7
Kalea 7
Rune 7
Ivan 7
Kimo 7
Lee 7DAZ 3D Generation 6's Figures : 21 figures :
Victoria 6
Aiko 6
Belle 6
Callie 6
Gia 6
Keiko 6
Lilith 6
Mei Lin 6
Monique 6
Olympia 6
Stephanie 6
Teen Josie 6
The Girl 6
Michael 6
Brodie 6
Corey 6
Darius 6
Gianni 6
Lee 6
Scott 6
Teen Jayden 6DAZ 3D Generation 5's Figures : 9 figures
DAZ 3D Generation 6's Figures : 8 figures
Everything is already covered in G7 and we even have a (superb) STAR 2.0 !! We just have 3 more char (G3F) already sheduled, one maybe this week/tomorrow (Sunny 7 Lilith 7 Monique 7), and certainly one+ G3M (darius 7?). Freak is already covered (kinda) by the Massive morph.
So, It leaves us just very few month of G7 char publication.
The really BIG thing that is missing (and I'm dying to see it!!!!) wich was present in all previous generation is..... CREATURE CREATOR (and all sub packs: male female HD etc...)
So, i'm thinking now: are we close to next gen? (Less than 6 month?)
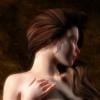
Michael and Friends Appreciation Association [Lots of images, please.]@DarwinsMishap I really hope you don't mind what I did with Scion. This really wasn't where I had intended on going with him, but I got inspired. It isn't my normal style of image as far as tone mapping goes, but I liked how it looks. I think I'm having way too much fun with tone mapping and it probably won't be to everyone's taste, but it made me happy. There are enough shadows that it took forever and a day to fully render out on my computer. When I first saw him in the store, all I could see was that black latex makeup and I didn't like it. Just not my style or something I would go for. I did like his head morph, though, and I found I did like the other makeups. I think the one I used is my favorite. I titled it Scion's Torment in my gallery.

It's gorgeous! Thank you so much. I love the tone mapping in this, and the pose and expression are so emotive. Well done, KM. Well done!
Infinite Insanity - There's ALWAYS Another Sale! (Daily Sale Talk)I don't want to sound like a sales person, but Aiko's body is a great shape to add in even if you don't do toony renders. She's idealized, but in the right amounts, can give a nice shape that looks different enough from the V7 and other model like morphs to be very useful, IMHO. Also, her head shape, in small doses doesn't necessarily mean toon either, but it's much easier to overpower a character morph with that than with the body.
Yeh small amounts, and its easy to dial down the eyes seperately too.
How to use V4 skin on G3F - SOLVEDThere are several ways, but the easiest and least expensive way to transfer the skin is to use one of Cayman Studios legacy UV sets, The V4 and G2F versions are sold over at Renderosity, but his newer sets for V5, M4, M5, etc. are sold here at DAZ. There's a thread on their use in the comnmercial products section here: http://www.daz3d.com/forums/discussion/79141/legacy-uvs-for-genesis-3-commercial
One thing to keep in mind is that V4 textures aren't set up for Iray, so if that's your renderer of choice, you'll need to adjust them manually or use an adapter script. I usually use SIckleyield's Beautiful Skins or V3 Digitimes products.
There's another commonly used option, Blacksmith 3d, also sold at Renderosity, but it's a bit more expensive to get into as it's an actuall painting program. That said, I have both and I almost always use Cayman Studio's product these days.
thanks for the heads up on converting V4 skins to Iray. Forgot all about that part. Sometimes, I just buy stuff with the mentality of buy now, use later and when later comes, I forget all about the product(s) I bought for its intended purpose.
That happens a lot /nod
Any similar morphs like this lady for G2F?Maybe with a bit of mixing? Some things are going to be difficult...her brows are very close to her eyes and not sure you can get them that close in G2 without taking the brows off an existing map and moving them down. I did this morph by mixing some of the head morphs from G2...a lot of Gia, a little Vicky 6, Hannah from Raiya and some other heads. Took a few minutes.
Laurie
Just wow!!!
Dracorn's Render ThreadTo save your character:
File, Save As, Character Preset.
This will save not only the morph, but the textures as well. It will create an icon which shows whatever is in your viewport within the Aspect Frame. So before you save, center your character's face in a 1x1 Aspect frame. Your save will take that picture. That looks much better than a picture of an armpit. =o)To load the character:
Content Library, Daz Studio Formats, My Library, Presets, CharactersIf you want to add hair and a costume, especially if you change colors or kitbash, use a Scene Subset. File, Save as, Scene Subset. I will do a render of the character first and save that in a Character file so I have a larger view. I also change "Genesis" or "Genesis 2 Female/Male" to the name of the character.
To Load the Scene Subset:
Content Library, Daz Studio Formats, My Library, Scene SubsetsDaz 3D is part of

Connect
DAZ Productions, Inc.
7533 S Center View Ct #4664
West Jordan, UT 84084Licensing Agreement | Terms of Service | Privacy Policy | EULA
© 2026 Daz Productions Inc. All Rights Reserved.