-
Skin Builder 3 render competition - Closing Date 31st of May 2017
"Oh, and I noticed your first item at that "other" store and was wondering if there was going to be a skin builder add on for it?"
No need for an addon. Load up Skinbuilder skin on figure then load that product after, and it will transfer skin over since that product uses the torso map loaded on the figure. In other words, it does not require specific maps because they are generated.
Real G3 peopleI think the trick is to offer a set of regular looking characters. Check out AliveSheCried's sets at Rendo.
This is what I am talking about... why aren't these products here?
I actually do have all of the morph packages and body shapers for G3, but to tell you the truth, it's not quite enough. Bethany is a good start to a mainline figure that's not 100% fit... where's the male equivilant?
Daz Studio Pro BETA - version 4.9.4.122! (UPDATED)>Richard
Could you use iit with auto-fit, when save as Clone? If you could, please tell me the way (no need to tell each step, but summarize how you use it) I may follow and try by myself.
I tried to make my character save as Clone. (I made it from G3, and with base G3 femlae)
I save as new Characterclone. I could find new character.dsf. dsj, (as same as before) then next, I export obj, which fit to my character shape. then re-import it to test new clone.
I tried to use TU, but I could not find this character clone as option. next I change the obj as figure, then try to use Auto-fit for base G3 . but I could not find option in Auto-fit as new clone, I could find all clone, which I have saved as morph and change type, as clone., with default clones.
then I do not know how We can use this saved clone. I may plan to make clone with G3 and G2 or Aiko7(G3base) with G1, but untill test those things, I really hope to know clear simple work-flow, which I can test it.
Real G3 peopleThis subject has been discussed to death and it always boils down to this
"The PA's say that regular looking characters dont sell as well"So my advice is get every morph pack you can find and dial in your own "regular" people.
Real G3 peopleWhich is why I usually morph-tweak a base figure - safe in the knowledge that anything I do is far from perfection!

 DAZ importer for Blender ( version 1.2) By Thomas Larsson
Then small tips, for user who test this add on but not hope complex things, this plug in offer quick way to import "usuall morphs" from "dsf" without export obj,dae, FBX etc, from ds, and import process.. (annoying, when you concentrate on blender)
this is clear advantage. you can import product morphs for cloth, hair,, actor, or scene props, when you need, from blender UI, with one click. (there is some option, to choose which morph you hope to import)
eg Now I am tweaking scene, then hope to change hair style, I know, this product "yumi Hiar" (one of my favorite pony tail products) have many morphs, but no need to import all. but add some morph, and tweak hair with current pose.
then I select hair mesh. then click, import moprh. (in this case I set controller for shape keys to change shape from add on UI), I locate this product morph data directory, then set ple-fix "tail", to import all tailXXXX morphs only.
now you can see, when I select, mesh, there is already imported all tail morphs as shape keys. (I hope those are simple morphs) but they colored as purple, it means controlled by driver, which auto generated and linked to another property. those controller are shown when I select "amatrue node" only . in categorize which my import settings.
you can choose, import morph without driver, (shape key), or add controller (then controll shape keys) from UI morph category too.
now I can tweak hair style from controller easy. (do not ask me, "pin" mark how work ^^; it is difficult for me, , in this pic, I just set key for contrller, (turn green) then memorize current value as key on timeline)
DAZ importer for Blender ( version 1.2) By Thomas LarssonAnd I do not think these setting change morph imported way, but it is my setting currently I used to mport genesis3 FBX.(as I said, I believe this plug-in best enough to import rig, then do not check each option presisely. just need to import morphs for me. but I know some option change node arrangement drastically., and if I set some option, I may no need clear transform, to see zero defromed shape, or I see breaked figure untill I set zero pose for all node.
Daz Studio Pro BETA - version 4.9.4.122! (UPDATED)Yes I know Power Pose is being up-dated. then not expect much about this beta power pose. But if daz hope to get feedback about Power pose, please offer test version, which at least can bend main nodes ,or there is no meaning to use power pose .
Then I really want to ask DAZ developer, what "save as clone" can do for User?
you added save as clone long time before, I know, it produce, dsj under data/daz 3d/(figure directory)/Tools/Clone, but have you ever offer guide about usage?
I have thought (just can supect) it maybe only need for some product, eg ,Cross figure resource kit but, this time up-date seems enhance it.
there is clone, which save as morph assets " set type as clone". we can use these "clone" properties , for Auto fit, or TU option.
Then "Clone" which save as clone assets (saved as dsj) work for what purpose? if it is only need for some plug-in, please clear discribe it.
or if we can easy use those "Clone" to enhancement our contents, please offer, clear guide. I believe most of us (less than 5%) can not understand what daz try to enhance , about "clone" things. if it is only for some product, or may need for vendor only,may better clear categorize so.
Problem: Transferring Daz clothing item to other side of G3 bodyOkay – admittedly I'm just catching on here. But I question that I have tried to resolve and haven't found an answer to.
I'm using G3 female with some morphs appled. Downloaded a clothing item from Daz – strap around the leg to hold a holster – but wanted to add two instances, one on right and one on left leg. It only attaches to the Right Thigh. Have duplicated it and tried to reverse the second instance to fit to the left leg, but can't seem to reconform it to the Left Thigh. I changed parent of the second instance to Left Thigh, but it's been impossible flipping it and chaning it to fit/morph correctly to the Left Thigh perfectly.
Any advice?
Can a weight/rigidity map protect a morph from Smoothing?There's always a little trade off when you apply Smoothing; such as weird distortions in the place of poke-through. On my current project, I'm forced to crank up my hairline morphs 2.5 - 5 times their normal influence because the Smoothing keeps forcing the hairline into the default curve. I'd like to fix this, before I present the model to Daz. So, I'm wondering if this is something I can fix in the weight mapping or the rigidity map?
All comments and proferred wisdom is greatly appreciated.
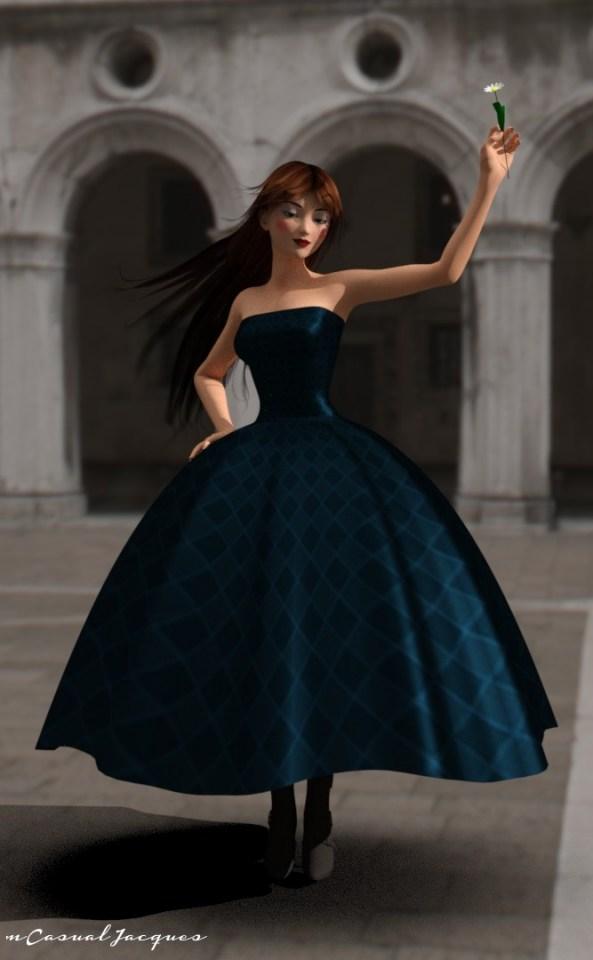
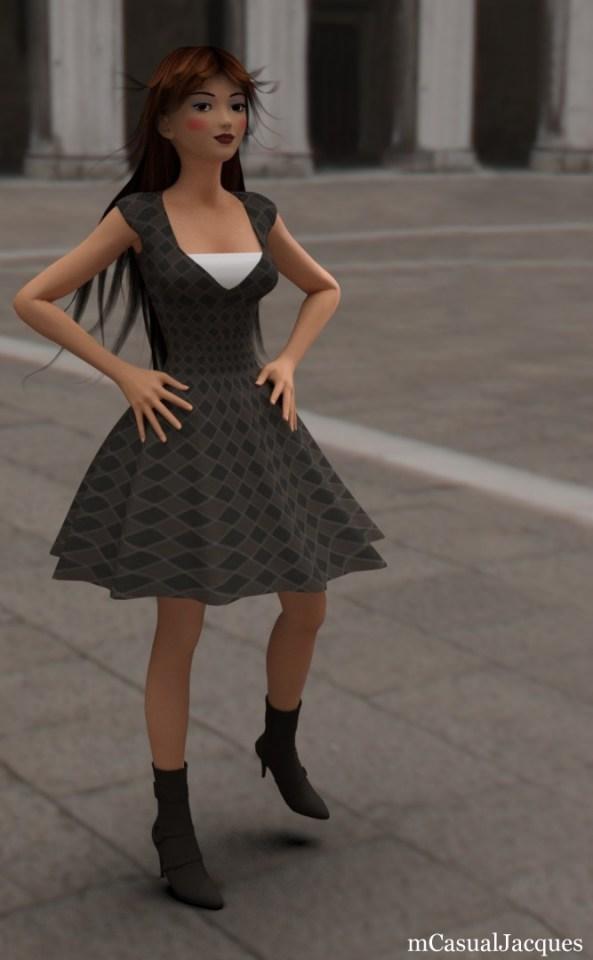
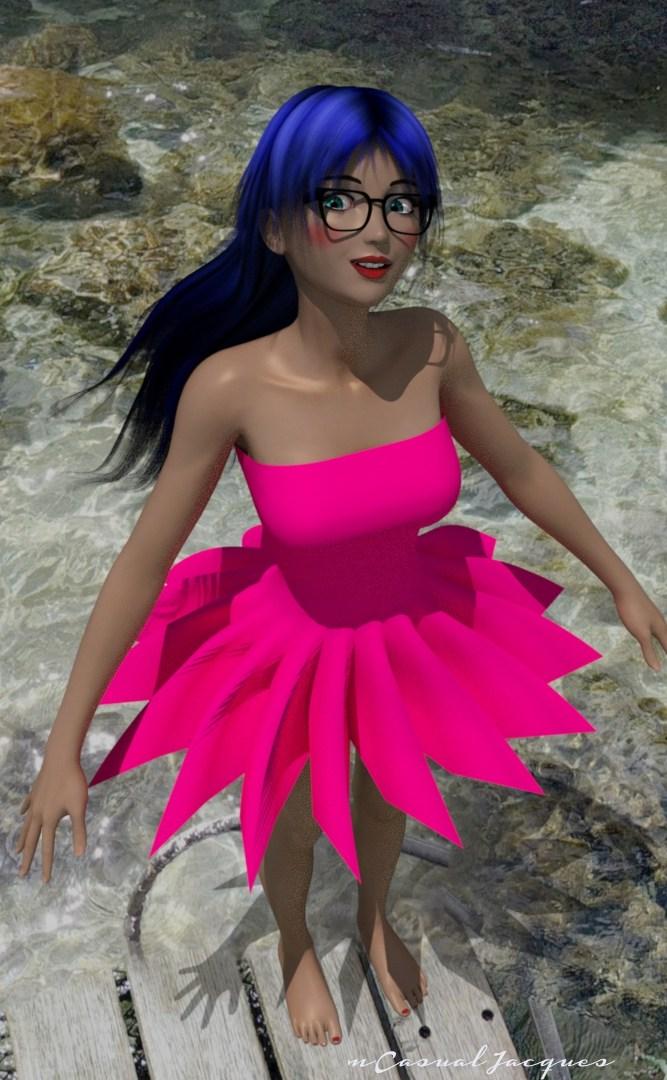
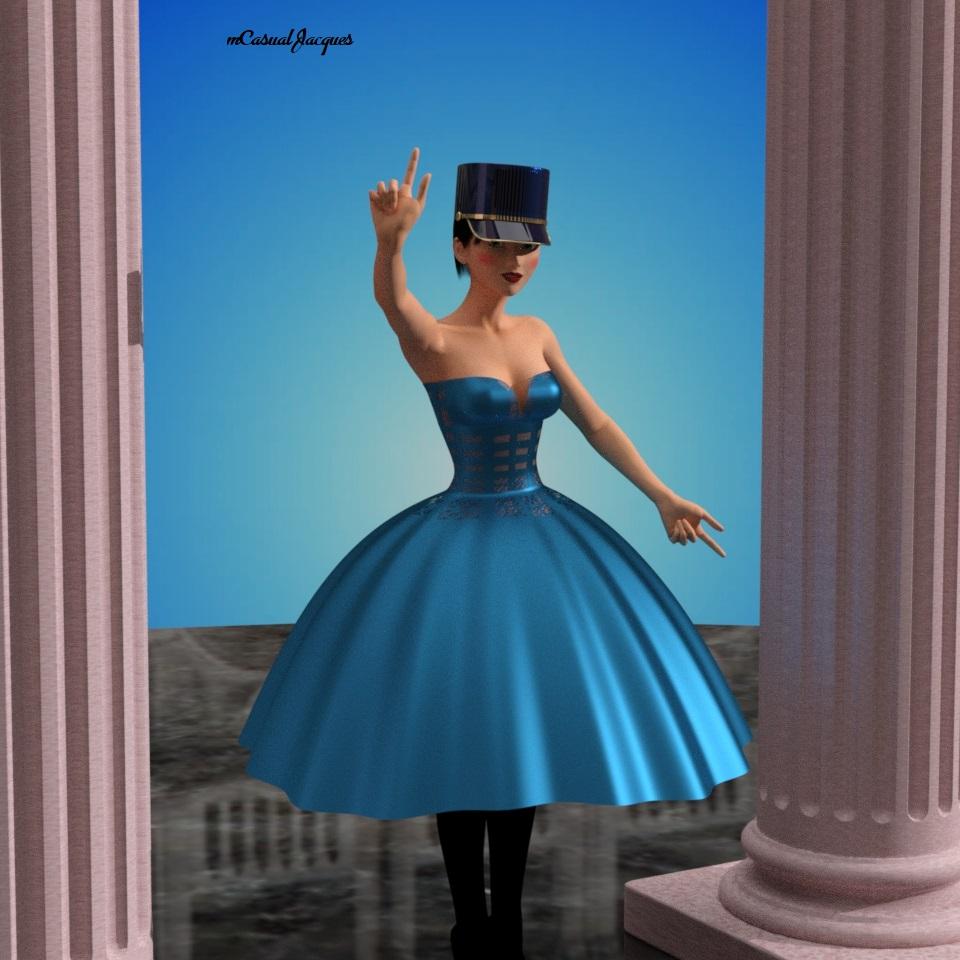
mcjA3BodyconG - bodycon for Aiko3 with 18 morphs to make dresses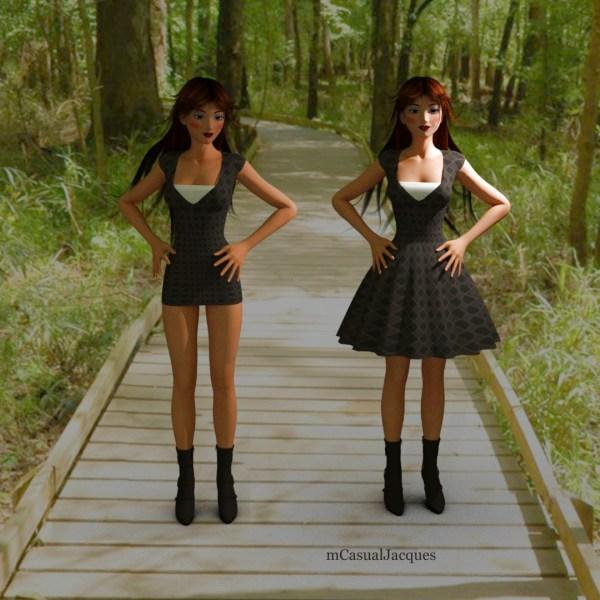
a bodycon is a very tight short dress, and with the new morphs here you can make it longer and pleated !
there's 20 "user" morph channels
https://sites.google.com/site/mcasualsdazscripts8/mcja3bodycong
 Anyone know who the first image is (blonde)?
Kinda looks like Olympia 7 with something else morph dialed in.
Genesis 3 male character too laggy to poseI made this one character for my game, on a Genesis 3 figure, with Lee7 65% body and some other characters morph parts and I find it considerably laggy to pose. I remove clothes, hair, everything and with just the figure it stays laggy.
Viewport and Camera view go smootly. It's just when I try to move the figure, or part of it like an arm that it moves slowly. I don't understand how a figure can use all my computer ressources like that.
Computer is i7-5820K CPU, 48GB RAM, 2X980ti GPU.
Can anyone help me out?
Cheers
DAZ importer for Blender ( version 1.2) By Thomas LarssonPlease can you explain better how do you get to export the JCMs and how do you use them in Blender ? I am really only interested in the knee and elbow corrective shapes. I don't need the whole JCM set. So if I can figure out how to get these two JCMs to work it is enought for me.
I can't see any pJCM entry in the fbx exporter. I can only see a lForearmTwist.YRotate2 that gets baked when I rotate the G3F left forearm. Moreover, if I set it to export I can get it in Blender but I can't figure out how to use it since this morph seems to do nothing. I would expect it to bulge the elbow area so I could use it as a corrective shape for the elbow when the forearm gets bended.
Also I can see the G3F pJCMs in the DAZ Base Correctives folder but when I import them as custom morphs with the plugin they do not show in the plugin Custom Morphs tab and/or in the blender Shape Keys panel. I am using the 1.2 developer beta version of the plugin as you suggested.
DAZ Studio 4.9.3 with default G3F no addons
Blender 2.78c
DAZ Plugin 1.2 developer beta versionGet frustrated every time I attempt to use Daz StudioMy whole issue with DAZ Studio is finding content. I gave it what I thought was a fair try from Oct 2016-April 2017 by trying to use nothing but Studio. In that period I never opened PP11 once and I completely started from scratch, deleted all my old runtimes and just let Content Manager install everything. I still can't find stuff even with Smart Content and everything put exactly where DAZ Studio expects it. Maybe I have a mental block but having issues both with finding content and trying to figure out the the differences between Poser and DAZ Studio without decent documentation just sucked the fun right out of my hobby. I didn't make a single finished render in that time so I gave up and went back to Poser Pro 11 where I know the location of all my content. At least it is saving me a lot of money here because VERY little new at DAZ is Poser compatible and I pretty much have all the older content I could ever need.
For me finding Content in Poser is a nightmare. This part of the Product is in Figures, this part is in Props, Materials are in Poses? (Yes, I know people started putting them there, due to the fact there was no where else to put them.) I explained it this way in a post about Folder Structure:
Poser Method:
Poser uses the Little Sort method. Poser groups similar content together, in the same Root Folder. Figure with figures, Hair with Hair folder, Props with Props, and if there isn’t a specified folder, then it goes in the Pose Folder. (It is the only logical explanation for how Morphs, Mats and other content, which are not Poses, end up in the Pose folder?)
[Thanks to icprncss for the explanation of how this happened:
A note regarding Material poses (Mat poses) and Morph poses (Mor poses). These are user hacks that Poser users discovered back in the days of Poser 4. ERC and JCM’s are another user hack that is now common practice. DAZ didn’t discover these and neither did Curious Labs or eFrontiers. (Thus proving Content Creators and Content Consumers are a powerful force, what were Hacks in Poser 4 are now the Norm, due to users forging into new areas and developers following.)]
So the workflow is to place your figure from the Figures, then go to the Hair folder for Hair, the Figure Folder for Clothes and then the Pose folder to apply Morphs, Mats and Poses, save for Hand and Expressions poses which have their own folders.
The advantage to the Little Sort is the ability to get to the content type you want very quickly, but this is where the apparent advantage becomes a disadvantage. The Content Consumer spends time searching for the Content compatible with the figure you have loaded; for folder mislabeling can send them down the wrong path. So Poser Content Creators have to be very careful how they label their content.
DAZ Studio Method:
DAZ3D Studio uses the Big Sort method. Studio groups content that works with a Figure or Object under the same folder tree. A Dress for Genesis would be in the clothing folder of the Genesis folder and the Surface Textures for the Dress would be in a materials folder in the Dress’ folder.
So the workflow is to go to the Genesis folder, place the Genesis Figure, then without moving out of the Genesis folder you can find Hair, Clothing, Poses and the like that work with the Genesis figure.
The advantage of the Big Sort is that the Content Consumer knows that everything with in the Root folder of the product will work with that product. The Disadvantage comes from misplaced content, outside the Root folder. Another possible disadvantage comes from a possibility of content duplication, for those assets that work with more than one Figure, but this can actually be controlled.
Finding Content is DAZ Studio is easy, even without Smart Content. I'm going to build a Scene with Michael 7, Horse 2, Dragon 3, and put them in “On a Certain Night” which is for Millennium Environment
- Open DAZ Studio
- Go to the Content Library
- Click on DazStudio Formats
- Load the environment first
- Environments - Landscapes - Millennium Environment - Scene - On a Certain Night and click on the prop
- Done (unless you want to add vegetation)
- We are going to have a dragon in this so let’s scale it up to 200% the hit a Ctrl-D to bring it to the floor.
- Load the Dragon
- Animals - Daz Dragon 3 - DAZ Dragon 3 Base
- Everything that works with DAZ Dragon 3 is in the folders in the Column to the right
- Adding the Horse is the same
- Animals - DAZ Horse 2 - DAZ Horse 2
- Here we have to pick mane and tail, and then Materials under the Materials folder
- To find a standing pose we look under Poses in the Folder to the right.
- Now Michael 7
- People - Genesis 3 Male - Characters - find Michael 7 in the group of Actors
- We click on Michael and lets get him dressed.
- Clothes are in Clothing
- Pick a Hair in the Hair Folder
- Change the hair colour by gong oto the Materials folder wishing the Hair’s folder
- Pick a Pose from Poses
- Click on Render Settings
- Environment on the left side
- in Environment Mode pick Sun-Sky.
- Drop to Dome Orientation X click on the number and type 30 if your scene is in the Northern Hemisphere (Tropic of Cancer is the Thirtieth Parallel) Southern Hemisphere type -30 for the Tropic of Capricorn. the Latitude and Longitude (are Currently set for the DAZ Offices. Date and Time are I think the Release date and Time for 4.6. but changing these setting will change the direction of the light in your scene.
- Now places every once and render.
Getting it now, Most products follow this method. So ask was it is, a sword for Genesis 3 Male, you are going to find it in Props under Genesis 3 Male, the Materials for the Sword are going to be in the Materials folder within the folder you found the sword, including any add on materials. Most Vendors follow this method. I believe most products are bring brought under this method. If you are looking for Dream Home, you will find it under Environments - Architecture - Dream Home - and there it all is.
That is only using the Raw folder structure, you can alway search in Products for the Product Name and do it that way. And if you use Smart Content it is even easier. When you select an asset (anything in the scene) DAZ Studio will narrow the mass of products down to the Assets that will work with the Selected Asset. But say you want to load a Genesis 2 Male outfit onto Genesis 3 Male, you can do that back in the Content Library, and Auto-fit will help make it all look right.
Now if you are looking for something which is Poser Format, then you have to switch your brain to Poser Mode or easier, look in Products for the Store Name, All Products with few Exceptions are given their Store Product Name. so if you are looking for [‘On the Dark Side' for Morphing Fantasy Dress] you can find it in the O’s, even though it is for V4.
Does that explain how to find something.
I hope this was helpful
Transfer Utility on Morphed CharacterNow my only remaining issue...
When I remove all the morph properties from the conforming clothing and save it as a Scene Subset (BTW, I couldn't figure out how to save it as a wearable preset...it just saved the base figure not the clothing) it fails to remember that I deleted all the morphs. So when I load it in and fit it to my morphed character all those morphs still apply. So I again had to go thru and delete the morph properties manually. That worked gread, and all is well, I'm just wondering the correct way to save my new conforming clothing and have it remember that I deleted the morph properties.
Thanks.
Transfer Utility on Morphed CharacterHEYY !!!! I DID IT !!!
Thanks to Mr. Haseltine's excellent 2013 post on turning props into conforming clothing, I selected my conforming clothing, then used the Property Heirarchy, and deleted anything that looked like a morph from the LONG list of various properties the clothing has. And that included PBM's, JCM's, and even a CTRL thing for some breast morph.
In any case, SUCCESS !!!
Thanks. This is a very cool and easy way to convert Blender cloth to conforming clothes. And I think an important part is to transfer rigging from a similar conforming clothing (like a draped dress in this case) since it already has bone influences more appropriate for clothing, as opposed to a G3 rig.
Morphs no longer working in 4.9Hi all
I'm fairly new to Daz and am experiencing some issues:
A few months ago I purchased the futalicious genitalia bundle. It was working fine back then - I installed it by unpackaging it into my daz3D library and all was good. Had a break from Daz as no longer had time but now just getting back into it. And that particular morph no longer works. I get the following error message when I try to load it:
"an error occurred while reading the file, see the log file for more details."
Also, I no longer have a preview thumbnail of the morph in my content library - just an exclamation mark on everything inside that folder.
Here's an extract from my log file:
2017-05-28 11:10:39.240 Loaded image fmn_haze01.jpg
2017-05-28 11:10:56.366 WARNING: libpng warning: iCCP: known incorrect sRGB profile
2017-05-28 11:10:56.368 WARNING: libpng warning: iCCP: known incorrect sRGB profile
2017-05-28 11:11:55.854 Error reading file, see log for more details.
2017-05-28 11:12:01.225 WARNING: /src/sdksource/cloud/dzcloudtasknotifier.cpp(178): recv failed errno=54
2017-05-28 11:12:18.329 Error reading file, see log for more details.
2017-05-28 11:12:31.039 WARNING: libpng warning: iCCP: known incorrect sRGB profile
2017-05-28 11:12:31.108 WARNING: libpng warning: iCCP: known incorrect sRGB profile
2017-05-28 11:12:33.050 WARNING: libpng warning: iCCP: known incorrect sRGB profile
2017-05-28 11:12:33.083 WARNING: libpng warning: iCCP: known incorrect sRGB profile
2017-05-28 11:13:53.164 WARNING: /src/sdksource/cloud/dzcloudtasknotifier.cpp(178): peer performed orderly shutdown errno=0I'm on an Imac.
Any help would be much appreciated. Thanks.
Get frustrated every time I attempt to use Daz StudioThis program is incredibly frustrating every time I try and use it. I figure there's a learning curve but I've learned how to use Xcode to write my own iPhone apps, I am learning Unity to make games, I've known Photoshop and simiar programs for years. ALL of these had a learning curve but at least there was a sense of small steps and accomplishments. Daz Studio has those as well but it really feels like "one step forward, three steps back". I installed the latest yesterday after not using this for awhile, In the past, I have used Poser and imported Daz assets, which worked somewhat but was cumbersome and buggy. So I thought that yesterday, I'd clear my old build, download the latest and see if anything has changed for the better. No, it has not! The Daz installer does not install what you need to run the program, you have to get an error message that it needs a "valid PostgreSQL CMS connection" So I found that and installed it, I installed the helper assets to run the tutorials and they did not show up in the file panel. I attempt to move around 3D space with the move, rotate and zoom tools and it is horribly jerky and cumbersome. I really CAN'T imagine working this way for an extended period of time. I decided to try a render and with the basic settings, half an hour later it was about 50% done and looked like grainy. Poser does a better job and faster. I just don't get the appeal of this. I see the potential, many of the assets and models look great! It's just USING the tool that is such a constant nightmare. I don't believe it's a learning curve with this program, I think it is poorly built. I want to like this and want to use it but it seems like a constant uphill battle to do the most basic things.
Going to take this in pieces:
First the Install issues:
The Daz installer does not install what you need to run the program, you have to get an error message that it needs a "valid PostgreSQL CMS connection" So I found that and installed it, I installed the helper assets to run the tutorials and they did not show up in the file panel.
Okay first, lets backup you and start Again:
First in the Download Filters Check the following:
- DAZ Studio 4.5+
- Install Manager
- General
- Software
- Plugin
- then your version of OS (Windows 32 or 64 | Mac 32/64bit
In the DIM do s Search for “PostgreSQL” and Install it if you haven’t already
then search for “DAZ Studio 4.”
You should see Only the DAZ Studio application and Plugins made for your OS
This should load all plugins for your version of Studio
Standard Plugins are: (If you don’t have the software don’t load the plugin)
- Photoshop 3D Bridge - Sends things to Photoshop
- Hexagon Bridge - Sends things to Hexagon
- GoZ - sends thing to ZBrush
Once the software is loaded, close down the DIM and Start Daz Studio
Now let's talk about your viewing and rendering experience.
I attempt to move around 3D space with the move, rotate and zoom tools and it is horribly jerky and cumbersome. I really CAN'T imagine working this way for an extended period of time. I decided to try a render and with the basic settings, half an hour later it was about 50% done and looked like grainy. Poser does a better job and faster.
Okay Viewing first:
- Start DAZ Studio
- When the Welcome Dialog opens and prompts you for your Email and Password, Click on the Radio Button that says "Work Offline" for the moment.
- Then click Next and then Ok.
- In the upper right hand corner of the Viewport, you should find a Dropdown Box that reads “Perspective View”.
- To the Left of the Camera selection, is a sphear or a cube.
- Click on that icon and pick “Texture Shaded” (If “NVIDIA Iray” is selected, the program will render the Veiwport with the Iray Render engine, Unless you have a very High powered video cart that will make the Viewport hard to control)
Now Rendering:
- Click on Render Settings tab
- if you have a Nvidia Video Card, then click on Advanced inside the Render Tab
- In the upper box you will see CPU and your Video Card
- If the Video Card is not Selected, Select it.
- If you don’t see anything but the CPU then your Video Card does not support Nvidia’s Cuda platform.
- If you are on a Mac OS System, then you might only have the CPU there, (unless it is an Older Mac)
- If you are still having issues I'd like to know what your OS and Spec are.
- System type: (Mac OS/Windows)
- OS Bit size: (32/64)
- CPU Make and model: AMD/Intel
- Video Card Make and Model: (AMD/Nvidia/Intel(CPU/GPU Combo)
- System Memory (RAM) in GB:
I just don't get the appeal of this. I see the potential, many of the assets and models look great! It's just USING the tool that is such a constant nightmare. I don't believe it's a learning curve with this program, I think it is poorly built. I want to like this and want to use it but it seems like a constant uphill battle to do the most basic things.
There is a Learning curve, and things are different than Poser. just like Mac OS is different than Windows or Linux.
But I would say, that in most cases you have more control with DAZ Studio then Poser and more choices.- DAZ Studio is got a Real World Scale. (1cm) not PNU’s.
- Exactly how big are those, 8' 8.5' 8.6' I can tell you that reguardless of what the Poser people think it is it is 8'.
- Anyone wanting to contest that, I have a few Models and renders to show you.
- Things made in most modelers will maintain their scale, they were created in.
- The various bridges allow you greater abilities and you can easily makes changes to a mesh or textures.
- Export Genesis 3 Female to Zbrush and modify the mesh.
- Transport it back and create a Morph, without issue.
- I find DAZ materials easier to understand and you have Iray and 3Delight Materials.
- And there is LIE so add decals to material images
- Place a Tattoo on the arm, a wound across the chest
- Sliders instead of dials, but they do the same things.
- Camera placement is from the same Zero Point as everything else, not from some other reference.
- If you want the Camera 200cm from the origin point, you can and 170cm above the ground, you can have it there.
- You can look though lights, like a camera (But you can't render from them)
- There are more choices in inport and export to and from other 3D applications and formats
- and the list goes on those are only the ones I can think of off the top of my head
I hope this is helpful, and you get up and running without issue.
Novica & Forum Members Tips & Product Reviews Pt 8I was still playing catch up with this thread after taking most of the last month off to write. Lots of great pictures. I was going to post my Sawyer image but then Novica already linked it so here is a render using a GypsyAngel fellow that I did last year. I like how it turned out considering it was my first render with Terradome 3. The handsome fellow is Merrick.

This handsome fellow is Ragnar without the scar on his face. I think he's cute. Such an excellent morph GypsyAngel made there. :)

I know I've rendered a few of the girls, too, but I'll be darned if I can find them. They are probably on the old hard drive when I had the big computer crash last year. I still haven't transferred all of my scene files and renders from that yet. I have all but 15 GypsyAngel's products. I really like her characters. I haven't managed to pick up Brahm and Ronan, yet, but they are definitely going to find a home in my library as soon as possible. Eventually, I'll get everyone. I really like how Elish and Roxanne look, too.
I'll have to see what I can do about rendering some of the girls in my library this week.
Oh, I thought I'd tell what I'm using for my desktop backgrounds. On my main setup in Linux, I'm using one of my latest renders. I just like how it turned out. You can see it in my gallery here. And, on the little drive when I'm in Windows because I still haven't managed to get everything working in Linux quite yet, I have this one set as my desktop background. It was a 3Delight experiment and I like how it turned out, too. I don't get a whole lot of good renders out of 3Delight, yet, and I love it when I get a great one.
Daz 3D is part of

Connect
DAZ Productions, Inc.
7533 S Center View Ct #4664
West Jordan, UT 84084Licensing Agreement | Terms of Service | Privacy Policy | EULA
© 2026 Daz Productions Inc. All Rights Reserved.


