-
LIE asset creating a line on the model's skin.
crosswind said:
Odd ~~ I saw no such an issue on my side... Which character are you using for showing the above screenshots ?
It's a JASA skin on a custom morph. I tested it on several random characters and it's definitely there. Like I said, it is barely noticable unless under the right light.
Cloth get messed up when I morph loader the figureMessed up how? If it gets scrambled that probably means the vertex order is being changed in whatever you use to create the morph.
Cloth get messed up when I morph loader the figureI want to custom shape a bit the face of my character. But everytime I morph loader ther charactert, the hijab cloth on the head get messed up, I mean totally.
How to fix this?
How do I make my characters' clothes distort for specific scenes?richardandtracy said:
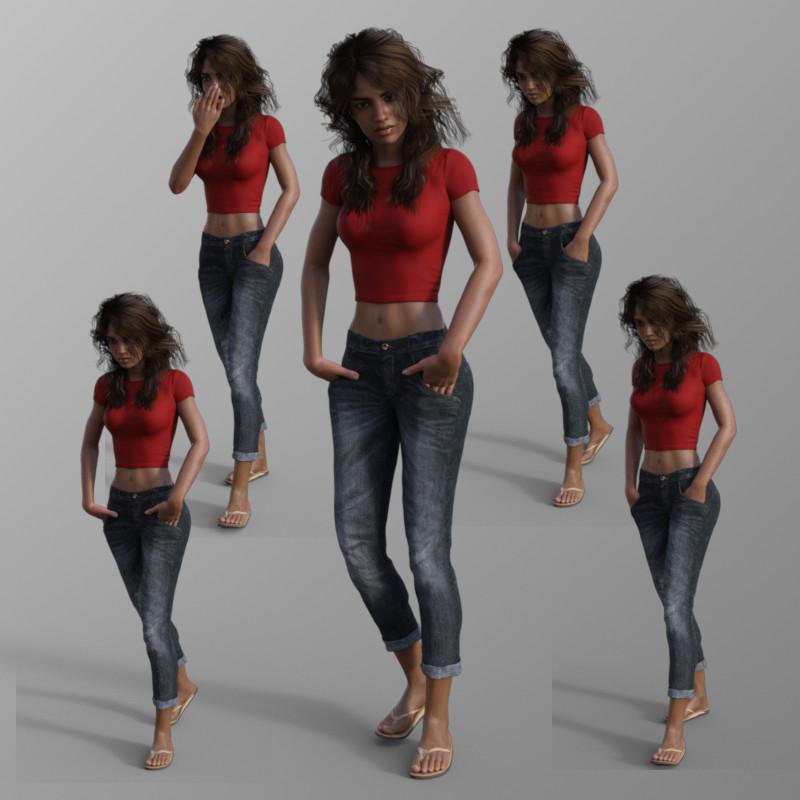
In Out Of Touch's G8F Megawardrobe, the Superjeans have an 'Open' morph for the pockets, as shown in the pose set below.
A jacket like 'Hypertaf's Winter Trendy' (now at a different shop from DAZ) also has pocket open morphs:
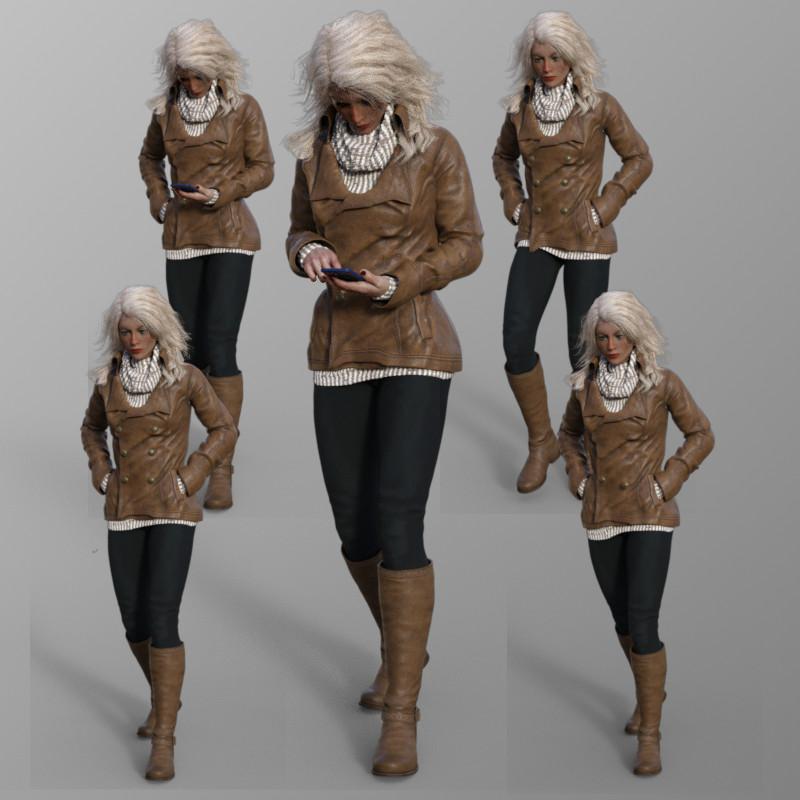
You need to look in the morph lists for the clothing on the sale page.
Regards,
Richard.
Thank you for your recommendation, but I would need to apply this "deformation" to my character's own clothes. I will understand more about how the Mesh Grabber works before purchasing it, as it appears to be useful for deforming the meshes of my character's clothes without having to use external software such as Blender or 3DS Max.
How do I make my characters' clothes distort for specific scenes?In Out Of Touch's G8F Megawardrobe, the Superjeans have an 'Open' morph for the pockets, as shown in the pose set below.
A jacket like 'Hypertaf's Winter Trendy' (now at a different shop from DAZ) also has pocket open morphs:
You need to look in the morph lists for the clothing on the sale page.
Regards,
Richard.
G9 Items on G8It is possible to create your own autofit clone that is 'adequate' without modelling or spending money (eg G8F autofitting G9 clothes). I couldn't do anything else when I made my TriAx Victoria 3 and wanted G8F clothes on her. I posed V3 as close as I could to G8F's pose, then scaled each bone in X, Y amd Z to make it as close as I could to G8F in the base shape. Then saved the obj & made an autofit clone. There is up to a 0.2cm error in places, so I do need a smoothing modifier, but, the top, jacket & trousers below on a morph of V3 is all from G8F 'Denim Diva' (not the shoes):
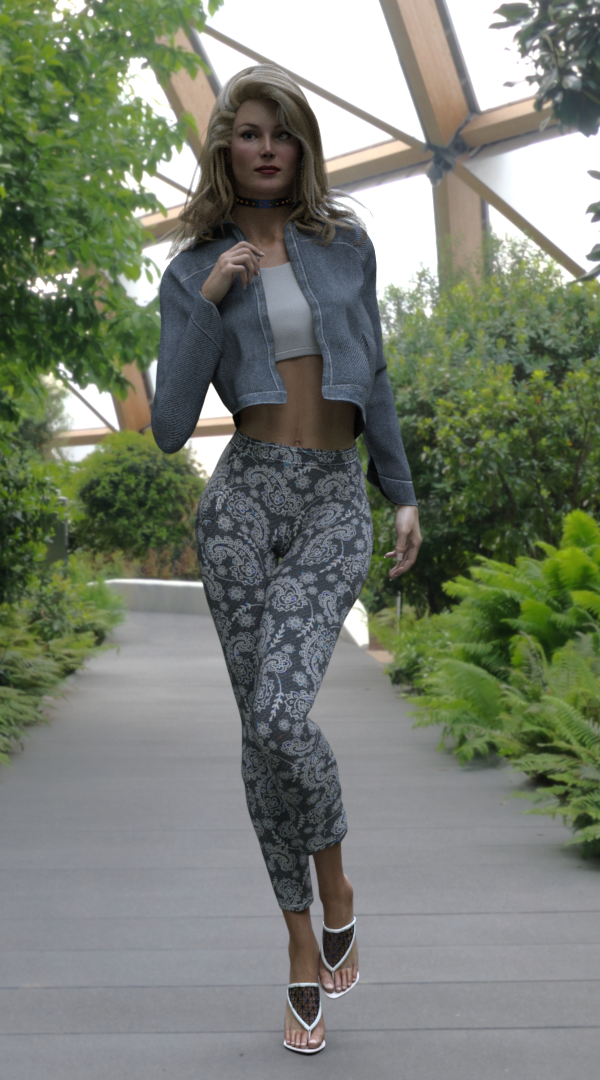
It does depend on the level of precision you need, but it's frequently a real surprise how far you can go with the tools built into DS and no need to purchase a thing.
Regards,
Richard
Trying to fix skirt distortion but having troubleThe closer G8F's skirt was made to the crotch area, the more chance you'll get that "triangulated distortion" projected from G9's body shape (crotch shape) after auto-fitting...
The best and quickest way to fix the distortion is to use Smooth Brush with Sculpt mode, as well as Flat / Grab brushes etc. to finetune the details as needed. Then import OBJ file back to the skirt as a fix morph with Morph Loader Pro, or directly update the base geometry of the skirt with OBJ file.
GENESIS 8 FEMALE LOAD WITH STRANGES SHAPESHello everyone,
I'm really looking for help, because I'm having a big problem with G8Female.
When I load a base model, or a custom, it arrives with a completely changed and incorrect anatomy, and if I try to apply a morph to it it's even worse!Here is some example, the first is a basic GENESIS8F, without modification, and you can see that it appears with elf ears and a completely unsightly body shape.
And the second is a morph applied to the model, and as you can see, things are even worse.( Sorry for the link, i don't know how to put pictues on the discussion )
file:///D:/daz%20ref/lma%20copiefff.jpg
file:///D:/daz%20ref/lma%20copiefffh.jpg
By doing EDIT: FIGURE: ZERO: ZERO FIGURE SHAPE
Nothing happens, no change, whereas before it was at least a backup solution to deal with this problem.Thank you in advance for your help.
Buy Something That Doesn't Work in Carrara? Post your Questions and Workarounds here. (please)Dartanbeck said:
To counter this, there are several options - Carrrara's modeling tools by the first that I would suggest. Just load the whole thing in the default pose and work the mesh to fit and still look nice.
Philemo was working on a fantastic plugin that I no longer know where to find - NoPoke, which ended up being abandoned for the VDW <> Carrara Bridge, which is Amazing for making clothing fit.
Fit Control Absolutely ROCKS!!! The morphs won't work directly in Carrara, but I believe that, if you turn off Mesh Smoothing in DS, then loaded Fit Control and adjusted the clothing to fit and nudged a few dials that you might like to be able to use in Carrara, then use Fit Control to remove unused morphs, then save to the library for Carrara use, you'll have some really nice adjustment morphs to use during your Carrara experience. Just pick the correct Fit Control for the correct figure and go to town!
For my DAZ Studio experience, I bought Mesh Grabber Bundle (Win) (MacOS) to be my Carrara modeling tweak for within DAZ Studio. The really fun side effect of using that is that we can use it no matter how the character (figure) is posed and still be able to save the changes as a morph - also no matter what shapes are dialed up on the figure. It's a really nice mesh tweaker. Again, that's something you'd do in Studio first, then save for Carrara use.
Thanks Dart. I'll try those.
Using StarBright with Carra Pro 8.5Currently rendering tons of promo images for Starry Sky Iray for DAZ Studio.
Once I get the main product finished and all of the promo and instructional work completed, I'll load it into Carrara and see what I can do about making a Carrara adaptation for it - should just load and work though, with a touch of Shader tweaks.
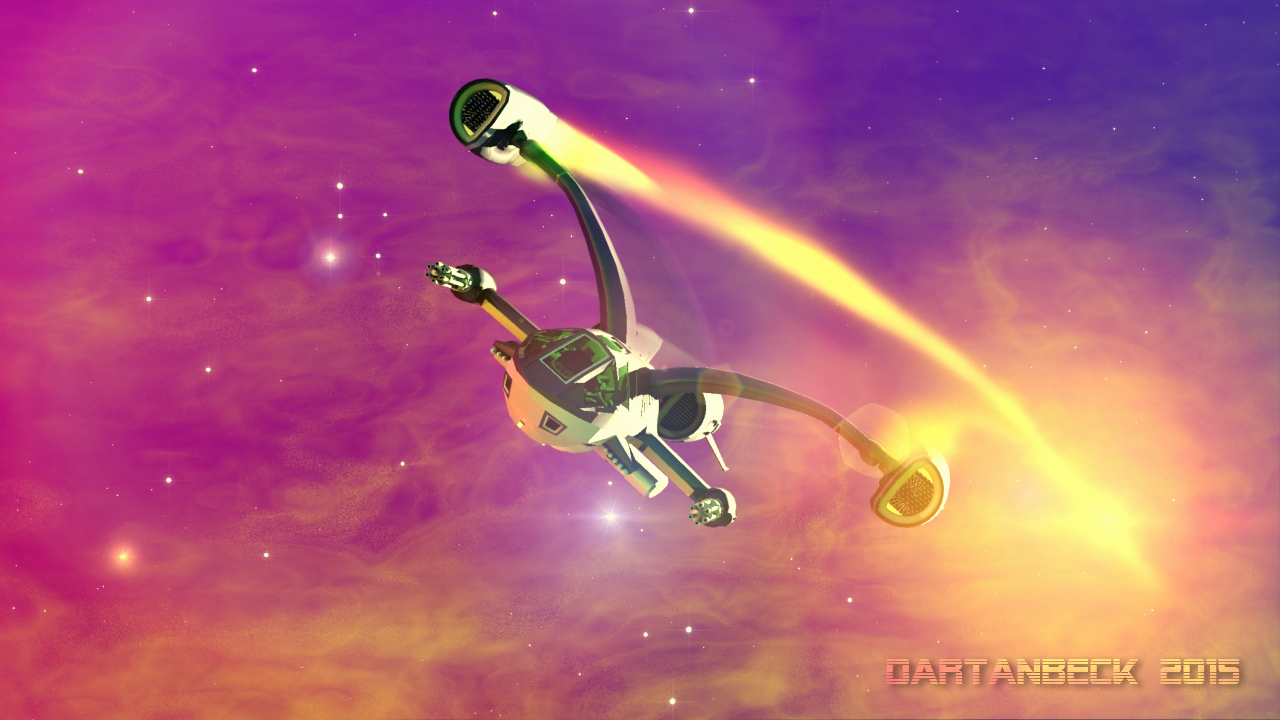
Either way, the original Starry Sky for Carrara works really well, I think. Especially when animating space scenes - I think that having 3D stars blows away anything we can get with projected images of space.
To help keep space from being completely black - as it is in Starry Sky for Carrara - unless we put it in a scene with an atmosphere or other sort of background scenery, the new one has a nebula prop with a few material presets (Iray) that I could easily transfer to Carrara shader presets if anyone's interested. There's also an add-on - Nebulous Wonders, which uses the Outer Space Globe*and/or the Iray Environment (HDRI) Dome as a variety of surrounding nebulosity effects, that turned out looking really cool!!!
There are presets for loading the various effects either to the Outer Space Globe or the HDRI Dome as well as presets that load Starry Sky Iray with the effects loaded into both the render environment dome as well as the Outer Space Globe, as well as presets that load the dome effect leaving the Outer Sapce Globe dark and refractive, for a really cool Dark Space effect, but with that touch of nebula effect peaking through the darkness.
* The Outer Space Globe is for darkening a scene that is otherwise not dark. It uses refraction to allow HDRI light through, but filtered. So we adjust the intensity of either this globe or the output of the HRDI for different lighting effects.
The Current presets load the same effect onto the globe as the dome - when both are used for the effects, but using the individual Outer Space Globe and Render Dome presets, we can mix and match for a massive variety of nebulous looks - and the Outer Space Globe is within the Starry Sky Iray group and is fully animatable in all ways - as is the nebula prop, which also has a few subtle morph dials.
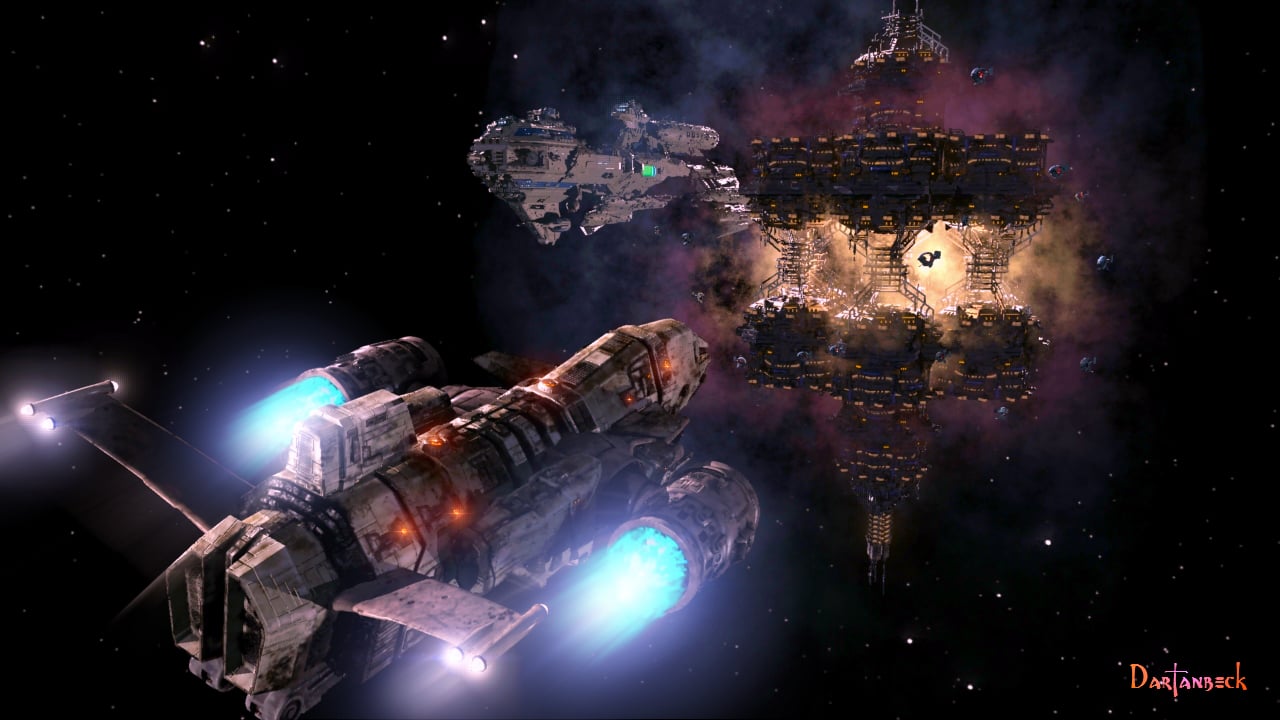
One of the Starry Sky Nebulous Wonders presets looking straight ahead through a 65mm camera - but the nebula surrounds the entire scene - looks Really Cool (I think)

The Outer Space Globe and Nebula Prop are part of Starry Sky Iray, whereas the Nebulosity Effects are the Nebulous Wonders Add on.
The original Starry Sky for Carrara was made when I was still brand new to Carrara - so I did a bit of over-thinking. For the brighter stars, I added lights to them - which is what gives them the starry glare effect when we load that. But when not using that effect, I actually delete all of those lights (look for stars that have a hierarchy - which is a parented light). For the glare effect, I select all of those star lights and reduce the distance effect of all the lights waaaaay down so they don't actually light anything.
Again, I was over-thinking it - but having them there if we need them, and deleting them if we don't is still much easier than Not having them, and then deciding that we need them. So I never saved it without the lights as an update. I'd just rather have them there and tweak or delete them than to not have them at all.
In both Iray and Carrara, there are a few things that I like about this system far beyond using images of space as a background or surround:
A - Parallax
Even if only slight, having a touch of parallax during space travel makes a Huge difference in the outcome of the animation! Even more so, Not having parallax sells itself as a stagnant image.
B - The Twinkle Effect
How long we let the render engine work for each frame determines how many of the smaller, most distant stars show up in the render. Low (fast) render settings will have much more twinkle during animations than High (Slow) render settings, but we always see at least a little bit of natural star twinkle. In reality star twinkle is cause by atmospheric quality as well as darker matter or other visual phenomenon from keeping the light from being in focus each time our eyes adjust - causing a twinkle. In our renders, it's caused from tiny spheres being far away from the camera, which causes render glitches that work in our favor - as they truly happen in very much the same sort of visual response - and was actually quite unexpected when I started working on the initial Carrara version years ago, but my beta tester and I liked it, so I made sure to keep a bunch of stars (Outer Star Field) toward the limits of the camera's ability to render minute detail.
(Early WIP of Starry Sky Iray)

C - Sharpness
Unless otherwise obscured by clouds or other phenomenon, stars in the sky appear as sharp points of light. Stars twinkle, planets don't - unless obscured. Using space images as backdrops and/or surrounds can have a tendency to appear at least a little blurry - and I just cannot have that. The star cluster within the trifid nebula was one of my first deep sky observations and, it was so beautiful it just blew me away!!! Even something that far away with all of that gorgeous nebulosity, the stars are brilliant points (tiny) of light.
That turned me into a Nebula/Galaxy hunter for a number of years. My wonderful antique RV-6 Criterion Dynascope is bored right now, but Rosie and I have been talking a lot lately about putting it back into full use again. For that I'll surely need to fasten my seat belt because deep sky observing is absolutely breathtaking - even through such a modest telescope.
(Image of Trifid Nebula from SPACE.COM)

D- Versatility
Having 3D stars in various groups works really nice for Sci-Fi rendering - especially animations. I wanted it to be easy to control - so there are various Star Fields, which are each a grouping of thousands of low-poly 3D stars that surround the scene fully - each being placed differently according to hand-made maps I made for replication distribution. So there individual star fields to control individually or all together in scale, translation and/or rotation - and that is entirely independent of background, backdrop, and any type of lighting we might have in the scene.
In Carrara, Volumetric Clouds and the fog primitive can be used to interact as nebulae or space dust or gasses or whatever.
Carrara's Volumetric Clouds - (below)
Carrara's Volumetric Clouds - (below)
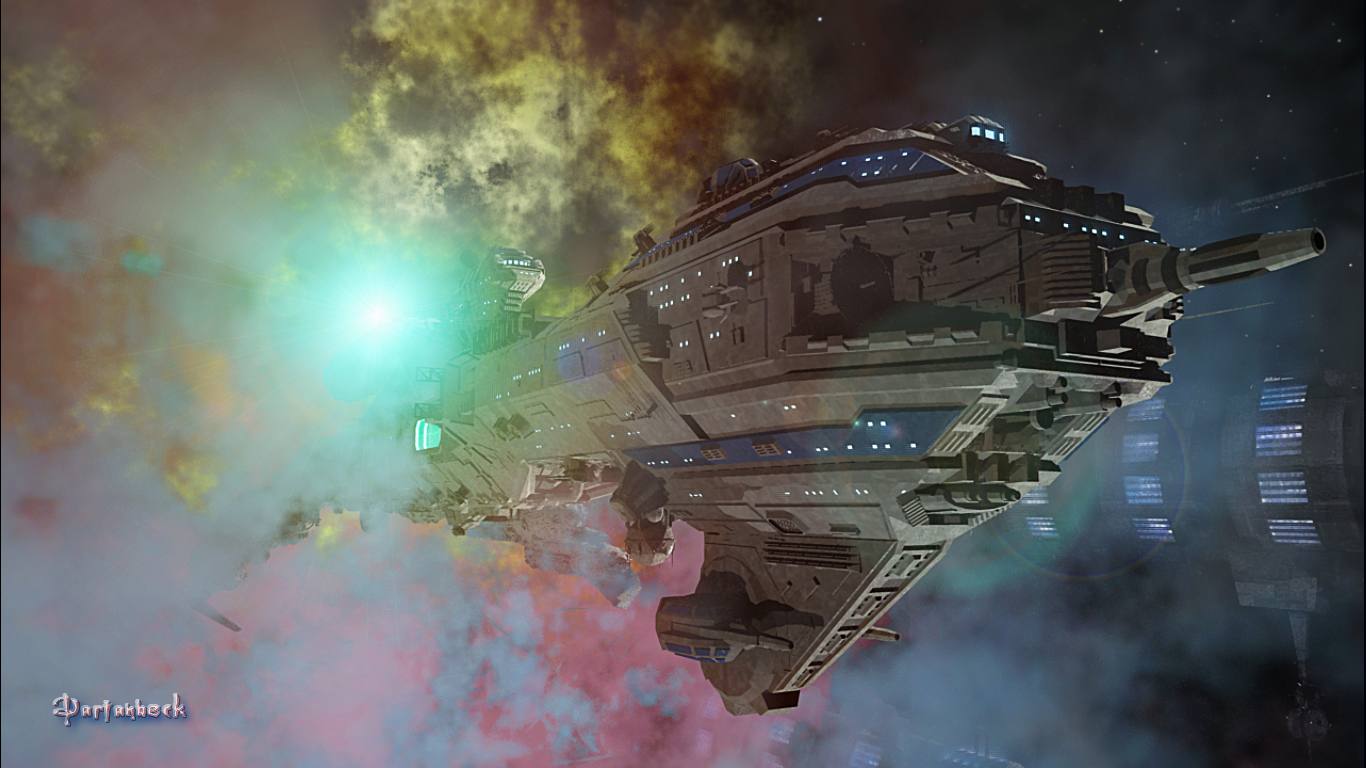
Carrara's Fog Primitive - (below)
Carrara's Realistic Sky Atmosphere - (below)
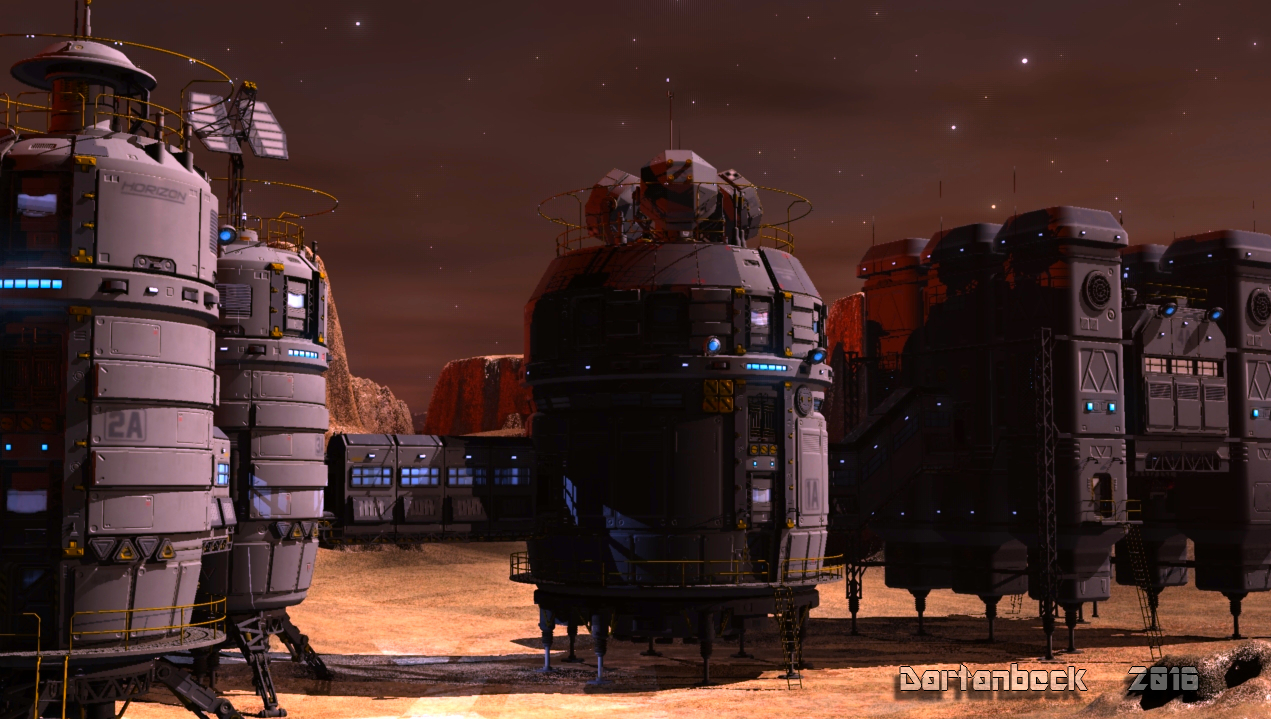
In Iray, I really love how I can use the HRDI dome (often hidden from view) to light the ships, station or whatever scene I'm using, and just add stars to it - which also has a refractive outer space sphere that we can use to add darkness, and ghost lights we can add for hero definition - all individually so each scene can be considered independently - which is really nice!
Most of the animations I've done with it for watching a star ship travel through space, I leave the ship in place - rotating it a bit here and there for navigation, and animate Starry Sky around the ship - either moving it across the scene or, more often, just rotating it along the vertical axis.
Being 3D, we can also get clever and create our own inventive ways to represent FTL travel - how that might look. Star Trek style? Star Wars style? or maybe we have our own vision in mind - perhaps based on String Theory ideas? The sky is no longer a limit!!!
Here's the crazy User's Guide for Starry Sky for Carrara. I love this! At that time we still had The Art Zone, and Howie Farkes, Mike Moir, and others had a Wealth of cool notes about their products - suggestions for different ways to use the product. I totally loved that! I'm glad that I made mine into a PDF so it didn't get lost in the digital archives when The Art Zone went down!
For the page backgrounds I printed up a viewing star map - just like the ones I use when I observe, and whited out the center. I still love the effect!
This one has some cool shots of Starry Sky Iray in its early stages as well. Just FYI, it's basically Starry Sky for Carrara for Iray - which took a Lot of work. The original was made when I was pretty young at working with 3D, and this is a culmination of years of experience to make an Iray version of it.
Since taking these renders, I've had epiphany after epiphany as I optimized it to a point where it's a Really Cool Iray product - for those of you who go both ways! ;)
There are five different material zones for each star field of stars. Adjust one of the materials changes the appearance of many stars. In the original Starry Sky for Carrara, I took great care - spent many Many hours working out the distribution of these, so that changing one material zone's shader makes sense in the appearance of the sky. Those material zones have been translated to Iray surfaces:
Constellation and Extra-Solar Patterns Star Fields
- Star 5 - Set to be the Brightest
- Star B - Blue Hue
- Star R - Red Hue
- Star Y - Yellow Hue
- Star Dim - Less Bright White
The Inner and Outer Star Fields
- Star B - Blue Hue
- Star R - Red Hue
- Star Y - Yellow Hue
- Star Dim - Less Bright White
So there are only Five material zones for all of the stars, but since they're each individual star fields, we can alter them individual if we want.
The placement of the stars took a l o n g time for me to get to what I thought looked right - being an avid galaxy hunter at the time of making it. The manual does a better job, I think, of explaining what it is and how it works. But in a nutshell - we load it and render.
Korg Nano Kontrol 2 plugin
I've been standing on the fence for a long time to buy a korg nano kontrol 2 - midi kontroller.
There's a daz plugin that can utilize it for posing. Such as turning the head.
But the reason for holding back is, the midi controller knob and slider has limit.
How am I going to use it correctly against different value of morph sliders in DAZ.
For example if the knob is already turned to far left, how am I going to reduce the value of a morph using the knob?
Anyone has the experience with the Korg Nano Kontrol 2 plugin?
Buy Something That Doesn't Work in Carrara? Post your Questions and Workarounds here. (please)Stezza said:
took a bit of work but managed to get Predatron's Bizzle/Cowboy into Carrara after modifications..

had to use the DS plugin to load the tail, boots and feet transfer to blended weight.. then duplicated each one and converted to object then transfer utility on each model to the corresponding object then save as scene subset.... phew..

result so far after nticking UVs
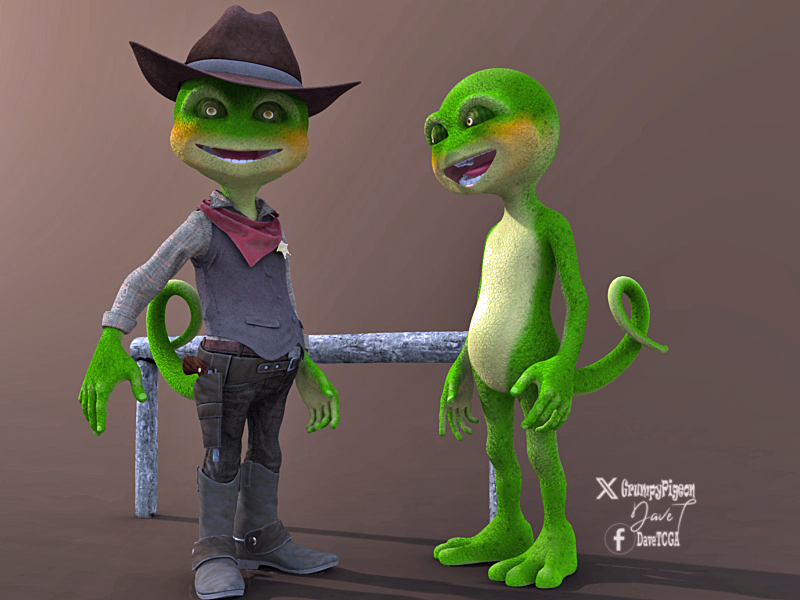
Beautiful turnout!!! Kudos!
Buy Something That Doesn't Work in Carrara? Post your Questions and Workarounds here. (please)To counter this, there are several options - Carrrara's modeling tools by the first that I would suggest. Just load the whole thing in the default pose and work the mesh to fit and still look nice.
Philemo was working on a fantastic plugin that I no longer know where to find - NoPoke, which ended up being abandoned for the VDW <> Carrara Bridge, which is Amazing for making clothing fit.
Fit Control Absolutely ROCKS!!! The morphs won't work directly in Carrara, but I believe that, if you turn off Mesh Smoothing in DS, then loaded Fit Control and adjusted the clothing to fit and nudged a few dials that you might like to be able to use in Carrara, then use Fit Control to remove unused morphs, then save to the library for Carrara use, you'll have some really nice adjustment morphs to use during your Carrara experience. Just pick the correct Fit Control for the correct figure and go to town!
For my DAZ Studio experience, I bought Mesh Grabber Bundle (Win) (MacOS) to be my Carrara modeling tweak for within DAZ Studio. The really fun side effect of using that is that we can use it no matter how the character (figure) is posed and still be able to save the changes as a morph - also no matter what shapes are dialed up on the figure. It's a really nice mesh tweaker. Again, that's something you'd do in Studio first, then save for Carrara use.
Face Transfer causes missing files related to the appdata/roaming foldersethernetmanx said:
doug said:
I've saved my face from the face trasnfer menu but still have this issue. Any ideas?! I'm saving out the scene as a .duf. when I open it back up it asks for the files screenshotted above.
Hello, the files that are asked means the textures. If you don't save your model from the face transfer menu, but only as scene or scene-subset, all face transfer generated textures of the models will be automatically saved in the temp folders (appdata). When you close Daz3D the textures (in the temporary folder) will be deleted. By saving your model over the face transfer menu, the textures will be saved in the correct directory. The base directory shown in the face transfer save options should always end with "My Daz 3D Libarary" by default. Enter a name for your model at "Label" and then click on accept. After that you have to save the model as "Scene" again. If you close DAZ3D now and open the saved scene after a restart again, your model should be loaded correctly. Remember that you can only save your model in the face transfer menu if the Genesis 8 Model is chosed in the "Scene" panel. If you have chosed something else like the hairs or clothes the save option will not appear in the face transfer menu at all.
Thanks ethernetmanx.
The precise default location is \My DAZ 3D Library\Scene Subsets\Face Transfer.
Making seperate Sliders for head and body shapes.Do this before creating the FB, ideally, since otherwise you will have to do joint adjustments and corrective morphs twice.
Recent figures have a Head Split dForm (for Genesis 9 it is avaialble through the Utlities group in Parameters, for older figures it is a dForm preset). Apply that, then load your full morph through Morph Loader Pro - in the options there is an Attnuate group, then under that you can select the dform 9its weight map is the thing of interest) and whether it should include or exclude; use it twice with different options there and you will get the ehad and body morphs. once you have the split morphs, make a new cotnroller to set them both to 100% for the full body version.
How to stop daz to navigate while typing on filter?How to stop daz to navigate while typing on filter?
Example: I was typing on pose panel to filter morph.
While I was typing the name of the morph, the viewport navigate away, cos I type letter R E S, etc.How to prevent this, cos it's annoying.
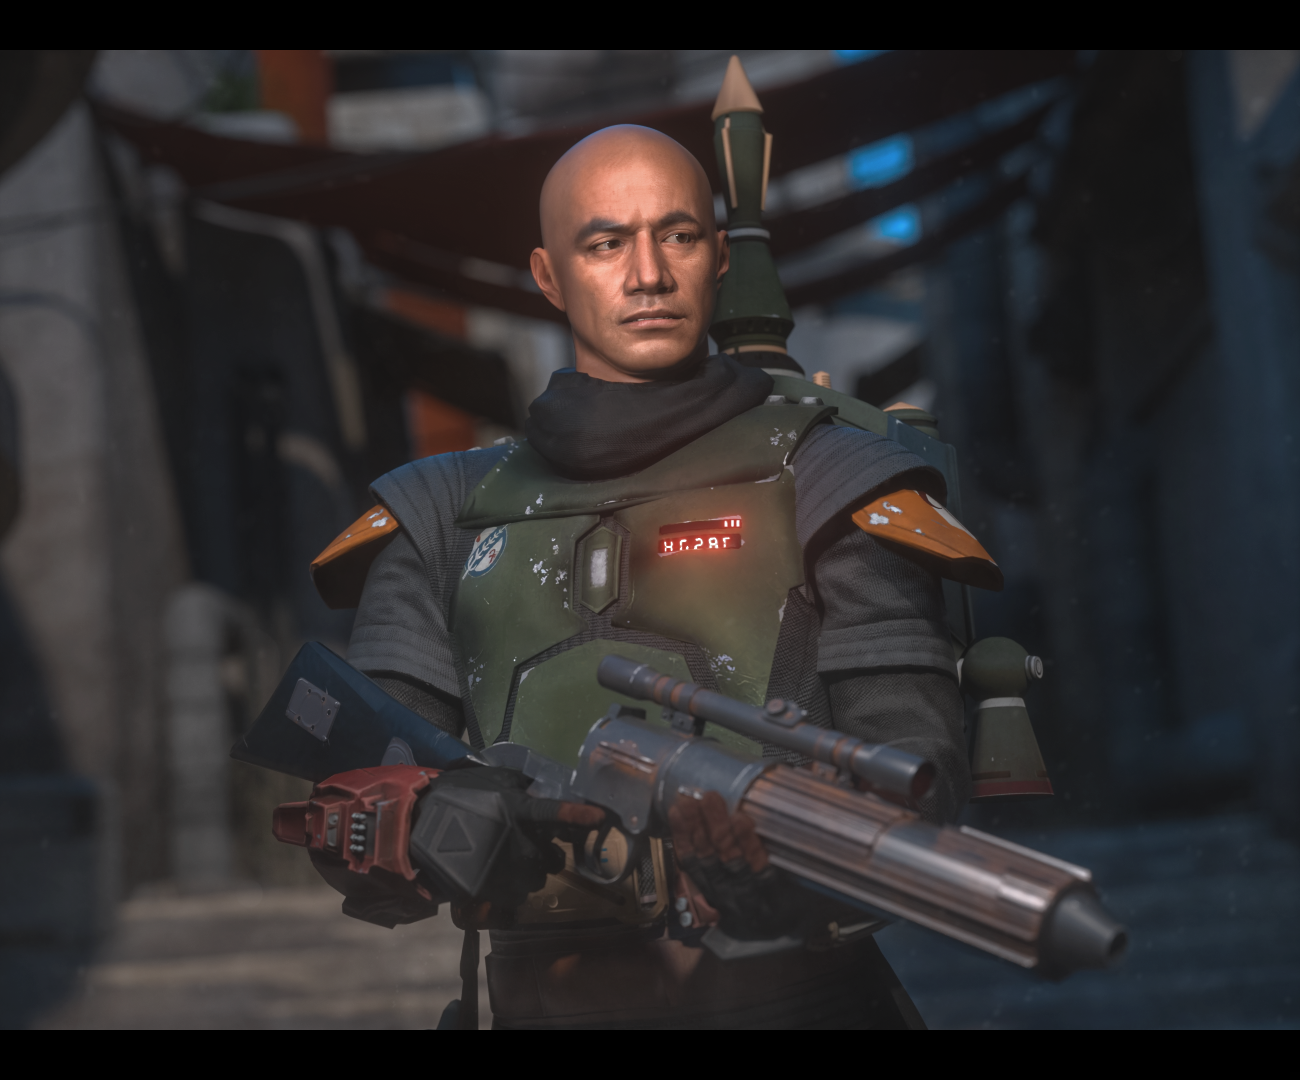
Star Wars Renders 2013 +MetalSunde94 said:
What skin did you use on the Boba Fett?
The game model always have the black hair.tried to "mash" it together with a G9 skin but doesn't look great, but it did work.
Around 3 or 4 different Face Transfer textures combined to get the end result
I've updated the face morph considerably since then but the textures are the same,
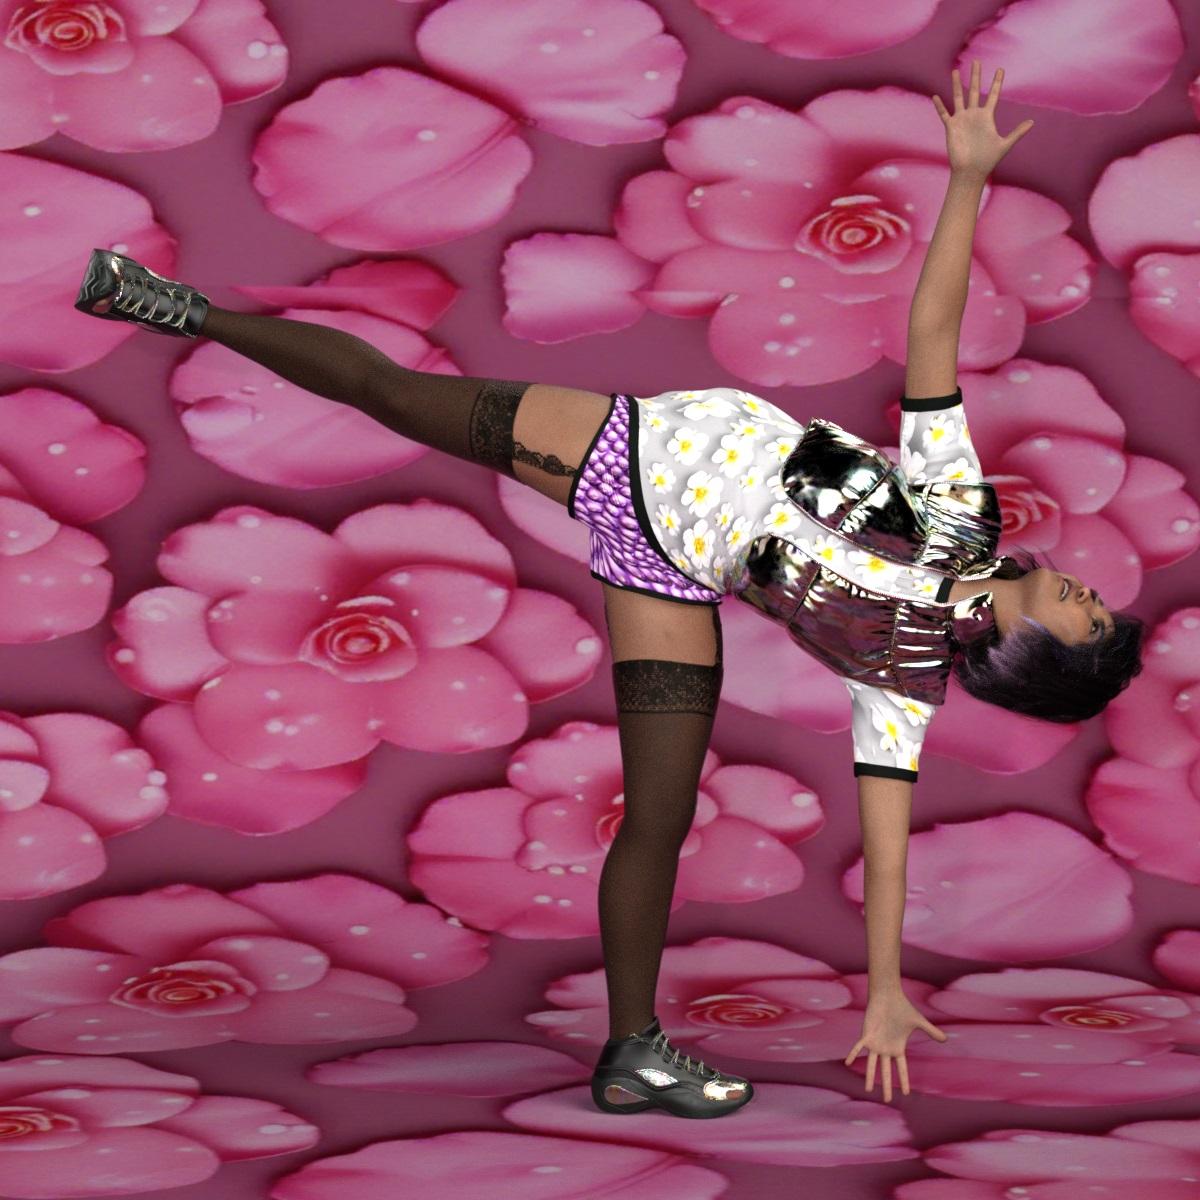
 AI images in Daz Studio.
Please post your Daz Studio renders incorporating usage of AI generated images in Daz Studio scenes.
I start with a usage of AI generated textures on some clothes and the backdrop.
Genesis 9 created with Face Transfer 2 was used in the scene.
Daz Studio Beta 4.22.1.123 rendered the scene.
 Loading Morph From Blender to Gen 9 gives strange results
adreacooper_c7d3371011 said:
Hi, thanks for answering, Crosswind. I tried using the settings exactly as you described, and the same thing still happens. It's good to know the settings to use when going from Blender 4 to DAZ. Scale has never been an issue for me, though, and whatever is happening to my mesh is something else entirely. It's just so bizarre that the arms and legs are fine, but everything else is messed up.
you have done something to vertex order. It is weird that vertex order would be preserved for parts of body and not other parts (assuming the morph loader pro settings you showed are what you actually did). If vertex order was compromised during export from Daz or Import to Blender, then likely you would see issue for the entire figure, not just part of it. So it might not be import/export issue. Instead, it might be the case that you did something after loading in Blender to change vert order.
There is a blender plugin from gumroad for restoring vertex order. So you can use that plugin to take the normal geometry to restore vertex order. Or just redo everything from scratch. Another method to avoid redoing the morphing in Blender, I think you might be able to load fresh undistorted Daz figure to blender, and then transfer your current shape as shapekey.
My figure's fingers are mutating!You just select "Currently Used" in Parameters pane, check if there's any dialed body morph property ?
Daz 3D is part of

Connect
DAZ Productions, Inc.
7533 S Center View Ct #4664
West Jordan, UT 84084Licensing Agreement | Terms of Service | Privacy Policy | EULA
© 2026 Daz Productions Inc. All Rights Reserved.