-
HD Add-on question
Ooh I can speak on this
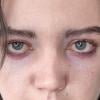
Firstly: AFAIK both the normals and hd morphs are made using the same hires mesh so while the difference between no normals > hd morph is subtle the difference between normals > hd morph is super subtle. Essentially both are trying to do the same thing and there are advantages and disadvantages to both (Morphs can be mixed and are a bit more accurate, normals can get smaller detail without bogging down your computer) I'll admit to using both from time to time, again afaik the Hd morphs are made at a subdivision level of 4 but that tends to make my poor computer cry, so I stick at a subd value of 3 and then use the normals to make up the difference and if its a bit linier tha it ought to be, well, I don't mind ;)
second: flat frontal lighting gets rid of any shadows which makes the details added by the hd morph (or the normal maps for that matter) really disapear, if you add some lighting from the side I'll bet you see more difference In the large image posted I could tell the difference between the 2 victorias (the edge of the lip is pretty noticable, the other big difference between HD morphs and normal maps is that the morphs actually move geometry) but not really with Karen.
HD Add-on questionIs it wrong to use the normal maps and HD? Or are you supposed to use one or the other? Always been confused by this. In all my renders I use a normal map and add the HD morph.
Also what is the difference between SubDivision Level and RenderSubD Level (Minimum)? When I increase the Subdivision Level from 1-2 i notice the HD morph detail increase in the preview. But have no idea how it differs from Render SubD Level (Minimum) other than this value increases when I change the SubDivision Level.
My suggestion to remove them was simply as a test to confirm the HD morphs were doing what they were supposed to. But it's an interesting question. If the normals are baked from the same HD mesh, is there any point/ benefit to using both?
HD Add-on questionIs it wrong to use the normal maps and HD? Or are you supposed to use one or the other? Always been confused by this. In all my renders I use a normal map and add the HD morph.
Also what is the difference between SubDivision Level and RenderSubD Level (Minimum)? When I increase the Subdivision Level from 1-2 I notice the HD morph detail increase in the preview. But have no idea how it differs from Render SubD Level (Minimum) other than this value increases when I change the SubDivision Level.
UPDATED: can't autofit V4, V5, V6 clothes to G8Transferring G1,2 and 3 skins to the new G8 is working great, but I can`t get G2 and G3 clothes to fit G8 correctly. When I follow a tutorial by Sickleyield, I am able to get G3 stuff to fit, but not when using autofit .... and trying to autofit G2 cloths G8 is completely hopeless. Any help on transferring G2 clothes (got a lot of those) to G8 would help.
** UPDATE** :
Here is the process I stumbled upon to add G2 clothes to G8.
No guarantee this will work for everybody, but after lots of trial and error (little sleep and some excellent pointers by others) ... I discovered how to transfer G2 clothes to G8 if autofitting isn't working properly ... not just G2 clothes, but also clothes with their original morphing channels (which can get lost when autofitting). If you want to add G3 clothes to G8, you can go directly to the tutorial that inspired this one, namely Sickleyield's Youtube tutorial here:
https://www.youtube.com/watch?v=wJk3LLfWq7Y
Because there are similar steps involved in transferring G2 and G3 clothes to G8 (and especially if you are a visual learner), I would definitely recommend watching Sickleyield's tutorial. In either case, it's a must for transferring G3 clothes to G8, but do take note of the fact that what I am showing here has some additional/different steps to make the clothes transfer work with G2 clothes, so be careful.
OK ... here we go. Let's transfer some G2 clothing to G8.
A. First do this:
** download this pose (script): https://www.sharecg.com/v/88527/browse/21/DAZ-Studio/G3G-G8F-pose-adjust-script
** put a copy ("G3F G8F pose adjust") in your script folder
** make another duplicate of the above script, open it with Notepad of something and change all the number 6's and 45's into their opposite value (i.e. if the script reads, -6 then change it to 6, if it says 45 then change it to -45 .... and so on (you'll have to do this 4 times). When finished name this file/pose/script ... "G8F G3 pose adjust". Also add this to your script library.
B. Finally:
(1) load G3 and G8 -- make sure they don't parent to each other when you load them ... and deselect both before going on to ...
(2) add "G8F G3F pose adjust" to the G3 figure (it will go into the same stance as G8). Before going on, make sure G3 is selected in your scene
(3) now load your fav G2 Female clothes (not shoes .... for hints how to do them, watch Sickleyield's tutorial). The autofit dialogue will open because you had G3 selected. For the autofit selection, use "Genesis 2 Female" because the clothes you are fitting are G2 clothes
(4) now select G8 and add "G3F G8F pose adjust" to the G8 figure (it will go into the G3 T-stance) ... then deselect G8
(5) next select your G2 clothes (which are autofitted and parented to G3) and right-click your "Scene" tab ... then choose: Edit: Scene Identification: Preferred Base (click on the far right "..." labeled small box): select "Genesis8: female": Accept: Accept
(6) next select G8 first and then add (by command clicking on the MAC) the G2 clothes (both objects will now be selected).
(7) then right-click your scene tab again and choose: Edit: Rigging: Transfer Rigging
(8) now, select only the G2 clothes and re-fit them from G3 to G8 (Parameters: All: Fit to). No autofit dialogue box should appear. Deselect G2 clothes. Hide G3.
(9) Select G8 and pose G8 (if all has gone well, the G2 clothes will autoflow in tandem).
** To deal with poke-thru (a) add a push modifier (edit: figure: geometry: Add push modifier) ... first using .20 as suggested by Sickleyield ... and/or use the smoothing/collision settings.
** to save the newly rigged cloths as a preset, go to File: Save As: Support Asset: Figure/Prop Assets (in order not to overwrite, assign a name different from the original)
***** Special thanks to Sickelyield (heavily indebted) and L'Adair (always helpful) ****
Diomede's Studio SketchpadOK - getting closer to being able to distribute as a freebie. I successfully rigged and saved a version as a figure/prop preset to what I think is the DAZ duf folder structure. It loads on my machine and the pages can be turned seprately by using bones rather than morphs. I still want to improve the weightmaps a little but it works. Yay. I also need to make the dimension morphs. This new version that I created is a base square so that the maps for the pages map the full uvmap. Once the dimension FBMs are in place, you will be able to load the book, apply any image you want to a page or the cover, then morph the book to dimensions matching your image to minimize distortion.
DAZ - PLEASE finish off the Ophelia 7 releaseWell I honestly feel if DAZ included the gen meshes as part of the body morphs it would increase sales of the body morphs, make anatomical and logical sense, and not hurt the Pro character bundles sales in the least although they could of course continue to include them in those Pro bundles too. Of course free with the free base makes the most logical sense but they have their sales numbers so I can't argue with that.
As far as educational aspects well the 'embarrasing' education material is rendered in drawing, paintings, pictures, sculptures and is available and yet 6th grade boys aren't lined up to ogle all that naughtiness. DAZ is sort of irrelevant except I can see that an enterprising curriculum creator might combine Unity 3D (or UE4 etc), DAZ models (or MakeHuman, etc), and intelligent instructional UI creation to create teaching aid apps that are a bit more engaging. However, such institutes are so flush with money they'd likely completely reinvent the wheel to accomplish those aims.
Particularly given that the gens have nothing to do with the individual character morphs that the character bundles are supposedly about.
Actually, while it obviously works for the company, I'm not sure that the sort of scattershot approach to the bundles is the most useful model for the users. I suspect that in the main, more people will buy a scattershot bundle with an all-over-the-map assortment of content if it comes with a DAZ O character morph. But I know that I would definitely consider a bundle of 4-6 outfits, two pose packs, and a hair which were targeted at a specific genre, or age group. Not just the big categories, like Fantasy, or SciFi, but things like Mid-Victorian/Female or Back to School, or Your Granparents Closet, or something like that. Particularly if the content is something that can be used to kitbash.
Mind you, I'm an illustrator, so that is going to affect how I evaluate things. I've usually got a pre-existing set of characters that I'm shopping for.
But, yeah. The Genesis base (all of them) is free with the program. Well, a version of Victoria 4 (with a painted on purple bikini) used to b free with the program. So was a dragon.
Why *not* offer a bundle of the Body, Head, and Expression morphs for the base and call that the Genesis # Starter bundle. Maybe throw in a pose pack and another hair. For a Genesis # Pro pack throw in the gens, a set of HD morphs which are built for the base UVs, a set of hand poses, and maybe a set of more extreme morphs.
Or, for all that this market doesn't do a lot with coupons, maybe the Pro pack should offer a one-time, one use, coupon which the user could build their own bundle of anything in the PC+ collection at PC+ price, even if they are not a member? And if they are a member, let them have another $6 DAZ O coupon that month. Or let one of their regular coupons be good on new items if they use it before the end of that month.
I mostly agree. I'd be more interested with the character models being sold independent of any bundle and instead clothing genre bundles, hair style bundles and the like. Hair is still the product I own the least of from the DAZ Store both because I find it so uninspiring and ridiculously overpriced. I'm essentially being asked to buy the same hair styles over and over using the same mediocre techniques in use since the 90s with minor re-fitting and style variations. Clothing too although I'm building up a pretty good collection of clothing. My character collection is also somewhat sparse because it seems no matter which characters I buy I wind up with a middle of the road bland skin tone when I render despite the ad copy unless I spend hours and days setting up & starting and stopping testing renders to test the effects of my changes. Yes, I know about floodlights and adjusting the Surfaces but hey, I see the ad and what it looks like, I buy the product and it's not dumb-dumb simple with presets like I'd expect a consumer product oriented to ignorant hobbytime folk to be.
How to get rid of character morph saved in base genesis 8I suspect you must have saved the morph as an asset file - in which case it will be in your content diectory under \Data\Daz 3D\Genesis 8\Female\morphs\author\product - where author and product will be names from the options dialogue on saving.
DAZ - PLEASE finish off the Ophelia 7 releaseWell I honestly feel if DAZ included the gen meshes as part of the body morphs it would increase sales of the body morphs, make anatomical and logical sense, and not hurt the Pro character bundles sales in the least although they could of course continue to include them in those Pro bundles too. Of course free with the free base makes the most logical sense but they have their sales numbers so I can't argue with that.
As far as educational aspects well the 'embarrasing' education material is rendered in drawing, paintings, pictures, sculptures and is available and yet 6th grade boys aren't lined up to ogle all that naughtiness. DAZ is sort of irrelevant except I can see that an enterprising curriculum creator might combine Unity 3D (or UE4 etc), DAZ models (or MakeHuman, etc), and intelligent instructional UI creation to create teaching aid apps that are a bit more engaging. However, such institutes are so flush with money they'd likely completely reinvent the wheel to accomplish those aims.
Particularly given that the gens have nothing to do with the individual character morphs that the character bundles are supposedly about.
Actually, while it obviously works for the company, I'm not sure that the sort of scattershot approach to the bundles is the most useful model for the users. I suspect that in the main, more people will buy a scattershot bundle with an all-over-the-map assortment of content if it comes with a DAZ O character morph. But I know that I would definitely consider a bundle of 4-6 outfits, two pose packs, and a hair which were targeted at a specific genre, or age group. Not just the big categories, like Fantasy, or SciFi, but things like Mid-Victorian/Female or Back to School, or Your Granparents Closet, or something like that. Particularly if the content is something that can be used to kitbash.
Mind you, I'm an illustrator, so that is going to affect how I evaluate things. I've usually got a pre-existing set of characters that I'm shopping for.
But, yeah. The Genesis base (all of them) is free with the program. Well, a version of Victoria 4 (with a painted on purple bikini) used to b free with the program. So was a dragon.
Why *not* offer a bundle of the Body, Head, and Expression morphs for the base and call that the Genesis # Starter bundle. Maybe throw in a pose pack and another hair. For a Genesis # Pro pack throw in the gens, a set of HD morphs which are built for the base UVs, a set of hand poses, and maybe a set of more extreme morphs.
Or, for all that this market doesn't do a lot with coupons, maybe the Pro pack should offer a one-time, one use, coupon which the user could build their own bundle of anything in the PC+ collection at PC+ price, even if they are not a member? And if they are a member, let them have another $6 DAZ O coupon that month. Or let one of their regular coupons be good on new items if they use it before the end of that month.
Adding a tattoo design, NOT L.I.E.Inkubo,
I saw you mentioned doing projection painting in Blender on a DAZ character. Are you using McjTeleblender to export/import the character and materials to Blender, or is there a better way? And is it updated to transfer Iray materials?
If you are just using projection painting to generate a tattoo warped and split to fit the UVs then there's no need for a fancy bridge, just import an OBJ exported from DS (using the desired UVs), paint, and save the image (and mask) for application - with LIE, with the Diffuse Overlay, or for adding to the base map in an image editor.
HD Add-on questionI only bought a couple of HD add-ons before I realised that I couldn't see the difference either. The exceptions are those by Zev0 for Aging and Vascularity, etc. I'd love to be able to convert those into normal maps but haven't had much luck with XNormal (which is the tool I was advised to try). HD doesn't seem to transfer to Geografts but, I think, the Normal Map does.
Daz Script and ERCI am not much of a coder. I know exactly enough to be dangerous. I was wondering if it was possible to call, list, send to variable, modify, etc ERC data held in a property with a script.
I've seen wonderul examples that tell me it is possible to straight up create a morph from a script. I gather from the documentation, as hard as it is read, it is possible to read and set a whole range of data to a property, from authorship down to property group and region.
What methods I've seen in the documentation that seem to copy properties wholesale state they don't read ERC links, and I'm wondering if that's just because Daz script can't do that. I also seem to recall there was a thread on here where there was a command given that made studio list all of the methods Daz Script has, but I can't find the thread. could anyone point that out to me?L'Adair's Kitchen… (How'd She Do That?)I have that unicorn but have not tried it in Iray yet. I like what you've done with it. It looks really good. I think I might have to dust it off and see what I can do with it. I will definitely come back to reread your secrets when I'm ready to play with SY's unicorn.
Thank you.
It loads with the body shape I used in the image. I didn't realize until later there is another body shape morph, for a smaller, more delicate unicorn. I would have used it instead, had I noticed it sooner, as I was really trying to showcase the sprites. But I had already put so much time into the mane, I didn't want to start over. Lazy of me, I know...
Adding a tattoo design, NOT L.I.E.Inkubo,
I saw you mentioned doing projection painting in Blender on a DAZ character. Are you using McjTeleblender to export/import the character and materials to Blender, or is there a better way? And is it updated to transfer Iray materials?
Video Formats For Animations - Which One?Mindsong, I did not see you mention one pass or two pass encoders in your post ... do you use two pass encoders?
@cordoni, as you know, that would be for the MP4 final result output stage (x264 setting), and buys you a better encoding at the expense of the two-passes -> analysis + encoding => slightly added complexity and some additional encoding time.
If you want a better result, I'd say sure..., fire it off and get a cup of coffee and do something else for a bit - or do it before bed... Maybe try it on a small representative clip to see if you can 'see' any difference in your specific content. If I wanted to do a final for a 'real' DVD/BR disk product, I think I would probably enable that just to be sure. The good news is that the resulting MP4 is simply better quality, with no computational cost to the viewing decoder/device.
One point of note, is with the higher resolutions/bit-rates, regardless of format (MP4/WMV/etc.), you have both more data (megabytes/gigabytes) to move, and computational overhead *per frame* during decoding/presentation. If you find the device that you're presenting on (PC, phone, Roku box, TV or DVD/BR player w/ USB or network stream) is 'stuttering' while playing, you may have to drop the bitrate. It may be computation or network-stream, but lots more info means lots more to transfer and process... older devices especially.
To those who know this stuff already, I hope my description/tone above were not too sloppy/condescending, as I think the big ideas are valid, and knowing roughly why/what you're trying to do is better than any specific encoder or tool that might soon be obsoleted by a better one.
It seems wrong to render out brilliance and surrender any of that to unnecessary conversions or loss.
I've occasionally taken crystal clear video and added softening and grain effects in the edit stage to 'date' it and make it less 'perfect', as the crispness seemed to distract from the experience. Ironic to work that hard for 'perfect', then intentionally 'smudge the lens'..., but having the choice and control to do so by *choice* was great.
hth,
--ms
Novica & Forum Members Tips & Product Reviews Pt 9Ilithyia for Genesis 3 Female(s) Talisken Hair and Character for Genesis 3 Female(s)
And this is why I initially said I wasn't going to do a Thread 8. That "have for you in 45 minutes" at 8:27am took until 2:10PM because if I do something with tweaks, I have to be happy with it. When I did the default character, I personally didn't like the mouth. And the expressions I tried didn't impress me. (Keep in mind when you try different ones, you may absolutely adore them.) You may really like her "as is" so this is just my personal preferences. So I changed her mouth and got rid of the long curves extending way out. Here you go! First, the original, no tweaks.
She definitely looks better without the "long curves"... with them, she looks more like a caricature.
Ilithyia for Genesis 3 Female(s) (my tweaked version) Talisken Hair and Character for Genesis 3 Female(s) Party Gown Outfit for Genesis 3 Female(s)
Now to look at her outfit. The Party Gown has amazing textures.
I started a scene yesterday with a home-brewed morph of Aibell on G8F, and I put her in that dress. It really is amazing. Lots of morphs and poses. And for little tweaks, you can adjust translation, rotate and scale per bone in Parameters!. Shoes don't fit, of course. (I need to follow @sickleyield's tutorial... It's one of many things on my To-Do list I haven't gotten around to doing!)
LONG pause during 3Delight renderThere's a pause when the render first hits a bucket with a surface with SSS - or rather each time it hits a surface using SSS and a different Group ID value. If the mesh has an HD morph the pause will be substantially longer.
I thought that pause (to do with AoA SSS) took place 'globally' at render start
No, or not unless it is a new behaviour. You are, however, right that transmapped surfaces will also slow the render down - but that applies to every bucket they are in, the SSS pause happens only once per GroupID.
How to get rid of character morph saved in base genesis 8I uninstalled genesis 8 Female Starter Essentials using the DAZ Install Manager. The I reinstalled. The problem morph is still there. And it exists in the Victoria 8 character that I also own.
Any other thoughts?
Thanks
How Do I Make a Morph that Correctly Effects an Already Morphed Figure?OK "reverse defomation" and "blender shape keys" are just two different methods. Lets discuss the Pros and Cons.
Reverse defomation is at first an easy to use instant exchange but you can only work on one morph at a time and the exported OBJ file is more like a temporary exchange file that you can't reuse later once you change the current character shape it is based on. In the worst case DS crashes before you have saved the current character shape with your custom property settings - I mean not just one character shape out of your library but many custom property settings - you better first save the scene file or at least a shaping or a character preset to your DS library and don't use different shaping/posing settings on different key-frames in the timeline (like I tend to do often - to fix this select the figure - go to Parameters pane and use Memorize Figure then Clear Figure) otherwise it will make the reverse defomation dont work probably if you can't remember the source shape you have exported.
The advantage of the blender shape keys is that you can seperate your morph-shape from the character-shape directly in blender - also you can work on more than one morph-shape stored in different blender shape keys parallel to see if they all work together so you have more options to fix and smooth out unwanted deformations but this needs some extra steps to setup.
Both will lead to the same result in DS and yes reverse defomation is easy to use - just select the OBJ file with the morph-shape you just created in morphloader pro - right-click the "no" behind reverse defomation and set it to "yes".
@ kitakoredaz
Reverse Defomation
I understand that it is like a filter that filters out any morph-shapes that are allready applied to the base shape of the figure and only saves the difference of the current figures character-shape in the DS scene and the new morph-shape you load in with the morphloader pro.
Your description with looking at one vertex postion and the delta transformation is a good example. Please let me explain to all readers what to take care of while using reverse defomation.
So Position 0 (X0, Y0, Z0) is the figures Base-Shape.
Postion1 (X1, Y1, Z1) is the vertex position after you applied some morphs like a character shape and/or maybe a pose in DS (usefull to create JCM-JointControlledMorphs I think).
Positon 2 (X2, Y2, Z2) is the new vertex position of the morph shape you add on top of the character-shape with the external editor like blender.
If you now use morphloader pro and you load your newly created morph-shape with the vertex Positon 2 (X2, Y2, Z2) make shure you have the exact character shape with the vertex Postion1 (X1, Y1, Z1) of the figure in the DazStudio scene like you have exported it in first place, otherwise the reverse defomation can't filter out all the shape difference.
Its easy if you make an additional morph for lets say the 100% Victoria 7 for Genesis 3 shape. But if you have first dialed in some of this and some of that and created some custom character with allot of shaping morphs and propertys its a good advice to first save a shaping or a character preset to your DS library. So you don't run into trouble shaping your perfect morph for hours in blender and try to load it back into DS the next day with the reverse deformation and have to realise that you don't remember the source shape of the character you have exported.
Using Smoothing Modifier as morph-target
I know what you mean with the smoothing modifier as morph-target.

I also used this method I would call "shrink-wrap" - this is where you need to use reverse defomation at the end otherwise it don't work and this is where I start to make use of reverse defomation more often lately.
So you can use the smoothing modifier as a shrink-wrap on clothes and hair with "Collision Item" set to the figure its fitted to - it does automaticly set the Collision Item to the figure it is fitted to. (you can tweak the Collision Iterations and Smoothing Iterations settings to higher values in the parameters pane to get a better fitting)
Then I also add some D-Formers here and there scale down and tranform or even rotate the D-Former a bit and also scale and tranform the D-Former-Field you can also use different setting for the x-y-z-Scale (for shrink all down first scale up the D-Former-Field until all vertex dots are red showing the infuence is at maximum value on all then scale down the D-Former itself - the scaling center is the position of the D-Former Base)
You can tweak the D-Formers until the cloth or hair somehow "shrink-wraps" around the figure shape and because of the collision settings it dosn't intersect with the figure - if it does start poke through set the Collision and Smoothing Iterations even higher or tweak the D-Former settings - depending on your CPU power it can take a while to update with realy high settings but don't worry we are creating a morph shape.
After that you can hide everything in the scene but the cloth or hair you are working on - as you hide the figure you can see the smoothing modifier and the collision will still calculate. Next export this clothes or hair shape as an OBJ file and make shure "Ignore Invisible Nodes" is on in the export dialouge. Now disable the smoothing modifier and disable or delete the DFormers. Than load the OBJ file back as a morph with morphloader pro and use "reverse defomation: yes".
For my taste most of the new Genesis 3 hair has to much volume to it and I start scaling it down a bit but by shaping the hair with D-Formers the scullcap sometimes disapears bacause it gets pushed into the head but I don't want to set the Collision and Smoothing Iterations to high. So first I ignore this and continue to create the smoothed shrink-wrap morph until I have it in the parameters pane. Then to fix that scullcap problem I use the Geomerty Editor to select the scullcap surface and then I use Morph Editing>Remove Selected Deltas from Favourites - see this Morph editing thread for more info about that.
There you have it a hopefully perfect fitting shrink-wrap morph and remember you have to save this new morph-property as a Morph-Asset so it loads up with the cloth or hair figure if added to a new scene from the library.
LONG pause during 3Delight renderThere's a pause when the render first hits a bucket with a surface with SSS - or rather each time it hits a surface using SSS and a different Group ID value. If the mesh has an HD morph the pause will be substantially longer.
I thought that pause (to do with AoA SSS) took place 'globally' at render start
LONG pause during 3Delight renderThere's a pause when the render first hits a bucket with a surface with SSS - or rather each time it hits a surface using SSS and a different Group ID value. If the mesh has an HD morph the pause will be substantially longer.
Daz 3D is part of

Connect
DAZ Productions, Inc.
7533 S Center View Ct #4664
West Jordan, UT 84084Licensing Agreement | Terms of Service | Privacy Policy | EULA
© 2026 Daz Productions Inc. All Rights Reserved.