-
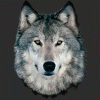
Aiko 8
You def dont need Aiko to use the textures, but she is about 60% of the morph. Here is a quicky without the Aiko morphs :) I am not used to doing brokers for non G8F figures so I always forget to include a G8F only render -.- Sorry about that!
I've got to learn to stop looking at the store at 3 in the morning, I just glazed over her and moved on. But I just went back and looked at her again after your sample, and I think I may need to add her to my library
New Laptop! Yay! Have to reinstall Daz! Boo! How to install libraries to external from the start?Question Richard... where should the manifest be stored as I just created a new My Library and want to make sure when I move it to my big workhorse computer I can make sure that comes along with the transfer so I don't get DIM freaking out on me and wanting me to redownload all of it again! lol
Should I merge content folders manually outside of DIM ?The main potential issue is that DIM stroes the absolute location of its installs in the manifest files for that product (the .dsx file in the Manifests folder). You can tell it to use the current install path for updates, but it won't - as far as I know - remove old files thata ren't in their current location. That won't usually be an issue, but if an update needs to remove a file (as, for example, when a morph is renamed) then the old file may be left behind. You can edit the manifest files, or you can uninstall from the old location and reinstall in the new. Connect, and the CMS in general, will work correctly with the moved files.
Sakura 8 causing problems.As an additional note:
If I uninstall Sakura 8, open up Daz, and load any female figure that is not the base Genesis figure, it still applies the Sakura Body morph, even though Sakura is uninstalled.
Sakura 8 causing problems.The first part sounds as if the Sakura shape was resaved with a default value of 100%, or as if an additional morph was saved at 100% that is setting Sakura to 100%. Not sure why that would stop other characters from loading with the 100% value though. Reinstalling Sakura should overwrite any chnages in the base morph, so that's the first thing to try.
Thanks for your response, I just gave that a try. I uninstalled Sakura 8, and reinstalled it, and I am still getting the same issue.
Aiko 8You def dont need Aiko to use the textures, but she is about 60% of the morph. Here is a quicky without the Aiko morphs :) I am not used to doing brokers for non G8F figures so I always forget to include a G8F only render -.- Sorry about that!
ZBrush, Why Bother?This tutorial by @SickleYield may help you (the steps didn't change since then) : Loading Your New Morph On Genesis 2 Female in DAZ Studio
Sakura 8 causing problems.The first part sounds as if the Sakura shape was resaved with a default value of 100%, or as if an additional morph was saved at 100% that is setting Sakura to 100%. Not sure why that would stop other characters from loading with the 100% value though. Reinstalling Sakura should overwrite any chnages in the base morph, so that's the first thing to try.
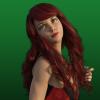
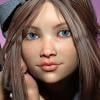
Who's the Best Avatar Creator?Here is a cyberfay or neopixie, again a mix and match of characters ( I remember Rain and Musoke and again another skin )and morph dialing plus some texture
I'm using this one as an avatar as well, she represents me when I talk to my readers as the author of my comic and she's in use on dA as well.
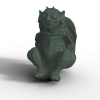
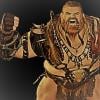
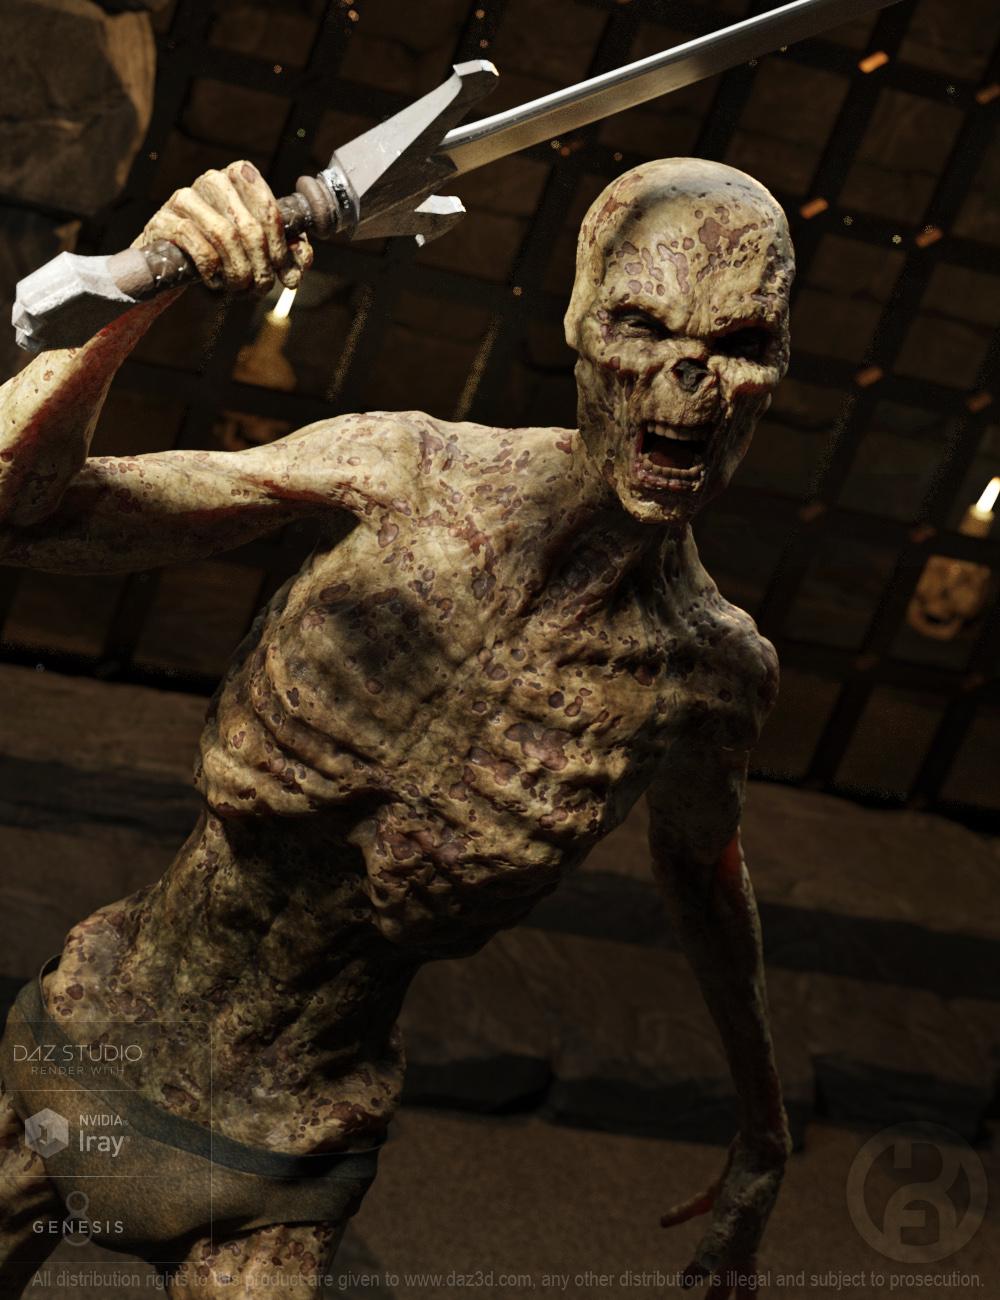
 Wither for G8M [commercial]
Wither for G8M
https://www.daz3d.com/wither-for-genesis-8-male
Sometimes they come back, and in the end the slain shall rise to reclaim their place in the world.....unfortunately some have been dead a long LONG time. With leathered skin and dried bones they come forth out of forgotten tombs haunted and hungry. Mummies or zombies, immortality is not always a good thing.
The set comes complete with custom crafted High Definition Morphs, and Highly detailed Textures for the utmost realism.
Product Includes:
-
- One Wither Character Preset
- One Wither Full Body HD Morph
- One Wither Shaping Morph
- Two Wither Full Body Material Presets
- Five Eye Material Presets
- One Mummy Wrap Geoshell
- Two Mummy Wrap Material Presets
- Includes both Iray and 3Delight Material Presets

 Saphirewild's Randomness Renders
I rather like the black and white version of the car render. All three look good but for some reason, I'm drawn to the black and white.
As far as modelling goes, what I've discovered is that if you can find which program its easiest for you to figure out the interface and get started, if you work on that for a bit, the other programs become less...intimidating. The knowledge does transfer over very well. I personally find Carrara to be the easiest to model in so far.
The other plus with Carrara, which I just learned yesterday, is that it can do some decent model conversions for Daz Studio to use as well. I guess Hexagon does, too, but this makes me more interested in at least giving Carrara a chance. When I got it, I also had Vue and Bryce to learn, of which I only really learned some Vue. But this causes me to reconsider Carrara as a contender alongside Hexagon (I'm pretty sure @Diomede uses both, so that's another reason to try it).
ZBrush, Why Bother?Hey thanks @grinch2901 ! Yeah I send quite a few figures to ZBrush for tweaks using GoZ but I've never sent one back to Daz, will give that a go. I'm guessing the poly count will need to remain the same for the morph to work. Just wondering how the rigging will be affected if I make limbs longer etc...
Aiko 8If it says that it requires Aiko 8 - it means it uses the Aiko 8 morph to help get it's shape. So while it would "work" on Genesis 8, the character's shape will look different without Aiko 8. Some characters that say "Requires ___" may only have that character's morph dialled in a small amount - but looking at Vernea it looks like she'd probably look quite different without the Aiko 8 character morph also.
Sakura 8 causing problems.This is a recent issue, as I have had Sakura 8 installed for months now, but there is something really weird happening with her base figure and other models.
If I load a Non Sakura store model, such as Aiko 8, when loading the figure, it loads it with a 100% Sakura Morph applied to the character. Similarly, when I load a custom character I have made with Sakura as a base, the Sakura morph does not load, and I have to turn it back up to 100% to get the figure right.
Any idea what may be going on?
L'Adair's Kitchen… (How'd She Do That?)A couple of years ago, I came across a post on how to use Gimp, (Photoshop, or other graphics programs that use layers,) to extract the makeup from any character to use on other characters. The resulting layer(s) are added to the target character's face map in LIE. Here are the steps:
1. Find the makeup you want to steal. In Gimp, open the base (makeup-less) texture of the character whose makeup you're stealing and the texture with the makeup you want.
2. Copy your makeup texture and paste it, as a layer, on top of your base texture.
3. Set the layer mode for your makeup layer to Subtract. The image should now be primarily black with some ugly colored makeup shaped splotches. This is exactly what you want in the file menu select export to save the file as a .jpg (Gimp has an odd setup, I know) save it somewhere you'll remember and layer it fairly clearly depending on the style of makeup it may have another image it goes with, so be sure to make it easy to identify as part of a pair.
4. In layer mode scroll back and forth between Difference and Subtract. If they are exactly the same, Hooray! Your makeup only darkens the skin and you only need one image to replicate it perfectly, you are now done in GIMP and can skip steps 5 and 6. If there are any differences the makeup lightens the skin as well as darkening and we need a second image to replicate this.
5. Set your makeup layer's layer mode to lighten and duplicate your base layer. You should now have 3 layers: the base layer, its duplicate and the makeup layer.
6. Merge the makeup layer and duplicate layer together, and set this new layer to difference. Once again you should have something primarily black with some makeup-y splotches export this image the same way you did the other one and give it a similar name so you can find both later. You are now done in GIMP.
7. Apply whatever texture you want to whatever character you want. The only limitation is that it does have to be the same UV map as the texture you took the makeup from (or convert the textures you made to the UV you want using the map transfer tool)
8. In the surfaces editor select the lip, nostrils, and face. Open the LIE for the diffuse texture.
9. In LIE Create 2 layers and open the textures you created (obviously if the makeup only needed one image you only need one layer). Set the first image you created's blend mode to subtractive, and the second to additive. Hit accept, your makeup should be fully transferred.
These instructions predate G3/G8, so the material zones listed in Step 8 will be different for the newer generations, and may also be different for much earlier generations as well.
In the Mika 8 thread, one of the PAs stated this procedure wasn't necessary anymore, that one could apply any Diffuse Overlay makeup preset to our G3/G8 character and then replace the map in the Diffuse Overlay Color, with the makeup we wanted to use.
My own testing with that process was not successful. For those presets I tested, the same image map was used for Diffuse Overlay Weight as for Diffuse Overlay Color, acting as a mask to control the weight of the map in the color parameter. One of the presets I used included eyebrows, so when I changed the map in the Diffuse Overlay Color parameter, the material from the texture I was using was also applied to the brow area, even though the overlay eyebrows didn't match either face texture I was using. Also, most of the older characters' makeup doesn't include blush on the cheeks, but the Overlay image(s) did. Here's an example of an extreme "fail":

This is Grandmother HD using an overlay makeup map for Charlotte 8 in the Diffuse Overlay Weight parameter and a makeup texture map from Stormy in the Diffuse Overlay Color parameter for the material zones Ears, EyeSocket, Face, and Lips.
For a point of reference, here are Grandmother HD without additional makeup, followed by LY Stormy with the same makeup shown in the above image:


The 04 makeup from Stormy required two layers , (using the method from j cade, above,) and does not include the lips. Using LIE I applied the makeup to Grandmother at 100% and then at 65%. On Grandmother, the blue looks darker, more dusky. That is due in large part to the darker skin materials of Grandmother's eyelids. Here are both images:


One thing to remember when using this method, there is no guarantee the colors will be the same from one model to another. Not only do the makeup layers combine with the color of the skin materials, but this method is only using the "diffuse" skin materials of the source to create the layers. Stormy, for example, uses other parameters for the eyeshadow. Here is Stormy with the same layers applied via LIE, (at 100%) as used on Grandmother. If you compare the two Stormy images side-by-side, you will see the LIE version looks more purple than blue, and the eyeliner is more dark gray than black..

While working with other character makeups, I found some PAs provide two images for each eyeshadow, one with eyeliner and one without. Using a variation of j cade's method, it is possible to extract just the eyeliner and create a mask you can use in either LIE or the Diffuse Overlay Weight and Diffuse Overlay Color parameters.
- Layer the two images in your graphics program: the image with the eyeliner needs to be the bottom layer.
- Set the layer blend mode of the top layer, the image without eyeliner, to "divide"
- The image should now be mostly white, with the eyeliner black to dark gray.
- If anything other than the eyeliner is visible, remove it by applying white.
- Invert the layer so that the eyeliner is white and the background is black, creating the mask.
Whether you use LIE or the Diffuse Overlay method, because this is a mask, you can use any color you want.
I feel like this is really just scratching the surface of what we can do using LIE and/or the Diffuse Layer method combining makeup, tattoos, even scars, from one character to another. And using the Map Transfer Utility, provided you have the necessary UVs, means you can use older content, too.
Who's the Best Avatar Creator?Thanks Steve! In addition to all the dials used, the biggest part of the face morph is Bianca for V4 from JKing which has been a fav V4 morph used in all generations since
Transferring G3 Morphs to G8?I have a couple of Genesis 3 characters I morphed from Genesis 3 figures to give them their own unique look and I would like to transfer their morphs - primarily their facial morphs - over to Genesis 8 so I can use some of the content created for G8 on my characters.
Does anyone out there know if this can be done and how?
Thanks for any help.
Who's the Best Avatar Creator?My forum avatar is my character Lori: https://www.daz3d.com/lori-for-genesis-8-female


But this is the character I've been using the most lately:

Her base is Top Model but she's been heavily morphed with 5 different morph sets, as well as HD details from the Rune 7 HD body details, and Gwenneli's HD face details.
Who's the Best Avatar Creator? Avatars can mean lots of different things in lots of different use cases (Forum Identities, Comic characters, etc.) But another cool use of Avatars is going on with our sister company Morph 3D who's leveraging a lot of the Daz 3D history and character platform experience to take the experience into the Gaming, app, and VR/AR world (Including a recent Avatar Creator for Ready Player One.) https://www.morph3d.com/ready-player-one-avatar-creator#Oasis
ME WANTS !
How can we do that?
Who's the Best Avatar Creator?Avatars can mean lots of different things in lots of different use cases (Forum Identities, Comic characters, etc.) But another cool use of Avatars is going on with our sister company Morph 3D who's leveraging a lot of the Daz 3D history and character platform experience to take the experience into the Gaming, app, and VR/AR world (Including a recent Avatar Creator for Ready Player One.) https://www.morph3d.com/ready-player-one-avatar-creator#OasisDaz 3D is part of

Connect
DAZ Productions, Inc.
7533 S Center View Ct #4664
West Jordan, UT 84084Licensing Agreement | Terms of Service | Privacy Policy | EULA
© 2026 Daz Productions Inc. All Rights Reserved.