-
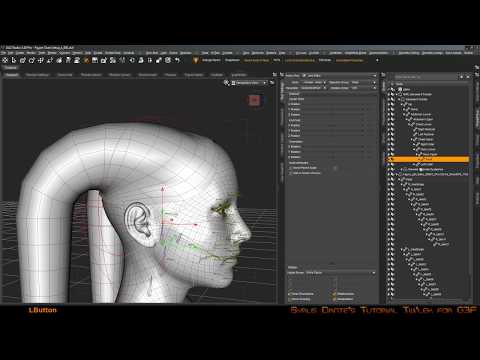
Creating a Morphing Skull Cap for Genesis
Heya! I've been trying to do this all day and everything I'm trying is failing. I am trying to create a skull cap that will fit on Genesis and will follow any morphs that I apply. Here are the steps I;ve taken so far.
1. I exported a base resolution Genesis unmorphed into Carrara. I then removed all the vertices that I did not want and then resaved just the head area as a unique obj.
2. I launched DS 4.10. Imported a Genesis figure, then imported my skull cap. I then carefully positioned the skull cap to sit in exactly the spot where I need it.
3. I covert the cap to SubD
4. I parent the skull cap to the genesis figure (head), with parent in place selected.
At this point everything is going as expected. But things go wrong
5. I then use Transfer Utility with Genesis as the Source and Skull Cap as the Target
All of a sudden, the skull cap has moved from the original position where I had it placed. Great that it now follows morphs, but it doesnt rest properly on the head and now that it is fit to the figure, I cannot manually adjust the positioning.
I feel as if I am missing something really really basic. Any help is greatly appreciated. Thanks everyone!
Transfering Morphs/MATs from G3M to G8MHello. Not long ago I was reading some threads regarding this topic but I lost track of it. I'm still trying to transfer morphs and mats from g3m to g8m. Last time I checked, there was not a solid way to do this. Is there any status update?
VWD in Carrara - installation and updateshya Rashad, ha ha not stupid questions,
glad to see you using vwd, it certainly has changed my image malking dramatically
quest 1:
I put them in my main directory so C:\VWD\
I think this helps alleviate things
quest 3) not sure about your error but putting things in correct places may fix
also
quest 2
this is the help file that comes with thebridge
Carrara bridge to VWD install instructions
System Requirement
This plugin, as VWD, runs on Windows (from Windows XP to Windows 10).
Python Installation
This product requires Python 2.7 to be installed on your computer.
Python 2.7 may be downloaded from this address:
https://www.python.org/download/releases/2.7/
Please download Windows x86 MSI Installer or Windows X8664
MSI Installer depending on the
version of OS you’re using (Windows 32bits or Windows 64bits) and follow installation
instructions.
Plugin Installation
Please copy the five files in the installation archive in the extensions directory of your Carrara
install (typical target is C:\Program Files\DAZ 3D\Carrara8\Extensions).
Quick Start
The command menu used to launch the bridge is at the bottom of the file Menu. Keyboard
shortcut is [shift][ctrl]V
There are 3 parameters :
● Path to VWD : path to the directory where VWD cloth and hair is located.
● weld identical vertices : As its name suggests, it will (for clothes and Hair) weld all
vertices located exactly at the same place. It prevents many problems in the simulation
(cloth spreading across seams). It invokes Carrara own welding algorithm . It's not very
fast and it may fail (or take too long) for high density meshes (more than 100.000
vertices). So, untick it if you're using such meshes or if you plan tu use the simulation
result as a morph source for the original cloth.
● Use discrete tweener. VWD is working at 30 FPS. If you're also using 30 FPS, you can
tick that option and you'll have the exact animation generated by VWD. If you're using
another FPS, untick it and you'll go back at the default tweener you've set (or linear if
you didn't set any). The morphs between 2 VWD frames will be interpolated.Which is the best model for my needs?Always cool to meet new DS users, welcome! It's very addicting, so be warned ;) Back to your question, there has been a toon character released recently and with tweaking, you should be able to get close: https://www.daz3d.com/toon-dwayne-8-pro-bundle
OR you could start with the more "realistic" way and start with Michael 8: https://www.daz3d.com/michael-8 and use products to tweak the character:https://www.daz3d.com/genesis-8-male-head-morphs
https://www.daz3d.com/ej-face-morphs-and-details-for-genesis-8-male
https://www.daz3d.com/genesis-8-male-head-morph-resource-kit-2
And use a toon shader t give it a more toony feel:
https://www.daz3d.com/oso-toon-shader-for-iray
There are more ways than one to approach this, but this is how I should've done it :) Good luck!
dForce, wind nodes, and Bang Bob Hair in an animationYou could try uisng a morph to move the hair off the shoulders, then make sure the item is set to drape from its initial shape (Parameters pane under Simulation)
'Add node' DForm to AutoFitted Clothes not workingYou could try right-clicking on the figure and selecting Transfer Active Morphs, if those are morphs (which the product says they are). If you want to use a dForm to match the moprhs, or tidy up the auto matching, then it would surely be better to apply it to the clothing in the first place.
Ok what I did was click on G3F then go to Assets -> Transfer Active Morphs but it said 'you must select a Figure with parametric joint parameters..........' so nothing happens. Right clicking on G3F doesn't show any Transfer Active Morphs option.
Right, sorry - I was thinking of Victoria 4 still. As Leana says, check the AutoFollow setting.
Auto follow is automatically turned on, so it isn't the cause of the problem. Then, I applied a D-Former to the clothing but when I clicked the field, no dots show up on the clothes even though I moved the field all around. This is a really weird problem. EDIT: I mentioned in my previous reply that when I opened a new scene and loaded a new G3F then loaded a V4 clothing, adding a DForm node to the clothing worked perfectly. HOWEVER when in this particular problematic scene, when I did the same thing with a newly-loaded G3F model, it doesn't work. Could there be something in the scene itself, like maybe conflicting IDs or something that is causing this malfunction?
StormLyght's Render AdventuresI've looked at that morph package myself. It looks like a lot of fun. Now there's one for the boys, too.
- Might be fun to make cartoon versions of book characters, eh? How about taking some of your serious characters and cartoonizing them? That otta be lots of fun.
Hmm, do you have any monsters by Josh Crocket...
Thank you @dracorn for stopping by! I was thinking exactly the same thing...taking my serious characters and cartoonizing them. And yes, I have some monsters from Josh Crockett, not many but I will try cartoonizing some of them.
Trish
WerewolfIn Oso's defense, Otter is an EXTREME body morph and beautifully executed. I very much enjoy the figure and it poses wonderfully.
StormLyght's Render AdventuresI've looked at that morph package myself. It looks like a lot of fun. Now there's one for the boys, too.
- Might be fun to make cartoon versions of book characters, eh? How about taking some of your serious characters and cartoonizing them? That otta be lots of fun.
Hmm, do you have any monsters by Josh Crocket...
HELP! My Iray Preview is all blackMuch better - added some lighting and new lashes and eyebrows.

I love the face morph. Care to share the settings?
Normally I wouldn't have a problem with that, but she is a book character, so I want to keep her unique. This is what I am willing to share:
G8F with Aurelia Head as the base.
EYES
Genesis 8 Female Head Morphs
- Eyes Almond Outer 20.2
- Eyes Width -26.1
- Lacrimals Pinch 100
200 Plus Head and Face Morphs for Genesis 8 Female(s)
- Eye Lids Bottom Puffy 40.3
- Eye Lids Inner Depth 16.0
- Eyes Arched -79.8
- Eyes Lacrimals Down 48.7
- Eyes Outer Height -19.3
RareStone's Face Morphs Collection for Genesis 8 Female
- RS Eyelids Upper Depth -17.6
- RS Eyelids Upper Height Adj 34.5
- RS Eyelids Upper Rotate 20.7
- RS Eyelids Upper Style 03 42.9
- RS Eyes Lower Inner 38.7
- RS Eyes Lower Middle B 10.9
- RS Eyes Outer Corners Height 13
- RS Eyes Shape 06 35.3
- RS Eyes Shape 08 22.7
- RS Eyes Upper Inner 29.4
- RS Lacrimals Detail Enhanced 77.3
- RS Lacrimals Upper Curves 01 28.6G8F Looks Like Emaciated Waif???Please show an image that is not skin textured.or add some clothing
Ahhh.
It is apparently a FREE Character from Renderosity that was downloaded some time ago (I sincerely hope this image doesn't offend anyone)

When I zero'd out the values the image returned to the base charecter (image not shown so as not to offend anyone).
The trouble is that when I saved it via the "Save As" - "Support Asset" - "Save Modified Assets" the change was apparently, not perminantly installed as after clearing the model and rebooting it again, it booted with the asset vallues back to 100%.
It really annoys me when people make changes to my system that I don't authorize.
I think I'll delete the product entirely as I don't need or want it anyway and warn others that 3D Models product Ericka, changes your base G8F character and you'll have to go through this process to reset it.
*** UPDATE ***
My bad...
Again, I sincerely hope this image doesn't offend anyone.
My bad...
When I went to the site to post my consternation, I found this...
Too bad I didn't read the comments page huh.
Now I know better though.*** UPDATE ***
Discovered that merely deleting the character within DAZ does not correct the issue. The character is deleted but the .dsf morph file remains in place under "My DAZ 3D Library/data/DAZ 3D/Genesis 8/Female/Morphs/" (offending morph files)...
You have to manually delete the morph file as well.Use the Microsoft “Start” button (lower, left corner)
In the “Search Programs & Files” box (lower left), Enter the name of the Character or prop
From the popup window, select the .dsf file associated with the offending character or prop and right click the mouse.
Select “Open File Location” from the popup that appears.Note the URL address of the file location on your hard drives URL window (top of screen)
If the file folder shown holds more files than the offending character or prop, delete only the character or prop files.
If the file folder holds no other files, delete the folder itself.After doing this, select "New" from the "File" task bar (top of screen)
Select "No" from the popup
Reboot the G8F and it should be back to norm.Need help with character creation (Morph Controlled Morphs, etc.)Thanks for the response. That's exactly what I needed to know.
I'm still a bit confused about which link I would be dragging my MCM into, add/subtract or multiply/divide, but if I understand it correctly, I would be dragging the EyesClosedR morph into multiply/divide because it controls multiple parts of the eyelid, instead of the individual "left eyelid upper outer", "left eyelid upper inner" etc.(?) I've noticed you can't expand the head controls for some characters to the extent that you can for others. Is this because you would have to individually sculpt a morph for each of those parameters, like the "left eyelid upper outer", or does it have something to do with how the creators rigged their figures? Like if you were creating a figure you were trying to submit for the store, you couldn't just use the "adjust rigging to shape" feature?
Also, when I use morph loader pro to bring in my corrected morph, it seems to automatically add a smoothing modifier to my entire figure. Is there a way to prevent this so I can keep fine detail, or is there a way to isolate an area of the body that the smoothing modifier is applied to?
All things The Witcher...my reference photo is horrible.
Maybe these are useful....
edit 2 more added
Perfect! Thank you! Looks like I might be making a full body morph too. Might even try hair. I can handle all the modeling and rigging, packing it up. Not looking forward to textures and surface settings, if someone is interested in jumping in here let me know.
HELP! My Iray Preview is all blackMuch better - added some lighting and new lashes and eyebrows.
I love the face morph. Care to share the settings?
Need help with character creation (Morph Controlled Morphs, etc.)OK, this is actually easier and can be done purely with the Parameters pane in Edit mode. Following the tutorial, you would set the Goblin morph, the MCM, and the EyeCloseR morphs to 100%, then put the Parameters pane in Edit mode by right-click, and right-click on the Goblin morph, then select ERC Freeze. In the dialogue uncheck the EyeCloseR morph in Sub Components, then go to the Attenuate section and select the EyeCloseR morph there, then click Accept.
That said, you can't use the same method for multiple corrections - those would have to be done using the Property Hierarchy. The method is essentially the same as the tutorial, with the Parameters pane replacing the left side of Property Eeditor and the Property Hierarchy replacing the right. You can right-click on a property in the Parameters pane and select Show in Property Hierarchy to get to it quickly. One change is that the Controllers/Sub-components are now split into 1st Stage (Add/Subtract) and 2nd Stage (Multiply/Divide) so by dragging into those you cut down some of the ERC type setting in the tutorial.
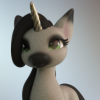
Cartoons - how are you doing?I use a bit of everything I've got for example on the right is Genesis 8 male with a Morphus M4 ,Asian Head morph ,and Cartoonizer ,plus a M4 Skin ,Duke Hair ,a G3 outfit.
On the left is Genesis 3 male with 50% ToonGeneration2 ,50% Guy7 ,and a bunch of my dial spins with M4 Skins , Cartoonized for G8 Male!
On the right is Genesis 8 male with a Morphus M4 ,Asian Head morph ,and Cartoonizer ,plus a M4 Skin ,Duke Hair ,a G3 outfit.
On the left is Genesis 3 male with 50% ToonGeneration2 ,50% Guy7 ,and a bunch of my dial spins with M4 Skins . How to place bones *precisely*?
You are talking about Blender and the 3D cursor. Select edge loop Ctrl+Alt, Shift+S snap cursor to selection, Tab to Object Mode select something else Shift+S snap selection to cursor.
The only time DazStudio alinges the bones automaticly to the Face Groups is by using the Figure Setup pane. The Joint Editor action Adjust Rigging to Shape does something similar but only works with morph shapes to automaticly fix the joint centers.
With the settings Auto Align Node and Auto Snap End Points in the Joint Editor tool right-click menu you have some usefull options to have the other nearby bone in the chain follow while you drag the Center Point. There is also an Align pane in DazStudio you have to select both items that should get alinged and then choose a setting and hit apply, needs a bit of practice to understand what needs to be selected in which order.
For the object alignment you can turn off Parent Items In Place and they start snapping to the other objects Center Point if you change parent (Drag&Drop in Scene pane or use the Change Parent dialogue). For to have someting like Blender's 3D cursor you could select something (face, edge, point) in the Geometry Editor tool, then right-click and choose Geometry Assignment > Create Rigit Follow Node From Selected [Edit]: Rigit Follow Nodes can only be assigned to face selections. This gives you an item that looks like a Null that is centered to the selection and attached to the geometry. Now you can snap other items to this Rigit Follow Node with parenting and Parent Items In Place off or the Change Parent dialogue.
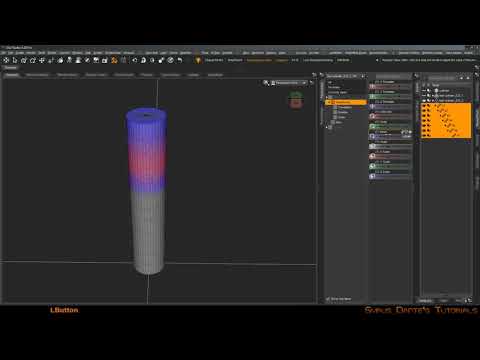
I also did some youtube videos about rigging. Maybe those can help you, even though those don't count as tutorials.
DazStudio Rigging a Cylinder
DazStudio Twi'lek for G8F 01 Editing ZarconDeeGrissom's Version
 G8F Looks Like Emaciated Waif???
You must have installed some morph that is on by default, can happen especialy with freebie morphs. But its easy to fix, have a look at the Parameters pane in the property group "Currently Used" you will find the morphs causing this shape. The values on the slider will show 100% or 1 in dark collor that means they are default values. Maybe they are hidden so check the Parameters options menu for Show Hidden Properties.
Now click on the Parameters Settings, its the gear icon on the slider. You get the Parameter Settings Dialogue where you can change the "Default" value to zero.

Finaly you need to save the Asset (the changed morph property settings) to have this default value of zero permanently saved. You can use File > Save > Support Asset > Save Modified Asset or Morph Asset the later is a bit more complicated because you have to find where the original morphs is saved on the harddrive in the Library folder called data. Usualy the morph Name is the Filename on disc.
How to tweak extreme poses?A JCM is just a morph that is driven by a joint rotation - for this you may not even need to set it up a a JCM, just as a regular morph. The existing JCMs are on the figure (as all moprhs are), not on the bones - they are hidden by default so in the Parameters pane option menu, the lined button in the top corner of right-click the tab, enable Show Hidden Properties and then look under Currently Used
Daz 3D is part of

Connect
DAZ Productions, Inc.
7533 S Center View Ct #4664
West Jordan, UT 84084Licensing Agreement | Terms of Service | Privacy Policy | EULA
© 2026 Daz Productions Inc. All Rights Reserved.