-
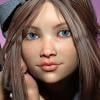
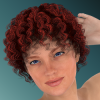
Aqua from Kingdom Hearts
If you don't mind making some adjustments - it comes with a ton of movement morphs and lots of bones for movement and positioning. You might be able to get the look you're after with some of the movement morphs and bones.
I wasn't able to spend much time on it, but here's after a couple of minutes of moving the bones and adjusting it with the movement morph sliders. You could probably get closer if you spend a bit more time tweaking it than I did.
Cutout opacity set to 3, X Scale (in the Parameters tab) set to -100%.
Specific morph huntAnother morph for Genesis
Thank you! :)
Specific morph huntAnother morph for Genesis
Specific morph huntI've not seen any horse heads. You mentioned HFS's Ultimate Shapes, did you attempt to create a horse head with mixing some of those? Those are the only ones I can think of that might get you close to the horse head look.
Yup, I tried using the deer head morph and orc etc. to make the snout longer/thicker. But the problem is with the ears, they're big on the deer morph and can't get rid of them. I will give this a try again though, thanks!
I think the Philosopher's Egg has a horse head morph, but it's not for Genesis 8. They are for the Generation 4 characters, but exceptionally well done.
Laurie
Thank you, just found it, looks awesome. Ok, I think I'll buy that then work out how to transfer that horse texture to G8, and then just play around with existing morphs for the shape. A bit of tweaking of those morphs, plus a texture designed to look horse like, might achieve good results.
Thanks to both of you! :)
Specific morph huntI think the Philosopher's Egg has a horse head morph, but it's not for Genesis 8. They are for the Generation 4 characters, but exceptionally well done.
Laurie
Where are the highly detailed, muscular HD-Addons for Genesis 8 female? Like Ophelia 7's HD-Addon?I've been looking into this, and I think you're asking the wrong question.
Ophelia 7's HD add-on isn't itself actually all that muscular. The muscles are almost all in Ophelia's SD morph, as can be seen if you load just the HD details onto a base Genesis 3 figure.
For comparison, I've done that, rendering the default G3F with Ophelia 7's HD details (and the default G8F materials, so both figures match material-wise), and the default G8F with the "Bodybuilder details" from the standard Daz Morph pack dialed to 200%, and Gia 8's HD details (in order to give both models HD detail from a "muscular" figure and thus largely remove the HD element from the equation).
Doing so, we can see that very little of Ophelia 7's muscle is in her HD add-on, but most of the muscle on the Genesis 8 figure just comes from dialling in a standard morph:
(Click for larger size)EDIT: Okay, there was actually a new (if repetitive) post in this thread before I put this here. I assume it got moderated, but I'm going to leave this, as I think it is actually a relevant addition to the thread.
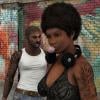
3D Art Freebie Challenge-March 2019-"Lady Luck" -Entries Thread Only3D Art Freebie Challenge March 2019 "Lady Luck"
"Lucky Ladies"
Starring: Tika (by RenderGuyNY)The tale:
Instead of drinking the cherry blossom tea geiko Kimiha and geiko Tsunemomo both had two cups of sake and were having a lot of fun when suddenly the doors slide open. Fortunately it was just maiko (an apprentice) Ayumi and not one of the instructing full geisha because then they would have been in serious trouble! "Pfeww!" (幸運の女神 means 'Lady Luck')
Soundtrack:
Alphaville - Big In Japan (1984)
https://www.youtube.com/watch?v=tl6u2NASUzU
COUNTABLE FREEBIES: (Alphabetic order)#01! AA Satin Dot Shaders for Daz Studio - Iray by AllenArt
https://sharecg.com/v/86624/gallery/21/DAZ-Studio/AA-Satin-Dot-Shaders-for-Daz-Studio-Iray **#02! AllenArt Iray Jewelry Shaders by AllenArt
https://www.sharecg.com/v/85120/gallery/21/DAZ-Studio/AllenArt-Iray-Jewelry-Shaders **#03! Amy AiMei for Genesis 8 Female (morphs only) by Amy AiMei
https://www.deviantart.com/amyaimei/art/Amy-AiMei-for-Genesis-8-Female-morphs-only-687709757#04! Aoi-marked Pill Case by Zippo (Laboratory108)
http://lab108.x0.com/lab108/misc.html (item 24)#05! Asa Akira for G3F by Desterotica
https://sharecg.com/v/90971/gallery/21/DAZ-Studio/Asa-Akira-for-G3F **#06! Bonsai Stand by 3Zi
http://sanzisannzi.blog83.fc2.com/category6-11.html (Scroll down to '3Zi_BonsaiStand.zipDownload')#07! Cherry Corsage by 3Zi
http://sanzisannzi.blog83.fc2.com/category6-8.html (Scroll down to '桜の髪飾り(3Zi_CherryCorsage)の配布')
[Single Cherry Blossom]#08! Cyclide Ritual Earrings (OBJ) by LuxXeon
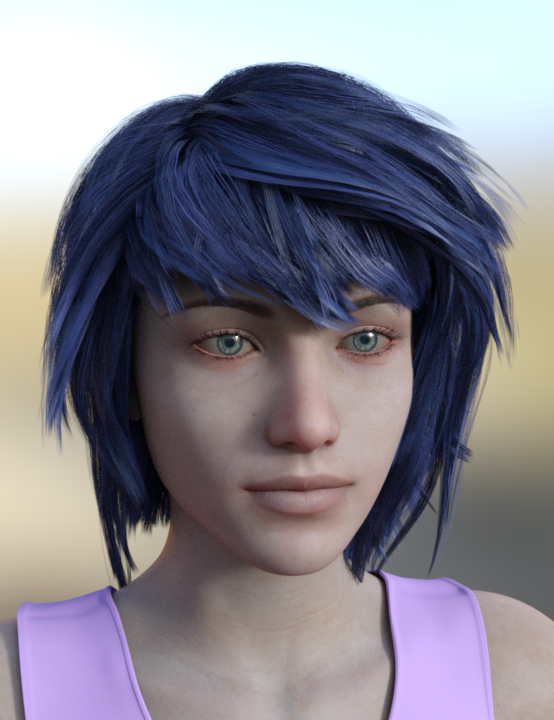
https://www.deviantart.com/luxxeon/art/Free-3D-Model-Cyclide-Ritual-Earrings-555485992#09! Daruma by Zippo (Laboratory108)
http://lab108.x0.com/lab108/misc.html (item 15)#10! Fancy Candle (Iray) by AllenArt
https://www.sharecg.com/v/87930/gallery/21/DAZ-Studio/Fancy-Candle-Iray **#11! Helena Promo Makeup by AprilYSH
http://shop.aprilsvanity.com/helena-hair.html#12! G3F 6 Gored Skirt & TShirt by Wilmap's Digital Creations
https://www.wilmapsdigitalcreations.co.uk/view_product.php?id=469 **
[Skirt used]#13! Ginkgo biloba by Xfrog inc.
http://xfrog.com/product/BN08.html **#14! Gwennili Hair for Genesis 3 Female by kayleyss
https://www.renderosity.com/mod/freestuff/gwennili-hair-for-genesis-3-female/77151 **#15! Iray car related shader presets 'megapack' by Tom2099
https://www.deviantart.com/tom2099/art/Iray-car-related-shader-presets-megapack-539622361#16! Japanese Lanterns by nergal83
https://www.renderosity.com/mod/freestuff/japanese-lanterns/76668 **#17! Japanese Umbrella by Tweety
http://park.geocities.jp/flashformobile/since2013/download/download_2.html (item 8)#18! Kakejiku by Zippo (Laboratory108)
http://lab108.x0.com/lab108/furniture.html (item 18)#19! Kanza-si Asian Hair Pin by MeshWorks
https://www.renderosity.com/mod/freestuff/kanza-si-asian-hair-pin/81019 **#20! Komachi-Hair for V4 by Fujiko
https://www.sharecg.com/v/38698/Poser/Komachi-Hair-for-V4 **
[Used the comb and hairpin]#21! Magazine by Zippo (Laboratory108)
http://lab108.x0.com/lab108/household.html (item 2)#22! mcjJapaneseStyleScreens by mCasual Jacques
https://sites.google.com/site/mcasualsdazscripts9/mcjjapanesestylescreens#23! mcjSlideWall02 by mCasual Jacques
https://sites.google.com/site/mcasualsdazscripts9/mcjslidewall02#24! Miko for G8F by Ocelot1300
https://sharecg.com/v/93218/browse/21/DAZ-Studio/Miko-for-G8F **#25! Morph Expansion Pack for Wilmap's G2F Short Skirt by BlackFeather1973
https://www.sharecg.com/v/76461/gallery/21/DAZ-Studio/Morph-Expansion-Pack-for-Wilmaps-G2F-Short-Skirt **#26! Oiran Clogs by Fujiko
https://www.sharecg.com/v/34015/gallery/11/Poser/Oiran-Clogs **#27! Oiran Decanter by Fujiko
https://www.sharecg.com/v/34087/gallery/11/Poser/Oiran-Decanter **#28! Oiran Rouge by Fujiko
https://www.sharecg.com/v/33987/gallery/11/Poser/Oiran-Rouge **#29! Orchid Flower in Hexagonal Pot by CGAxis
http://free.cgaxis.com/product/3d-orchid-flower-in-hexagonal-pot/ *1#30! Pillow by kratzdistel
https://www.renderosity.com/mod/freestuff/pillow/80880 **#31! Sago Palm by Xfrog inc.
http://xfrog.com/product/HP05.html **#32! Sake Bottle by Zippo (Laboratory108)
http://lab108.x0.com/lab108/food.html (item 36)#33! She's A Lady Poses for Genesis 3, Genesis 8 Female by Marlene Turcotte
https://www.sharecg.com/v/90074/browse/21/DAZ-Studio/Shes-A-Lady-Poses-for-Genesis-3Genesis-8-Female **#34! Shimmery Sheer II Shader Presets for Iray by AllenArt
https://sharecg.com/v/91062/gallery/21/DAZ-Studio/Shimmery-Sheer-II-Shader-Presets-for-Iray **#35! Shiny Wood Tiles Free PBR Texture by CGAxis
https://free.cgaxis.com/product/shiny-wood-tiles-free-pbr-texture/ *1#36! Tatami and Pedestal Set by Aarki
https://www.deviantart.com/aarki/art/Tatami-and-Pedestal-Freebie-148688210#37! Tika for G8F by RenderGuyNY
https://sharecg.com/v/93222/browse/21/DAZ-Studio/Tika-for-G8F **#38! Trish Hair for Genesis 3 Female by kayleyss
https://www.renderosity.com/mod/freestuff/trish-hair-for-genesis-3-female/77150 **#39! Uchiwa by Zippo (Laboratory108)
http://lab108.x0.com/lab108/household.html (item 3)#40! V4 Free Pearls & Fans by Rick Bridenbaker
https://www.sharecg.com/v/35896/Poser/V4-Free-Pearls-&-Fans **#41! Vase 03 by OneSix
https://www.renderosity.com/mod/freestuff/vase-03/77360 **#42! Villainous Masks Props for DAZ Studio by MDO2010
https://sharecg.com/v/87391/browse/21/DAZ-Studio/Villainous-Masks-Props-for-DAZ-Studio **#43! Wind Bell by Zippo (Laboratory108)
http://lab108.x0.com/lab108/household.html (item 8)#44! Wind Chimes by Jim Farris (Xaa)
https://www.sharecg.com/v/41919/gallery/11/Poser/Wind-Chimes **#45! Woodland Forget-me-not 3D Model by CGAxis
https://free.cgaxis.com/product/woodland-forget-me-not-3d-model/ *1
NO-COUNT ITEMS:--- IDG Vibrant Light Probes (The Holiday Loyalty Sale 2018 Free Item)
PURCHASED/PAID FOR ITEMS: None. 100% Free
*1 E-mail address required
** Registration required
#x! Countable Items (Bold ones are used by me for the first time.)
--- No longer available freebies
++ Free with DAZ Studio (or the Essentials)
$x. Purchased/Paid For Item
Rendered with DAZ Studio 4.10.0.123 (nVidia Iray)Other free software used: GIMP v2.10.8 and Irfanview 4.52
Postwork: (oa) used the AltaLux Image Enhancement Filter (Effect) by Stefano Tommesani that comes with Irfanview and the Lens Flare that come with GIMP.

"Lucky Ladies"
Specific morph huntThere's a lot of cool morphs that I already have, such as EJ's fantasy morphs and HFS ultimate shapes. Especially in the latter there are some animal head morphs such as cat, dog, deer etc. But I have never found a horse head morph.
So I'm asking if anyone is aware of one out there somewhere. A genesis 8 m/f horse head morph?
My Genesis 8 Male is brokenHere are some my posts about this issue.
[Quote]: Genesis 8 figures keep loading with some kind of pre-applied morph.... I am losing my mind here
Syrus_Dante said:
The morphs can also be hidden ones maybe you can't see them.
There is a setting called Show Hidden Properties in the Parameters pane Option Menu (that is the lined button on top of the pane) check if its on to also see hidden morphs (properties).
After Edit>Figure>Zero>Zero Figure the genesis figures should look default again. Zero Shape will only affect shapes but we can't be shure the author of the false morphs was smart enougth to set the morph type to Modifier/Shape in the Parameter Settings dialog. I have seen a few morphs without any type set, only zero figure will reset them I guess.
Then also use Edit>Figure>Memorize>Memorize Figure this will set all zeroed morphs (properties) to be zero by default.
If you didn't do anything else than the two things above with the figures you can also try:
File>Save As>Support Asset(s)>Save Modified Assets to save the morph changes to zero and default zero to the affected morphs in the library.
The Save Modified Assets will show a dialog and lists every morph and asset in the scene that has been modified and gets updated by confirming. If possible you could make a screenshot of this dialog that could help others to identify those troublesome morphs.
Tell us if its working. Shure it will help with the morphs that are on by default (common issue). I'm only concerned about the figure settings that may be set to zero but should be set to something else. On Genesis 3 figures the Navel and the Teeth HD was on by default so even Daz released morphs that where set on by default. I'm not shure about something simmilar with the Genesis 8 figures right now.
Check the Mesh Resolution settings in the Parameters pane here are the default values Resolution Level: High Res, SubDivision Level: 1, Render SubD Level: 2 if those settings didn't have changed with Zero Figure its all good. If they have changes set them back to default and use Save Modified Assets once more.
OK I've just checked my default Genesis 8 Female/Male and yes beside of Render SubD Level that falls back to default 1 there are three Eyelashes morphs that are on by default and gets zeroed:
- Render SubD Level: 2
- Eyelashes Curl
- Eyelashes Length Lower
- Eyelashes Length Upper
Turn them up to 100% then Save Modified Assets and you have your Genesis 8 figures back to default without installing the starter essentials again.
Bra Morph..?Sorry, but I'm not quite understanding the issue.
Yeah, I am not following this either. What exactly are you trying to do? What look are you trying to achieve?
It's an issue that's probably more obvious to women, most of whom wouldn't be caught dead going braless in public once their "melons" start to shift downwards. Take Mrs. Chow for example. If she were a real woman, her breasts might look like that under her bathrobe or nightgown, or while bathing/showering, but when she dresses up in her classy Daytime Noir outfit—I guarantee you—she's not going braless!
What Melissa wants, along with numerous other women in this hobby, is a morph to snug those babies up into a more realistic, corralled shape. As the artists for these characters create a wide variety of shapes and sizes of breasts, we'd dearly love for those artists to include a custom morph with each of the character/figures that emulates what the breast would look like if the character was wearing a bra. If Daz would do that for all the named figures, too, artists could rely on that morph for their characters based on any given female figure.
I mean, seriously, would you really want to see your mother, (or grandmother,) walking around braless all of the time? Regardless of what she's wearing, or where she's wearing it?
Thanks for the reply and the explanation. I disagree with having a custom morph with each character though, that would be a ton of work for each PA and inconsistant. There are already plenty of breast morphs that will move the breast in any direction already including the default ones for each pectorial (see image).
these 2 products can acheive the look you are going for easily
https://www.daz3d.com/breast-utilities-for-genesis-8-female-s
I have Zev0's breast contol utilties for G2 through G8. I love his utilities, but they can only do so much. I remember wasting a lot of time, trying to get a decent shape to the breasts on Sydney, and I couldn't do it.
The simplest solution is usually the easiest. I'll just have to stop buying females that I feel need a custom breast morph to use. (And I can spend my time creating my own morphs in Hexagon for the females I already own, like Sydney and Mrs. Chow, rather than fiddling with 3rd party morphs that try to work for all characters,).
Wearable vs. Character preset.Yeah saving a Wearable Preset is nice and easy to include unsaved morphs in the clothing. You just have to remember to select the genesis figure first and in the save dialog choose which clothings, hair and what not to include with the preset.
But again its saved embedded this means the morphs will only be available with loading the Wearable Preset and not with loading the original clothes from the library or scenes where the original clothes are included.
I suggest you to use File>Save As>Support Asset>Morph Asset to have your morph available with the original clothing.
Thanks for this explanation. I've always saved clothing morphs as Morph Assets and have never really looked at what a Wearable might be. Sometimes we just stick to tried-and-tested without venturing into new areas.
Bra Morph..?Sorry, but I'm not quite understanding the issue.
Yeah, I am not following this either. What exactly are you trying to do? What look are you trying to achieve?
It's an issue that's probably more obvious to women, most of whom wouldn't be caught dead going braless in public once their "melons" start to shift downwards. Take Mrs. Chow for example. If she were a real woman, her breasts might look like that under her bathrobe or nightgown, or while bathing/showering, but when she dresses up in her classy Daytime Noir outfit—I guarantee you—she's not going braless!
What Melissa wants, along with numerous other women in this hobby, is a morph to snug those babies up into a more realistic, corralled shape. As the artists for these characters create a wide variety of shapes and sizes of breasts, we'd dearly love for those artists to include a custom morph with each of the character/figures that emulates what the breast would look like if the character was wearing a bra. If Daz would do that for all the named figures, too, artists could rely on that morph for their characters based on any given female figure.
I mean, seriously, would you really want to see your mother, (or grandmother,) walking around braless all of the time? Regardless of what she's wearing, or where she's wearing it?
Thanks for the reply and the explanation. I disagree with having a custom morph with each character though, that would be a ton of work for each PA and inconsistant. There are already plenty of breast morphs that will move the breast in any direction already including the default ones for each pectorial (see image).
these 2 products can acheive the look you are going for easily
https://www.daz3d.com/breast-utilities-for-genesis-8-female-s
Wearable vs. Character preset.Yeah saving a Wearable Preset is nice and easy to include unsaved morphs in the clothing. You just have to remember to select the genesis figure first and in the save dialog choose which clothings, hair and what not to include with the preset.
But again its saved embedded this means the morphs will only be available with loading the Wearable Preset and not with loading the original clothes from the library or scenes where the original clothes are included.
I suggest you to use File>Save As>Support Asset>Morph Asset to have your morph available with the original clothing.
Bra Morph..?Sorry, but I'm not quite understanding the issue.
Yeah, I am not following this either. What exactly are you trying to do? What look are you trying to achieve?
It's an issue that's probably more obvious to women, most of whom wouldn't be caught dead going braless in public once their "melons" start to shift downwards. Take Mrs. Chow for example. If she were a real woman, her breasts might look like that under her bathrobe or nightgown, or while bathing/showering, but when she dresses up in her classy Daytime Noir outfit—I guarantee you—she's not going braless!
What Melissa wants, along with numerous other women in this hobby, is a morph to snug those babies up into a more realistic, corralled shape. As the artists for these characters create a wide variety of shapes and sizes of breasts, we'd dearly love for those artists to include a custom morph with each of the character/figures that emulates what the breast would look like if the character was wearing a bra. If Daz would do that for all the named figures, too, artists could rely on that morph for their characters based on any given female figure.
I mean, seriously, would you really want to see your mother, (or grandmother,) walking around braless all of the time? Regardless of what she's wearing, or where she's wearing it?
Anyone know what hair item this is on the store?Looking at Mousso's product page there appear to be quite a few characters that are using this hair style, interestingly enough the Michiko character is the only one that does not list external hair products used in renders. However; the character Harper does, (very similar hair style,) and leads to this style. https://www.daz3d.com/voss-hair-for-genesis-3-8-female-s
Can't guarentee it is the correct one, the legnth being the only major difference I see, but there may be a morph within the hair for that aspect.
That said, best bet would be to ask Mousso what they used in the render. May be the quickest way to resolve.
Keiko 8Thanks; that was a body transfer as well - worked well that time, although I've not tried any extreme poses. Well, until yesterday, I hadn't tried any.
Gooey Gum that stretches when stepped on?Does anybody know if there is any gooey substance (gum or anything, but not feces) that has a morph that can stretch from the ground to the foot when the foot is lifted?
My Genesis 8 Male is broken..haven't experienced any such issues with G2 or G3.
That doesn't mean that others haven't. I've seen several threads on this:
https://direct.daz3d.com/forums/discussion/207696/genesis-3-characters-load-weird-shape
https://www.daz3d.com/forums/discussion/207341/every-g8f-morph-is-messed-up
https://www.daz3d.com/forums/discussion/30605/corrupted-genesis-base-character-fixed-again
vertex gone AWRY when making morphsI did a morph on a head attachment for G3F and it did import correctly, the vertices had gone bizarc.....I did turn on "keep vertex order" in Blender's export settings to no avail. Any idea why??
G2F Open Problem Note NudityThis sort of thing happens when a morph file gets corrupted to have a nonzero default value. The easiest way to fix it is to delete and (maybe) reinstall all files relating to the character. (If you can identify the exact file causing the problem, it's also possible to manually edit the file to fix it.)
Daz 3D is part of

Connect
DAZ Productions, Inc.
7533 S Center View Ct #4664
West Jordan, UT 84084Licensing Agreement | Terms of Service | Privacy Policy | EULA
© 2026 Daz Productions Inc. All Rights Reserved.