-
How to get rid of properties for good
First you should be realy careful with permanetly saving changes you made to the morphs. You can save modified existing morphs, recently created properties or imported morphs along with the scene file to continue editing them between DS sessions. But you have to keep in mind that those morphs and modifications will only be available by loading the scene file because those modified assets will get saved embedded. You may have loaded the default genesis figure asset from the Content Library and this will be the unmodified version.
Also make shure that the morphs you want to save are set to a default value of zero in the Parameter Settings.
To save morphs go to File>Save As>Support Asset>Morph Asset and if you want to "update" your modified existing morphs by overwriting the morph file on disc you have to be super careful to select the same Content Library, Vendor and Product Name in the save dialog like the original morph is saved to. To check where the original morph asset is saved first open up the Parameter Settings and copy the morph Name. Then open up your file browser like the MS-Explorer and navigate to your content directory and open this path "Content Library\data\DAZ 3D\Genesis 8\Female\Morphs\DAZ 3D\Aiko 8" the file name is "eJCMAiko8SmileFullFace.dsf".
Asset Directory: select your main Content Directory where you have installed Genesis 8 Female
Vendor: DAZ 3D
Product Name: Aiko 8
Then you have to select which morph you actualy want to save in the bottom Properties list you have to navigate to the Hidden/People/Aiko 8/eJCMs property group and click to checkmark the eJCMAiko8SmileFullFace.
Next press accept to save the morph asset. Then you also have to delete the current genesis figure from the scene or start a new scene and load the default figure asset from Content Library to get the saved morph assets loaded from the Content Directory and not embedded from the scen file.
This post is just a short introduction to saving moprh assets if you want to know more about this subject read my post in this thread: Update Custom morphs?
I use to shop here.DAZ could bundle the dforce hair toolset and the HD morph toolset into an advanced tools product and market it for $100 a pop. Then a year later after alot of folks have bought it, they could turn around and offer it free to everybody...... naaaa.... just kidding.... they would never do that.
Do I really need to buy teen Josie 7 to use another character?I would like to purchase the Tamara Character, but when I click on add to cart, it shows that Teen Josie 7 is a required product. Does anyone know why it is required or if I can use it without Teen Josie 7?
It allows me to buy it without Teen Josie, but are there any benefits to buying Tamara and Josie or any reason why it would be better to buy both?
I appreiciate any information or help you are able to give me.
To expand on what Chohole said, characters that show a Daz Named figure as a requirement are using that figure's shape morph to some extent. The product page won't say how much.
Which product are you looking at? If I have her, I'll do a quick render of her without TJ7 dialed in.
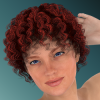
More Non-photorealisitic Renders (NPR II)Today I decided to spend a little time playing around with the new La Femme figure to see if she could be fitted into my current workflow. I still need to run some more tests to see how well she adapts to Victoria 4 poses. To be honest, I should have worked on her expression a little more, but overall I like some of the new features the figure has to offer. The fabric draping was simulated in the Cloth Room.
As usual, this was created with Poser Pro 11 and Clip Studio Paint.
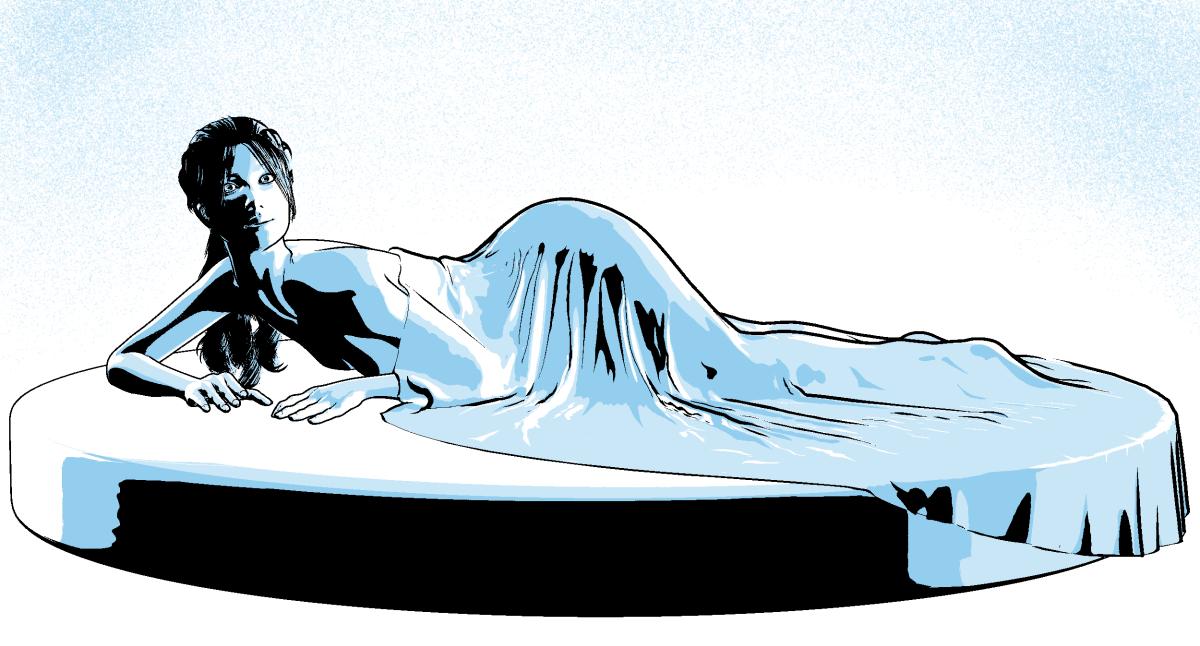
The shading on this is just amazing, The blues are a great choice but I would add a little of that blue beneath her and just under her hands. I've had a go with the new figure and it will take a little getting used but there's some serious potential there - especially with Black Hearted's morph pack - I would have purchased that with the figure just for the legs. If I need to render something with a focus on legs, this is a go to option.
You are absolutely right. I should have taken the extra time to finish the image before posting. To that end, I decided to go back and try adjusting the expression and then I added some blue beneath her to give it the depth and sense of completion that it needs. I was just tired and since I was really focusing on the folds of the fabric I just wanted to walk away from it. Here's my updated image. Any thoughts?

I have not looked at that morph pack you mentioned, but I will now.
I am going to start a new project soon and I'm toying with the idea of using La Femme as the figure for the lead female character. But, before I can do that I have to be certain that she can use V4 poses and expressions. So far when I've tried to use poses strange things happen to the hands. Likewise, expressions have not been really successful. But I haven't done enough testing yet to make a determination. (BTW: The project is the one that the M4 "Arton" character appears in.) We'll see how it goes after I make a few more La Femme images and have time to determine her compatability with the poses/expressions/props in my content library and if she is as easy to work with as V4.
That's the ticket I think.
I have to say, she's a very different animal from V4 - and as for expressions, I would recommend doing those yourself. It's been designed with a view to making expressions easy... but easy with practice. The best way to get an expression on her is not to spin the dials but to work directly on the face.
I use to shop here.A lot of people are annoyed at Daz for locking the dforce tool for strand based hair to PA's only. Fair enough but I understand the business decision.
They locked the HD morph feature to certain PA's as well - people found a way around it. People will work a way around dforcing strand hair as well.
The obvious fix if it annoys you so much is to get a product published, voila you are a PA and have access to the dforce tool.
As far as I am concerned I am genertically incapable of producing anything like that (yes I have tried, I am clueless) wso will make do with what I can do. I render daily, but assets that fill a need for something I want to do and happily pay my money to daz and the PA's for giving me access to software and assets that give me enjoyment. They do the work, I pay them for that work. Sounds fair to me.
David
More Non-photorealisitic Renders (NPR II)Today I decided to spend a little time playing around with the new La Femme figure to see if she could be fitted into my current workflow. I still need to run some more tests to see how well she adapts to Victoria 4 poses. To be honest, I should have worked on her expression a little more, but overall I like some of the new features the figure has to offer. The fabric draping was simulated in the Cloth Room.
As usual, this was created with Poser Pro 11 and Clip Studio Paint.
The shading on this is just amazing, The blues are a great choice but I would add a little of that blue beneath her and just under her hands. I've had a go with the new figure and it will take a little getting used but there's some serious potential there - especially with Black Hearted's morph pack - I would have purchased that with the figure just for the legs. If I need to render something with a focus on legs, this is a go to option.
You are absolutely right. I should have taken the extra time to finish the image before posting. To that end, I decided to go back and try adjusting the expression and then I added some blue beneath her to give it the depth and sense of completion that it needs. I was just tired and since I was really focusing on the folds of the fabric I just wanted to walk away from it. Here's my updated image. Any thoughts?
I have not looked at that morph pack you mentioned, but I will now.
I am going to start a new project soon and I'm toying with the idea of using La Femme as the figure for the lead female character. But, before I can do that I have to be certain that she can use V4 poses and expressions. So far when I've tried to use poses strange things happen to the hands. Likewise, expressions have not been really successful. But I haven't done enough testing yet to make a determination. (BTW: The project is the one that the M4 "Arton" character appears in.) We'll see how it goes after I make a few more La Femme images and have time to determine her compatability with the poses/expressions/props in my content library and if she is as easy to work with as V4.
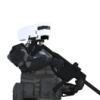
[Released] Clothing Converter from Genesis 3 Male to Genesis 8 Male [Commercial]Did your base character model get accidently modified with a changed scale factor or some morph always dialed in? Some products are being sold lately with morphs that apply to everything, not just the character the morph is supposed to affect.
Dark ElfI'll look into those. I also heard back from Quanto, turns out it is a custom morph that he does not intend to share.....
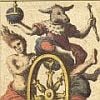
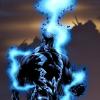
[Released] Medieval Fantasy Bedroom [Commercial]For the candles, the pose controls @Strangefate set up for the candle flames work quite well as far as getting the flame to dance goes:
http://algovincian.com/temp/candle.mp4
I'm sure it could be improved, but the flame motion took literally less than 60 seconds to key by randomly setting some keys for the 4 twist controls.
As far as the smoke goes, I think the most resource efficient way to do it would be to create a new MDL shader that supported 2 opacity maps each with their own UVs - a smoke pattern and an envelope. The envelope could just be a static gradient (causing the smoke to fade as it rose). The smoke pattern could be seamless (vertically) and animated by keying it's vertical UV offset. The keying would have to be done via script using signals on frame changes since mats in DS aren't animatable. Layering these two using an overlay blend and sending the output to the cutout opacity should work.
Of course, simply recording some smoke footage and making it seamless in time would probably look better and be easier, though use more resources. You'd still have to key the individual frames via script as above. And, you'd also have to make the smoke starting point follow the tip of the flame as it dances
Would actually be a fun side project - wish I had more free time to mess with it lol.
- Greg
ETA: I think a similar approach could be used for the fireplace.
yes they certainly are animatable and could be instanced
my main problem is all the multiple planes in the fire, one posibility would be export the lot as an obj and alter single parameters export those and load the objs on the original export as morph targets
then one could puppeteer an animated pose preset
the smoke scaling, transforming and rotating would probably suffice
More Non-photorealisitic Renders (NPR II)Today I decided to spend a little time playing around with the new La Femme figure to see if she could be fitted into my current workflow. I still need to run some more tests to see how well she adapts to Victoria 4 poses. To be honest, I should have worked on her expression a little more, but overall I like some of the new features the figure has to offer. The fabric draping was simulated in the Cloth Room.
As usual, this was created with Poser Pro 11 and Clip Studio Paint.
The shading on this is just amazing, The blues are a great choice but I would add a little of that blue beneath her and just under her hands. I've had a go with the new figure and it will take a little getting used but there's some serious potential there - especially with Black Hearted's morph pack - I would have purchased that with the figure just for the legs. If I need to render something with a focus on legs, this is a go to option.
Is there a way to morph a single body part from one character to another, in this case teeth?With your figure selected have a look in the Parameters pane "Currently Used" section. Maybe the full character morph utilizes a seperate teeth morph that you can turn off. Otherwise the teeths could also possibly be part of the characters full head/body morph.
How to get rid of properties for goodI see people often get confused by this ERC-Linking subject and it seems this includes even PAs that release those mophs. But once you have understood the ERC-Linking dpendencies is isn't that complicated.
I saw a similar issue with my Genesis 3 Female and Mika7 "eCTLMika7EyesClose". If I closed the eyes the eCTRL for Mika7 was always activated even with the genesis base shape. This should make shure that the eye lids exactly match if the eyes are fully closed and the Mika7 shape is applied.
I did fix this issue by myself in the Hierarchy Editor by adding a Controller: ERC [Multiply] FHMMika7 to the eCTLMika7EyesClose morph.
You can set the Parameters pane to Edit Mode in the right-click menu where you can also find Show in Hierarchy Editor if you right-click on the moph slider. This will open up the Hierarchy Editor pane and will select the property there, then you can drag and drop morphs from the Parameters pane to the Hierarchy pane into the Controller or Sub-Components and set a linking type like ERC [DeltaAdd] and ERC [Multiply] under the section Attibutes.
In case of the Aiko8 I think the eJCM dependency chain should look like this:
[Edit]: I was writing nonsense here.
Expression: Smile Full Face HD Sub-Component: ERC [DeltaAdd] eJCMAiko8SimileFullFace - this will establish a 1 to 1 relationship between the expression and the correction morph slider
Morph: FHMAiko8 Controller: ERC [Multiply] eJCMAiko8SimileFullFace - this will establish a dependency that the correction morph will be linked to the value of the Full Head Morph "Aiko 8 Head"
The first ERC Link will make shure that the Expression Joint Correction Morph for Aiko will get dialed up if you use the Smile Full Face HD expression.
The second ERC Link will make shure that the Expression Joint Correction Morph will only get dialed up by the amount you dial up the Full Head Morph Aiko8. If the full head morph is set to zero there will be no correction morph applied by the smile expression.
I've attached another example of how the expression correction eCTRLAiko7Angy is ERC-linked in the PropertyHierarchy. I hope this will clear up some of the confusion.
How do I move my content to another drive?For some content I used the Install Manager, other items were downloaded from within Daz Studio. Do those count as the same thing?
No. Not the same thing.
It just means more steps in the process.
I'm going to create a step-by-step for you. It will take a bit of time, but should be posted later today.
I'm doing the same as winduptoy, and I have several hundred non-DAZ items (Rendo, etc.).
What do I need to do with them? I assume DIM won't transfer them.
I'd hate to have to reinstall them manually, hunt them down, create new products in the Content Library, etc.
Could I just copy the DAZ 3D Library from the C drive and paste it onto the D drive? (In my case, F)
And, since the new drive is a large SSD, should I move Studio to it for speed?Hi, and yes you can. I myself have my content library copied for security reason in a few hard-drives. My personal advices would be for you to use robcopy functions in roder to do it smoothly enough. From my personal experience it's the best way to copy large groups of files.
You can also reinstall your DAZ software to an SSD althought from my expirence it won't make such a difference. But still, it's easy to try and compare times by yourself. Good luck!
My current C drive is a 4TB, as is the SSD that I bought. Could I just use the SSD manufacturer's clone software to copy the C drive and then delete the non-DAZ files?
Hi and NO. I hope to not be late in my answer.
Why so? because SSD are a great improvement in computer technology but they are extremely sensitive, so if you write, erase, rewrite and so so so too much you can easily mess up them. Plus I can imagine buying such SSD was not cheap, so keep the ticket just in case.
Just today I post a tutoral that I believe could help people with your kind of needs so if you will you may check it:
My advice but, is that since you have such a great new piece of hardware bu also expensive and sensitive one, if you are not sure about doing this by yourself visit a trusted computer shop with a solid guarentte politics and ask for guidance and help.
General GPU/testing discussion from benchmark threadI think that's why RayDant is rooting for a measurement unit like Iterations per Day/Hour/Min/Sec in order to reduce variance
For people still on Win7 the task manager doesn't show GPU usage.
I don't know if googleearth can affect benchmarks. Firefox and Chrome and other browsers have been using hardware acceleration for a few years, without forgetting flash based tech
But they use 2D/3D acceleration and GPU memory to do so and not Cuda. You should check if Compute or Cuda ressource are used
In the same vein, does watching or encoding a video or using any CPU based application (like a lot of these apps you may have that autostart, like Antivirus, Smartscreen...) while benchmarking affect the result?
* Edit to be more clear : Are the numbers taken from DS log where the render time is strictly only render time and doesn't take data transfer in account so that eventual delay due to GPU memory utilisation by other program may be ignored ?
Is there a way to morph a single body part from one character to another, in this case teeth?I have a few characters with some really bad dentists... I see they made them irregular and assymetric. While I appreciate that effort, there are gaps between all the teeth which look really goofy IMO. I would like all the teeth to be basically touching each other (seems to me that is how it is with most adults)
I would think the simplest fix would just be to grab another character's teeth morph and use it on the characters with bad teeth. Is that possible?
Default genesis load corrupted?Just checked that now @Richard Haseltine and yeah, the defaults are fudged and set at .50. (Beside a whole bunch of others I can't even find but I know are messing with my clean Genesis load.) Thanks for pointing that out for me, by the way! I would have ignore those annoying little numbers for something else.
I changed this back to 0.00 for both "Default" and "Value". File>Save as>Support asset>Save modified Asset. Deleted the morph. Loaded a new scene, loaded a new Genesis annnnnd Elf morph popped up again. /facepalm
Even downloading a new Genesis file from daz hasn't fixed it so I broke something else in here somewhere. Apparently it is something to do with the default values but I have no idea how to get my updated and zero'd default values to stick...
Unless I have multiple Genesis figures floating about? Could that be it? I'm trying to fix a broken figure not knowing I have a fixed one elsewhere? (My runtime looks like a bomb went off inside it, it's that spectacularly disorganised.)
RareStone is KILLING MEI just tried and she loaded without error from the character preset - but I do have some other rarestone sets installed, including the big morph packs. The morph you list isn't in the files installed for Minto, certainly.
dForce simulation issueHello,
I don't know if this is the right place for my question... Please bear with me!
I have a cloth simulation: it should fall on a table. The cloth is dForce compatible but when I run the simulation, all the part of the dress gracely fall but the chest and collar.
I think is something morph related but wasn't able to spot it out. I am attaching some pictures to explain better. Hope that someone will be able to help me undestand.
Thank you,
Adam
Generally, I've found, when a dforce item has been set up with some static parts, is to re-apply a dforce modifier if all I want is it drapped on a table, chair (or whatever). I also use VWD, which allows me to tweak it's placement but that is an alternative product from elsewhere and can make non-dforce items easier to work with.
I have no choice but to make my own HD morphs, so how do I do it? I have zbrush.Thanks for sharing. The render though doesn't really show properly where the torso & head seams meet.I do also have a test render of Olympia 7's HD details on G8F,
Thanks! Will have to do same, and then pan through my scene with bright sun and see if I can find any seams.
Because they're simultaneously baked from the HD morphs, the displacement maps are consistent across all zones, so as long as they use the same displacement parameters, the displacements on those materials will match.
That's a really good point. Will have to check how some of the PA's HD's look as well, so have more options. If I can setup a workflow in my 3d app, I can maybe bake them out one by one.
Many of the bump maps I find unnatural looking for skin textures on certain zones of the body. Will check it out, but am guessing from all my test renders so far, will continue to minimize or stay away from normal & bump maps.In this case, the bump map is made directly from the HD morph; although they work in different fashions, bump and displacement maps both use a height map format along the normal vectors of the face, so the actual input data is interchangeable.
LOL, that's what I was doing for several of my tests. Plug Bump map into displ and turn off bump.
The difference here is that you're just trading normals caused by tesselation of the surface for one calculated at the incidence phase, so while there is a slight difference in where the final surface is along the base mesh's normal, the final normals correlating to any given point on the UV map can be exactly the same if correctly configured. As this trade-off reduces issues with mesh clipping while preserving the same apparent surface contours, it's a reasonable compromise.
Still not sure where am going to end up with displacement strength setting in Daz mat parameters. As soon as I fiddle with that, which i did, it's where things start needing more tweaking. Really have to sit down soon and work on this in depth to see what's what to meet my needs in various scenes, distances, angles and lighting.
If you ever do a HQ render @4k with the 2 characters side by side and showing the skin details, would love to see it. (4k so a person can zoom in and pan through)
My hardware really isn't up to 4K rendering, I'm afraid. I'm either on a slightly old ultrabook, or a compact desktop that relies on half-height graphics cards*.
* Although it does have the blessing that other than limited space, it does still use proper desktop hardware, rather than being one of those compact desktops that's really a laptop in disguise. (And although the CPU is now a few generations old, it is nearly the top of said generation, so it holds up reasonably well).
Well that's pretty cool that your processing HD subD 4 with that well-matured system and making it work! Hope a windfall of money finds your way and you get a computer upgrade. ;)
Default genesis load corrupted?Oof. Ok, so update.
I loaded my Genesis 1 model into a new scene and got this by now familiar elf-creature. I went to parametres and zeroed the entire figure and saved the morph asset as per your suggestion, DrunkMonkey, deleted the character, loaded a new scene and reloaded a new Genesis 1 character and ended up with the weird Elf again.
Any other suggestion, guys?
BTW, this is what my default Genesis character loads as. You can't see the feet but they are like bigger than both Genesis and Aiko 5's default feet so I have no idea where their sizing came from.
Daz 3D is part of

Connect
DAZ Productions, Inc.
7533 S Center View Ct #4664
West Jordan, UT 84084Licensing Agreement | Terms of Service | Privacy Policy | EULA
© 2026 Daz Productions Inc. All Rights Reserved.