-
Show Us Your Bryce Renders Part 10
Laura - very nice render. Like the staircase do you have a link to it.

Thank you!
Here is the link - it's a sketchup model but I have exported it as .obj. https://3dwarehouse.sketchup.com/model/bee7465ed0b06104a55a2eafff111bd2/The-Grand-Staircase-update-no-2
Check out the uploader's profile - has more options.
Just want to add the grand staircase have a fuller wall at back but I cut parts out due to texture issues. Also changed textures on wood railings due to same problem.
Show Us Your Bryce Renders Part 10Tim82 - Stunning still life, very realistic!
Thank you! I am making now freebies (to give back to the community) but had struggled quite a bit to learn making these envelopes. Adding textures is the main problem. Even with this one I made a mistake at first as back image initially appears black. Then have to go back to Sketchup model and check out the problem.
 Forgot to 'reverse faces'. Now it works.
  I always test it in Bryce first before uploading at ShareCG and Renderosity.Show Us Your Bryce Renders Part 10
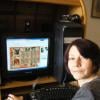
A W.I.P. image I am trying to use on the sewing envelopes I am making and give away as freebies. There is a part that I have difficulty to remove (small black square - seems some kind of shadow but have no idea of what) in front of the Georgian style dressed male. EDIT: I have just think, best will be to give the male clothing a black texture in stead of white. Have done that on back part image - have to paint out poke-through.
I have used Wendy's clothing on Genesis (male & females). Staircase used from Sketchup Warehouse.
Test render using my sewing pattern envelopes, but lights real messyI have recently completed a set of 3 sewing pattern envelopes which I've created in Sketchup.
To be able to see the outcome of the envelopes in a scene outlay I have put a parallel light in front which turns out really bad!!
The left part of the image is not too bad, but the right part looks aweful with that horrible white part spoiling the image totally.
What type of light will work better in such a situation? If the light is taken out, it's too dark.
Any tutorials on building/coloring props?Most of the Daz work I'm doing is for 3D printing so the coloring of a prop really doesn't matter. That said, I'd like to be able to do it right and create finished props suitable for Daz.
I'm using several programs, Sketchup, Zbrush, Netfabb and others to build what I need. Say I were to build a snowman. I can build the shapes, no problem. But how do I get the accessories on that prop to be the right colors when I import into Daz? Or do I need to import the body, scarf, hat, nose, buttons, arms and mouth as separate, properly colored items and merge them together?Anyone here using Bryce and have knowledge of Sketchup too? [SOLVED]If anyone can test a Sketchup file I have done recently where textures works perfectly, but for some reason show only partly in Bryce, it will be much appreciated. Please let me know so than I can send the .skp and .obj files.
I use Bryce as my main scene/render editor and Sketchup for create some models.
EDIT: Got someone at Sketchup forum with a quick simple trick to get both sides to show textures!
 Is there a method to zoom faster (farther)?
All I want is faster zooming with the scroll wheel... just like you get with literally every other 3D software under the sun.
Actually, more than one 3D program struggles with the zoom controls (and quite a lot of 3D games too). I don't know why coding a decent zoom is so hard to do. Sketchup gets the camera stuck in walls (because close objects slow down the zoom), and Blender just stops zooming after a while for no apparent reason, and you have to twist around and unzoom, which is somewhat counter-intuitive.
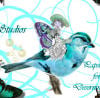
Sewing pattern envelope (now with bit of texture on back part)An envelope to use in sewing scenes.
I have followed a video on how to texture a bag of potato crisps in Sketchup. I still struggle with the back of envelope to add textures and keep it untextured for now. I have no idea why the front part texture exports well but back texture do not export. Guy91600 from Renderosity gave me permission to use his freebie clothing on the images. Image texture created in Daz Studio & Photoshop.
File uploaded here:
https://sharecg.com/v/93492/browse/5/3D-Model/PATTERN-ENVELOPE-1
EDIT: Tried again in Sketchup to get back part a bit textured and added some text. Not easy to get text on.
I have an image prepared for the back but for some reason the front image have a mirror effect when back image is applied.
https://sharecg.com/v/93499/browse/5/3D-Model/PATTERN-ENVELOPE-1-NEW-BACK-TEXTURE
Laura
How do you handle your workflow and files/folders?aah I was wondering about this myself.
I tend to have for a project :
Reference graphics (Pureref collections, Pinterest, photos, sketches, napkins, misted up windows...(don't laugh. I once designed an engine room layout on a misted up kitchen window))
Model Files (Heaxgon, Sketchup, Blender)
UVmapping Files (Obj etc)
test renders
texture maps (paint.bet, photos etc)
render files (daz, Keyshot, etc)
Notes
I've been looking for a simple program to help to organise this mess... thinking of you'd link your project files to 1 master file in this, then when you open said master, it'd have all your work ready to open in just a click or 2...
yeah, I'm dreaming...
I use ActionOutline for my attempts at organisation, and it works for me. I have checklists created for most of the things I'm likely to be doing (creating a 3D product for sale, producing a book cover etc) and use them as templates, duplicating the appropriate one to edit with each new project as appropriate. At each step I can include links to local files or web pages, add images and notes and stuff, and hopefully eventually check it off as done. The sort of things I include in the templates are links to the Substance Painter and Materialize .exe files on my hard drive at the texturing stage of making a model, required promo image sizes at Rendo at the submission stage... things I won't have to search for or remember every time. Then when I use a template I can include reference images and notes for a particular product at the research stage, a 'child' checklist at the morphing stage outlining the morphs that I'll need to create that are unique to the product. It's also searchable, which can be useful if you encounter a problem with a project that you know you somehow managed to solve in a previous one.
None of this is the least bit complicated. As it's name suggests, you can use ActionOutline to outline and create books, articles, tutorials etc and export it to various formats if you've a mind to, and obviously you can use it for non-work related things too, like outlining painting and decorating projects then checking each stage as it's done (including a picture of the Sistine Chapel at the kitchen ceiling painting stage for inspiration if you're feeling really ambitious!). It won't work for everyone, but I'd probably be lost ithout the program.
Nice suggestion. I'll check it out!
I don't overthink it. I have a portable HDD that I run the free windows utility synctoy on every time I get new content or complete a session workin on a new project. It checks for new files and collisions and transfers bidirectionally depending on newness. The result is two drives with identical content. This not only acts as a backup but allows me to take my content on the road with me when I travel for work.
You can get a 2TB My Passport for $70 and a 4TB version for $100 on amazon.
Thank you, but this is not what I'm asking about. I already have simple file/folder syncronization/replication covered. Thanks anyway!
How do you handle your workflow and files/folders?aah I was wondering about this myself.
I tend to have for a project :
Reference graphics (Pureref collections, Pinterest, photos, sketches, napkins, misted up windows...(don't laugh. I once designed an engine room layout on a misted up kitchen window))
Model Files (Heaxgon, Sketchup, Blender)
UVmapping Files (Obj etc)
test renders
texture maps (paint.bet, photos etc)
render files (daz, Keyshot, etc)
Notes
I've been looking for a simple program to help to organise this mess... thinking of you'd link your project files to 1 master file in this, then when you open said master, it'd have all your work ready to open in just a click or 2...
yeah, I'm dreaming...
I use ActionOutline for my attempts at organisation, and it works for me. I have checklists created for most of the things I'm likely to be doing (creating a 3D product for sale, producing a book cover etc) and use them as templates, duplicating the appropriate one to edit with each new project as appropriate. At each step I can include links to local files or web pages, add images and notes and stuff, and hopefully eventually check it off as done. The sort of things I include in the templates are links to the Substance Painter and Materialize .exe files on my hard drive at the texturing stage of making a model, required promo image sizes at Rendo at the submission stage... things I won't have to search for or remember every time. Then when I use a template I can include reference images and notes for a particular product at the research stage, a 'child' checklist at the morphing stage outlining the morphs that I'll need to create that are unique to the product. It's also searchable, which can be useful if you encounter a problem with a project that you know you somehow managed to solve in a previous one.
None of this is the least bit complicated. As it's name suggests, you can use ActionOutline to outline and create books, articles, tutorials etc and export it to various formats if you've a mind to, and obviously you can use it for non-work related things too, like outlining painting and decorating projects then checking each stage as it's done (including a picture of the Sistine Chapel at the kitchen ceiling painting stage for inspiration if you're feeling really ambitious!). It won't work for everyone, but I'd probably be lost ithout the program.
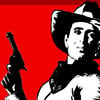
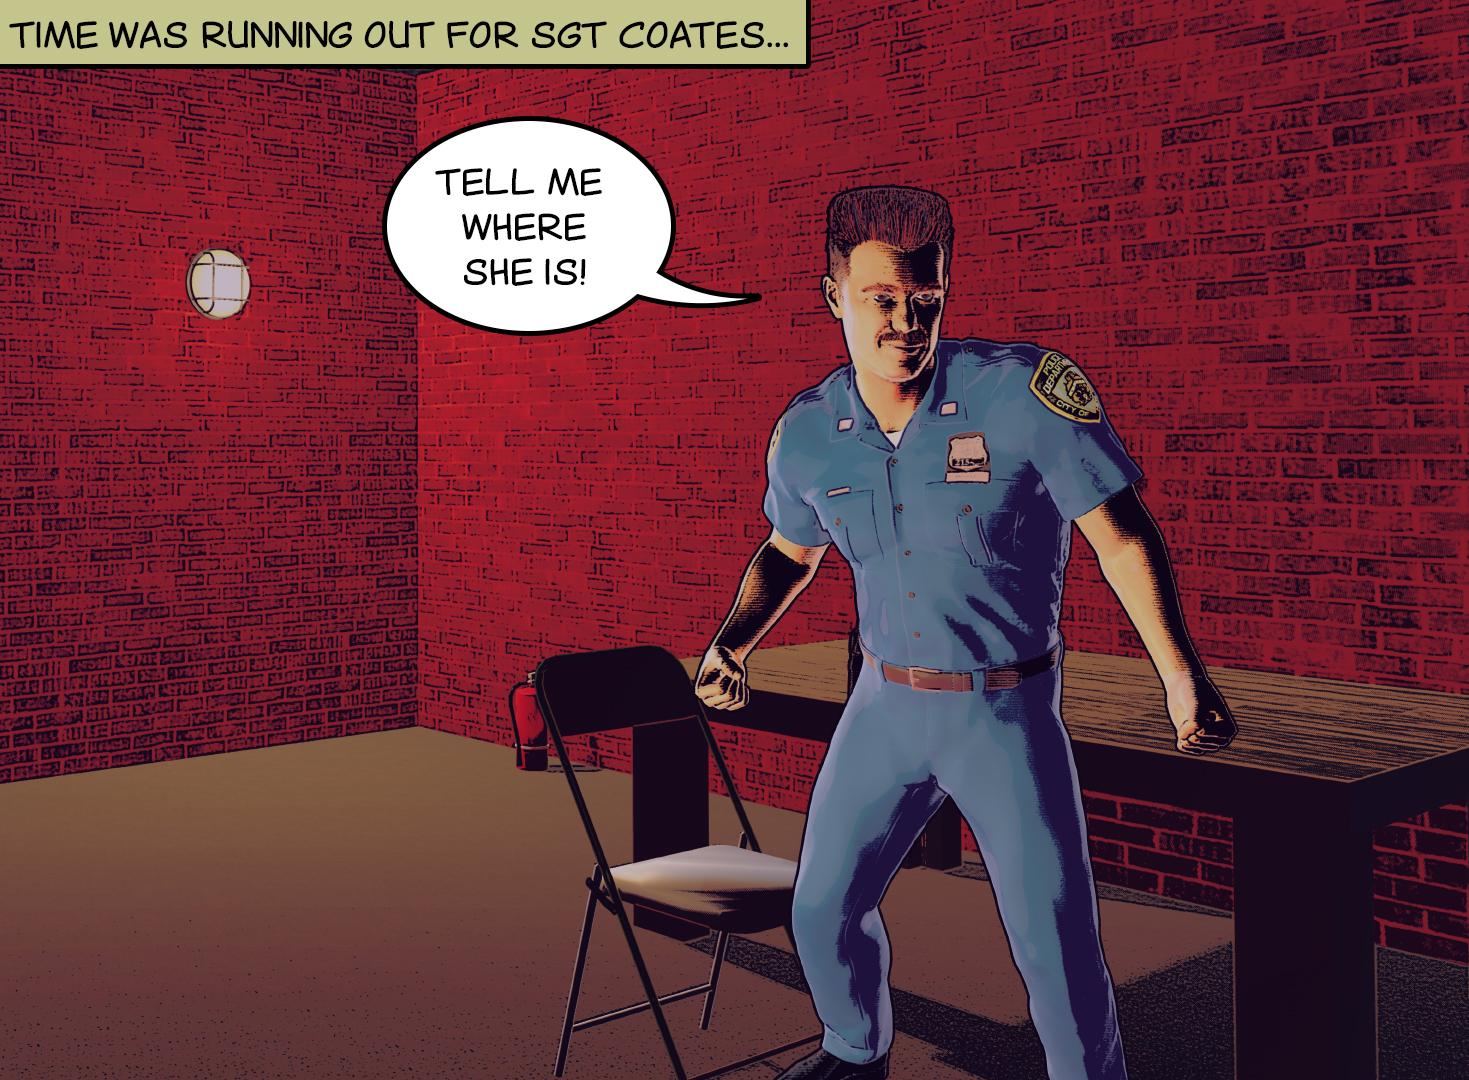
3D Comic Book Tips And PicturesI am still experimenting with different looks for my potential comic. One of my lead characters is a cop. What do you think to this character, along with a manipulated background I created in Google Sketchup.
It's not bad, but I would appreciate any feedback from others.
Thanks
Pete
This is a very good start to creating a comic-usable look. Before I dive into my super-obsessive nitpicking, let me emphasize that there is a LOT to like here. I think you’re onto something with this approach.
Let’s break this down into categories:
Colors & Shadows
- Your tones, in general, are consistent and pleasing.
- I really REALLY like the shading on his arms. Those straight lines coming off the deep shadows give it a sort of hatched/inked look.
- But this effect is not repeated on the clothes.
- His uniform color is a bit washed out, but it’s okay.
- The red is overdoing it. I would suggest toning it down a little (maybe a shade or two darker). Or go gray walls?
- The rooms seems very evenly lit. To enhance mood, make it darker on the right side of the panel.
Linework
- The line on top of his flattop haircut seems to be too thick and even. Consider breaking it up.
- You have very strong lines on the outside of his body and I like them a lot. But the lines don’t continue across him. I would suggest hand drawing an outline on his jawline; this will give the illustration a more uniform look.
Composition & Scene
- Move his word balloon to the other side of his face, so that our eyes flow from the caption mentioning Sgt. Coates to the cop and then to what he says. I’m pretty sure this would be more effective.
- There should not be a red fire extinguisher lying on the floor near the corner. The room should be bare of things a perp can pick up and use as a weapon.
- Conversely, maybe add some props to the table? Like a folder, clipboard, or something like that to give a little depth to the scene?
- Consider lowering the camera so that he looms up above us in the scene. This is an old movie trick to make people seem more menacing.
Wow. Looking at it all above, I seem to have gone off the deep end again with my nitpicking. Of course, the only reason I did this was because you inspired me. There is a LOT of good stuff here and I’m interested in seeing where you go with this approach.
Great feedback! Thanks for suggesting some really good points.
The camera angle would be very good. I added the speech bubble after I composited it and it just sort of went in this direction. You are absolutley right, changing it to a low angle would work for this type of shot.
I tried experimenting with shading and shadows on the background and I struggled with that one, due to the lack of geometry in the background. I'm still experimenting with this technique. (Do you think backgrounds should be simple or detailed?)
The colour of the background is pretty distracting. I'm going to simplify the brick pattern and go with a brownish/grey shade for the walls.
I like the comment about changing the position of the speech bubble in order to direct the viewer's eyes across the image.
I will experiment with this and see what effect it has when I try different colour schemes and angles.
I'm going to try and think about directing the viewer's eyes more into the image through creative composition.
I can see you have a couple of tutorials out there, I've taken a look and there's some good advice and techniques.
I might be adding to my comic book tutorial on Udemy with something about composition and engaging the reader. You seem quite knowledgable about this. If you are interested at some point in the future I would appreciate it if you could help out. I would obviously pay you for your contributions and give credit to your work for my students.
It's still an idea at this stage, but if you are interested I will start to develop it further.
Pete
Thanks for the response. When you get to the point of needing help, drop me a line!
As for backgrounds, I'm a fan of minimalism when it suits the story. By that, I mean starting off with a good image to set the scene (in other words, a god establishing shot to tell the reader where we are) and then cutting down on the backgrounds so that we can focus on the characters or lead props that actually move the story along. As long as it's not taken to an extreme I think that's a method that works for me.
When I complete a few more pages I'll post them along with some diccussion.
GENERAL FREEBIE REQUESTS part 3I am sitting now for almost 2 days to get a simple sewing pattern style envelope to be textured.
The only 1 that fits such an envelope is a model I got from Sketchup Warehouse. I followed a YouTube video tut on how to texture it. Front is working though but back is not picking up any textures.
I got permission from Guy91600 at Rendo to use his clothing on images. I want to use such envelopes in sewing shop renders, etc.
Are there any free envelopes I can use for such patterns?
Sample of mine attached.
I think that this bag will work. It does not have the traditional flap or the neat edges on it but it has some morphs and a template file included. It is here: https://www.renderosity.com/mod/freestuff/garden-black-soil-bags-and-splatter/62193. If you are working in DAZ Studio then you will need this handy script to get the morphs to work. https://www.daz3d.com/forums/discussion/222911/script-create-morphs-from-poser-pmd-files/p1. I have attached a jpg that shows the placement of my image on the template to get the image that you see in the sample. If I were going to want this to be more real I would use some deformers in DAZ Studio to straight out the top and bottom edges to make it more true to a pattern envelope. The original butterick pattern image was 1067 by 1688 pixels. I just put it on a layer on top of the template and scaled to size. Hope you can use it.
DollyGirl, thank you for this freebie link and idea. Looks quite nice to use.
GENERAL FREEBIE REQUESTS part 3I am sitting now for almost 2 days to get a simple sewing pattern style envelope to be textured.
The only 1 that fits such an envelope is a model I got from Sketchup Warehouse. I followed a YouTube video tut on how to texture it. Front is working though but back is not picking up any textures.
I got permission from Guy91600 at Rendo to use his clothing on images. I want to use such envelopes in sewing shop renders, etc.
Are there any free envelopes I can use for such patterns?
Sample of mine attached.
I think that this bag will work. It does not have the traditional flap or the neat edges on it but it has some morphs and a template file included. It is here: https://www.renderosity.com/mod/freestuff/garden-black-soil-bags-and-splatter/62193. If you are working in DAZ Studio then you will need this handy script to get the morphs to work. https://www.daz3d.com/forums/discussion/222911/script-create-morphs-from-poser-pmd-files/p1. I have attached a jpg that shows the placement of my image on the template to get the image that you see in the sample. If I were going to want this to be more real I would use some deformers in DAZ Studio to straight out the top and bottom edges to make it more true to a pattern envelope. The original butterick pattern image was 1067 by 1688 pixels. I just put it on a layer on top of the template and scaled to size. Hope you can use it.
How do you handle your workflow and files/folders?aah I was wondering about this myself.
I tend to have for a project :
Reference graphics (Pureref collections, Pinterest, photos, sketches, napkins, misted up windows...(don't laugh. I once designed an engine room layout on a misted up kitchen window))
Model Files (Heaxgon, Sketchup, Blender)
UVmapping Files (Obj etc)
test renders
texture maps (paint.bet, photos etc)
render files (daz, Keyshot, etc)
Notes
I've been looking for a simple program to help to organise this mess... thinking of you'd link your project files to 1 master file in this, then when you open said master, it'd have all your work ready to open in just a click or 2...
yeah, I'm dreaming...
3D Comic Book Tips And PicturesI am still experimenting with different looks for my potential comic. One of my lead characters is a cop. What do you think to this character, along with a manipulated background I created in Google Sketchup.
It's not bad, but I would appreciate any feedback from others.
Thanks
Pete
This is a very good start to creating a comic-usable look. Before I dive into my super-obsessive nitpicking, let me emphasize that there is a LOT to like here. I think you’re onto something with this approach.
Let’s break this down into categories:
Colors & Shadows
- Your tones, in general, are consistent and pleasing.
- I really REALLY like the shading on his arms. Those straight lines coming off the deep shadows give it a sort of hatched/inked look.
- But this effect is not repeated on the clothes.
- His uniform color is a bit washed out, but it’s okay.
- The red is overdoing it. I would suggest toning it down a little (maybe a shade or two darker). Or go gray walls?
- The rooms seems very evenly lit. To enhance mood, make it darker on the right side of the panel.
Linework
- The line on top of his flattop haircut seems to be too thick and even. Consider breaking it up.
- You have very strong lines on the outside of his body and I like them a lot. But the lines don’t continue across him. I would suggest hand drawing an outline on his jawline; this will give the illustration a more uniform look.
Composition & Scene
- Move his word balloon to the other side of his face, so that our eyes flow from the caption mentioning Sgt. Coates to the cop and then to what he says. I’m pretty sure this would be more effective.
- There should not be a red fire extinguisher lying on the floor near the corner. The room should be bare of things a perp can pick up and use as a weapon.
- Conversely, maybe add some props to the table? Like a folder, clipboard, or something like that to give a little depth to the scene?
- Consider lowering the camera so that he looms up above us in the scene. This is an old movie trick to make people seem more menacing.
Wow. Looking at it all above, I seem to have gone off the deep end again with my nitpicking. Of course, the only reason I did this was because you inspired me. There is a LOT of good stuff here and I’m interested in seeing where you go with this approach.
Great feedback! Thanks for suggesting some really good points.
The camera angle would be very good. I added the speech bubble after I composited it and it just sort of went in this direction. You are absolutley right, changing it to a low angle would work for this type of shot.
I tried experimenting with shading and shadows on the background and I struggled with that one, due to the lack of geometry in the background. I'm still experimenting with this technique. (Do you think backgrounds should be simple or detailed?)
The colour of the background is pretty distracting. I'm going to simplify the brick pattern and go with a brownish/grey shade for the walls.
I like the comment about changing the position of the speech bubble in order to direct the viewer's eyes across the image.
I will experiment with this and see what effect it has when I try different colour schemes and angles.
I'm going to try and think about directing the viewer's eyes more into the image through creative composition.
I can see you have a couple of tutorials out there, I've taken a look and there's some good advice and techniques.
I might be adding to my comic book tutorial on Udemy with something about composition and engaging the reader. You seem quite knowledgable about this. If you are interested at some point in the future I would appreciate it if you could help out. I would obviously pay you for your contributions and give credit to your work for my students.
It's still an idea at this stage, but if you are interested I will start to develop it further.
Pete
3D Comic Book Tips And PicturesI am still experimenting with different looks for my potential comic. One of my lead characters is a cop. What do you think to this character, along with a manipulated background I created in Google Sketchup.
It's not bad, but I would appreciate any feedback from others.
Thanks
Pete
This is a very good start to creating a comic-usable look. Before I dive into my super-obsessive nitpicking, let me emphasize that there is a LOT to like here. I think you’re onto something with this approach.
Let’s break this down into categories:
Colors & Shadows
- Your tones, in general, are consistent and pleasing.
- I really REALLY like the shading on his arms. Those straight lines coming off the deep shadows give it a sort of hatched/inked look.
- But this effect is not repeated on the clothes.
- His uniform color is a bit washed out, but it’s okay.
- The red is overdoing it. I would suggest toning it down a little (maybe a shade or two darker). Or go gray walls?
- The rooms seems very evenly lit. To enhance mood, make it darker on the right side of the panel.
Linework
- The line on top of his flattop haircut seems to be too thick and even. Consider breaking it up.
- You have very strong lines on the outside of his body and I like them a lot. But the lines don’t continue across him. I would suggest hand drawing an outline on his jawline; this will give the illustration a more uniform look.
Composition & Scene
- Move his word balloon to the other side of his face, so that our eyes flow from the caption mentioning Sgt. Coates to the cop and then to what he says. I’m pretty sure this would be more effective.
- There should not be a red fire extinguisher lying on the floor near the corner. The room should be bare of things a perp can pick up and use as a weapon.
- Conversely, maybe add some props to the table? Like a folder, clipboard, or something like that to give a little depth to the scene?
- Consider lowering the camera so that he looms up above us in the scene. This is an old movie trick to make people seem more menacing.
Wow. Looking at it all above, I seem to have gone off the deep end again with my nitpicking. Of course, the only reason I did this was because you inspired me. There is a LOT of good stuff here and I’m interested in seeing where you go with this approach.
3D Comic Book Tips And PicturesI am still experimenting with different looks for my potential comic. One of my lead characters is a cop. What do you think to this character, along with a manipulated background I created in Google Sketchup.
It's not bad, but I would appreciate any feedback from others.
Thanks
Pete
GENERAL FREEBIE REQUESTS part 3I am sitting now for almost 2 days to get a simple sewing pattern style envelope to be textured.
The only 1 that fits such an envelope is a model I got from Sketchup Warehouse. I followed a YouTube video tut on how to texture it. Front is working though but back is not picking up any textures.
I got permission from Guy91600 at Rendo to use his clothing on images. I want to use such envelopes in sewing shop renders, etc.
Are there any free envelopes I can use for such patterns?
Sample of mine attached.
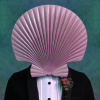
Try making 3D sewing pattern envelopes to offer later as freebies, hopefullyRecently an idea came up to create a 3D shop selling sewing stuff. Then I was thinking also of get free models such as sewing pattern envelopes. I could not find any and search for an envelope that will fit in. I found a model at Sketchup Warehouse that fits more or less a sewing pattern envelope. But then, how to get it textured was another question.
I got a link on YouTube to add one's own textures on Sketchup models, in this case how to add texture to bag of crisps. I followed it (with extra help from forums) and the result is as the image attached. It was not easy for a beginner with limited knowledge of the software too! Guy91600 from Renderosity gave me permission to use his free clothing sets on my images.
I still have to do the back part of the envelope. Tested and rendered in Bryce. I have used an .obj but how do I save it for use in Bryce when offered it to Brycers? Do I just save it directly as .obp? I have never done this before.
If I have success and people will be interested, I will make more different envelopes to share as freebies.
Laura
What inspired you to start purchasing 3D content?In 2017, I wanted to do an ambitious graphic novel of around 800 panels, and knew my drawing skills were not good enough for what I wanted to do. I reckoned I could "cheat" by using Sketchup for the backgrounds, and just worry about the figures. Then I wondered if there was a program that was like a digital version of a posable artist's mannequin. I figured there must be, but when I got hits for stuff like Daz et. al. I was completely blown away. I had no idea at all that there was consumer-level CGI available!
Gen 3 was out, but I figured I'd go for the best and get the latest and greatest: V4! I mean, it was Gen 4, so it had to be better, right? Thus, my first purchase was the V4 starter bundle, for which I paid full price ($50). At that point, I my plan was to copy and trace so that my final product would be a traditional drawing, but I soon realized that I should just do it all in Daz and skip the drawing part.
I'm up to around 600 panels now and the book starts with M4/V4 in 3DL and is now using G8 with Iray. It worked out because the story is chronological, and the stuff in the distant past is more dreamlike, and as the reader moves through time, things become more and more photoreal. At least I hope it worked out!
Daz 3D is part of

Connect
DAZ Productions, Inc.
7533 S Center View Ct #4664
West Jordan, UT 84084Licensing Agreement | Terms of Service | Privacy Policy | EULA
© 2026 Daz Productions Inc. All Rights Reserved.