-
Long load time for G8F -- Stumped on log file
Basically DS has found a badly done alias file (or three), and it's caused the program to crap itself, had a hissy fit and sat in the corner for 4 minutes while it pulled itself together again.
Problem is that it doesn't tell you which alias files are bad, so finding them is likely to be a royal pain, especially if it's just started happening and you've just batch installed a bunch of content. Only good news is they are alias files, basically a dummy slider on a bone, majority of them are totally worthless and a waste of drive space, so deleting the broken ones wont cause you any issues, especially as they are broken and not working to begin with.
You also have morphs being loaded that shouldn't be, the eyelash morphs are the only ones that should be preloaded, the character Erevan Airy is a known issue, but I thought that it had been fixed.
Richard, even if you have every G8F morph and character in the store, and assuming there are no errors messages, then 30 to 40 seconds is what I would expect a load time to be. I have a couple of thousand asset files in G8F's Morphs folder, those that come with her, Vicky 8 and Monique 8 (minus the correctives I don't have the products for), whole bunch of freebies, manually converted morphs from other figures, and a bunch of my own custom morphs.
Log file is clean, so G8F's load time is 5.9 seconds, and that's on a 2.9 Ghz i5, DS is on an SSD but the content is on an external HDD that's USB 2.0.Dial Control for Genesis to Genesis 8 (Commercial)
No collection. Reason for that is because inter machine changes aren't the norm. We will explore the option though. Could be useful for something down the line.WIll it have an ability to collect files as well as list them, so if I wanted to transfer some of my favorite hand-dialed characters to a new machine, I wouldn't have to transfer all the original morph packs?
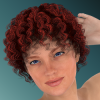
Novica & Forum Members Tips & Product Reviews Pt 13Alexandra and Leisa are interesting. I really like Leisa's materials! Now I have a confession- I was surprised to see materials impact the facial features so much in that they look like morphs to me. Or what I consider morphs. I always thought of the materials as the "skin covering" on top the mesh, and the morphs as the mesh. Two separate things. The eye wrinkles using Alexandra materials are so deep compared to Leisa's materials, those would have been a morph to me, aka part of the mesh. The wrinkles aren't just drawn in, they catch light and make shadows, right? I don't model or do materials, so I haven't a clue.
Am I making sense?
Yes.
I'd look, but I'm rendering right now. I suspect the difference is in the normal maps, which will fake the displacement so they "catch light and make shadows" but if you could look at it from an angle, the mesh would be smooth, wrinkle free.
I actually remember why I bought Dwayne. He's required for Brandon, who I do like. When I put items in the cart I want, and the price is close to or more than the bundle, I go for the bundle. And I wanted the Variety Facial Hair from RedzStudio. I've since kitbashed from a couple of the wardrobe items. It wasn't a bad value overall, even without wanting Dwayne per se.
Novica & Forum Members Tips & Product Reviews Pt 13Alexandra and Leisa are interesting. I really like Leisa's materials! Now I have a confession- I was surprised to see materials impact the facial features so much in that they look like morphs to me. Or what I consider morphs. I always thought of the materials as the "skin covering" on top the mesh, and the morphs as the mesh. Two separate things. The eye wrinkles using Alexandra materials are so deep compared to Leisa's materials, those would have been a morph to me, aka part of the mesh. The wrinkles aren't just drawn in, they catch light and make shadows, right? I don't model or do materials, so I haven't a clue.
Am I making sense?
It's probably Alexandra's normal maps that make her crows feet look so deep. I bet if you put her normals on Leisa it would look the same.
Novica & Forum Members Tips & Product Reviews Pt 13Alexandra and Leisa are interesting. I really like Leisa's materials! Now I have a confession- I was surprised to see materials impact the facial features so much in that they look like morphs to me. Or what I consider morphs. I always thought of the materials as the "skin covering" on top the mesh, and the morphs as the mesh. Two separate things. The eye wrinkles using Alexandra materials are so deep compared to Leisa's materials, those would have been a morph to me, aka part of the mesh. The wrinkles aren't just drawn in, they catch light and make shadows, right? I don't model or do materials, so I haven't a clue.
Am I making sense?
Dial Control for Genesis to Genesis 8 (Commercial)WIll it have an ability to collect files as well as list them, so if I wanted to transfer some of my favorite hand-dialed characters to a new machine, I wouldn't have to transfer all the original morph packs?
[Released] Oso Blendy Two Layer Shader for IrayHey Oso3D,
okay, see your points.
But what do you think of making a new product with the focus of skin blending?
First some background informations:
For skin blending I worked first with Geoshells. These have one big disadvantage, because of translucency. Many skins have translucency settings which make them appear much darker when used on a geoshell.
After that I developed a nodejs script which merges two skin maps (with a opacitymap) to one. That works great, but has the disadvantages that with skins shares one shader setting. Also not great, but better than using geoshells.
For skin blending it would be very very very usefull to have a solution which allows me to use 100% of the original skin shader settings, without having the darkening effekt.
The idea is, for the scripting part, you could ask an other PA like @RiverSoftArt or Meipe (https://www.daz3d.com/meipe). Meipe is primary active on an other store and doing Geocrafts and did a lot of scripts which copies skin settings to the Geocraft.
You could do a handfull of different skin blending shaders with all the most common settings for skins from different PAs.
For the script you would select two figures (source and target). The script would applay to the target figure the matching skin blending shader and copies all the settings from the source figure.
About different UV maps. I was afraid of this. A work around is that we can transfer the UV maps of the target figure manually with the map transfer tool the the matching uv map. Sadly, that can not be part of the script at the moment, because DAZ doesn't offer a script API of the map transfer tool yet :/
What do you think? Does this sounds good for you?Genesis 8 on Hexagon and viceversaAs long as you do not make any real changes, just move the geometry around ... then you can send it back over the bridge to D/S and make a morph. If you like the morph, save the morph.
Celebrity Look-a-Likes for 3D figures Part 2Maybe already asked, and maybe already answered... But has anyone seen a a morph of Dawn Wells (aka "Mary Ann" of Gilligan's Island)?
If not, what the heck are you all waiting for!
G
Search for Maryann over at Rendo. addy has a character Maryann that is almost the spitting image of Dawn Wells, circa 1965, young sweet and georgeous. Now if I could just find a 60's era Tina Louise and a 60's era Bob Denver for a stranded raft scene.
Some success with Face TransferI haven't had much luck to date with this utility, mostly because of textures and matching them. Gave it another bash this morning.
Got a big image to work with which unfortunatly was b&w so I had to colourise it a bit for a starting point. Genetared a FT face map, overlayered it with an existing map to try to match up the colouring of the torso (the hard bit).
Generated a normal map for the face. Put them all together and played a lot with the images and settings. Got an acceptable result (at last).

 Novica & Forum Members Tips & Product Reviews Pt 13
@L'Adair, I'm rendering my Edie/Mabel HD images with 50% of each HD morph. Maybe that is not the right way to do it. I'm still working on my renders. I got sidelined by strange appearance of the teeth when applying the HD morphs. I was not aware that morphs could change the appearance of the textures, but I have double, triple quadruple checked, and I cannot find an error in the scenes. Could it be that the HD morphs make the teeth thinner or something, making the light affect them differently?
I thought about mixing the HD, but decided against it. I also rendered each with 50% of the HD, but didn't see much difference between that and the 100% versions. Maybe SubD 4 wasn't enough.
I've never noticed an issue with teeth. I've got the Leroy/Dain scene open, so I'll take a closer look…
I did notice that rendering with 50% HD for each of Mabel and Edie actually seems to REDUCE the detail of Mabel. I think maybe the Edie 8 HD is counteracting some of the shaping of Mabel. I have looked looked to see if I am doing something wrong, and I can't see anything. This exercise has opened my eyes to strangeness I wasn't aware of before. I'm almost done with my renders. I'll post them soon.
I tested numerous combinations with Dain 8, changing SubD, adding Dain's HD, switching to Leroy's HD, and so on. I saw no difference in the teeth at all. I did notice the teeth had relatively deep ridges. So I checked the materials and found the bump was set to 2.0. That is probably fine for distant shots, keeping the surface from looking too polished. But it's a bit much for closeup.
It could be because the two I chose are fairly "normal" guys. Edie and Ollie are both more extreme shape morphs. Perhaps that's why you're seeing this issue with the teeth.
Who said Blender was hard?
How does you workaround Provide for lipsync and facial performance???So I’ve been playing around with Blender and I bought Auto Rig Pro. It actually does a really good job of rigging a high-resolution (subdivision 1 or 2 if your feeling gutsy) obj export from Daz.
Rigging the eyes (at least on G8) is a little tricky. I ended up seperating each eye into its own object, setting the origin to center of mass (surface) and then tracking it to the appropriate eye IK bone thing. Expressions are much harder to do here, but one thing that you can do is export the ones you know you’ll want to use from Daz as separate OBJ's and then use blend-shapes to animate facial expressions.
I like this becaue Blender gives me a lot more control over animation and a lot more ability to have things like references in the viewer. I may even purchase the X Muscle System add-on and start playing around with muscle deformation and fat jiggling.
EDIT: I forgot to mention that it's a neat alternative to Dforce, too. Since your character exists in the A-pose (or T-pose for earlier generations) you can basically just export clothes from Daz and then use the cloth simulation to drape them on your character. If you do your posing on frame 12 or so, you’ll get pretty nice results.
Might I ask how you're getting the cloth simulation to work a little more? This has been the only thing I can't get to work in Blender. I have a kimono on a character and I have her arm raised, but every time I try the cloth sim, it either explodes or falls off. I've figured out the pinning thing to keep it from falling off, but now it just inflates or fully explodes and I don't know what's going on. I know without seeing my settings it's hard to guesstimate what's going on with me, but what's your process for getting it to work if you don't mind me asking?
Is that kimono a bought product or something you have made yourself?
I have seen objects falling off, or disappear into the body, but I don't recall any explossions.
The Kimono is actually this one:
https://www.daz3d.com/dforce-kimono-outfit-for-genesis-8-females
I'm going to delve into learning how to make my own clothes here during this quarantine just to learn something new. Yeah, most times they don't fall off for me, but when I use the kimono, it's on the floor in 20 frames lol.
I try the cloth sim, it either explodes or falls off. I've figured out the pinning thing to keep it from falling off, but now it just inflates or fully explodes and I don't know what's going on. I know without seeing my settings it's hard to guesstimate what's going on with me, but what's your process for getting it to work if you don't mind me asking?
- Make sure your character is scaled correctly, or the settings will not work reliably.
- In all your objects, got to the Viewport Overlays in the upper right of the 3d viewport, and turn on Face Orientation. The outside of objects should be blue, not red. If you see red, your normals are flipped. But from your description, you seem to be OK.
- In the physics tab for the kimono object, select a cloth preset to get reasonable physical values.
- The default collision distances are way to high. Under object collisions, set the Distance to 0 and let Blender bump it up to the minimum value. Disable Self Collisions for now (but when you get the sim sorta kinda working and want to enable it, set its Distance to 0 as well).
- Got to your character object's Physics tab, and set it as Collision. Under Softbody and Cloth, set both the Thickness Outer and Inner to zero, and let Blender set them to the minimum value. The effective distance is the sume of the cloth's distance and either the inner or outer distance of the collision object.
- Hit the space bar to see the sim. Adjust the Collision's Quality parameter upwards if there's still penetration due to fast movements, etc. If the Kimono gets stuck in any object, try selecting Single Sided on that object's collider.
- If it explodes, try changing the Damping parameter on the cloth object as well as the collision objects.
Good luck!
@TheMysteryIsThePoint, many, many thank you's! This looks to be exactly what I was looking for :) Also, I signed up for Quixel and have been loving the textures there, you pointed me in their direction a month ago or so, just wanted to say thank you for that tip as well!
For modeling your own clothes, in my opinion there are only a few reasons to do it:
1. You want something really unique and can't find it anywhere so you decide to do it yourself.
2. You want to eventually become a PA so you want to learn how to do it
3. You enjoy modeling and/or making everything yourself
I don't think it is worth modeling your own clothes just to not buy them. Even for people that are very proficient and making them (the PAs that sell them), for the clothes to be worth their time, they have to sell them to a lot of people. I don't think the time creating a good item of clothing is worth it if it's just for one person.
For example and to show I speak from experience I attached a screenshot of a dress I made when I had just started out with Daz and decided I'll make almost everything myself (At that point I even wanted to make the hair). I have not really finished the dress. This is just modeled and moved to Daz. There I autofitted it with the transfer utility to G8 and that's it. It has no corrective morphs (other from the autofit ones) nor weight maps, rigging or anything. I just applied smoothing modifier on it and dForce and than used the Fit control to correct a minor pokethrough on the left hip and one on the breast area. I have also just made this dress when I modeled it purely from imagination with no design in mind.
I'm actually going to have to change the scale I work at in Blender - it's fine for modelling but running any cloth-sims / rigid-body sims is much easier if you're working at the right scale within Blender.
I actually never scale anything when importing into Blender. I use the huge scale that Daz has and almost always have to adjust my view to be able to see more than the original 1000m. It's a little annoying at first that you have to scale everything else in Blender to that size but I got used to it. The huge scale also helps with simulations.
Oh no, I'm not going to delve into it so I don't have to buy anything anymore, it's so worth it to just pay the 10, 15 bucks or whatever for an item here in the store. But I figure with all the extra free time right now, I should learn something I don't understand at all and maybe I'll learn something I didn't know before that could help in something else as I'm seeing so many things are tied together.
I find Many advantages to modeling my own content.
Particularly if one needs more than just another tight mini-dress (As in Alex86's example),for the G8 females
I work in the MALE oriented sci fi genre.where I need future tech ,armors weapons etc as well as Sci-Fi environments.
I am also an animated film maker who not only needs purpose built content for my narratives
But will also need that content OPTIMIZED to be both animated and rendered in realtime environments( like EEVEE,Iclone) where 4K textures are not the best approach for animation.
Also the ability to support the older Genesis models with custom content is a huge advantage as the The G3/8 models present certain well documented challenges with external Character animation system such as Mixamo.
The older G1/G2 models have far less problems in this regard IMHO and based on my experience making a 93 minute feature length, animated film with Daz content&figures.
The attached image is a conforming Sci fi armor for the G2 male created in Blender 2.82
very low poly with blender procedural materials ,and converted to an Iclone realtime avatar for animation and Alembic export to Blender for EEVEE rendering
This is my advantage.Oh! I figured out a Mixamo workaround for G8 last week! So you have to download the DAE and open that in Blender. Scale it up to however you want. Then export that as a BVH. Then bring in your Daz character and use the Diffeomorphic BVH tool and it works perfectly. I've been using Mixamo stuff all week, and you can change any part of the animation you want through the keyframes in the animation tab. This also works for G3 as one of the characters I used in a shot was Mei Lin 7, so it works for both G3/G8!
I need my characters Speaking like so [Released] Character Converter from Genesis 2 Male to Genesis 8 Male [Commercial]
How about a Crossgender morph transfer set?
Sickleyield and I did one for G8: https://www.daz3d.com/rssy-cross-gender-clothes-genesis-8
That's for clothes, not morphs.
Doh! You are right. I don't think the cross-gender morphs would come out very good.
Novica & Forum Members Tips & Product Reviews Pt 13@L'Adair, I'm rendering my Edie/Mabel HD images with 50% of each HD morph. Maybe that is not the right way to do it. I'm still working on my renders. I got sidelined by strange appearance of the teeth when applying the HD morphs. I was not aware that morphs could change the appearance of the textures, but I have double, triple quadruple checked, and I cannot find an error in the scenes. Could it be that the HD morphs make the teeth thinner or something, making the light affect them differently?
I thought about mixing the HD, but decided against it. I also rendered each with 50% of the HD, but didn't see much difference between that and the 100% versions. Maybe SubD 4 wasn't enough.
I've never noticed an issue with teeth. I've got the Leroy/Dain scene open, so I'll take a closer look…
I did notice that rendering with 50% HD for each of Mabel and Edie actually seems to REDUCE the detail of Mabel. I think maybe the Edie 8 HD is counteracting some of the shaping of Mabel. I have looked looked to see if I am doing something wrong, and I can't see anything. This exercise has opened my eyes to strangeness I wasn't aware of before. I'm almost done with my renders. I'll post them soon.
[Released] Character Converter from Genesis 2 Male to Genesis 8 Male [Commercial]How about a Crossgender morph transfer set?
Sickleyield and I did one for G8: https://www.daz3d.com/rssy-cross-gender-clothes-genesis-8
That's for clothes, not morphs.
How to remove unwanted morphsSorry but I have a follow up on this. I saved a custom morph and for some inexplicable reason, well, inexplicable to me at least, if I remove or delete the one I made I'll get errors about it with entirely different characters. But if it's installed, I believe it's one of the many "duplicate formulas" that errors that I absolutely need to fix. So the question being, why is Daz referencing a file that I made that isn’t even being used in a new scene or with any random character?
Novica & Forum Members Tips & Product Reviews Pt 13@L'Adair, I'm rendering my Edie/Mabel HD images with 50% of each HD morph. Maybe that is not the right way to do it. I'm still working on my renders. I got sidelined by strange appearance of the teeth when applying the HD morphs. I was not aware that morphs could change the appearance of the textures, but I have double, triple quadruple checked, and I cannot find an error in the scenes. Could it be that the HD morphs make the teeth thinner or something, making the light affect them differently?
I thought about mixing the HD, but decided against it. I also rendered each with 50% of the HD, but didn't see much difference between that and the 100% versions. Maybe SubD 4 wasn't enough.
I've never noticed an issue with teeth. I've got the Leroy/Dain scene open, so I'll take a closer look…
Novica & Forum Members Tips & Product Reviews Pt 13@L'Adair, I'm rendering my Edie/Mabel HD images with 50% of each HD morph. Maybe that is not the right way to do it. I'm still working on my renders. I got sidelined by strange appearance of the teeth when applying the HD morphs. I was not aware that morphs could change the appearance of the textures, but I have double, triple quadruple checked, and I cannot find an error in the scenes. Could it be that the HD morphs make the teeth thinner or something, making the light affect them differently?
Four arms for genesisI would like four arms morph. Daz used to have one for genesis but discontinued it. Anyone make one for G8M or G8F? Or G3 characters?
Ear morph questionsThanks for the reply nemisis10 but I do have that morph package and it still doesn't allow me to move the ears up or down on the side of the head or have them closer to the head or sticking out. It basically just allows me to morph the ears into fantasy shapes
Daz 3D is part of

Connect
DAZ Productions, Inc.
7533 S Center View Ct #4664
West Jordan, UT 84084Licensing Agreement | Terms of Service | Privacy Policy | EULA
© 2026 Daz Productions Inc. All Rights Reserved.