-
Daz3d to Blender WorkflowBut his blender is the older version which is annoying since the UI has changed quite a bit.
(oh hey! you're the asymmetric face morph guy! thanks for that!)
I've been playing with the skin shader in blended and got my model to something I'm for now satisfied with. However there are really jagged shadows on her forehead and chin, am not sure how to resolve these. She has already been shaded smooth. Does she need subd surfacing?You absolutely MUST apply some sort of subd to imported Daz models. From the size of your jaggies, it looks like you exported at base resolution. But its an area of confusion because of the poorly names "base resolution"... this leads people to think that it's a lower resolution version of the model. It isn't. All character models in Daz Studio, as far as I know, are meant to be subdivided, if just at level 0. So what Daz provides you is not a base resolution model, but a subd cage intended to be subdivided. The thing is, the subd cage does not necessarily represent the artist's vision of the model and it's not supposed to. It's there so that the subdivided model does.
After adding a subsurface modifier, you might try toggling Normal Smoothing for the character object, on the vertices tab in the properties window on the lower right, under Normals. OBJs that come in from Daz Studio come in with the normals flipped. You should go into Edit Mode on your object by hitting tab, and select all your verts by hitting a. Select Mesh from the menu in the upper left, then Normals, and then Set From Faces. Then clear the selection with alt-a, and exit Edit Mode by hitting tab again. This operation may have changed you normal smoothing option, so you might need to toggle it again. I'm not sure why, but sometimes I had to even do a Reset Vectors as well.
Tray all that :)
EuropApt Lamp without StructureI am not sure, if I am answering your question, but each light has an on and off morph inside the parameters tab. You can control the light that way. I have used both the kitchen and the above lamp in other products to light rooms that have poor lighting. Let me know if this helps.
Na'vi like character (Avatar) Any help?Closest one I know of is The Navarian and Navarian Hair from DarioFish at Renderosity and it's for the original Genesis not Genesis 8. SickleYield has a tutorial on how to transfer morphs from one figure to another. Riversoft has hair converter programs as well for Genesis to Genesis 8 Male/Female that work great as well.
Moving DAZ Content off of C: Drive in 2020This post was originally a question I had about finishing this process halfway through, and I was able to successfully get it done... So I thought I'd change this to lay out the exact steps I used for anyone else who might be looking to do this.
If you already have your Content on a new drive, you can scroll down to the Red Headings and skip straight to Pointing DIM and Daz to your new Content Folder.
Otherwise...
These are the steps to follow in the case that you're a Windows 10 user, don't use Daz Connect and have DIM set to Delete Downloads after Install.
Copying My DAZ 3D Library to a new Drive
There's really one folder that you need to worry about moving for sure, it's C:\Users\Public\Documents\My DAZ 3D Library. This is where your Daz Store bought (and 3rd party Manual Installs if you've done that to the default Data, People and Textures Folders) Content all resides.
I'll mention now, that when accessing this folder in any way using Windows Explorer interfaces of any kind, the above mentioned path is probably:
C:\Users\Public\Public Documents\My DAZ 3D Library
Some of the directions below require the actual physical path which is:
C:\Users\Public\Documents\My DAZ 3D Library.
Just keep this in mind when you have to browse to it in Windows Explorer.
I read when looking into this to use robocopy (which is a native feature in Windows 10) to copy your My DAZ 3D Library folder to another Drive, because it allows you to be sure ALL files are copied, where Windows Explorer is notorious for trying to decide what Hidden Files, or Files it thinks should be Hidden, or empty Folders might not be copied. I don't know for sure that it's absolutely necessary, but it worked perfectly for me.
1. At your Desktop, on the keyboard hit: "Windows Key + R" (R only capitalized so it's easy to see here)
2. In the little interface that opens, type: cmd then hit Enter or the [OK] Button
This opens your Command Prompt where you can feel like a computer enthusiast from the late 20th Century...
3. Here's the string you'll want to input:
robocopy "C:\Users\Public\Documents\My DAZ 3D Library" "D:\My DAZ 3D Library" /xo /e /v /a-:h
The above example can be copied and then pasted into the Command Prompt, assuming you're ok with the new location being D:\My DAZ 3D Library. If you want a different location on your D: Drive or another Drive, E:, G:, etc, just replace the D:\My DAZ 3D Library with your desired path, keeping in mind that the folder at the end of your Path MUST be My DAZ 3D Library. For example, I used G:\DAZ Transfer\My DAZ 3D Library.
If you do want to change that path, it may be easiest to create a new Text Document by right clicking on the Desktop, and pasting the robocopy string you copied from above into the Text Document, make your changes there, then copy the string again from your Text Document and paste that into your Command Prompt (this is because in the Command Prompt you can't edit the middle of a string, you have to backspace to where you want to make a change and re-type everything from there... easier to make changes in the Text Document and Copy/Paste into the Command Prompt, especially in case you were to make a mistake and need to fix it and try again).
You do not have to physically create the new destination My DAZ 3D Library Folder (or Folder Structure) on your D: or whatever Drive you choose before running the robocoy string. Whatever path is in the second set of quotes in the robocopy string will automatically be created when you run the string if it doesn't already exist. Alternatively, you can physically create the new Folder (or Folder Structure) on the new Drive before running the string, as long as you correctly put that path into the second set of quotes in your robocopy string. It might be best to do the first option, let the robocopy string create the new Folder(s), so that you don't inadvertantly end up with something like: D:\ ... \My DAZ 3D Library\My DAZ 3D Library.
4. Whether using the new location in the example robocopy string above or an altered string for a different new location, once you've pasted it into the Command Prompt, hit Enter.
Depending on the size of your Library, it may take a while to copy all that DAZ goodness. Consider watching a handful of episodes of something on Netflix or spending some time with your family.
Once it finishes, DO NOT erase that original C:\...\My Daz 3D Library yet... Keep it around until you've successfully finished the process and confirmed that everything is working with your new location after a few more steps.
Pointing DIM to your shiny new DAZ 3D My Library folder
1. Open DAZ Install Manager
2. Click the Settings Cog in the upper right corner of the window, and in the Dropdown Menu choose Advanced Settings...
3. There are 4 Tabs, choose the one labelled Installation.
4. In the bottom area of the window, there's a field with two column headers, Label and Path. In the field below them there should be one entry, your current default My DAZ 3D Library.
Right click in the open area of that field underneath the entry that's already there, and choose the one option, Add Content Path Shortcut...
5. In the window that opens, there are two fields to fill in...
Label : - This can be anything you want, it's probably for people who set up multiple paths to distinguish them from each other.
Path : - Click the Button [...] at the right end of this field to open a Windows Explorer style interface and browse to your NEW My DAZ 3D Library folder, wherever you ended up putting it.
In this Win Explorer Interface, you want to have your new My DAZ 3D Library folder highlighted either in the hierarchy (Left Column), or in the Right Browsing area, then click the [Select Folder] button at the bottom of the interface.
6. You're back at the Installation Tab now. Directly above the field you just added the Shortcut to, there's a Bar labelled Content Path Shortcuts:
Click that Bar and select the New Shortcut you just made in the last step.
7. Click the green [Accept] button.
At this point, you're set up to have DIM installations go to your new My DAZ 3D Library location. Yay!!
You could go back into the Settings Gog, Installation Tab, and in the bottom field headed Label: and Path:, you could Right Click on the original Default Shortcut (it's not there for me now to confirm exactly what it was called) and choose Remove, but it also doesn't matter if it sits there for the rest of time, so you should wait until you've completely finished the rest of the process and confirmed everything is working before removing it if that's your intent.
Confirm that DIM is set up to Install to your new My DAZ 3D Library folder
If there's anything sitting in the Ready to Download tab under Products (not Product Updates) in your DIM, it is an easy chance to test your work so far and confirm that a new Installation goes to your new My DAZ 3D Library.
1. Use DIM to install something that currently is not. Hopefully if you"re going through this process there's a good chance there's something you've un-installed or never installed because of it's size for you to use. If so, go ahead and Install it.
2. Maybe you're familiar with browsing your Content using the Content Library Tab in Daz, or going to actual Texture folder locations to do some editing, or installing things manually from Renderosity or Freebie sites... If so, use your knowledge to browse in Windows Explorer to your new My DAZ 3D Library, and search in any way you can for the product you just installed. Worst case scenario, while browsed to your new My DAZ 3D Library folder, you could use the Search feature to look for the product by name.
Hopefully you'll find it's been installed there... You can also browse to the same location in your original C:\Users\Public\Public Documents\My DAZ 3D Library and confirm that the newly installed product IS NOT there as well.
If both of the above are true, there's not much left to do!
Pointing DAZ to your shiny new DAZ 3D My Library folder
1. Open Daz Studio
2. Go to your Content Library Tab
If somehow it's not docked somewhere or something that you don't use regularly, in the Main Menu Bar select:
> Window > Panes (Tabs) > Content Library
3. In the Content Library Tab's Left Column / Folder Hierarchy (it can be easiest to look at if you collapse everything as far as possible by clicking any "Down-Pointing Arrows" so that they point to the Right), you're looking for 2 Folders:
> DAZ Studio Formats
> Poser Formats
4. Start by Right Clicking on > DAZ Studio Formats and selecting Add a Base Directory...
5. No matter where the Windows Explorer style interface that opens is currently pointing to, use it to browse to your new My DAZ 3D Library folder. This is the same as when we did it in DIM, you want your new My DAZ 3D Library folder to be highlighted either in the Left Column Folder Structure or in the right side browsing area, and hit the [Select Folder] button at the bottom of the interface.
6. Click the Right Pointing Arrow next to > DAZ Studio Formats to expand it, and you should now see 3 folders under it:
> My Library
> My DAZ 3D Library
> My DAZ 3D Library
The bottom > My DAZ 3D Library is the one you just added. You can confirm this if you like by right clicking on it and choosing Browse to Folder Location...
7. Right Click the MIDDLE (first of the two) > My DAZ 3D Library and select Remove Base Directory.
ALMOST DONE!!!
8. Now repeat the same exact process starting from Step 4 just above, this time Right Clicking on > Poser Formats (instead of > DAZ Studio Formats) selecting Add a Runtime Directory..., etc. Finish the rest of the Steps exactly the same way, only under > Poser Formats (instead of > DAZ Studio Formats) and dealing with Runtime Directory instead of Base Directory.
Now you should be fully migrated and set up to have your new My DAZ 3D Library used by both DAZ and DIM.
Deleting your original My DAZ 3D Library folder
Try using Daz Studio for a bit. Close it, re-open it and make sure everything is working properly, then when you feel comfortable doing so, you can travel over to your poor old C: Drive and delete your old My DAZ 3D Library folder.
1. In Windows Explorer, browse to:
C:\Users\Public\Public Documents\
2. With the folder My DAZ 3D Library selected in the Right Browsing area, on your keyboard hit Shift + Delete. This is a Keyboard Shortcut to bypass the Recycling Bin.
3. A window will pop up asking "Are you sure you want to permanently delete this file/folder?"... Click [Yes].
This may take at least a little time depending on the size of your Library, but once it's finished, so are you! Congrats!!
Hopefully this helps out anyone who might be in the same particular situation I was, feel free to ask any questions at all. If I can't answer them, there are several abolutely brilliant people who already responded to help me and will if needed for any questions that come up.
Genesis 8 Female: modified body parts costantly intersect clothes in a dForce basic cloth animationThanks to all that have replyed me. Even if I have not answered directly to all of you I tried pretty much all of your advise.
I tried better quality simulation, more passes, set off smoothing, tried to enlarge /morph the bardot top... I tried even to shrink the breast to normal, but still ... was clipping and poking out!!! Every time the bardot top falls on the body (from normal model position to dForce position) the breast (nipples in particular) still poke off the clothes... that was annoying because it was a basic test of a basic Genesis 8 femal with initally available dForce cloth.
Every time I left the last word to dForce, it will make the cloth be clipped by the G8F curves... So I decided not to leave the last word to dForce.
At the end I have resolved in a pretty good way... for a simple test like this one (even if that test take me way too long time): I don't know if this is a workflow that could be accepted in a professional project.
This is the procedure I used to resolve:
I reset all the previuos simulations. I have positioned the girl (base gf8, with bumped breast like I have explained above) in a pose with no breast clipping (with Bardot Top). I set off mesh smoothing and collision settings.
Then I launched the simulation with default parameters (and Simulation Settings > Start Bones From Memorized Pose = On , Frames To Simulate = Animated (Use Timeline Play Range) ): nipples poking and breast clipping all over the place like before (sigh).
But, AFTER the simulation has finished I set those parameters:
- Bardot Top > Parameters > Transforms > Scale : 103.0% (this stop Left and Right Pectoral from clipping the cloth)
- Bardot Top > Shaping > Adjustements > Expand All + Loosen Lace : 100% (this stop Nipples from clipping the cloth)
And that works also maintaining the dForce simulated deformations of the cloth during all the movements of the animation.
In any case I'm pretty disappointed from the fact that dForce just does not work out of the box and without further tweakings.
Only a question: why dForce does not work out of the box, with default settings, even in a so basic example test?
Daz3d to Blender WorkflowHow are folks managing hair in 2.8x ?
I don't use none strand/dforce hair as it rarely looks as good.
I've been trying to learn the particle hair system from this video
https://www.youtube.com/watch?v=KpVyTc_72z0
But his blender is the older version which is annoying since the UI has changed quite a bit.
(oh hey! you're the asymmetric face morph guy! thanks for that!)
I've been playing with the skin shader in blended and got my model to something I'm for now satisfied with. However there are really jagged shadows on her forehead and chin, am not sure how to resolve these. She has already been shaded smooth. Does she need subd surfacing?
Figure Setup bones order doesn't matchIf you have a figure that has the skeleton you want, you can load that (remove geometry after copying it in, it will keep the hierarchy) and then load the geometry from your obj, but the face group names must match the bone names for the geometry to be associated with the proper bones. If it's for your own personal use, any asset could be used, but if it is for redistribution or resale, you would have to build the hierarchy manually.
It could also be done interactively with the Rigging Tool and Transfer Utility, with Donor Rigs and more stuff I am not really familiar with. I have been playing with the Figure Setup myself lately, and found a few forum posts on how to transfer rigging. Search for "Figure Setup" or "Figure Template" (use Google).
Novica & Forum Members Tips & Product Reviews Pt 13@nath Mary posted over in the Aubrey thread, a screenshot of all the morph sliders of one of the outfits. Don't know if you saw it, but I'm going to go see which outfit it was.
Yes, I did - and with the dforce as well, it's a lot more versatile than you would think at first sight.
All in all, I'm pretty happy with yesterday's purchases.
Novica & Forum Members Tips & Product Reviews Pt 13@nath Mary posted over in the Aubrey thread, a screenshot of all the morph sliders of one of the outfits. Don't know if you saw it, but I'm going to go see which outfit it was.
Edit: Ah, the High Collar one. Here you go. (and so everyone can see it.)
Clothing partly onI'd say alot of what you mention can be accomplised via dForce.
Say you want this guy to hold his shirt in his hand while he's wiping the sweat off of his forehead. I'd do something like this:
1. Load the shirt into the scene without having the Genesis character selected.
2. With the shirt selected, I'd go to Edit > Rigging > Convert Figure To Prop.
3. Then I'd parent the shirt to the Genesis character's hand, pose him in a "start" pose then move my timeline slider to frame #30 and pose him in the desired pose. i/e the shirt on his forehead and him holding it there.
4. Then I'd make sure the Simulation Settings are set to Animated (Use Time Line Play Range).
5. Hit simulate.
Ofc this would take some trial and error but that's what I would do. Purposely clipping the shirt to the hand would help keep in place as it travels to the head during the animation.
You might want to have the shirt hang off of a primitive sphere to get a nicer shape to parent to his hand. Run the simulation with the shirt clipping into a cube or sphere. Then, export that shape out as an OBJ. Then import back in via Morph Loader Pro to create a morph of the shape for the shirt in question. Dial in the morph, run steps 3-5 again.
Something like that.
Broad shoulder morph for Genesis 8 female?There's the basic, which a lot of characters require:
https://www.daz3d.com/genesis-8-female-body-morphs
Using the Shoulder Width morph dialed to 100% on the character on the left. Character on the right is out of the box.
For this and many more options, there's also
Stop genesis from loading morphsLoad G8F and go to the Parameters or Shaping pane, find the dial for the morph that is active when you load G8F, click the gear icon above the dial at the far right, choose "Parameter Settings", and set the Default to 0.
Models, Characters and Character Presets... what's the difference?Q: Based on the examples above, if Deric is derived from Jonathan 8 who is himself derived from Genesis 8 Male, why then would Jonathan 8 be a prerequisite for Deric? Because Deric uses Jonathan's skins? (ie. if C:B:A then why not C:A)Because it uses Jonathan morph as the base to create Deric.
Q: So, if one were to only purchase Deric, what would happen if one were to apply Deric to Genesis 8 Male without first owning Jonathan 8?
He won't look as in the promos since you don't have one of the required morphs. The skin will work, but the shape will be different.
Q: Characters and Character Presets are not necessary items (eg. I could manually morph G8M to look like Jonathan but I will just not have the latter's skins and eye colors, etc).They're not necessary, except if you want to use a product which requires one of them. They're useful to get more variety.
Models, Characters and Character Presets... what's the difference?Models, Characters and Character Presets... what's the difference?
Without ever really having understood much, I have oddly amassed quite a collection* of DAZ models, characters and "character presets" over the years. It might be the simplest most obvious explanation but could somebody enlighten me so that I will no longer harbor this big question mark in my head :P
(1) Models are the basic, no-frills base starting point which is usually free (eg. Genesis 8 Male G8M)
(2) Characters are specifically created from base models and portray, well, a character; these usually come with their own set of skins, textures, body transformations etc to be applied on a base model from the same generation (eg. Jonathan 8 for G8M)
(3) Character Presets are other characters built/derived from Characters from the same generation; these always come with body/face transformations and sometimes with their own set of skins and textures (eg. Deric for Jonathan 8)
(4) Both Characters and Character Presets are primarily time-saving artistic renders that enable us to "dive straight" into a scene without having to transform the base models to a face which we will enjoy seeing in our renders :P
Q: Based on the examples above, if Deric is derived from Jonathan 8 who is himself derived from Genesis 8 Male, why then would Jonathan 8 be a prerequisite for Deric? Because Deric uses Jonathan's skins? (ie. if C:B:A then why not C:A)
Q: So, if one were to only purchase Deric, what would happen if one were to apply Deric to Genesis 8 Male without first owning Jonathan 8?
Q: Characters and Character Presets are not necessary items (eg. I could manually morph G8M to look like Jonathan but I will just not have the latter's skins and eye colors, etc).*A cursory look at my Product Library revealed that I currently own Genesis, Genesis 2, Genesis 3, Aiko 3, Michael 3, James, Benjamin, Victoria 5, Gabi, Tori, Aiden, Axel, Logan, Brandon, Michael 6, Victoria 6, Genesis 8, Callan, Quinton, Zander, Ryker, Martin, Orrin, Chace, John, Wufei, ... most of whom I have never before used or even greeted... and not to mention I believe I have dogs, robots and dragons too!... I sometimes feel like I have a whole extended family that I have yet to meet LOL This has been such a mystery and it wish it could be unraveled once and for all :P
Thanks guys!
Broad shoulder morph for Genesis 8 female?Hey guys. I tried finding this but most stuff seems to be just piling on muscle, and not making them wider. The standard bodybuilder morph that comes with Daz also just does this, making a situation where its just a narrow frame with lots of muscle piled on top. Can any of you point me to the right product, so I can get more variance in body shape?
Celebrity Look-a-Likes for 3D figures Part 2I have been using Face Transfer plugin in Daz Studion and have come up with this morph of Alexis Bledel and Lauren Graham. I frequency edited the source image but I think that more diting wouldf improve the skin texture to remove some of the specular reflectiion
Selfie Thread?It occurs to me that with all the face and body morph kits on daz studio, it's possible to make a self protrait and I was wondering how many people would be interested in doing a daz selfie thread? I think this is a really fun idea. Lets all do our best to create a selfie in daz and upload!
Stop genesis from loading morphsMS,
Tried the .off idea because I thought it might really be powerful. Like 'commenting out' a bunch of content. I tried it with an expression and I am not sure I understand the result. In this case anyways, if you add the off suffex to both the alias_head_eCTRL3duDaytonExpressionAfraid.dsf and the eCTRL3duDaytonExpressionAfraid.dsf the affraid expression dial disappears and I might assume the morph is not loaded into RAM. If you add the off suffex to only eCTRL3duDaytonExpressionAfraid.dsf only, the expression dial dissappears. If you add the off suffex to only alias_head_eCTRL3duDaytonExpressionAfraid.dsf the expression dial remains and the expression works. I am not sure it is a safe assumption but I think you have to apply the .off to both and if you do it will not read the expression into RAM. I was really hoping that one combination would have left the dial but it not work - that way I could have applied the off to a bunch of content that I didn't want loaded into RAM but I would still know it was there if I wanted to turn it on.
interesting - from your info, I would gather that the '.OFF' technique that D3D uses with his checkboxes in GenX2 probably coordinates related and dependent morphs as a group, where as my manual attempts would probably miss these dependencies, without identifying the file-dependencies manually.
Like you, I like to 'comment things out' to help minimize interactions when I'm debugging black-boxes.
I could see that even moving folders might also trigger this effect if dependencies exist across the folders (e.g. when a PA uses the core DAZ dials for part of an expression, etc.). I'll still hack at things like this, but I may pick my battles more carefully knowing this.
Thanks for the update.
--ms
The Mac FAQI'm really getting interested in Marmoset, as perhaps a means of fast renders. In this thread: https://www.daz3d.com/forums/discussion/389081/auto-muscle-enhancer-hd-commercial/p15
hookflash asks, [H]as anyone tried exporting their AME animation from Daz in Alembic format and then rendering in Marmoset Toolbag? In theory, it should work as long as the Daz Alembic exporter really is "vertex exact," as the product page says[?]
And D. Master answers: ABC render in marmoset. Once in marmoset it just play. And I can pan around the animation. Video was just a scene capt of Mamoset.
There is a link to the video: https://youtu.be/o2DauchvTkA
hookflash says about the Alembic format: Basically, it allows you to transfer pure mesh data (static or animated) between 3d applications, such as Daz and Marmoset, without having to worry about the usual incompatibilities that you get with formats like FBX and DAE.
So, does this show great potential for Mac users if iRay via nVidia GPUs are never coming back to the Mac platform? I'm just seeking information. I'm not trying to promote Marmoset or anything else.
[Released] ManFriday's Mesh Grabber [Commercial]Okay, after spending a lot ot money and time on products that don't do what they say they do, it was a revelation to find Mesh Grabber! Worth every penny. The problem I'm having is that I don't know how to get the most out of it. Sure, I've got "poke through" solved (THANK YOU THANK YOU THANK YOU) but I have no idea how to get some of the other effects shown in your vids, like smoothing clothing and extending the top of a tower. Are there going to be any youtube instruction tutorials? That would make this whole thing make sense for me.
Well, I use it a lot times, I made simple videos who show examples. In the rotation thread did I showed what I made with the rotation.
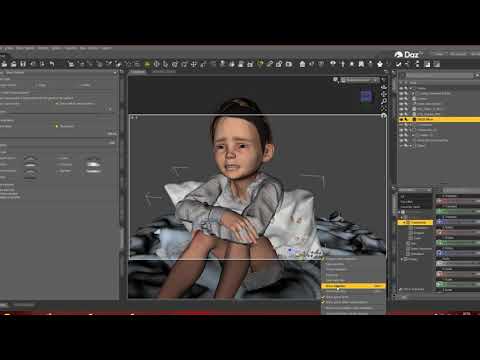
There can you see how I used it to make a pillow fit in the arms of the boy, but that was an old version with more struggles.
Here I showed how to move the blanket over the teddy using the rotation + side moving features.
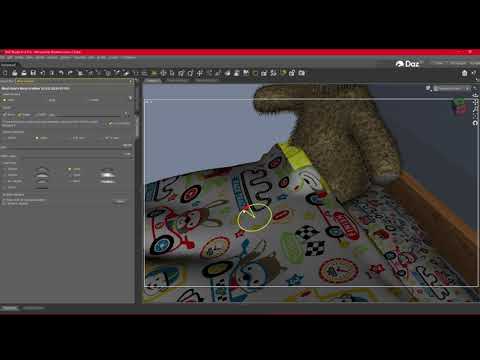
I mainly recommend use the Linear function. I also use Meshgrabber to Model a bit, also to fit Clothes to my will.
Here you saw a other thing I made:
https://www.daz3d.com/forums/discussion/407321/making-a-morph-out-of-meshgrabbers-move
If you set the Falloff Size from meshgrabber to 0, you can use it to move Objects who are inside other objects. It... give soo much examples, BUT.
You should not try to find what others do and copy that, mainly I would say Meshgrabber comes TO YOU, when you need it, You have an object but you wanna change it, you pull out Meshgrabber and try to adjust it ;)
Daz 3D is part of

Connect
DAZ Productions, Inc.
7533 S Center View Ct #4664
West Jordan, UT 84084Licensing Agreement | Terms of Service | Privacy Policy | EULA
© 2026 Daz Productions Inc. All Rights Reserved.