-
Introducing the Daz to Blender Bridge & native Blender File Formats
I can't find the bridge that's supposed to transfer from Daz3D to Blender. I had to export an object and well, now the textures don't work. I have it installed, there is no "Script" tab on my Daz Studio (4.12), I can't find it in any layout and when I found the postgres script it was not very friendly nor did it show where the export went. I know I'm missing something but anyway, I just need a little help. I tend to overthink a lot so maybe I just missed something.
I ran into this issue as well. What I found was that I was using the public beta version of Daz studio. When I loaded the public release of studio. Everything was where it was supposed to be. So those that can't find the scripts link and the bridge. Might be using one of the beta versions. Hope this helps.
MEC4D's celebration ( with freebies ) [commercial]
Bruh this is so cool, gonna be fun trying to replicate this in octaneHello, just dropped by to show you some progress, today sand smart layer, one of many
real sand scan that react to light like quartz sand do
the first image is a light from a spot light on the floor passing through the grains , then the scan, and smart layer, followed by 2 final render test.
sadly displacement want work with little particles like that only bump and normal , even if subdivided to 12, it was too clumpy , but overall looks fine so far
I will try tomorrow vector displacement and see how it works.as I know vector displacement works in iray as well as I did it before and much better than regular displacement , same as HD morph
we will see
Daz to Blender Bridge - Initial ThoughtsSo I was looking through the user manual, and saw that there is supposedly a command called #clear morph which is supposed to solve the "too many unnecessary morphs" problem that I complained about in my original post.
However, this command doesn't seem to work at all in the current version. When I type in #clear morph into the command box, I get a popup message saying "invalid command". Was this command removed entirely, or renamed to something else?
I found that the error doesn't come up if you just type in clear morph without the #, now if it does anything I can't say as the character is still coming in for me at 6-9GB for a character, clothes, and hair. When I turned on the render preview, it shot up to 20GB a couple days ago on me.
And as for things changing after #real size, I've noticed that trying to zoom in with the middle mouse button is extremely difficult as it wants to go at like a 60 degree angle instead of straight in. That gets pretty annoying to try and maneuver as well. Not sure if I'm alone in this or not though.
Daz to Blender Bridge - Initial ThoughtsSo I was looking through the user manual, and saw that there is supposedly a command called #clear morph which is supposed to solve the "too many unnecessary morphs" problem that I complained about in my original post.
However, this command doesn't seem to work at all in the current version. When I type in #clear morph into the command box, I get a popup message saying "invalid command". Was this command removed entirely, or renamed to something else?
MEC4D's celebration ( with freebies ) [commercial]Hello, just dropped by to show you some progress, today sand smart layer, one of many
real sand scan that react to light like quartz sand do
the first image is a light from a spot light on the floor passing through the grains , then the scan, and smart layer, followed by 2 final render test.
sadly displacement want work with little particles like that only bump and normal , even if subdivided to 12, it was too clumpy , but overall looks fine so far
I will try tomorrow vector displacement and see how it works.as I know vector displacement works in iray as well as I did it before and much better than regular displacement , same as HD morph
we will see
dForce and under-bust clingthe cling is caused by dforce taking the initial shape of the object you're simulating as its rest position, so all vertices and springs try to go back to that shape.
If you absolutely don't want to have your character animation in the timeline space after the morph/initialisation simulation space then you can first use the timeline simulation to fit the clothes, then export them as obj and load as a new morph. you can then clear the timeline, apply the morph, use the timeline for animation and simulate as normal once the animation is done."... then clear the timeline" - easier stated than done. How do you do that?
I guess I could have two copies of the scene - one with a dForce animation and one without, but then I'd still need to drape the clothing in the non-animated scene. Such frustration around what should be a simple task.
How to reduce the figure size when transfer to C4DHello everyone
Is there a way to reduce the size of figures or scene when transfer to C4D ?, I encounter that my genesis 8 has a lot of morphs - not used - that also are transfer trough the bridge. This takes in some cases an eternity. Probable there is a way to avoid this. Can any one help me ? Thanks in advance
extreme long body partsYou can use the Genesis 2 figures - they have an additional part for 3D printing. Like any of the figures, they can be morphed to have limbs longer. After morphing, dial the morph in full, select the Joint Editor [bone] tool, on a bone right-click and edit rigging to adjust to the new mesh shape. Then select the pointer tool again, go to the Parameters Tab - and on the morph dial right-click selecting Edit mode. Then right-click again or go via the tool cog ... find the selection for ERC freeze. I normally just keep with everything selected and the 3 options at the bottom also selected. Let it do its thing. Then zero the morph, File > Save As > Supports Assets > Morph Asset ... to your subfolders.
dForce and under-bust clingthe cling is caused by dforce taking the initial shape of the object you're simulating as its rest position, so all vertices and springs try to go back to that shape.
If you absolutely don't want to have your character animation in the timeline space after the morph/initialisation simulation space then you can first use the timeline simulation to fit the clothes, then export them as obj and load as a new morph. you can then clear the timeline, apply the morph, use the timeline for animation and simulate as normal once the animation is done.dForce and under-bust clingAutofit and conforming clothing always creates the problem where the cloth disappears into the crease under the bust of the more voluptuous women. I had hoped that dForce would free the cloth from the clutches of the crease but it doesn't. Even if the cloth breaks free, it drapes with the shape of the crease maintained but now hanging below the actual crease. Smoothing helps a little but I usually have to manually make a morph in Blender to smooth out the polygons in that area, which is annoying and time consuming.
Am I missing a trick?
Feedback for the C4D BridgeWhen you bend the hand in DAZ it applies 1 or more JCM morphs, something like pJCMHandDown..70L and pJCMUp...30L or whatever, they need to be applied when the joint bend, so bend hand down 0-70 degrees, apply morph 0-100% and you get a much nicer bend of the hand, the importer does not handle this, you also have to make sure the HJCM morphs are exported, they are usually "hidden" in DAZ, you don't see them in the list of morphs in the FBX exporter for example, but if you add a filter to inlude them, they will be included in the export, but there is a ton of them for eye lids and all kinds of stuff, for a "normal" character you just need a few (hands, forearms, shoulders, thigh, shin and maybe foot).
In C4D if you do it manually you would create an Expresso tag and map the joint rotations to the morphs with a range map in between (sometimes it is a little more complicated than that though).
KHImage studio does it again, now for GENESIS 8!Old thread, but...
I've been testing this product vs. the Victoria 8 version, and it doesn't seem like the Collar Fwd / Back morph is doing anything.
The first is the Vicky 8 version, the second is the general G8.
Also, when I move the master controller, nothing happens in that area when I'm using the G8 slider, but does for the Vicky version.
I have the same issue, but also with the arms/shoulders. If I use Victoria 8, then the Victoria 8 Ultimate Bend morphs work perfectly. However, if I use say Gia 8, then the Genesis 8 Ultimate Bend morphs do nothing from the waist up. I only use pre-made poses and/or bones to pose. It has caused me to uninstall the product, sadly, as I have passed my refund window.
Just tried 100% GIA HD.
It worked for me for upper body.
Key is a dramatic pose for shoulder blades to trigger morph.Tho - don't remember ever see anything on the upper arms?
So shoulder blades is the biggy, and elbows and forearms (for the twist).
Can find the elbows too pointy so dial those to 40% or 0%.3 images.
One at 0 UNBM.
Second at 100% UNBM.
Third with 100% UNBM, but neck bones were reset to 0 and then head, neck posed with the Pose>Neck so UNBM morphs kicks in for that.EDIT: Looked through the list of morphs under Parameters for UNBM and saw a Partial JCM for farm..which would guess is fore arm. In those images, it did move those. Didn't see any morphs listed for upper arms.
The "Animators Assemble!" thread for Daz animation WIPs, clips, and tipsI recently found a free lip syncing software called Papagayo. I wrote a script that converts its output to a file that can be loaded in DAZ Studio. Here is an animation I made using it.
YES!! I just did that too! ( Used Papagayo and your script )
Is it this one on sharecg? https://www.sharecg.com/v/88621/view/8/Script/Script-For-Importer-Files-Lip-Sync-in-DAZ-Studio?fbclid=IwAR10C9SKKeR7U-TwmZaf88EeP_23cijPqnSSYEBPEKIGtP-ErQIYZgdI9Uw
Anyways.This was a test that snowballed into way too much obsessive work to finish a 20 second scene. ( I only did POTO because I did a still scene a couple of years back and I thought I could see what it would look like to animate his mouth.) I read a post about using the free PAPAGAYO LIP SYNC tool https://my.smithmicro.com/papagayo.html and then transfer the data into daz using the free Script For Importer Lip Sync in DAZ Studio UPDATE. https://www.sharecg.com/…/Script-For-Importer-Files-Lip-Syn…
It worked, but not 100% accurate as papagayo doesn't have all of the visemes that G8 has. What does work nicely is that it gives you a clear synced timeline to the music you're trying to animate. I popped the audio clip into DAZ and saw the synced keyframes that corresponded. From there I tweaked the visemes ( substituting "W" for "T" and "SH" for "S" etc..)
It was turning out better than expected! So then, I applied it to the still scene and that's when the obsession exploded. I had to animate him...I had to animate the girl. ... and well I think you get the idea.
So here's the workflow with a lot of redo:
PAPGAYO TO DAZ ( Lip Sync importer )
FACE TRANSFER ( Michael Crawford )
Setup Scene in DAZ then split the elements into sub scenes.
Rendered in Iray (Girl, Guy, Candelabras, Background,)
Rendered in Octane ( Shadows )
Rendered the fog volume in C4D
Composited in After Effects
Finished in Premier Pro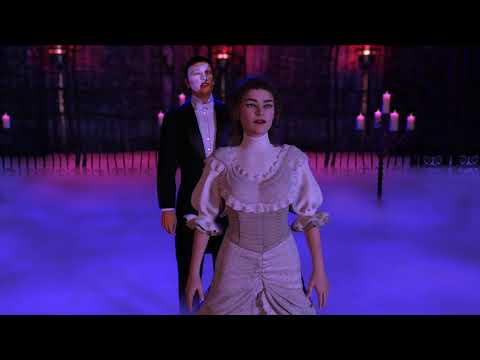 Aeon Soul Undress/Dress poses/clothes
mats76 said:
Anyone having problems with pokethroughs? For me it looks good in preview but in iray preview or render I get pokethroughs even with G8F base.
Image below is G8F base with no active morphs or hidden morphs
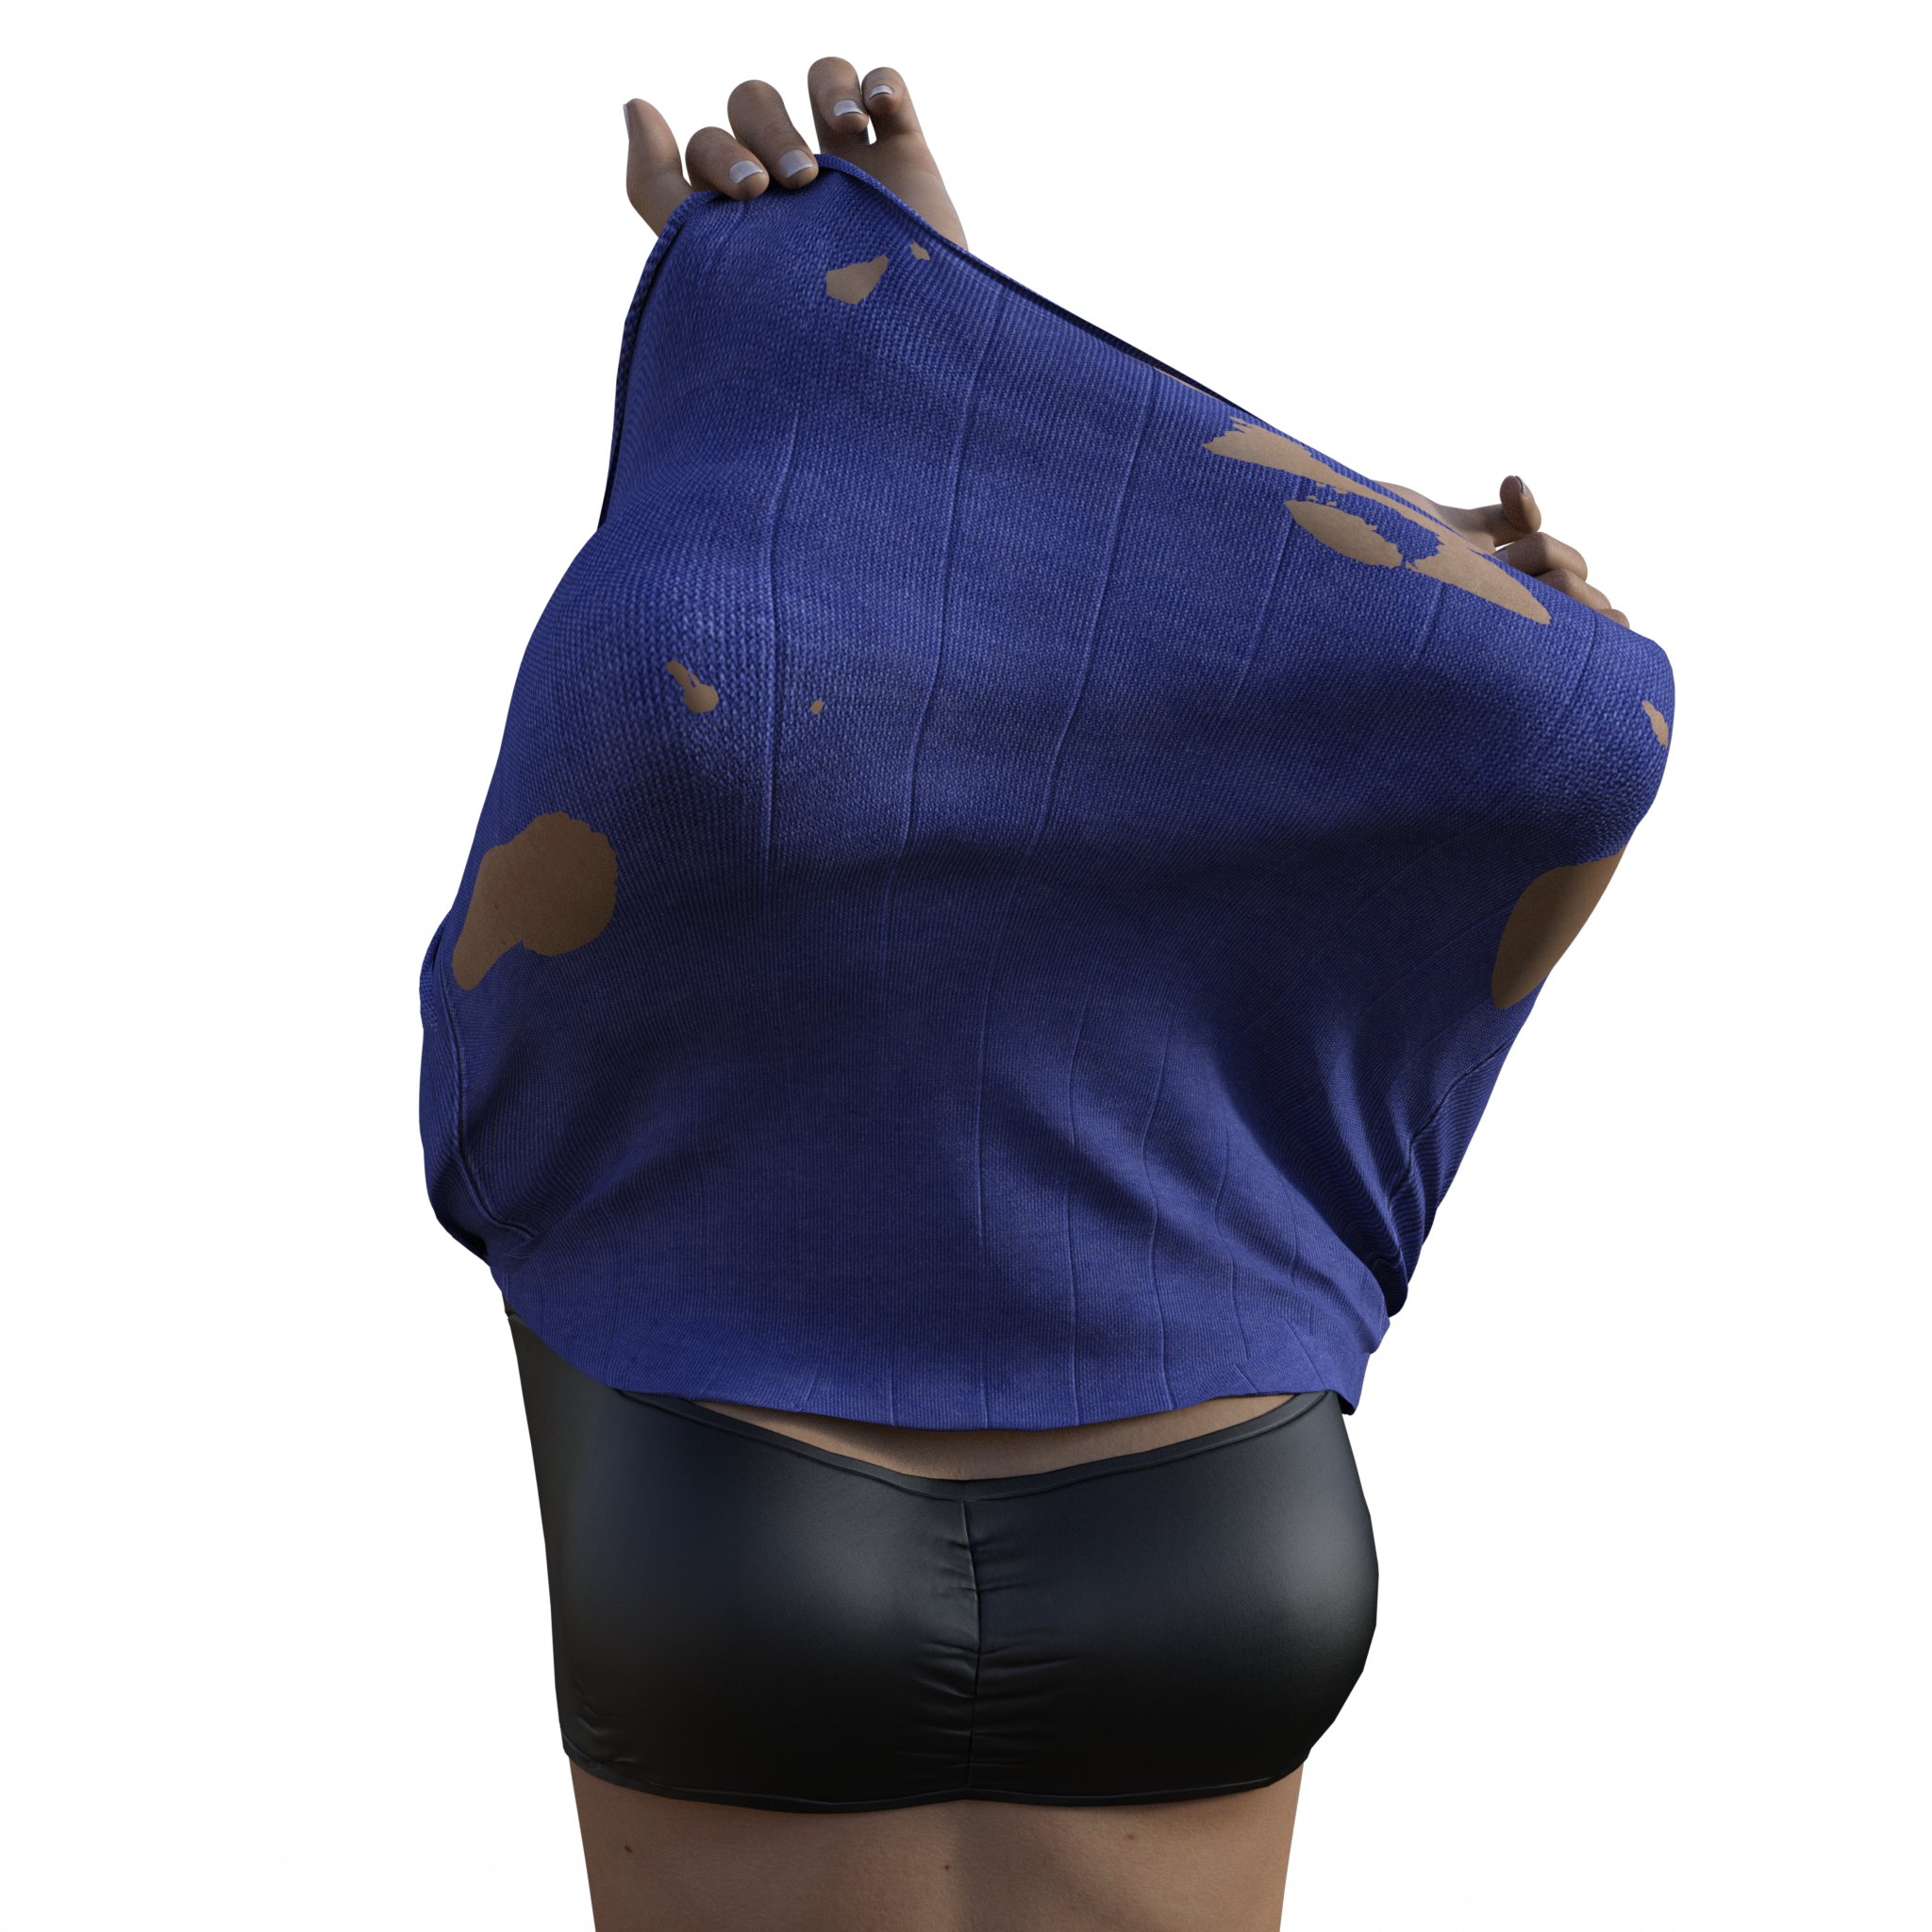
This is a displacement problem, we just managed to replicate this.
We'll check this out, but meanwhile you can just set the displ at 0 value or try fine-tuning the min/max displacement values. The Enlarge/Shrink morph should also help, but you have to set the min/max displacement values at the same value (say -0.3 /+0.3).
We'll fix any that have this problem on our end asap, thanks for posting about this!
Thank you, lowering the mamimum displacement worked out great
 Where are the files generated by the Daz2Blender Bridge?
@ 3D Vitality -- You are welcome, and I agree.
@ stevejackhammer -- I agree with your last sentence, and that was the very first thing I did when I ported the GoBlender-Daz Studio bridge (morph target bridge only) to B2.80 -- It was ridiculously easy on the Blender side, and wasn't that hard on the DS side even though I only code in B-Python.
I already planned on doing this for my copy of DTB, but there are many more files to go through, and make sure all the I's are dotted and T's crossed. Plus, I am no where near finishing the improvements on the GoB-DS addon, so have no time for DTB just yet.
It's easy to do, so maybe we'll find somebody who wants to tackle it...
Aeon Soul Undress/Dress poses/clothesmats76 said:
Anyone having problems with pokethroughs? For me it looks good in preview but in iray preview or render I get pokethroughs even with G8F base.
Image below is G8F base with no active morphs or hidden morphs
This is a displacement problem, we just managed to replicate this.
We'll check this out, but meanwhile you can just set the displ at 0 value or try fine-tuning the min/max displacement values. The Enlarge/Shrink morph should also help, but you have to set the min/max displacement values at the same value (say -0.3 /+0.3).
We'll fix any that have this problem on our end asap, thanks for posting about this!
Aeon Soul Undress/Dress poses/clothesThank you for sharing this. A couple questions.
In "2". Does it mean that a lot of what is seen in the video comes from this addon or there may be too much overlapping/duplicates?
You also say a couple times "pose morph" body pose has morph too or only presets? does it mean this can animated? Or is a big leap between stages?
Hi,
the "2" only refers to the clothes name "Everyday 2". We had a similar set for G3, Everyday, and this is its successor.
The Morphs + is an add-on for Everyday 2 clothes: https://www.daz3d.com/everyday-2-for-genesis-8-females and includes a few clothing items with special morphs. It is unrelated to the Dress/Undress poses + clothes in terms of sharing any morphs etc., but it can certainly be complimentary.I'm not sure I understand the other question about the poses, let me know :D.
- Are there plans for a male version of these morphs? And if so, will You take care of males and females often undressing in a different way (= just check how most men take off a t-shirt compared to how most females do it
 )
) - Is there a chance that we might get trousers with long legs instead of the capri pants, which are so.. '70s ?
Apart from that, these sets (and the other Everyday Clothes Sets) are on my wishlist until price and my available money are on an even level... But I look forward to that moment
Hi! We are not working on a male version of poses+clothes morphs at the moment, mostly because the get dressed / undressed sets and another couple of sets with more everyday kind of poses were all created before the male version existed.
We have considered it, but until we do start working on it I can't say neither yes nor maybe.
If we do, yes, we will use male references for the poses. I know what you mean, like grabbing your shirt from the back rather than the hips and stuff like that, yep, we'd do that for sure!I went ahead and purchased it (and the Cyberpunk Add-On, plus the Sporty one). Haven't tried with the shirt but for the capris, you can get more varied looks if you mix up the morphs for the same pose.
I do have one additional question. Are the UVs from Everyday 2 and the Everyday for G3F compatible?
No, they are completely different items, they only share the idea of shirt+capri pants, hence the n.2 in the name.
We run a few tests yesterday and we may be able to do something in terms of length and/or style. We need to take into consideration texture stretching, because something like making the capri long pants would be taxing on the UVs. The tests we did yesterday looked pretty good though, so we're willing to look into this.
KHImage studio does it again, now for GENESIS 8!Old thread, but...
I've been testing this product vs. the Victoria 8 version, and it doesn't seem like the Collar Fwd / Back morph is doing anything.
The first is the Vicky 8 version, the second is the general G8.
Also, when I move the master controller, nothing happens in that area when I'm using the G8 slider, but does for the Vicky version.
I have the same issue, but also with the arms/shoulders. If I use Victoria 8, then the Victoria 8 Ultimate Bend morphs work perfectly. However, if I use say Gia 8, then the Genesis 8 Ultimate Bend morphs do nothing from the waist up. I only use pre-made poses and/or bones to pose. It has caused me to uninstall the product, sadly, as I have passed my refund window.
Rendering questiona. I know that Daz products are stored locally and cannot be moved from one machine to another just by sending a scene like in Maya for instance, but is there a way to transfer a render job to a remote server or render farm in some way?
You could share the daz product library between computers (at least on local network) by putting them somewhere accessible via a network.
For example, my laptop gpu have more vram so i use it for render. so I make the partition that my Daz library is installed on shared with the local network, (i think the process goes something like: desktop: this pc->right click on partition->property->sharing->advanced sharing->share this folder, also permissions->allow read and write, then on my laptop (this pc->network ->find desktop->find partition->right click->map network drive and add the folder in daz). Then you can open any file saved on the shared drive.
There is also iray server that is the professional product for remote rendering, but that cost money.Rendering questionHi friends.
Few questions about rendering:
a. I know that Daz products are stored locally and cannot be moved from one machine to another just by sending a scene like in Maya for instance, but is there a way to transfer a render job to a remote server or render farm in some way?
b. If the answer to the above is "No" - what would be an optimal render solution for large animation sequences? I guess that I am not the first one to produce such sequences and I find it hard to believe that all Daz users use only their local machine and nothing more for this purpose.
If there is a solution to my needs, please let me know about relevant documtation.
Thanks in advance!
Daz 3D is part of

Connect
DAZ Productions, Inc.
7533 S Center View Ct #4664
West Jordan, UT 84084Licensing Agreement | Terms of Service | Privacy Policy | EULA
© 2026 Daz Productions Inc. All Rights Reserved.