-
Poser 9 and Windows 10
Just getting back into things after about five years and everything has changed. I have the disc for Poser 9 but
it is no longer on my computer. Will Poser 9 work with Windows 10?
If the answer is yes, is there a way to bring G8 figures into it? I have some that I used the face transfer on that
I would like to see in Poser. I first started with Poser 4 but like I said everything has changed.
I can use Daz Studio but I am more comfortable with Poser. (I always have trouble with the lighting in Sudio.
I really don't want to upgrade to Poser 11 because of money situation.Diffeomorphic DAZ-to-BlenderFor some reason the eyelids and eyelashes stay that way.
Unfortunately for G8F the eyelashes are a separate figure. And honestly I never figured out why they designed it that way. So to make them work you have to transfer correctives the same as you do with outfits. I'm also quite surprised that you managed to mix the custom morphs as well. Obviously diffeo is better than I thought.
Another test that you may try is if every figure in the mix exports fine with her custom morphs. This at least gives you the basic elements before exporting the mix itself.
But again, you can see that mixing figures complicates everything, using morphs packages to make a character is much safer.
edit. I also see that Thomas is working very actively on the new morph system and there are recent fixes so be sure to grab the latest development version.
HD Add On VS Normal Mapping Brawl!this goes against everything i was ever taught
but i like it
I like breaking the rules! Just ask the mods.

Displacement is different, it can actually alter the mesh. I am sure that the same rules apply. I don't use displacement very much, few models have it these days, but it does slow down renders. It is certainly better to be able to sculpt that detail rather than use displacement, but there are times where displacement is a good option. Like adding veins to a character while using other normals and/or HD shapes. The big advantage to both normals and displacement is that the end users can alter them and mix and match them easier. The biggest issue I have with HD is that we end users have no way to alter them. Zelara HD has a HD head and HD body, and that is it. I cannot go and pick a smaller section of that morph and use it, or alter it in any way. With the texture maps, if there is say a mark I do not like, I can get rid of it easy. I can do that on standard Genesis mesh, too. But I cannot do that to a HD shape. It is really frustrating. Like one area that is often over done are the ridges on fingers. Too many DO characters have freakin' canyons on the fingers, I have never seen a person with knuckles like that in my life. With a normal map, I can smooth that down a little while still keeping the rest of the detail.
Feedback for the C4D BridgeYes you are correct.
The property editor allows for setting of your own keyframes so it IS possible that you can set these things in very complex ways, but I cannot remember any of the morphs on the more modern figures having more than the upwards and then downwards increase.
Btw perhaps you don't know this but you can export the rotational values by clicking the maya helper scripts on the fbx export and this will generate a <exported_fbx>.mel file in the same folder as your exported fbx which contains all the rotational values for each of the jcms. The script can be directly ran in maya to link up the rotations but we can use it to put the values for C4D since they work for us aswell.
My initial idea from that was to create a parser with python, which goes through the helper file and looks for trigger passages and then basically takes the values for the joint, the axis, the morph and each of the values into variables and then creates expresso rangemappers with the values and links these to the correct rotations for the joint axis and the morph on the posemorph tag. I am not sure if this would be slower than the direct evaluation through python which we got now in your script, but the rangermapper allows for using curves which might come in handy if there are more complex custom jcms from third parties. I am just not yet very comfortable with the c4p scripting api and python in general, otherwise I would have already done it :)
These are the values from the mel file, so you can use them to put into your script :
setDrivenKeyframe -at Genesis3Female__pJCMShinBend_90_R -v 0 -cd Genesis3Female|hip|pelvis|rThighBend|rThighTwist|rShin.rotateX -dv 0;
setDrivenKeyframe -at Genesis3Female__pJCMShinBend_90_R -v 1 -cd Genesis3Female|hip|pelvis|rThighBend|rThighTwist|rShin.rotateX -dv 70;
setDrivenKeyframe -at Genesis3Female__pJCMShinBend_90_R -v 1 -cd Genesis3Female|hip|pelvis|rThighBend|rThighTwist|rShin.rotateX -dv 110;
setDrivenKeyframe -at Genesis3Female__pJCMShinBend_90_R -v 0 -cd Genesis3Female|hip|pelvis|rThighBend|rThighTwist|rShin.rotateX -dv 155.5;
setDrivenKeyframe -at Genesis3Female__pJCMShinBend_90_L -v 0 -cd Genesis3Female|hip|pelvis|lThighBend|lThighTwist|lShin.rotateX -dv 0;
setDrivenKeyframe -at Genesis3Female__pJCMShinBend_90_L -v 1 -cd Genesis3Female|hip|pelvis|lThighBend|lThighTwist|lShin.rotateX -dv 70;
setDrivenKeyframe -at Genesis3Female__pJCMShinBend_90_L -v 1 -cd Genesis3Female|hip|pelvis|lThighBend|lThighTwist|lShin.rotateX -dv 110;
setDrivenKeyframe -at Genesis3Female__pJCMShinBend_90_L -v 0 -cd Genesis3Female|hip|pelvis|lThighBend|lThighTwist|lShin.rotateX -dv 155.5;setDrivenKeyframe -at Genesis3Female__pJCMForeArmFwd_75_R -v 0 -cd Genesis3Female|hip|abdomenLower|abdomenUpper|chestLower|chestUpper|rCollar|rShldrBend|rShldrTwist|rForearmBend.rotateY -dv 0;
setDrivenKeyframe -at Genesis3Female__pJCMForeArmFwd_75_R -v 1 -cd Genesis3Female|hip|abdomenLower|abdomenUpper|chestLower|chestUpper|rCollar|rShldrBend|rShldrTwist|rForearmBend.rotateY -dv 75;
setDrivenKeyframe -at Genesis3Female__pJCMForeArmFwd_75_R -v 0 -cd Genesis3Female|hip|abdomenLower|abdomenUpper|chestLower|chestUpper|rCollar|rShldrBend|rShldrTwist|rForearmBend.rotateY -dv 135;
setDrivenKeyframe -at Genesis3Female__pJCMForeArmFwd_75_L -v 0 -cd Genesis3Female|hip|abdomenLower|abdomenUpper|chestLower|chestUpper|lCollar|lShldrBend|lShldrTwist|lForearmBend.rotateY -dv -135;
setDrivenKeyframe -at Genesis3Female__pJCMForeArmFwd_75_L -v 1 -cd Genesis3Female|hip|abdomenLower|abdomenUpper|chestLower|chestUpper|lCollar|lShldrBend|lShldrTwist|lForearmBend.rotateY -dv -75;
setDrivenKeyframe -at Genesis3Female__pJCMForeArmFwd_75_L -v 0 -cd Genesis3Female|hip|abdomenLower|abdomenUpper|chestLower|chestUpper|lCollar|lShldrBend|lShldrTwist|lForearmBend.rotateY -dv 0;I don't think there are more of these. Everything else seems to have a simple linear a to b connection. And on g8f they have normalized this into all of the base jcms having these linear a to b connections.
Just keep in mind that you will first have to unhide the jcms that you want to export, otherwise the exporter will ignore them.
Ok here is updated script:
https://gist.github.com/maxenko/10a8472aafe8adc1b3be96f8090700fb
I only applied it to the pJCMShinBend_90_L and pJCMShinBend_90_R, if you end up mapping the rest for gen3/8 please share or edit the gist itself. I intend to use this script in the future if Daz Bridge doesn't offer this by default.
One thing - there is dead space between 0-70 and 110-155.5. So I mapped it 0-110 instead (line 256,257)
I think this is where the curve thing might come in handy. To be 100% perfect, this gets hairy quick. Basically you'd have to define curves in UserData for each of the morphs that need them and then reference them as last parameter on utils.RangeMap(..)
Regarding loading weight maps from maya file: its totally doable, and if you're concerned about loading the file each frame, you can always restrict to updating it from disk on first frame only. I don't blame you on not using Python in C4D, although everything is exposed - its very documentation reliant and unintuitive (at least to me).
The Doctor Appreciation threadThought I'd try my hand at morphing the new companion.
found out by accident the perfect combo
Addy Syrah for the morph
Addy Rayven for the skin.what outfit fid you use
Catherine HD for Genesis 8 Female(s)It is intentional. If you go into the actor tab and look at the morphs that are currently used, you will see one called Catherine eye and this morph brings it back down to normal.
it is a real condition called anisocoria
Show us your 3Delight rendersThat's really unique, Sven! How did you do the head/hair?
I made an asymetrical morph using dForce, so body proportions are all messed up:) Dialed in just a tiny bit of it. The hair is Garibaldi, with the aweHair shader, the rest is aweSurface per usual:)
HD Add On VS Normal Mapping Brawl!Here is another test. This test is about scaling to performance. This time I rendered the same Zelara scene as before, but I only used ONE GPU instead of both 1080tis. I used my non-display GPU, to help rule out any funny business. The non-display 1080ti is only doing one task, render.
Like before, the first test is 5000 pixels high with Zelara's default standard preset. She has normal maps and is set to subD 2.
Total render time: 11 M 58 S VRAM: 3300
This is fantastic, because the VRAM reported is identical to what it reported in the first test. Like Adam Savage would say, I love consistent data! The time is also nearly double the result of two 1080tis, which shows just how well Iray can scale with 2 GPUs. All around, this great.
But the question is this: Does the HD morph scale as well?
Zelara HD add on, no normals, subD set to 3. ONE 1080ti.
Total Render Time: 7 M 26 S VRAM: 3261
And sweet, the VRAM for this test is also exactly the same as my first test with these settings. For time, it looks like it does scale. So this not a case of some kind of precalculation causing the times, otherwise the results would not have scaled so equally. And the result is also striking for a different reason. Remember, my original time was 6 minutes and 12 seconds with normal maps...with TWO 1080tis. By turning OFF the normal maps and increasing subD to 3, I rendered the scene in 7 minutes 26 seconds with just ONE 1080ti. Just think about that, people! The time saved is so significant that it is in within striking range of using TWICE the GPU power to achieve the same thing using normal maps. I mean...wouldn't you like to have that kind of performance by making such a simple change? If I was to guess, my result would be about the same time as a 1080ti+1080 (non ti) might achieve. That is big piece of hardware there, and all I did was remove normal maps.
Just think about somebody who has a 1070. A 1070 is (or was) a decent card, but they usually take twice as long as a 1080ti. So you could estimate the render time by simply doubling my single 1080ti times. Now you are looking at a 24 minute long render with normal maps, but that could be 15 minutes with no normals and HD level 3. That is not saving a minute, that is saving 9 minutes, these are significant chunks of time. This is not "Gone in 60 Seconds" with Nic Cage! When you put things in perspective you can really see how this adds up.
To me, this is incredibly compelling evidence that maybe it is time to rethink how we do things.
And also...I think Daz might want to thank me if people start buying their HD add ons more, LOL.
Diffeomorphic DAZ-to-Blender@ChrisSerket You may try importing the figure without additional morphs, then import the closed eyes as custom morph using a obj and check that it works fine. Then start adding the other morphs and check that the eyes works fine until you find what's messing things up.
As I said, making characters by mixing other characters is looking for troubles. The basic shape is exported fine because it is baked in the dbz, but then the custom jcms and mcms need to be mixed as well for them to work fine. If I understand correctly your character is a G8F + Sakura8 + Hotaru mix.
The "good way" to make characters is to use the standard body and face morphs, also most morphs packages are fine if they don't "inject" custom jcms mcms. But mixing characters isn't safe.
Diffeomorphic DAZ-to-Blender@benniewoodell I suspect you're using an old version of the plugin since that issue with smoothing has been fixed a while ago.
Wait, no you're right, this is a previous version. I downloaded the newest development version and installed it last night and when I imported her in, her clothes or hair didn't transfer in. Tried it three times, going back in and resaving it each time, and it was just her with no add-ons, so I turned on an older version to see if something was amiss and she loaded in with the problem you see above. So you're right, it was old one, but the one that's the newest development brings her in completely nude and bald. I completely forgot about that.
How to make a Strap/Sling for a prop?dForce can do some of that, but you'd probably want 2 separate simulations (for each side of the strap). It might be technically difficult this way if you're not familiar with messing around with dForce.
Another idea is a poseable rope or string. If you make the rope wider and flatter (reduce the Z-axis Scale, or whatever is giving depth to the rope), it can look like a strap. Mechasar has a String product, which may be useful. https://www.daz3d.com/strings
Take 2 rope/string segments (you don't need to pose the section that is behind the figure/off camera), morph and pose the rope/strings as appropraite.Celani 8$52.90 Pro Bundle with four add-ons? Nope. As usual, there's a tax on early adoption of Pro Bundles. New coupon code gets Bundle price w/ 4 add-ons down to $39.68. An improvement, but not a Deal. The $15 per category pickings are threadbare for me.
Celani has personality, and that is one of the two most important criteria I use for Core Figures (the other is radiant, detailed skin). Great head morph, realistic body morph, nice skin (unless it's due to an exaggerated bump map, as it appears to be on Wilona Hair promos), beautiful eyebrows, (though no eyebrow geometry).
I really like the expressions in her character promos. I wish they were included or indexed. The HD morph only succeeds in making her look older---creased nasolabials---not always hardly ever desirable. I want PORES from my HD.
Mada's outfit (AS USUAL) is the standout clothing, and it will be usable in non-dystopian scenes. With seeming dystopia just a shot away, I'm not too interested in recreating that. Not excited about the rest of the clothes---their craftsmanship (boots appropriate for toon characters, to name one). I really appreciate having five options for Core Figure darker black women (Sahira, Alawe, Kala, Tasha, Charlotte, & Edie are options for lighter).
Masozi and Dezzi look interesting, and I'm glad to get CDI poses included in the bundle. I wonder if Holt 8is a black guy, or if Daz is doing BWWM, like so many US TVC's.
"Blade Runner's" Rachael head INJ files. See page 3. Face texture added.Need a good laugh? Watch me trying to fix eyes lol ...
1. We did succeed in making a new .cr2 to load the original plus the new morphs, so that is doable.
2. The Rachael morph needs a little more work about the eyes and eyelashes. {I'm seriously not good with those lashes}
@ mic685_ddf880de57 When you can get the eyes, lashes fixed and also applied on the Rachael figure ... if you send the mass over to Hexagon, rename it to Victoria 4.2 then ship it back over to a Fresh Load of Victoria 4.2 - make the morph. Then run the script again but this time make it to have a new name. Hopefully that is how we can get all the morphs together.
Sakura 8 Eyes Can't Bridge - - HelpHello People,
First, I count be more excited about the new Bridge to blender. It really make the Daz Library extremely attractive.
So I've bought the Sakura 8 Pro Bundle and sadly the eyes seems to not bridge, producing the error below.
It's specifically the eyes, the transfer work when I delete them from the model.
I'm far from familiar with the Daz internal logic, but If someone could have an idea how to bypass this problem, maybe by relinking both object to the armature after 2 bridge or anything.
Thank you really much for your time
Feedback for the C4D BridgeYes you are correct.
The property editor allows for setting of your own keyframes so it IS possible that you can set these things in very complex ways, but I cannot remember any of the morphs on the more modern figures having more than the upwards and then downwards increase.
Btw perhaps you don't know this but you can export the rotational values by clicking the maya helper scripts on the fbx export and this will generate a <exported_fbx>.mel file in the same folder as your exported fbx which contains all the rotational values for each of the jcms. The script can be directly ran in maya to link up the rotations but we can use it to put the values for C4D since they work for us aswell.
My initial idea from that was to create a parser with python, which goes through the helper file and looks for trigger passages and then basically takes the values for the joint, the axis, the morph and each of the values into variables and then creates expresso rangemappers with the values and links these to the correct rotations for the joint axis and the morph on the posemorph tag. I am not sure if this would be slower than the direct evaluation through python which we got now in your script, but the rangermapper allows for using curves which might come in handy if there are more complex custom jcms from third parties. I am just not yet very comfortable with the c4p scripting api and python in general, otherwise I would have already done it :)
These are the values from the mel file, so you can use them to put into your script :
setDrivenKeyframe -at Genesis3Female__pJCMShinBend_90_R -v 0 -cd Genesis3Female|hip|pelvis|rThighBend|rThighTwist|rShin.rotateX -dv 0;
setDrivenKeyframe -at Genesis3Female__pJCMShinBend_90_R -v 1 -cd Genesis3Female|hip|pelvis|rThighBend|rThighTwist|rShin.rotateX -dv 70;
setDrivenKeyframe -at Genesis3Female__pJCMShinBend_90_R -v 1 -cd Genesis3Female|hip|pelvis|rThighBend|rThighTwist|rShin.rotateX -dv 110;
setDrivenKeyframe -at Genesis3Female__pJCMShinBend_90_R -v 0 -cd Genesis3Female|hip|pelvis|rThighBend|rThighTwist|rShin.rotateX -dv 155.5;
setDrivenKeyframe -at Genesis3Female__pJCMShinBend_90_L -v 0 -cd Genesis3Female|hip|pelvis|lThighBend|lThighTwist|lShin.rotateX -dv 0;
setDrivenKeyframe -at Genesis3Female__pJCMShinBend_90_L -v 1 -cd Genesis3Female|hip|pelvis|lThighBend|lThighTwist|lShin.rotateX -dv 70;
setDrivenKeyframe -at Genesis3Female__pJCMShinBend_90_L -v 1 -cd Genesis3Female|hip|pelvis|lThighBend|lThighTwist|lShin.rotateX -dv 110;
setDrivenKeyframe -at Genesis3Female__pJCMShinBend_90_L -v 0 -cd Genesis3Female|hip|pelvis|lThighBend|lThighTwist|lShin.rotateX -dv 155.5;setDrivenKeyframe -at Genesis3Female__pJCMForeArmFwd_75_R -v 0 -cd Genesis3Female|hip|abdomenLower|abdomenUpper|chestLower|chestUpper|rCollar|rShldrBend|rShldrTwist|rForearmBend.rotateY -dv 0;
setDrivenKeyframe -at Genesis3Female__pJCMForeArmFwd_75_R -v 1 -cd Genesis3Female|hip|abdomenLower|abdomenUpper|chestLower|chestUpper|rCollar|rShldrBend|rShldrTwist|rForearmBend.rotateY -dv 75;
setDrivenKeyframe -at Genesis3Female__pJCMForeArmFwd_75_R -v 0 -cd Genesis3Female|hip|abdomenLower|abdomenUpper|chestLower|chestUpper|rCollar|rShldrBend|rShldrTwist|rForearmBend.rotateY -dv 135;
setDrivenKeyframe -at Genesis3Female__pJCMForeArmFwd_75_L -v 0 -cd Genesis3Female|hip|abdomenLower|abdomenUpper|chestLower|chestUpper|lCollar|lShldrBend|lShldrTwist|lForearmBend.rotateY -dv -135;
setDrivenKeyframe -at Genesis3Female__pJCMForeArmFwd_75_L -v 1 -cd Genesis3Female|hip|abdomenLower|abdomenUpper|chestLower|chestUpper|lCollar|lShldrBend|lShldrTwist|lForearmBend.rotateY -dv -75;
setDrivenKeyframe -at Genesis3Female__pJCMForeArmFwd_75_L -v 0 -cd Genesis3Female|hip|abdomenLower|abdomenUpper|chestLower|chestUpper|lCollar|lShldrBend|lShldrTwist|lForearmBend.rotateY -dv 0;I don't think there are more of these. Everything else seems to have a simple linear a to b connection. And on g8f they have normalized this into all of the base jcms having these linear a to b connections.
Just keep in mind that you will first have to unhide the jcms that you want to export, otherwise the exporter will ignore them.
Feedback for the C4D Bridge@ mxo : I have setup everything, correct data types etc I assume (link for the two objects, string for the Prefix). But you forgot to mention that you are not using HPB but instead XYZ?
Also I noticed that we need some additional logic in these bindings, because some of the morphs have more than just a zero to hundred percent range. The shins and the forearms both have extra keyframes in them. So for example on the forearmfwd we have the larger morph to 155 go straight up but the smaller one only goes up to 100% when it reaches 75 degrees, and then goes back down to 0% when it goes from 75 degrees to 155. Not sure if there is a way to simulate this with the vector method, but we might be able to add some if cases into it that reverses the logic when the rotation value goes past a certain degree.
If I understand this correctly its something like this?:
forearmfwd.X maps to morph from (0 to 75) as (0 to 100) and then (75 to 155) as (100 to 0)?
If that is the case, I think script needs a two step map then. I can add it, do you have the list with all these mappings? When I wrote it I was guessing.Also all of these are linear, I have no idea if Daz uses curved translations. This can all be added, but I'll need a reference to how Daz does it...
all daz original products with $5 interactive licenses!!!!! omg!!!Yes, it is the excellent deal and all items in the bundle will get interactive licences, as well.
For example:
https://www.daz3d.com/slaying-the-dragon-bundle
gives interactive license for Genesis and Genesis 2 starter essentials.
Do not forget about interactive licences for morph packs like:
https://www.daz3d.com/genesis-8-male-body-morphs
https://www.daz3d.com/genesis-8-male-head-morphs
https://www.daz3d.com/genesis-8-female-body-morphs
https://www.daz3d.com/genesis-8-female-head-morphs
and expressions:
https://www.daz3d.com/genesis-8-male-expressions
https://www.daz3d.com/genesis-8-female-expressions
if you plan to use characters based on:
https://www.daz3d.com/genesis-8-starter-essentials
which also has the interactive license, as well.
Feedback for the C4D Bridge@ mxo : I have setup everything, correct data types etc I assume (link for the two objects, string for the Prefix). But now I get no errors in the python console but it is also not taking any effect.
ah damn @ mmdestiny, you are right. I completely forgot about this. C4D strangely only seems to save the morph deltas when manually dragging it in. Always found this super wonky. Thanks for reminding!
Sorry!
I wanted to provide example file but didn't want to post all that purchased content I got in my scene.
I made one with Gen3. I hope Gen3 is ok to post here (its free!), sincere apologies if I am violating anything, its for science.
Attached file is 2.5mb but unzips to 320mb containing c4d scene that works. The tag only works when animation is playing.
The part of the script in main: applies all the morphs, I have not checked if its all correct yet, axis may be wrong on some of them.
No, I'm afraid it isn't OK to share the file.
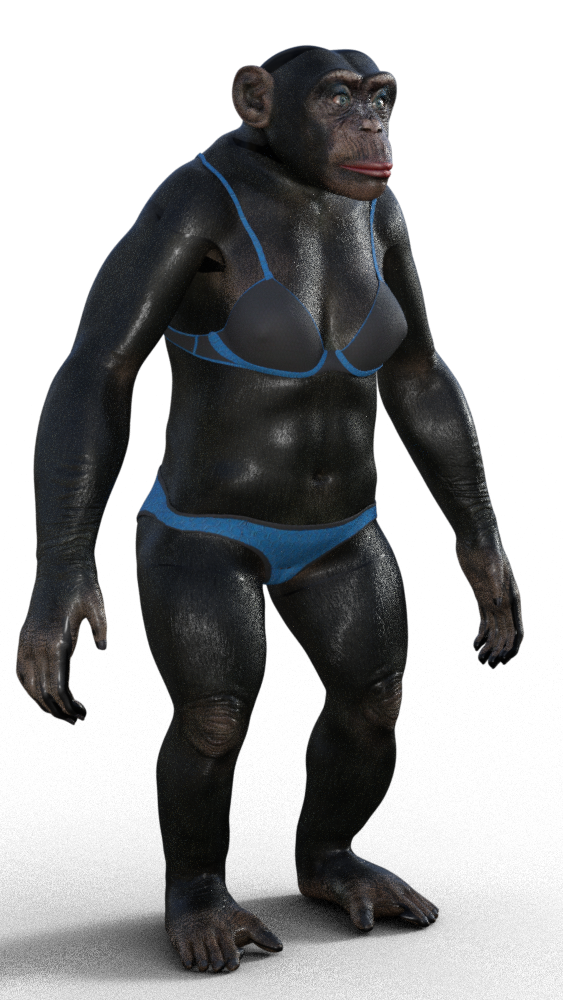
G8F Morph to G8M? Elf Ears?You can use the Transfer Utility to transfer morphs across genders. Try the settings I posted in this thread: https://www.daz3d.com/forums/discussion/402716/g8f-chimp. Favorite the ears morph first.
I'll take a look...I tried to use the transfer utility to import the morph as a morph asset but no potatoes. I'm sure it was something I was doing wrong, as my extent of knowledge for morph importing is with clothing, etc.
*edit* Ooooh it worked! I heart you!
Are you sure you were using the Transfer Utility and not Morph Loader? Transfer Utility doesn't "import" anything. Glad you got it working. Remember to save that morph asset!
G8F ChimpRediscovered this thread looking for transfer utility steps, so now that I have AM's chimp:
Daz 3D is part of

Connect
DAZ Productions, Inc.
7533 S Center View Ct #4664
West Jordan, UT 84084Licensing Agreement | Terms of Service | Privacy Policy | EULA
© 2026 Daz Productions Inc. All Rights Reserved.