-
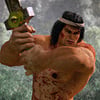
Celebrity Look-a-Likes for 3D figures Part 2
I did a v4 morph 9 years ago, which given its age is not that bad. I was thinking of doing an image myself. I can update it and put it on sharecg if you want.
I would love an updated morph for G3 or G8. Thank you. I can dial spin the body, just need the face. I could also do the face but it would take me days as I have many irons in the fire right now. Took me almost a month to get my private Bettie Mae character to the point I thought she looked right.
I want to transfer all my DIM files to another hard driveHello everybody my name is Jacob and I have some file transfer questions. First off I have a windows 10 PC desktop computer. My C (SSD) and E (HDD) drives are internal on the same computer. The daz3d PROGRAM is located on my C drive and currently my DIM (daz install manager) default saves to:
package archive: file:///C:/Users/Public/Documents/DAZ 3D/InstallManager/Downloads
thumbnail archive: file:///C:/Users/Public/Documents/DAZ 3D/InstallManager/Thumbnails
manifest archive: file: file:///C:/Users/Public/Documents/DAZ 3D/InstallManager/ManifestFiles
content database base: file:///C:/Users/User/AppData/Roaming/DAZ 3D/cms
64-bit software base: file:///C:/Program Files
32-bit software base: file:///C:/Program Files (x86)
I would like to move all my purchased and future saved content to my E drive while having my daz program stay on my C drive as it's a SSD with less memmory on it while my E drive is an HDD with a lot of memory space.
1) Would that cause any issues?
2)If not, how do I go about moving content from C to E? (any suggestions on better organization of content?)
3)How do i chang the default in the DIM (daz install manager) to E drive file?
4)If need be, how do I tell the daz program where to find the relocated files?
Thank you for your time
Sincerely,
Jacob.
No Pose Controls on Import [SOLVED]Hey all,
No matter what character I bring in to Cinema 4D via bridge, there are no pose morph controls. What am I missing? Do I need to enable this some where?
Thank you!
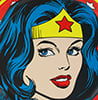
Celebrity Look-a-Likes for 3D figures Part 2I did a v4 morph 9 years ago, which given its age is not that bad. I was thinking of doing an image myself. I can update it and put it on sharecg if you want.
That was nice work
Agreed - lovely lady, lovely morph
Celebrity Look-a-Likes for 3D figures Part 2I did a v4 morph 9 years ago, which given its age is not that bad. I was thinking of doing an image myself. I can update it and put it on sharecg if you want.
That was nice work
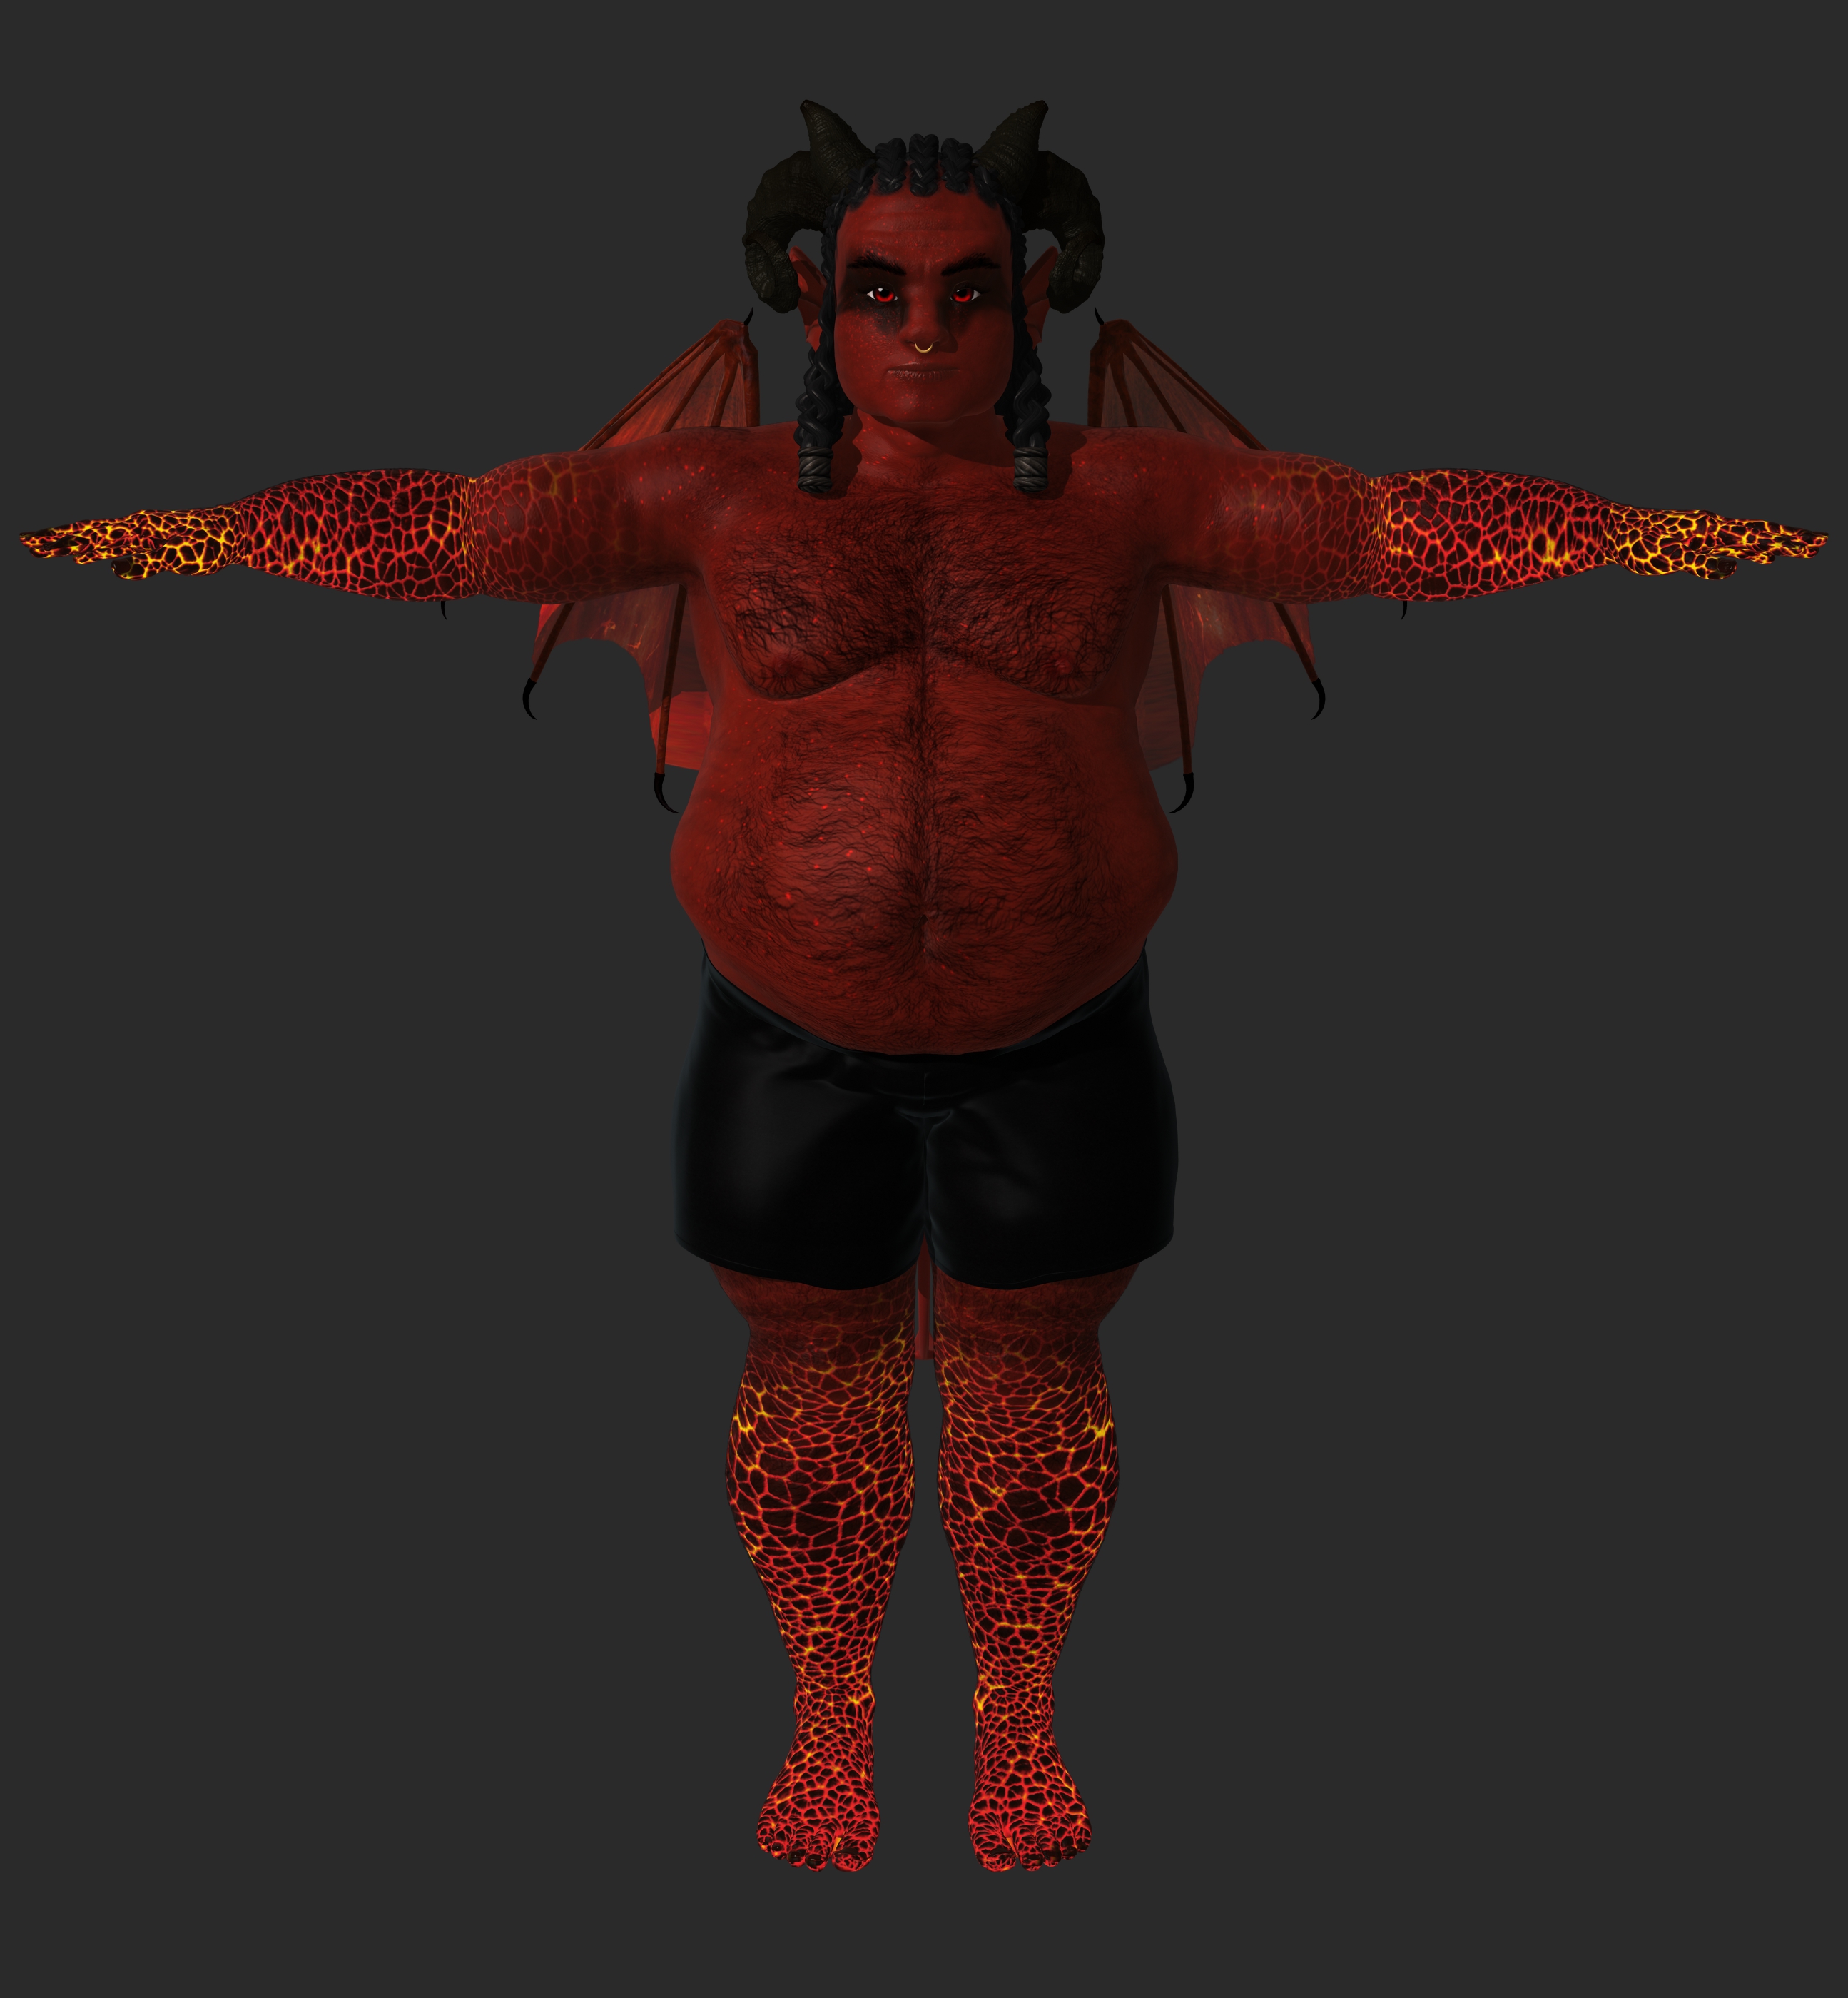
*Released dforce Desert Queen Hair* Commercialhttps://www.daz3d.com/dforce-desert-queen-hair-for-genesis-3-and-8-females
YAY for Strand Based Hair!!!
I'd like to include some general information and helpful tips for you to use my new sets in the store :)
What is the difference between strand based hair and fibermesh?
Strand Based Hair is generated inside Daz Studio. Fibermesh is actual mesh generated within Zbrush. Fibermesh can bring even the nicest computers to a painful crawl once it is imported into Daz Studio. Strand Based Hair is so much lighter!! There are a lot less hairs in your viewport, and the rest are generated during the render. I don't know all the magic behind that part, but its really awesome.
SBH ( Strand Based Hair ) is DYNAMIC! - Yes!!!!!!!!!!!!!. As an artist that has been working with Daz Studio and Poser for almost 20 years, this is what I always dreamed of!!!!!! Well I have also dreamed of being a millionaire too, but I'll settle for this
 .
.But what if I don't want to run a simulation? With the ones currently in the store, you do not need to run a simulation unless you want to. There are morphs that will move the hairs around like a traditional hair model too! The coolest part is that you can use the morphs before a simulation, without a simulation, and/ or after a simulation.
How do I use it? Select your figure and load the model like you normally would. Make sure that you do not have the geometry editor tool or the awesome Mesh Grabber Tool selected, pose your figure and render.
How do I use the morphs? These SBH hair models are currently in pieces to add more versatility. Selecting it in the scene tab will make the morphs appear in the parameters tab ( They are parented to the head) . Keep in mid that because these hairs are separate pieces they are grouped. So you will have to expand the options in the scene tab to find the individual pieces. Then just play with the sliders to your liking!
How do I simulate the hair? Welll there are several ways to do this, but the easiest way is to click on the simulate tab and click simulate. No extra settings needed. You can also use a timeline animation, or use the settings provided to use just gravity.
There will be so much versatility!! I have added a ton of separate surfaces so you will be able to easily kitbash these. Shut off certain surfaces to combine them with other SBH hairs orrrr maybe even combine them with some of the regular 3d hair models in the store and make a hybrid!
Technical Stuff:
Line Start With & Line End Width - This is how thick your hair is and how it tapers. I kept mine slightly thicker @ .09. and .03 to keep the amount of generated hairs to a minimum. If you want the hair to be thinner or taper more, you can turn this amount down, but oviously you will have to add more hairs.
Root Radius - This is the mode I have chosen to favor. It doesn't require painted maps or interpolation algorithms ( where hairs can go off in crazy directions for almost no good reason) and it is much more predictable for me when I import my hair from outside programs. With that said, there are no options for the cool stuff like frizz. Sorry guys :(
PS Points (per hair) - for those of you that model this is similar to CVS in a curve. It can control how smooth the hair will look. If you do a simulation and the hair just turns to a straight mess, try turning this down. The lower the setting, the more stiff the hair itself will behave and keep it's shape. Too low and you may end up with some jaggy edges. I feel like 20 to 30 is a good start for these stiffer styles.
PS Hairs (Per guide)- This is fairly self explanatory. If you want a fuller look, you can try adding more hairs. More hairs will probably require more computing power. But feel free to play with the setting.
PS Hair Tip Separation - This is a clumping option. Positive direction moves the hair away from the tip. Negative direction forms a clump at the tip.
Bias and Gain - This also has to do with clumping.
Bias is where along the hair shaft the clumping/non clumping starts. The lower the number the higher up the hair shaft the tip separation starts and vice versa.
Gain is how the bias transitions along the hair shaft.
I don't bother messing with these too much, but feel free to play with them.
PS Hairs and PR Hairs - PS hairs are supposed to be more accurate when simming than PR hairs. Also, I have found that PS hairs have a more delicate, natural look to them. PR hairs are great for adding a little extra bulk or frizz depending on how you use it. To get hair more dense looking, you can add PR hairs one or two at a time. I like to think of PR hairs as a multiplier, so you don't need to add a whole lot. If you want to make the hair appear a little more frizzy, you can play with the distribution radius and the tip separation for the PR hairs.
More Technical Questions * This will be added to as questions come up so all info can be placed in one convenient place
I like to use the NVIDIA Iray Preview. The hair is not chowing up in it. How can I preview the hair in that window?
You can view the hairs by going into the parameters tab: viewport line tesselation sides. You can change this setting from 0 to 2 or higher.
I want a certain section of my hair to drape more. Is there a way to do that? Yes! There are a few options you can use to adjust the draping so it suits your particular scene better. You can adjust the PS Points on the surface you select to something higher. The double dutch braids in particular are kept fairly low around 20. This keeps the whole hairstyle fairly stiff. I would start fairly high at maybe 60 and see what results you get and what you are exactly looking for. If it drapes better but its lost too much of your shape you can adjust other options as well.
You can also adjust the Local Shape Constraint Stiffness. Turning this down lower will also make the hair drape more while keeping the shape of the hair more in tact.
You can also adjust the tips of the hair with Local Shape Constraint Tip Stiffness. This will loosen up how the tips drape more. A lower number will spread those tips out more during a simulation.
All of this is a process of trial and error and what exactly you are looking for in an end result.
I want to simulate hair on a figure that is on a floor. When I sim the hair it makes an explosive mess. Help! This wasn't a question posed here yet but I know it's on the way :) You have a few options to handle this situation. If you are on an older computer that doesn't do so well with simulations, try keeping the model's head height as the same level the default figure loads in. I hope that makes sense. When a simulation is going it is essentially pulling those hairs to the end pose. Further away from default equals more pulling.
If you have a decent computer and you don't have an issue with simulations then you can simply change the simulation settings - Pose Transition Time to something higher than 1. The promos I did with Victoria on the floor all had a pose transition time of 3 - but I believe 2 probably would have done just fine.
Some general dhair issues were discussed in a different dforce hair thread and I want to share them here along with solutions.
"Needs greater stability when dealing with hair not pretty much falling straiht down, but with head/neck at 'strange' angles.
Hair falls with gravity. If you bend the head to the right, then the hair should essentially fall to the right. However, depending on the style of the hair; you may need to use a pose, a morph, or a simulation setting to nudge the hair in that direction. If it is a stiffer style, you will more than likely need to adjust the points or the stiffness.
I have had on several occassions tried to get a hair to flow a certain way. Case in point : https://www.daz3d.com/dforce-soft-curls-for-genesis-8-and-genesis-3-females the promo with victoria on the ground. I tried several animations to get her hair to fall like that. Using morphs i was able to nudge the hair the way i wanted but it still didn't fall the way i had hoped. Simply changing the simulation controls "Start Bones from Memorized Pose" to off used gravity instead of an animation. It's a lot of trial and error. Understanding your options, settings, and little tricks along the way can give some wonderful results. The key is really to be patient. Learning takes time.
"Needs to be affacted by wind nodes in a consistent fashion"
I am not quite sure I understand what the author meant by this, so for the time being.. Im going to guess.
Hair that is lodged into a figure will not move. No matter how hard the wind blows.
" Needs to be able to cope with morphs that could produce poke-thru (such as elf ears) without crashing"
If you have poke through, you will get a mess. Plain and simple. The bigger the mess the more likely chance you will have a crash.
I understand you will want these products to do everything and then some that you can throw at it, but please understand we can't forsee all of your creative visions :)
I will look into seeing if morphing within daz studio can potentially be done by a customer. If it can, I will share some info here.
"Needs to handle motion in animations without leaving a 'trail' of hair floating in the air behind the figure."
I'm guessing that this is referring to producing a still render with a simulated hair animation.
Easy fix. Change the pose transition time to something greater than 1. If you still have trails, adjust to 2. You can also increase the stabilization times to something greater than1.
You can also try and move the figure closer to world center so there is less "pulling" on the hair during the animation.
Now go have some fun and be creative already!
I will be here checking this thread as often as I can to help, should you get stuck, have questions, or just wanna show off pretty pictures :)
 Celebrity Look-a-Likes for 3D figures Part 2
I did a v4 morph 9 years ago, which given its age is not that bad. I was thinking of doing an image myself. I can update it and put it on sharecg if you want.
G8F Base Distortionyou probably have a morph that is applying when it shouldn't, go to parameters > currently used, you may need to show hidden paramters too.
go through the list of currently used parameters and adjust them to see which might be causing it.
I set up g8f in a similar leg pose and have attached a screen grab of the leg correctives in use
 Transferring Mixamo animations to Genesis 2 figures in Carrara?
I am wondering if there is a way for me to transfer Mixamo animations onto Genesis 2 figures in Carrara?
Sagan: A DAZ Studio to Blender Alembic Exporter@Marble ....
@TheKD tip #4 with the UV mapping is important for figures like the cyborg DA-15V or Aurora with deep grooves and multiple layers of clothing or in this case 'shell' armour around her. But it takes maybe 30 seconds to go into blender shader editor and just fix it and 100% correct textures along with the alembic files for all those deep grooves and extra detail.
Also tested it on monsters; for example the hydra 7 head creature with a 300 frame animation on all heads and also subdivision 4 detail for other HD models (even though animation with sub level 4 is gonna give you millions of vertexes and a looooooooooooong time to write the alembic cache file) but it works....
So basically I haven't come across an issue but instead finally happy to work in daz, animate, morph, pose, layer clothing etc. and export to blender and get exactly what I expected and further edit my scene around the daz character and finish. Blows my mind still. Difffeo and Sagan been a game changer.Daz Studio Pro BETA - version 4.12.2.60! (*UPDATED*)I'm running Daz Studio 4.12 64 bit on Windows 10 Enterprize with Intel Core i5-4570T CPU @2.90GHz. And I have the Genesis 8 Model installed, and every time I load the base figure in, I get this creepy looking body and figure shape. And the only way I found to get rid of it is to uninstall Daz Studio, clean up the registry, and re-install. Is there something wrong? Is there another way around this? And what would cause it to happen?
https://www.daz3d.com/forums/discussion/comment/4448441/
It has nothing to do with DazStudio, just a wrongly saved morph ...
CC#54 WiPs ~ What is it that you truly desire? after party Chit Chat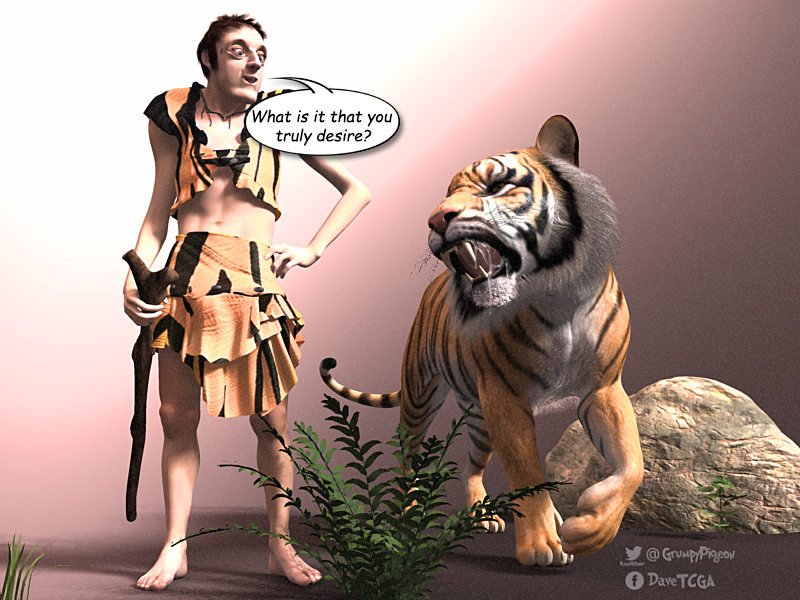
I recognized that outfit

it's the only piece of clothing I have for G8 F & M ~ dunno where it came from, maybe one of the sales or G8 download, didn't even know I had it till I went looking for clothes lol
I used your transfer to get it onto Genesis

Cool!
 ONLY Render shows pokethrough
I've found often hd morph on figures cause pokethrough on men's clothing.
That was sadly the problem :( I disabled the Body HD morph and now the pokethrough is gone, had it again (I build comics, so I need my char multiple times).
but well, the boy is covered full in clothes so the body is anyway not visible and the HD details aren't needed, I just let the Face HD on, not that I really see it xD...
Yeah, I'm sorry to be right. In rendering men, with HD muscles all the time, I can never get their clothig not to have pokethrough. So what I do is save out two versions, one with HD, and one with none but head for wearing full clothing. But yeah, I agree, it is disappointing and frustrating issue.
Immutable Rules of the DAZ Universe - Add Your Own!Ooh, wait. I have more:
In Dazlandia, you can never put your hands in your pockets because the pants don't morph that way. You can never stick a cigar in your mouth, because the mouths don't morph that way. You can never wear a hat because the hair doesn't morph that way! Everybody is double-jointed, but nobody can look back over their shoulder without looking like they got put through a wringer.
Yes, there are exceptions to most of these, but as a general rule, I have seen all of these issues.
Mesh smoothing can actually simulate hands in pockets.
The "Animators Assemble!" thread for Daz animation WIPs, clips, and tipsI love Lynx! What a cutie!
As for Daz Studio, I'm fairly certain that I could get into it and become proficient at doing my work in there. When I am in DS, I have a lot of fun and enjoy all of the hard work the development team has put into it over the years - which, in its own was very fun and exciting to witness. I downloaded D|S beta 0.7 when I had Poser 5 or 6, and still have a copy of it on one of my backup discs. It was pretty... empty then. But it gave hope when it was announced that Poser may end up getting the plug pulled. I have a few other versions stored along the way as I trudged forward in Poser.
Finding Carrara was like finding out that I had polished a Genie's lamp and the Genie had granted my ultimate wish - it really felt like that. Remembering back, yeah... the was a learning curve to getting used to a new way of doing things, but I can manipulate mesh on-the-fly with real modeling tools! That made animating Daz figures work for me!
I was one of the folks who voted in the poll to add support for Daz 3D's next gen figures (the yet unnamed Genesis 1 figure) and I'm glad I did. Genesis 1 is such a versatile figure for me - especially now that I have GenX2 with the Genesis 2 and 3 addons. For a while there, Rosie 5 wore 3D Universe's Jazelyn's face along with other shappes blended in - almost always using at least a few tweaks from Thorne's shaping tweak products. When I got the Genesis 3 addon I tried out Mika 7's face and really liked it. They still didn't quite give me the look I was going for, and I finally ended up with using a blend of Keiko 6 and Aiko 6 with Gia 6 full-on for the body, with a few other tweaks to make her as small as she is (she's only 5'2") and her face is a massive blend of G4, V4++, Girl 5 and a bunch of others blended in there - and I can still use my wonderful collection of V4 maps - currently Reby Sky Elite blended with V4 HiRes.
She has an enormous amount of expression morphs from G4 and V4, Genesis 1 and 2 along with Josie 6 expressions. The incredible side effect of this is that some of them reside under Actor instead of Head, so I am able to use a bunch of them for face shaping, which is how I got her mouth to look the way I want it to.
Ooops... darn it! I'm babbling again!
Animating her is a real blast. I just love it! Dart 5 follows the same sort of path toward getting morphs into him, with my Genesis Morph Reduction process to keep the amount of Morph dials down to only what I need, but his shape is so much easier - closer to standard Daz 3D figure shapes.
The great love you feel for Carrara is enviable, you even want to go use it right now.
I am rendering as we speak!!! ;)
Time for bed though. Dreaded work! LOL
CC#54 WiPs ~ What is it that you truly desire? after party Chit ChatI recognized that outfit
it's the only piece of clothing I have for G8 F & M ~ dunno where it came from, maybe one of the sales or G8 download, didn't even know I had it till I went looking for clothes lol
I used your transfer to get it onto Genesis
Generation 3 Aiko and Hiro Appreciation Thread"Cower before me mortals for I am Twinkie Lord"
Definitely broke Hiro with this one, he looks great but the are a few small problems. Fitting clothes to him sucks and his arms break when posed, not sure how to fix that last one. So no art with him... for now.
Why don't you transfer the shapes to G8?
Well... I don't know how. Also if it requires any add-on products, I don't have them, and I have very few resources for any of the genesis males.
Something else I could try is do a render then covert him to a weight mapped figure, do a second render and try compositing them together... or I could try adjusting his rigging. 0_0
Never mind I fixed him, just needed to scale the collars along with the chest. durp
Now what to do with him. Mmmmmwwwwahahahahahaha
 Generation 3 Aiko and Hiro Appreciation Thread
"Cower before me mortals for I am Twinkie Lord"
Definitely broke Hiro with this one, he looks great but the are a few small problems. Fitting clothes to him sucks and his arms break when posed, not sure how to fix that last one. So no art with him... for now.
Why don't you transfer the shapes to G8?
Well... I don't know how. Also if it requires any add-on products, I don't have them, and I have very few resources for any of the genesis males.
Something else I could try is do a render then covert him to a weight mapped figure, do a second render and try compositing them together... or I could try adjusting his rigging. 0_0
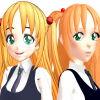
Celebrity Look-a-Likes for 3D figures Part 2Not much going on here so I thought I would show further work in process of the princess. Not finished yet but getting closer.
It's coming along nicely! I would suggest a bit more of a pout to her lips, though you said it wasn't finished, so that may be on your agenda anyway. It also might be useful to do a clay render, or maybe a render with another texture set. In my experience at least, using a texture based on an actual photo of the target can actually create an illusion of sorts that the morph is much closer than it actually is.
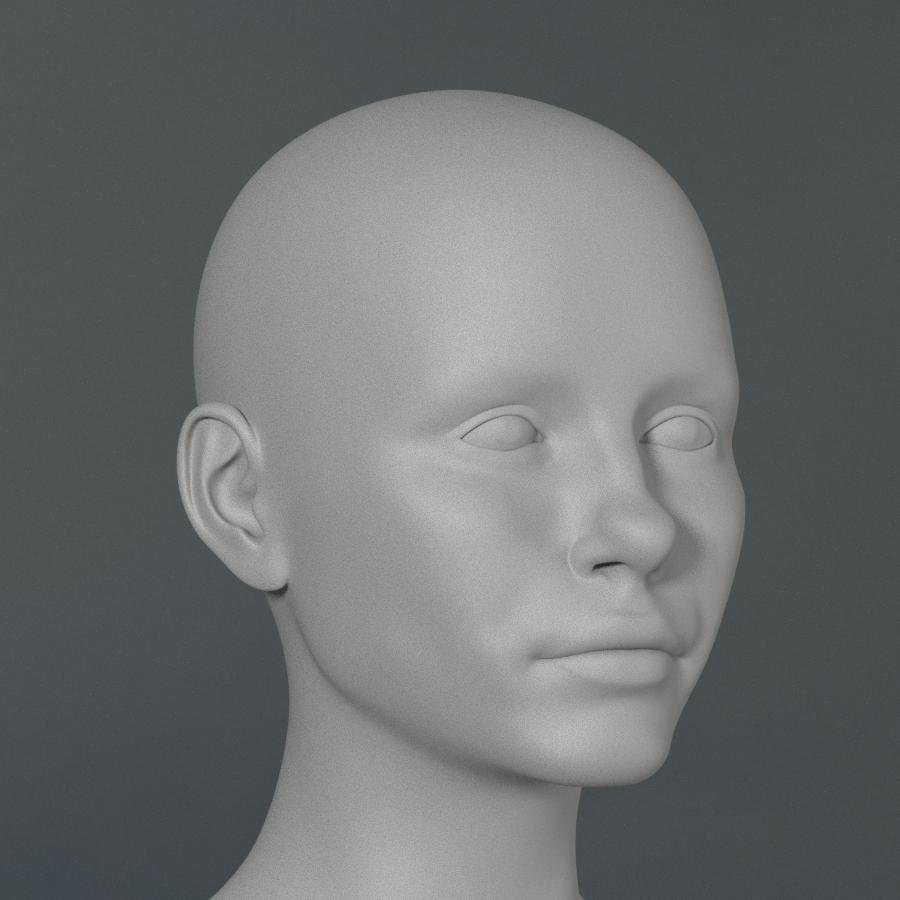
While you tinker with V4, I've continued tinkering with G8F. Here's the latest of my own rendition of Naomi.
Natural:

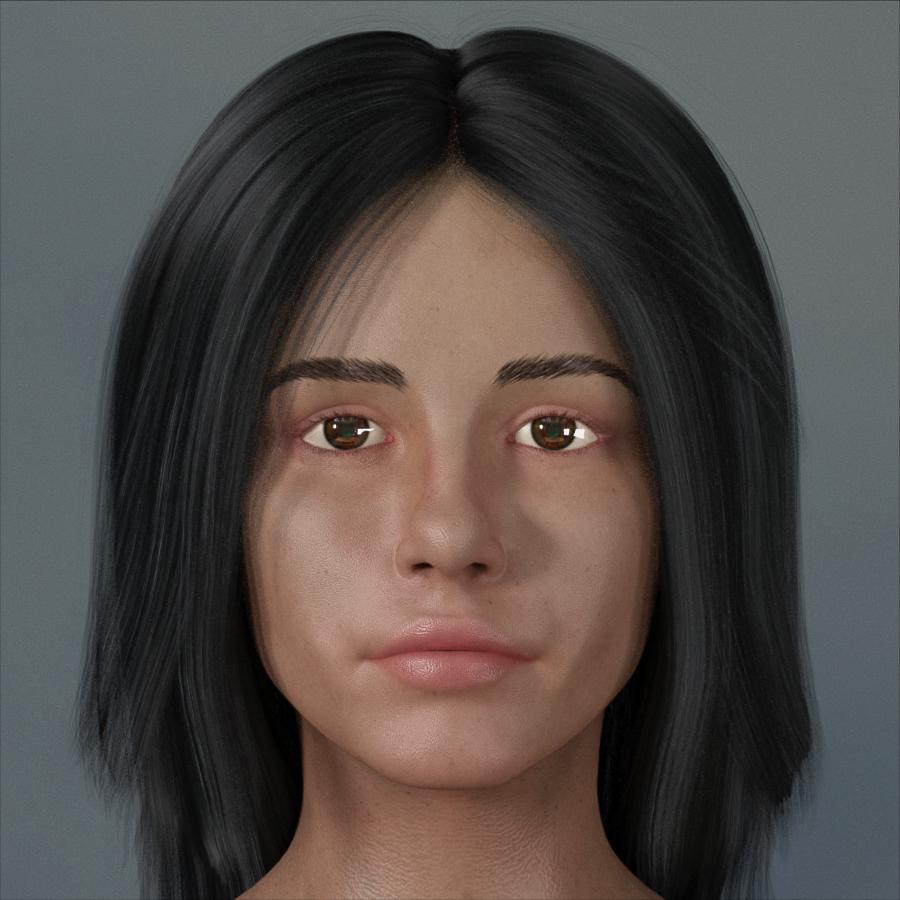
Make-Up:

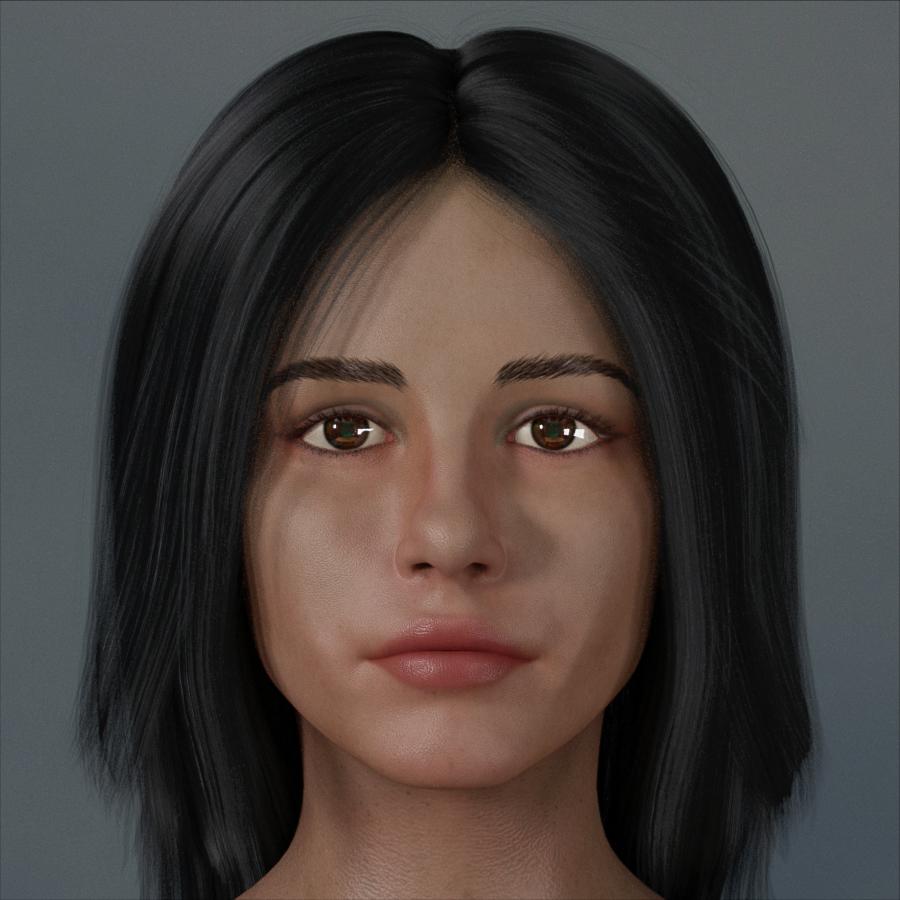
Clay:
 The "Animators Assemble!" thread for Daz animation WIPs, clips, and tips
I love Lynx! What a cutie!
As for Daz Studio, I'm fairly certain that I could get into it and become proficient at doing my work in there. When I am in DS, I have a lot of fun and enjoy all of the hard work the development team has put into it over the years - which, in its own was very fun and exciting to witness. I downloaded D|S beta 0.7 when I had Poser 5 or 6, and still have a copy of it on one of my backup discs. It was pretty... empty then. But it gave hope when it was announced that Poser may end up getting the plug pulled. I have a few other versions stored along the way as I trudged forward in Poser.
Finding Carrara was like finding out that I had polished a Genie's lamp and the Genie had granted my ultimate wish - it really felt like that. Remembering back, yeah... the was a learning curve to getting used to a new way of doing things, but I can manipulate mesh on-the-fly with real modeling tools! That made animating Daz figures work for me!
I was one of the folks who voted in the poll to add support for Daz 3D's next gen figures (the yet unnamed Genesis 1 figure) and I'm glad I did. Genesis 1 is such a versatile figure for me - especially now that I have GenX2 with the Genesis 2 and 3 addons. For a while there, Rosie 5 wore 3D Universe's Jazelyn's face along with other shappes blended in - almost always using at least a few tweaks from Thorne's shaping tweak products. When I got the Genesis 3 addon I tried out Mika 7's face and really liked it. They still didn't quite give me the look I was going for, and I finally ended up with using a blend of Keiko 6 and Aiko 6 with Gia 6 full-on for the body, with a few other tweaks to make her as small as she is (she's only 5'2") and her face is a massive blend of G4, V4++, Girl 5 and a bunch of others blended in there - and I can still use my wonderful collection of V4 maps - currently Reby Sky Elite blended with V4 HiRes.
She has an enormous amount of expression morphs from G4 and V4, Genesis 1 and 2 along with Josie 6 expressions. The incredible side effect of this is that some of them reside under Actor instead of Head, so I am able to use a bunch of them for face shaping, which is how I got her mouth to look the way I want it to.
Ooops... darn it! I'm babbling again!
Animating her is a real blast. I just love it! Dart 5 follows the same sort of path toward getting morphs into him, with my Genesis Morph Reduction process to keep the amount of Morph dials down to only what I need, but his shape is so much easier - closer to standard Daz 3D figure shapes.
The great love you feel for Carrara is enviable, you even want to go use it right now. My case is somewhat similar to yours, I have 2 programs that I adore, and one of them is Daz Studio. The other is the MikuMikuUniverse (I put it like this because there are several tools). I feel that both are very easy to use in what they are their forte (Daz generate models and scenarios, and MMU animate and render them). The rendering times of the MMU even in 4K are lower than those of Daz using OPENGL and with obviously much better results than OPENGL, being a good option to comfortably animate and that the pc does not die during rendering :) :)
Daz 3D is part of

Connect
DAZ Productions, Inc.
7533 S Center View Ct #4664
West Jordan, UT 84084Licensing Agreement | Terms of Service | Privacy Policy | EULA
© 2026 Daz Productions Inc. All Rights Reserved.