-
Mixamo animation and daz to blender
Copy and paste of a BVH or other motion file to a native blender rig can work in theory, but only if the two rigs are exactly the same. They need to have the same bone names and armature structure, then you could go into the dope sheet and copy and paste the keyframes from one rig to the other. If the rigs are not the same, the only way to transfer animation keyframes between the rigs is to retarget the animation keyframes from one armature to the other. Retargetting can be done with addons such as Auto-Rig Pro or some other addons mentioned here.
n00b to published artist?So, I got into 3d modeling a couple of months ago so I could create fanfic type things, but I think now that I might want to create a few products to sell so I can buy more stuff from the Daz shop without risking my kid's college fund. I have years of experience in actual dressmaking, usually historically accurate garments or fantasy-type things, and I was thinking it might transfer kind of well to 3d clothing? Does this sound like A Plan That Could Work or am I getting ahead of myself? Is there even demand for historically accurate clothes?
Not in the know but I would think that yes there's a market for historically accurate garments.
It takes awhile to learn how to use, let alone master, any 3D modeling program. Blender can do lots of things including "sewing" ... there are video tutorials over on YouTube. Hexagon is free {and a good utility to have on board even if only to be able to use the bridge for making morphs}. Before investing in any others, look for free trial downloads ;-) All have quite different user interfaces - best to find one that "clicks" with how you want to work. There are programs such as 3D Coat, Zbrush, etc.
eta: Model any clothing pieces to the "default as it loads" shape figure. If wanting to make clothing that will work nicely with dForce, that means the "A" posed figures of G8.
Looking for this outfitThe pants appear to be Aeon Soul's Everyday 2 for Genesis 8 Females with the Sporty texture pack.
https://www.daz3d.com/everyday-2-for-genesis-8-females
Not sure about the top. But could be from the Everyday 2 Morph pack.
https://www.daz3d.com/morphs-for-everyday-2
Lee
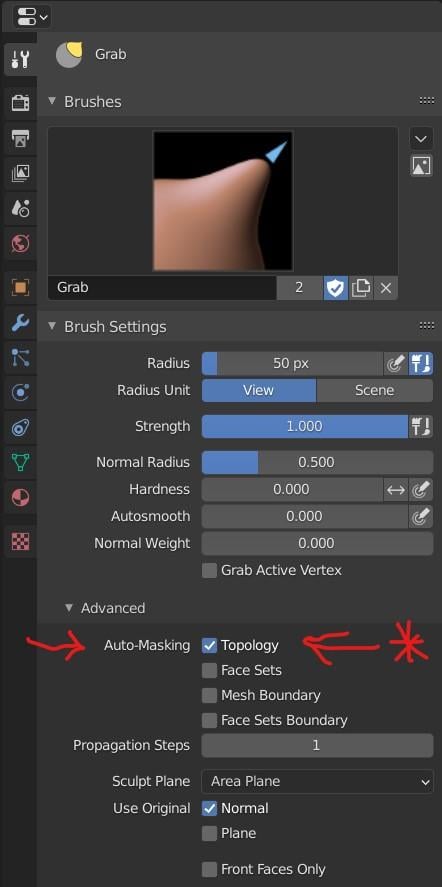
Blender Topology MaskI'm using Blender when I want to fix/morph clothing. There has been one thing that has long frustrated me and that is how to deal with parts of clothing that are all part of the same mesh but are separated - like the two sides of an open Dressing Gown. The frustration came because I use Sculpt mode in Blender and if I grab part of the cloth on one side of the separation, the other side moves with it. Well, maybe now there's a solution.
I know that ZBrush has a brush called Move Topological which is exactly what is needed for this task but, as far as I know, Blender doesn't. However, I've just discovered a feature that I had no idea was there and it seems to do what I need. It is a Check Box in the Tool settings for the sculpt brush (the Grab brush in this case). See screen shot.
 Genesis 9 delayed until at least 2020. Will you be buying it?
To be honest this is not a bad thing if you transfer the figure over to other apps for lookdev projects, because working with obj import and sorting out all the surfaces in the new app can be pretty painful. If each surface were a different object ... not so much. Honestly, I like this.I think a good idea for Genesis 9 would be some kind of modular design in which each body part is a separate figure. Like the upper and lower arms, upper and lower back, hands, feet, and everything are all separate figures parented together. Then if there are any parts people never change (for instance, if all the characters have the same eyeballs, tongue, or feet, or neck) then those could all be converted into instances to save polygons. I assume the parts could auto follow each other if changing the shape of one part would affect the shape of another part.
And it would create opportunity for all kinds of frivolous money grabs. Product makers would be selling people a new highly detailed torso or more accurate feet and everything. And it would render all pre-existing UV maps and clothing items incompatible so you have to buy a new version of everything.
Daz to Maya Bridge [Morph Exporting Problem - Reason and FIX]Yeah, for the moment u setup my shader manually because I'm not happy with how maps created for Iray look in Arnold. But yes I agree this is useful generally.Thank you again, I would have spent days painting weight maps or redoing all my custom sculpts or sculpt the morph manually without this. You saved me a lot of time.
Bunny's nightmare Outfit problemThis is a great suit, but I too am having problems with it following body poses. Hopefully it'll get patched soon, because its pretty busted right now.
Also, I can't find the shape morphs for the Bunny Breast and Bunny Torso that were suppose to be part of the package. Not sure where those are hiding.Those apply to the character, not the suit, so you'll need to select the character and check shaping parameters for something with "bunny" in the name or try the Shaping folder. The product has no readme, so you'll have to poke around.
Found them. Bunny Best is in Breast Shape (naturally), but Bunny Torso is in Waist morphs of all places, because it's a waist morph and should probably be called Bunny Waist.
Plugin does not work in C4D R23It looks like DAZ does not maintain this plugin for C4D at all. The shader creation for Redshift is a big mess with textures put into wrong ports and normals imported wrong and with wrong parameters. Refractive materials are imported completely wrong. The C4D plugin does not work in R23 at all. There were absolutely no updates to the bridge since release at all. There should have been quite some updates for reported bugs (some of them very easy to resolve), but nothing.
I'd be happy enough just being able to load the stuff (Preferably with the Pose Morph feature and rigging intact) since I'm used to having to adjust shaders even after "automatic conversion". Used to use several render engines back in R13 and even when the conversions were passable, they still needed tuning (usually when it came to specular or reflection). Now in R23 I've been using Cycles almost exclusively and so I have to do things by hand pretty much all the time anyway xD
But yeah I guess the Cinema Bridge isn't high on their To-Do list :/
I don't really have much need for keeping D|S around while the Bridge isn't working to be honest, since I only really downloaded it for the Bridge. I'll hold onto it though just in case, but I feel it'll probably be a while :(Male Poke throughfind it is a waste of time - i use sickleyield "pant masculinizer" which works well or another bulge morph... i dont think bulge morphs are that horrible and when compared to real photos of men in underwear or pants are that unrealistic either
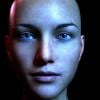
IRAY Photorealism?That is amazing I would definatly buy that just saying

I haven't popped back here in a while, but I ave been doing some stuff in Iray as well as cycles
So way way back I posted this reference
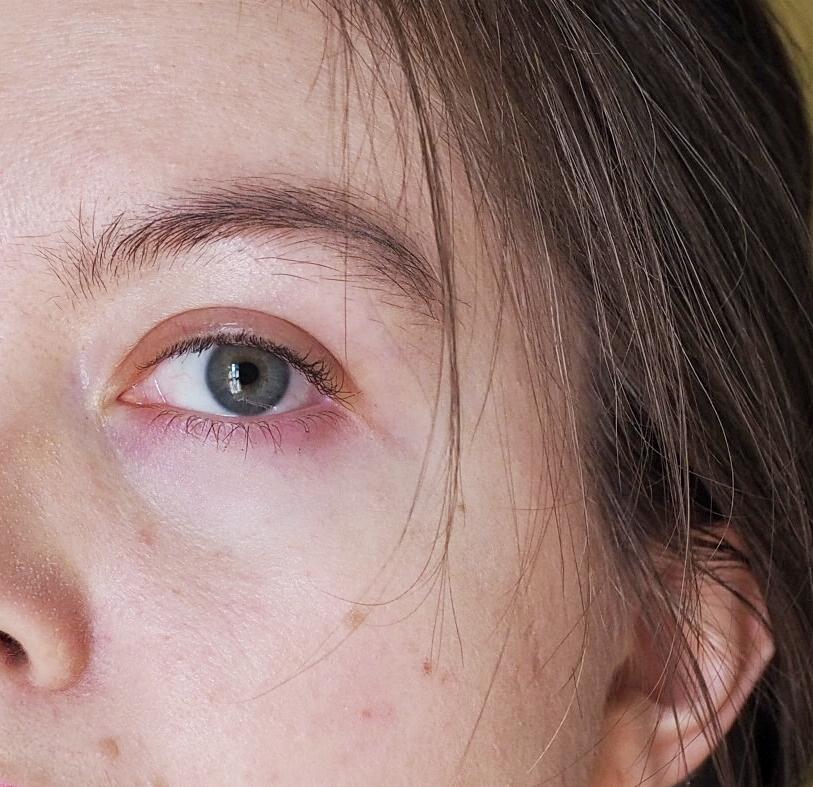
And at some point after decided hey lets see how exactingly we can recreate this
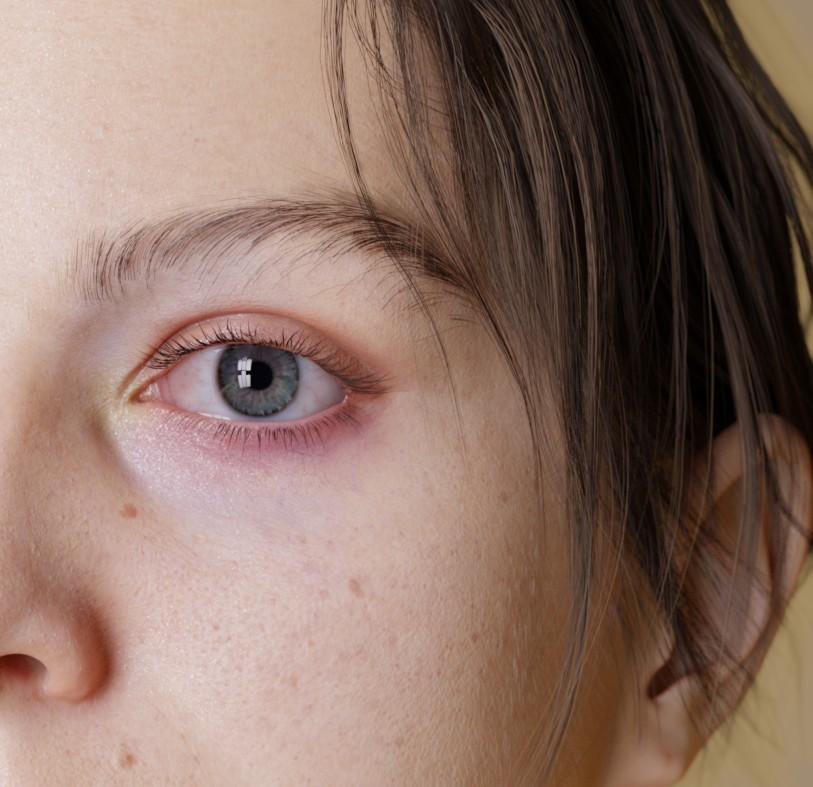
By which I mean lets create a custom morph and heavily edit some textures and just to be extra set up photomectric lights in a pattern that matches the window of the room the photo was taken in so the eye reflections even match
And then I completely forgot to ever post it. A couple months go by - I make another morph completely unrelated, but I look at it and go "hey this is sort of similar to my face" so I tweak it and make a morph matching my face again and then I remember: Oh yeah have a texture that matches the freckles and moles on my face pretty well (actually it only really matches 1/2 my face because I never bothered with finishing the other side)
So I stick them in some nice lighting and
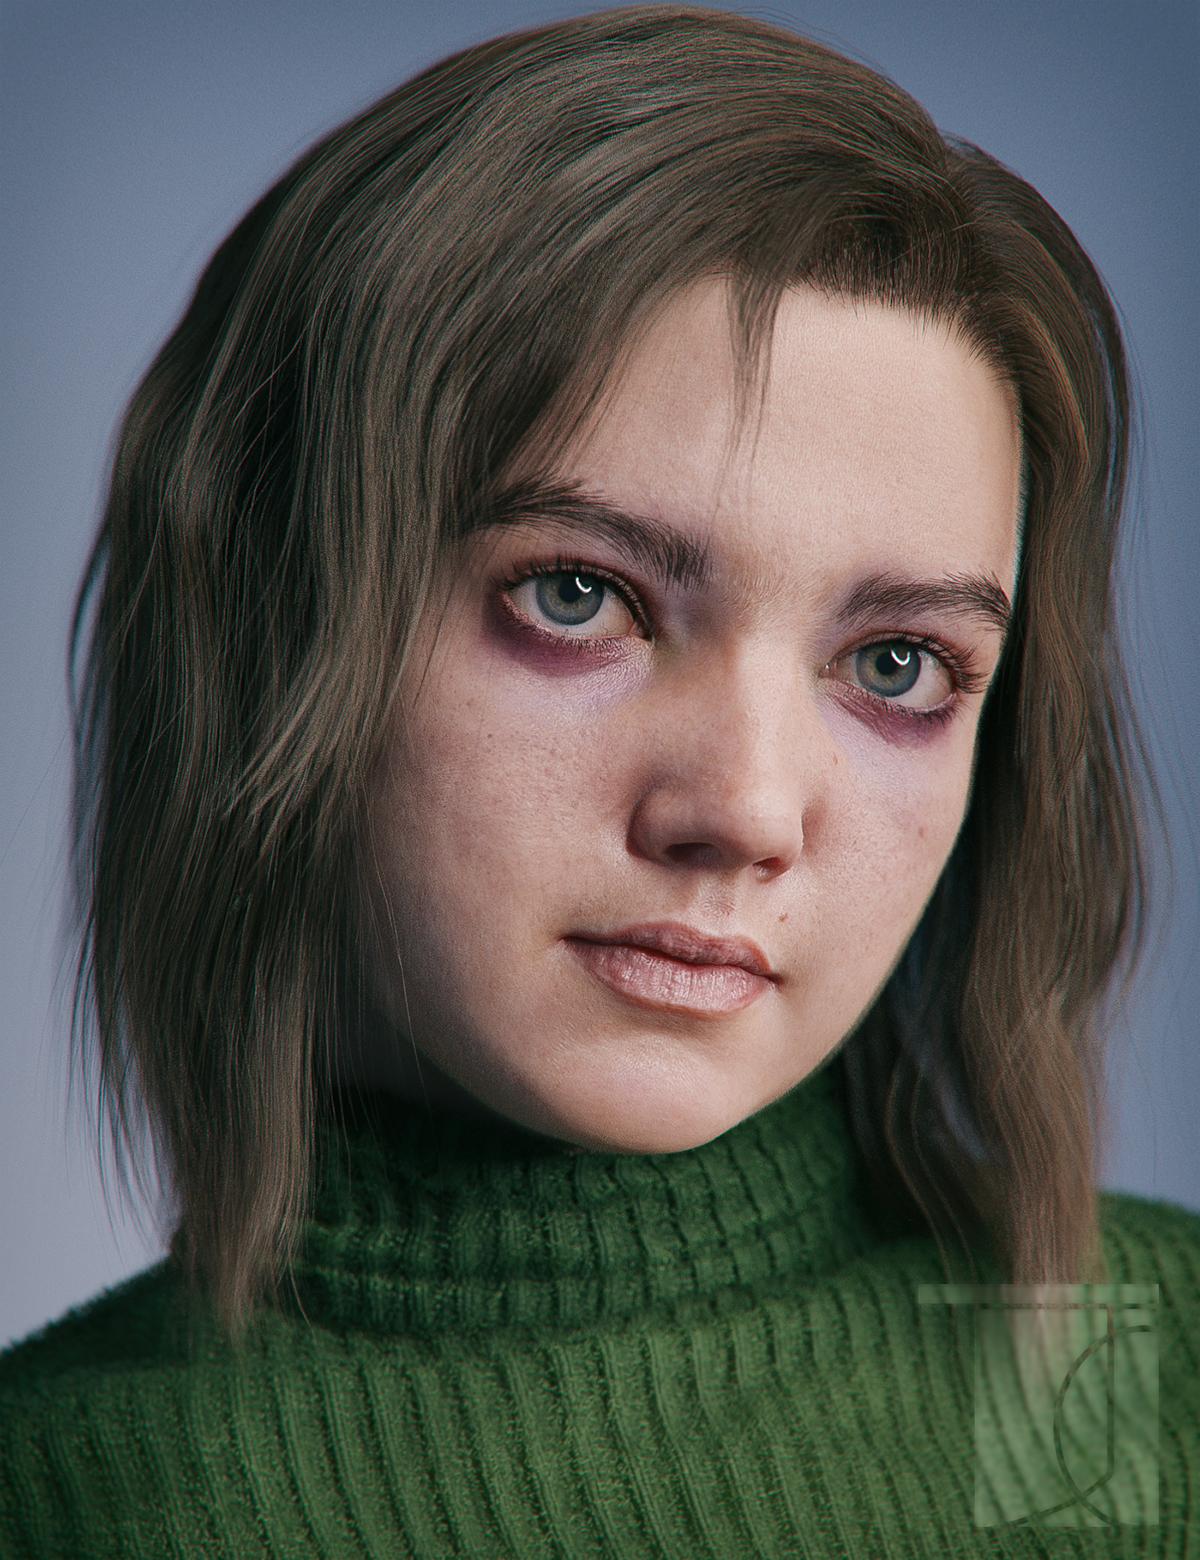
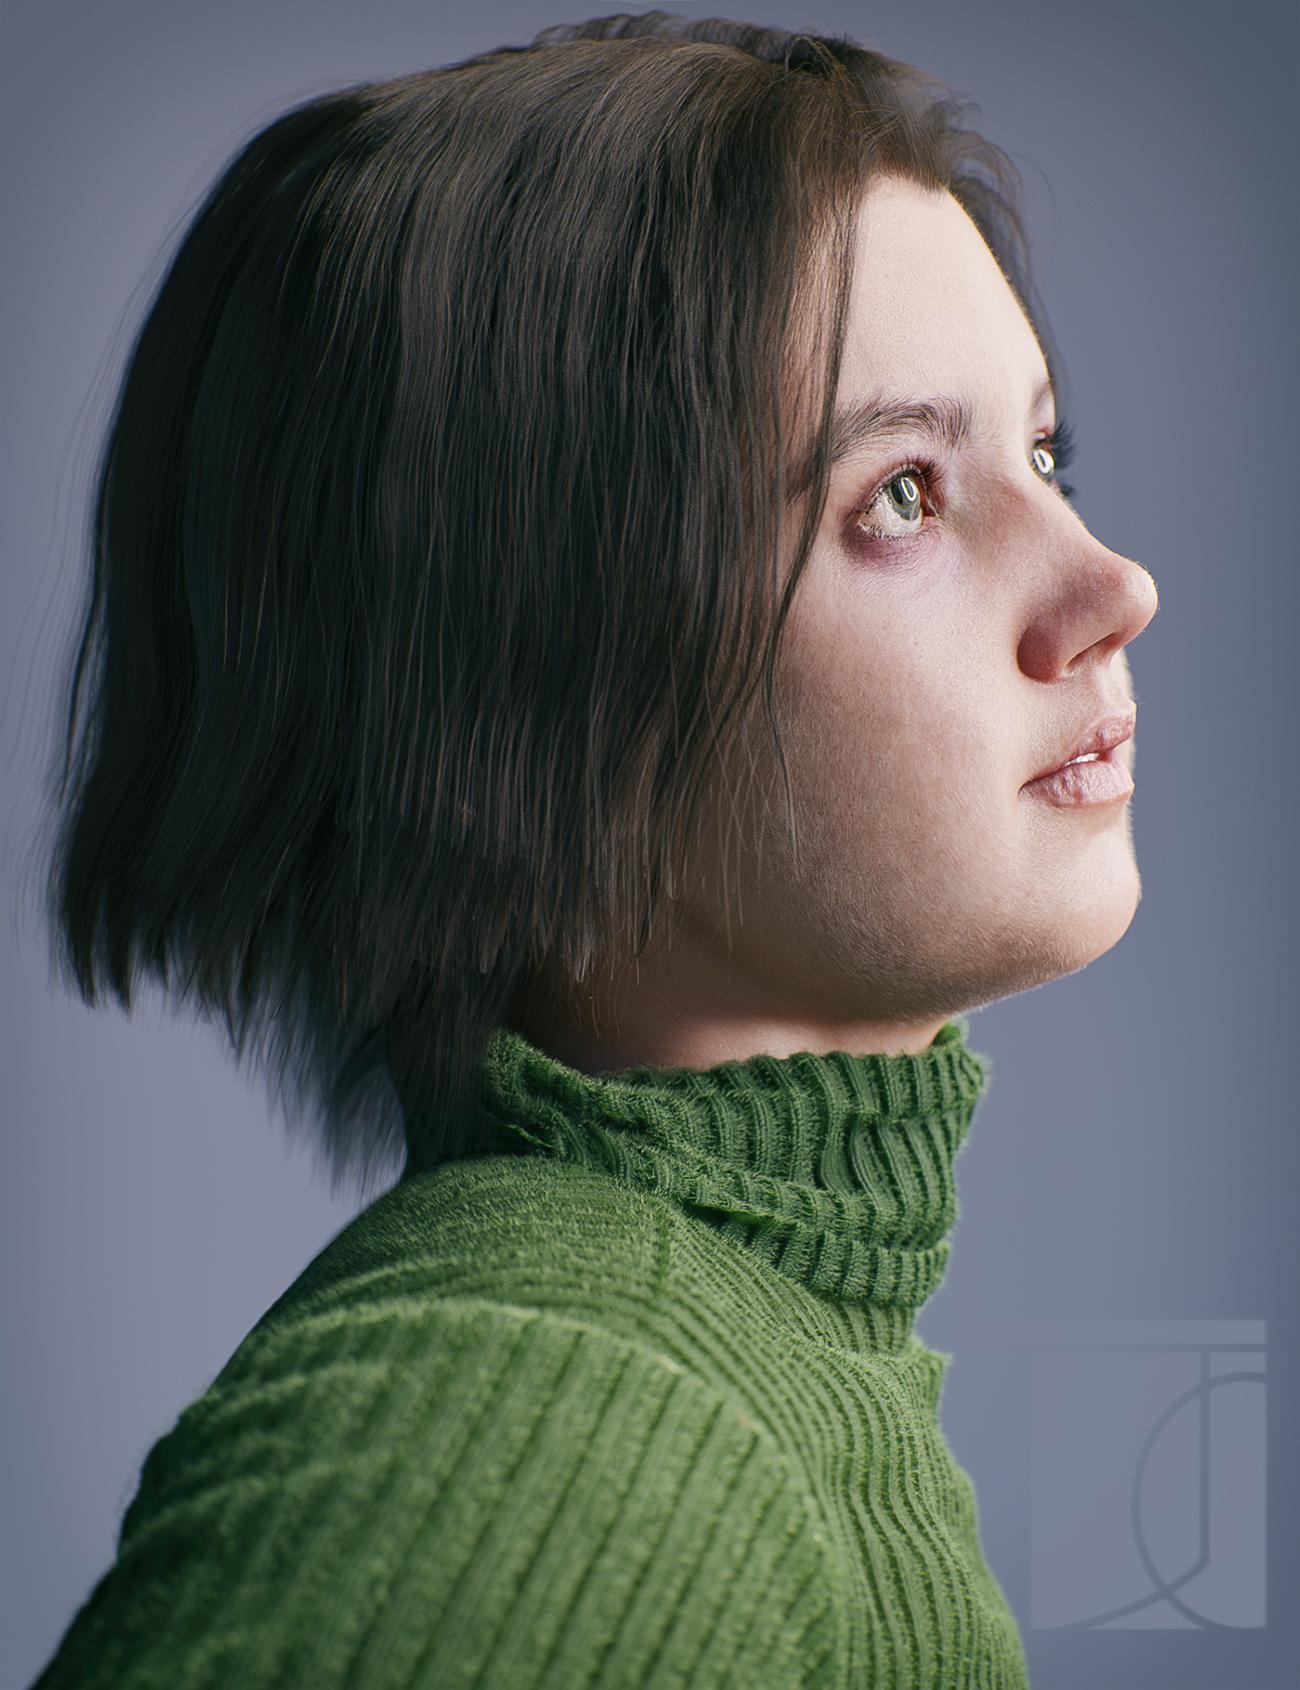
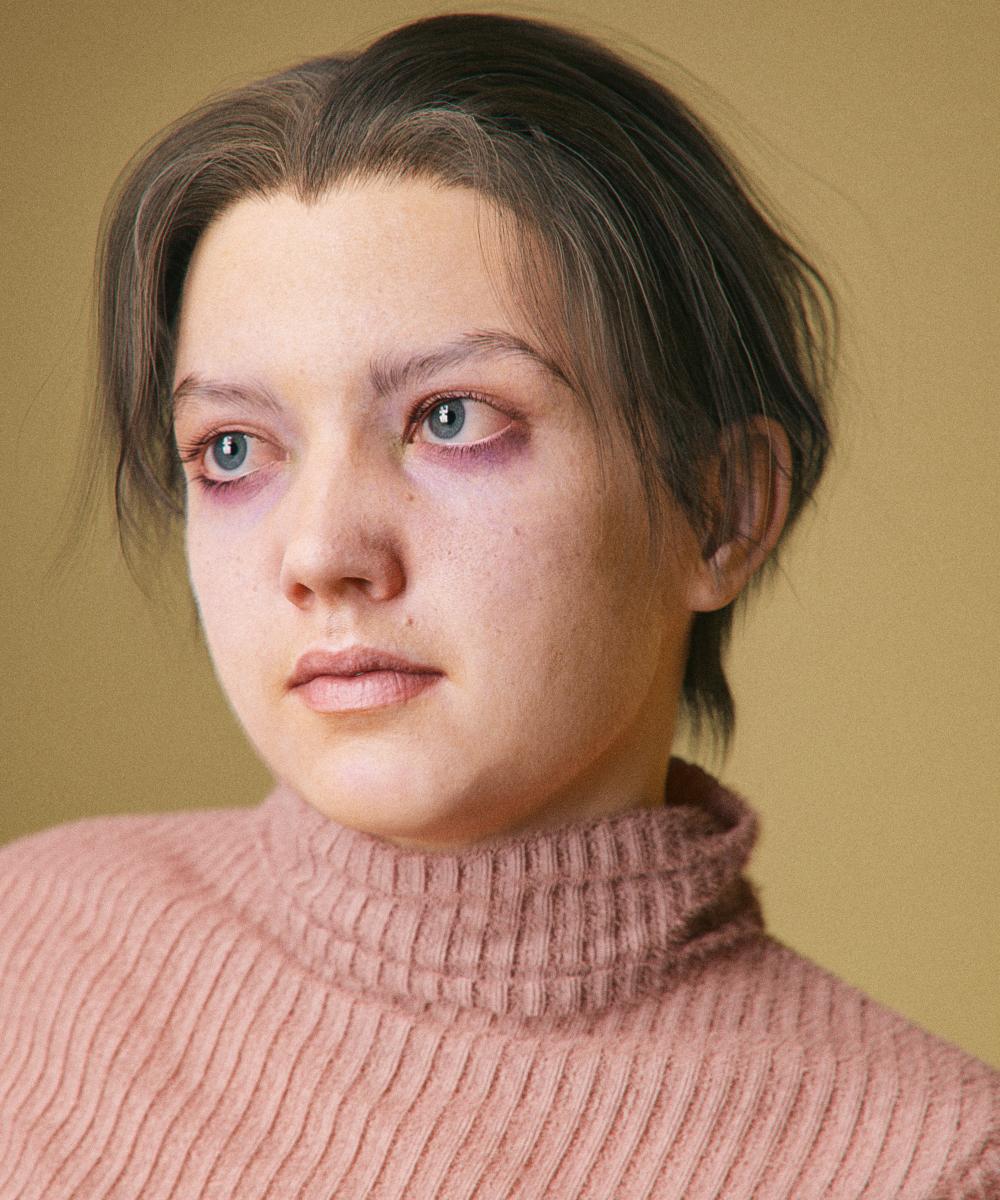
And I made a new icon!
Technical notes
the textures are actually customized V8. Extra details were painted onto the diffuse and bump maps. For the bump map the lips were completely painted over. (I have some feelings about lip bump). Skin settings are pretty similar to the isadorekeegan method - main takeaway transmitted color of .98/.98/.98 so that it works well in spectral
just an obscene amout of strands: the hair is strands, the eyebrows are strands (the more recent renders with a new and better shape) the lashes are strands from blender converted to mesh, the sweater is covered in strands. There aren't strands on the eyes or teeth, although I'm sure I'll figure out a reason to one of these days. For the vellus hair for instance the max hair density is a truly gross 350 strands per cm^2 (though controlled with a density map so there are less in some areas) and a base thickness of .015mm. So that my computer doesn't explode, all hairs have their tesalation set to 2 rather than 3 - although either DS has gotten a bit better with strand memory or I've gotten better at picking my settings, because I swear its been way less memory intensive and freezy.
The morph itself is also even more different from the default than it looks - I mean the general proportions and over all skull shape are just completely different - though that may have as much to do with my head as the relative realisticness of the base G8. Some G8 sameyness really comes down to a lot of characters - even if they have different features - having very similar proprtions: thie lip might curve differently but its width relative to the face stays the same; the eyeshape is tweaked but its height and depth remain unchanged. I think I've said it before, but I am really starting to think that things like morphs and hair are at far more important than the minute details of material settings when it comes to realism. Also even when it does come to materials a large part of how our skin looks is effected by the fact that we are indeed covered in hair - In some of these renders you can't really see the idividual vellus hairs, but, were I to hide them, the skin would look completely different
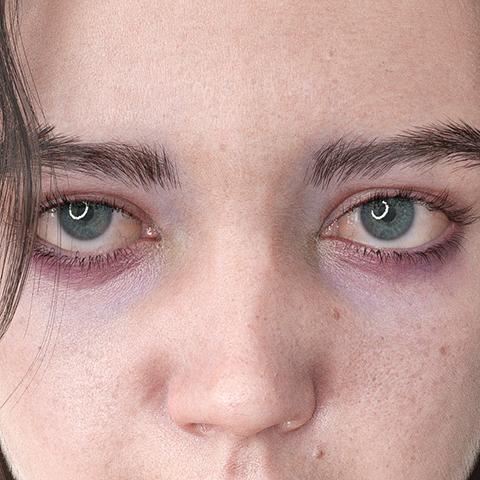
I think as a photo-real render it looks great, especially the eyeballs. However, that heavy-duty purple under the eyes is ultra-extreme. I think it looks unhealthy, like a zombie, not realistic ironically. It detracts from everything else mastery-wise you have going on. I know it is the character's feature, but I would tune it down. And yes, I know the reference photo had a version of that coloring, but it's not a must-have for yours to look real. Hers was a softer dark-pink and yours is looking heavy purple. Just my thoughts, ignore as you wish.
Out of curiosity - morph question
I thought they need the PA tool to import the morph and set it up as an HD morph in DAZ. Do they also sculpt in the PA-only HD tool? @mods: I realize maybe this is something we non-PAs are not supposed to know, if so, I apologize. I'm only curious regarding the workflow behind the process.The HD Morphs involve PA only tools. Whether all PAs use them, I can't say.
Out of curiosity - morph questionCan someone knowledgeable weigh in - if DAZ sells an original character, they sell a base morph for that character and an HD addon (sometimes). If a PA sells an HD character the character packs I've seen so far include both a base morph for the character and an HD morph for the HD details.
I don't know if there are special PA tools for it, but I guess probably not, so PAs probably sculpt a character morph with all details and then go back to base subdivision 0 for the base morph and import the high subdivision sculpt as HD morph? And if they use a sculpting program with different subdivision algorithm (dunno what ZBrush uses, doubt it would be catmark that DAZ is using) do a vertice order transfer? Or do you PAs sculpt a base morph in subdivision 0, import this as character morph, subdivide and then sculpt the HD details and then import the morph as an HD morph to DAZ?
I believe so, yes - work on a higher dvision level in soemthing like ZBrush, export the base morph at base resol;ution as the rest of us do, then export the HD morph and use a tool to import it with the base morph reversed out - we can do something similar, but using displacement or normals on top of the base morph.
Out of curiosity - morph questionCan someone knowledgeable weigh in - if DAZ sells an original character, they sell a base morph for that character and an HD addon (sometimes). If a PA sells an HD character the character packs I've seen so far include both a base morph for the character and an HD morph for the HD details.
I don't know if there are special PA tools for it, but I guess probably not, so PAs probably sculpt a character morph with all details and then go back to base subdivision 0 for the base morph and import the high subdivision sculpt as HD morph? And if they use a sculpting program with different subdivision algorithm (dunno what ZBrush uses, doubt it would be catmark that DAZ is using) do a vertice order transfer? Or do you PAs sculpt a base morph in subdivision 0, import this as character morph, subdivide and then sculpt the HD details and then import the morph as an HD morph to DAZ?
Male Poke throughWhat would be nice, is a tucked in morph for gens that makes them the same size as the bulge morph for non-gen.
Genesis 8 Basic Female Broken MorphsOk, it sounds like you saved the morph presets with non-zero default value, which causes the morphs to be activated for any and all G8F based characters.
When you saved the character morphs, the DS didn't save the status of your own morphs since they were in their default state (not moved from default)Now, as the default state of your morphs was changed to zero, the character presets do not have the information to activate your morphs - Use the dials to activate them and save the character presets again.
Huge increase in G8F load times since circa 4.14 upgrade (morph option overload?); steps to resolve?I draw your attention to one interesting feature of the "Fit Control" package, where you can delete unused morphs from clothing. So, the capability exists in Daz3D to trim off unused morph-fluff (tm), but this is the only place I have seen it used.
Genesis 8 Basic Female Broken MorphsI saved as character preset and morphs as morph preset. they are all in the right location. I had the same issue on November 8 and I have redone all morphs for my character. I thought it was fixed but it occures again. It messes up with G8F base figure and dev figure. I deleted 2 other characters and their morphs that where in the way. The issue is still there.
Male Poke throughJust making the element invisible creates a divot in the clothing where the element used to be that hurts to look at. Ouch!
Best to just unfit the bodypart. Select the element and then "Fit To" and select "None", then make everything invisible using the command-click on the Eye in the menu. However, there's a bug that when you refit the element and have Jepe's Bodyhair Shell applied, your, ahem, element will be transparent. It's a bug, throw it on the pile. I just delete the element, and usually most of my figures are saved both ways. Well, it works.
To get the effect that should be there in clothing (pants and and possibly the shirt if your hero needs it), I use the "Fit Control" property to transfer the, ahem, proper attributes from the member to the clothing. It's very nice, and also allows you to remove unused morphs from your clothes to reduce, ahem, the file size. I wish you could delete morphs that aren't used from all items and save them, as it would really decrease load times and is clearly already implemented (but unused elsewhere).
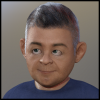
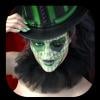
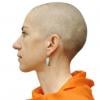
Celebrity Look-a-Likes for 3D figures part 3Any resemblance?
What character is that?
Exactly. It's a morph for the figure. But it doesn't exist as a product yet.
Newbie questionWhich basic child figure, Kids 4 or earlier, or a genesis morph?
Daz 3D is part of

Connect
DAZ Productions, Inc.
7533 S Center View Ct #4664
West Jordan, UT 84084Licensing Agreement | Terms of Service | Privacy Policy | EULA
© 2026 Daz Productions Inc. All Rights Reserved.