-
Growing Up for Genesis 8 (Commercial)
It is up to hair developers to add Growing Up support. What you can do is dial out the projected youth morph or other growing up morphs on the hair once fitted, which will set it more to the default shape.
Torment 8.1I bought just the character and HD morph. Not use for the rest of it.
Laurie
Genesis 8.1 / Victoria 8.1Mystiarra said:
but ... V8.1 is shorter.
V8.1 is just a character (morph), Genesis 8.1 Female is the base figure. There are a lot of shorter characters also for G8 without having problems fitting clothes on them either.
Genesis 8.1 / Victoria 8.1vagans said:
How does Kii'Na work being both G8 and G8.1? Does it have separate entries for both? It's only showing a single Apply.
G8 and G8.1 have identical geometries, so a shape morph can be applied to either. I assume Victoria 8.1F shape can be applied to the Genesis 8 Basic Female, but I haven't tried that. Materials are different but there seems to be some fix-up code in Daz 4.15 that will put G8 torso materials on the correct G8.1 surfaces.
Female characters not loadingPerttiA said:
2021-02-16 21:13:17.013 WARNING: ..\..\..\..\..\src\sdksource\fileinput\dzassetdaz.cpp(6777): Could not find output property for formula: Genesis8Female:/data/DAZ%203D/Genesis%208/Female/Morphs/ChangelingChick/CC%20Avandrael%20for%20Genesis%208%20Female/CCDevilTail_DefaultPose.dsf#CCDevilTail_DefaultPose?value in file : /data/DAZ%203D/Genesis%208/Female/Morphs/levie/Ahsoka/Ahsoka_FBM.dsf
Read as; While DS was reading the morph file "Ahsoka_FBM.dsf" it found a reference to another file "CCDevilTail_DefaultPose.dsf" and DS cant't find that file or the setting/pose "CCDevilTail_DefaultPose" inside that file => DS doesn't know what to do with the reference it found inside "Ahsoka_FBM.dsf"
The easiest solution is to remove "Ahsoka_FBM.dsf"
Most of the warnings you have are the same type, which is not that uncommon with the number of creators and variety in their skill levels.
This isn't an error as such, it's - as it says - a warning. It might be an error if it appeared in a log when someone thought they had a link set up, which is the purpose of logging it, but having links to add-ons that the user may not have is quite common and does no real harm (it might slow loading, I'm not sure).
Is there a way to prevent Morphs from loading?Unless you remove the morphs from the morph directory of the base figure, there is no way to prevent them from loading.
If there is a problem that DS considers a problem, then you should be able to find a warning about it on the log (Help->Troubleshooting->View Log)
Female characters not loading2021-02-16 21:13:17.013 WARNING: ..\..\..\..\..\src\sdksource\fileinput\dzassetdaz.cpp(6777): Could not find output property for formula: Genesis8Female:/data/DAZ%203D/Genesis%208/Female/Morphs/ChangelingChick/CC%20Avandrael%20for%20Genesis%208%20Female/CCDevilTail_DefaultPose.dsf#CCDevilTail_DefaultPose?value in file : /data/DAZ%203D/Genesis%208/Female/Morphs/levie/Ahsoka/Ahsoka_FBM.dsf
Read as; While DS was reading the morph file "Ahsoka_FBM.dsf" it found a reference to another file "CCDevilTail_DefaultPose.dsf" and DS cant't find that file or the setting/pose "CCDevilTail_DefaultPose" inside that file => DS doesn't know what to do with the reference it found inside "Ahsoka_FBM.dsf"
The easiest solution is to remove "Ahsoka_FBM.dsf"
Most of the warnings you have are the same type, which is not that uncommon with the number of creators and variety in their skill levels.
Is there a way to prevent Morphs from loading?I think I may have an issue with a morph, but I don't know which one is causing the problem.
Is there a way to prevent all morphs from loading when opening a .duf file?
Two things are happening, one is that any/all of my saved scenes can't be viewed except in IRAY view in the viewport.
and the Golden Palace anatomy is screwed up.,
Why is 'Blender' so popular for creating daz characters?Blender is nice BUT...Nothing beats workflow of Daz to Zbrush Via GoZ and send back changes as a morph or correction and go back again back and forth etc etc.
Pale skin for men comparable to Mousso's beauties?I have been using the Altern8 settings a lot today- they are very easy and effective. To tweak those results more toward blue or rosy red, I added diffuse LIE overlays with very pale colors (pale blue or pale purple for example) at 10% opacity and had some good results. I had better results with Altern8 starting with medium skin tones than light ones.
One thing I learned the hard way is that you should remove eyebrows BEFORE making changes to the skin, not after. Doing it after can lead to seriously messed-up results. I was able to undo a step and then transfer the no brow temp files manually though, so at least I didn't lose all my work. I saved material presets every time I found a result I kind of liked, and now I have ten or so skins with varying degrees of paleness. They are all based on M7, since I like the detail in his skin, but if I want to switch base skins, I can use the same techniques to achieve similar results. One day, when I'm feeling feisty, I will go through the trouble of modifying the base skin diffuse maps in gimp. My guess is this would produce some nice results.
Right now my big problem has nothing to do with "how" but rather "which": I can't decide how pale I want my guy to be. I am currently leaning toward a peachy pale color that is less extreme: https://imgur.com/1ndlRXB. This is one of the skin settings I made with a very pale diffuse blue color, and a somewhat darker (but still pale) blue overlay at 10%: https://imgur.com/wPHVkxx. I really liked that one by itself, but when I put it next to the leading lady, it was too extreme. Thankfully, this project is something I'm doing for fun, so I have time to sleep on these decisions and try lots of stuff out before locking in my choice.
I added the G8 UV swap to my wishlist. I have the G3 UV swap product already, but I am finally making the switch over to G8 so I guess I better pick it up. I also added Chace to my wishlist. Not sure if I will use him, but he is cheap and I need to start loading up on G8 males anyway.
Note: I was unable to get the same really nice results (https://imgur.com/zlct2r0) with a regular white point. Maybe it is possible by changing the base maps, but I just could not figure it out with the methods I was using. A pale yellow white point really seems to give skin a nice rosy-pale boost. I am not against doing some renders with a pale yellow white point if it makes my guy look better without making everything else look weird. I will definitely be keeping it in mind in the future.
Thanks to everyone who chimed in and offered advice. It has been extremely helpful.
Daz3d to Unreal Engine BridgeUsually the face gets distorted if you don't set the retarget source. http://davidvodhanel.com/daz-to-unreal-animations/
If you export a morph that scales the character at runtime, it won't animate properly when applied (if you choose it in the morphs list in the export). If it's baked in because you didn't export it as a morph, it should work.
Sending Retargeted Animations to DazYes and no. You can export models or animations out of Unreal by right-clicking and choosing Asset Actions -> Export.
If you got animations from the Epic Marketplace they are only licensed for use in the Unreal Engine though. So you can touch them up in another program and bring them back to Unreal, but you can't use them to make a final product in Daz Studio unless you get permission from the creator.
Also, when you transfer characters in DazToUnreal I rename the root bone and depending on your settings the character gets rotated to match Unreal's coordinate system, so you may have additional fixes to apply before you can actually use them.
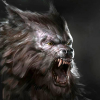
Contortionist/Extreme Poses - Bending IssueI've seen this posted in various places, but the answers seem to be a bit scattered. The issue happens when I bend their leg/arm too far, then their joints look odd. Now I did look for the JCM morphs, but they didn't seem to make the effect that I was looking for. I attached a picture of what I'm trying to acheive. The products that I've seen people suggest are these -
https://www.daz3d.com/bend-control-for-genesis-8-female-s-46267
https://www.daz3d.com/ultimate-natural-bend-morphs-for-genesis-8-female
https://www.daz3d.com/z-utility-bending-down-poses-and-partials-for-genesis-3-and-8
Are these the only products that I would need to make the contortionistic poses that I'm going for? Or is there some other morph/feature that's already in Daz that I could be editing to make this happen? Thanks for any help.
Female characters not loadingPerttiA said:
First you need to remove those added Content Libraries, which are not real Content Libraries from DS
Can you please walk me through it?
2021-02-16 16:21:46.999 WARNING: ..\..\..\..\..\src\sdksource\fileinput\dzassetdaz.cpp(7032): Duplicate formula found linking yEnd & Youth Morph Muffin in /data/DAZ 3D/Genesis 8/Female/Morphs/Angel - Wings/Youth Muffin/Youth Morph Muffin.dsf.
2021-02-16 16:21:47.004 WARNING: ..\..\..\..\..\src\sdksource\fileinput\dzassetdaz.cpp(7033): owner: Genesis8Female
2021-02-16 16:21:47.004 WARNING: ..\..\..\..\..\src\sdksource\fileinput\dzassetdaz.cpp(7034): output: upperFaceRig:/data/DAZ%203D/Genesis%208/Female/Genesis8Female.dsf#upperFaceRig?end_point/y
2021-02-16 16:21:47.004 WARNING: ..\..\..\..\..\src\sdksource\fileinput\dzassetdaz.cpp(7035): input: Genesis8Female:/data/DAZ%203D/Genesis%208/Female/Morphs/Angel%20-%20Wings/Youth%20Muffin/Youth%20Morph%20Muffin.dsf#Youth%20Morph%20Muffin?value
Blender HD morphs for DAZ StudioI know I am commenting on an older thread. (I have no idea how to monitor threads myself so wouldn't know if any of those originally in this discussion have a way to know I commented.) Anyways, I too am intrigued by the observation that AFE uses a graft. I cannot say if AFE was the source or something alse was going on but I found AFE to be a real drain on my system. And it seemed to auto load on every G8 figure once installed: maybe I had installed it incorrectly. I am perhaps slower than most but because it has non-zero default values I found it very difficult to track down what was happening/use/isolate. I suspect it has tons of potential that I could never figure out how to exploit: sadly it is placed in my discard pile. ....But I do find myself wish I could make an HD morph or some other trick to create piercing indents for earrings etc. . . .
FBX exporter morph rules syntaxThis isnt working I am assuming its the spaces in the names, if that is correct how do I handle spaces, is there an escape character to use for the spaces or something? Thank you for any help!
oSettings.setStringValue( "rules", "Adj Abdomen Upper\nExport\nAdj Arm Lower L\nExport");Was following this from the documentation:
// Morph Rules
// Format for rules is "Match1\nAction1\nMatch2\nAction2\nMatch3\nAction3",
// where Match# is a string to search for and Action# is one of Bake|Export|Ignore
// The names of the morphs are in the form: node_name.parameter_name
// The default action is to Bake
// So "FBMHeavy\nExport\nThin\nExport" would export all morphs that have FBMHeavy and all morphs that have Thin in the name
oSettings.setStringValue( "rules", "" );Superheroes Rebooted - Renders Assembleplasma_ring said:
GeoffreyHawkins said:
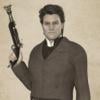
Hey all, I'm working on a Batman design and I'm trying to track down a good cowl for either G3 or G8. I like MightyMite's stuff over at Rendo but I only see his Adam West design. His Red Robin (Mask 42) would be perfect but it doesn't indicate that it has batear morphs. Trying to avoid autofiting back to M4 stuff that's out. Any help would be appreciated.
For one of mine I use SickleYield's Super Suits cowl with the bat morph from RawArt's No Suit. Finding a kitbashable piece is surprisingly hard! Most artists don't create masks that come down over the nose.
If I can't come up with anything else, I'm going to probably do a similar mashup, using the MightyMite Mask 42 that I mentioned and the cowl from the G3 Super Bodysuit as it has ear morphs.
Superheroes Rebooted - Renders AssembleGeoffreyHawkins said:
Hey all, I'm working on a Batman design and I'm trying to track down a good cowl for either G3 or G8. I like MightyMite's stuff over at Rendo but I only see his Adam West design. His Red Robin (Mask 42) would be perfect but it doesn't indicate that it has batear morphs. Trying to avoid autofiting back to M4 stuff that's out. Any help would be appreciated.
For one of mine I use SickleYield's Super Suits cowl with the bat morph from RawArt's No Suit. Finding a kitbashable piece is surprisingly hard! Most artists don't create masks that come down over the nose.
Flattening tires where the rubber meets the road3141592654 said:
Another option would be to make a morph in Hexagon ... That can work great and be quite detailed ... If you have already become familiar with Hexagon though.
Yup, good call, and it's free. Personally I haven't tried to use it in years, was quite unstable on the Mac so gave up trying to learn it, should have a new go at it now
 IRAY Photorealism?
justanother__boy_ca94588ae2 said:
j cade said:
The problem is You're going to get different advice from everyone - some of it conflicting
My personal tastes/habits
- Use spectral rendering
- as a result using Isadorekeegans method of a trasnsmitted color of .99/.99/.99 to fix the chromatic sss spectral bug
I'll try to go point by point here, sorry for late response by the way, the forums made it seem like my post wasn't posting and honestly i just gave up and assumed it wasn't going to work, didn't realise the post actually went through xD
Spectral rendering;
I've tried to mess around with spectral rendering before but it's honestly just confusing for me xD It's meant to make the colors look more true to life, but whenever i try to use it, it makes the colors feel wrong, off, desaturated, i don't know, it just doesn't feel right, is this at all related to the point you mentioned after?
as a result using Isadorekeegans method of a trasnsmitted color of .99/.99/.99 to fix the chromatic sss spectral bug
If so, could you possibly elaborate a little more on that? It's generally a good rule of thumb to treat me like a toddler and explain a little more than is neccessary xD
turn down/off burn highlights/crush blacks they make things look awful - if you need to adjust contrast later do i with something that doesn't turn highlights weird colors
Okay so that's an interesting one, i found pretty good results upping the 'crush blacks' a little bit more and definitely agree with turning down the burn highlights, but i didn't really consider turning them both off (To 0 i presume?), do you keep your burn and crush at 0 and simply work with various elements of contrast in post? I'll have to give that a go :3 I think i get a bit caught up trying to minimize my post-work and perhaps do a little too much of the work in Daz itself xD
avoid rendering in a void: use a floor or scenery or physical backdrop for improved bounce light that blends your character into the scene
I've only just recently started really getting away from rendering in a void hey xD It really does make such a huge difference, completely agree :3 I love transparency, i am an absolute glutton for transparent background xD But including basic scene elements changes the game SOOOO dramatically yeah in terms of the lighting and just the overall DEPTH of the render which is huge xD
realistic morphs: a lot of daz characters can be semi-stylized. Piling realistic textures shading etc on an unnaturally shaped character is never going to look right
Ugh okay, yes, completely agree, it is REALLY... REALLY hard to get naturally feeling characters, i've tried so many times to use references to get everything just right, overlayed proportion diagrams and stuff to make sure everything is correct, i even tried to mess with Wrap3 and some other stuff to get perfectly natural characters, nothing ever works, EVERY SINGLE RENDER i can look at and be like "Ugh, something is still off with this character -_-" I wish there was a better way but honestly i think without sculpting the morph yourself, it's just a losing battle xD
LEARN AND USE STRAND BASED HAIR!!!!!! It will absolutely take time and effort but what's your altenative? waiting for some magical fix to come in and complaining about how bad it looks when you have another option right there? even if it takes you literal years to learn thats still faster than waiting for something. I refuse to believe that I am the only person capable of using it. So I am going to keep beating this horse until everyone grows sick of it and hates me.
Okay let me just take a moment to point out that i just LOVE strand based hair xD
It never quite agrees with me, and i've flirted with the idea of getting Zbrush, learning blender hair, trying to do haircards for laziness, blah blah blah, but i feel like strand based hair is like my white whale, like i *HAVE* to make it work xD It's a beast i cannot fathom taming but i always try xD And 120,000% agree, it makes an INSANE difference in making a character look more believably human, so yeah, don't worry, i will continue to try to tame strand based hair xD IT MUST SUBMIT ONE DAY xD
Just for some like.. Context?
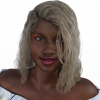
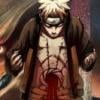
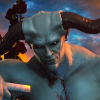
I've started messing with Michael 8.1 lately and so i've got a couple of terrible renders i've done to that end;
Try not to hate on some of the lighting, i was using references with harsh lighting and simply replicated it xD
DISCLAIMER: I make male renders, clothing is optional (EXCEPT FOR GENS, they will always be covered) and they are meant to feel more natural than studio, there are elements that intentionally lean more towards stupid insta pictures than photoshoots, this is, again, intentional, please don't hate xD
So i mean, the hair is strand based, obvi xD But it doesn't really want to behave properly xD
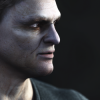
I think some turned out better than others, again, pretty obvi xD
I've only JUST found the 8.1 face controls so there's some janky face stuff going on but yeah...
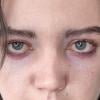
That's my 3 most current attempts minus one which has some inappropriate wording in it that i thought wasn't appropriate.
Oh, also, i welcome ALL opinions :3 Even if people have different ideas or opinions or advice, i wanna hear and try it all and find what works for me :3
I think that's the joy of a collaborative community, we can all have different opinions and ideas on what's right and wrong but in the end, two opposing opinions don't actually have to be mutually exclusive, they don't have to be right and wrong, they both just serve as different lessons on the path to the same goal ;3
1st of your strand based hair looks very good
to answer some of your questions I like spectral rendering because I like the idea of accuracy, but mostly you can use slightly higher values for transmitted distance and scattering distance as I've found that as you use smaller values iray behaves in unexpected and funky ways. If (as I do) your using translucecy values from .95-.1 with spectral rendering off, If you want your skin not to look like jello, you need to use scattering distance values of .05 and DS really doesnt like that. With spectral on you can use higher values.
the downside is that spectral has a bit of a bug so if you use a color in transmitted color you get weird dark seam lines - thankfully a user named isadorekeegan discovered that if you use non- colored value the seams go away so the fix is you use a transmitted color of .99/.99/.99 and a transmitted in the range of distance of .01-.03 things look very nice.
I also thinks spectral handles light a bit nicer which is the other main reason and leads into my reasons for tuning down burn highlights/crush blacks (typically I don't turn them all the way off, but down to .05)
Burn highlights/crush blacks are post render effects that up the contrast of your image (burn highlights also does it in a particularly ugly way that tends to turn highlights yellow) the thing with esentially just upping the contrast is you're then not creating that contrast with the lighting itself. so you end up using lights of lower strangth than you might otherwise. lets say you want some nice ear glow you need some rim lighting for that. If your highlights burn out the second it gets slightly bright, you use less bright rim lighting which means less ear glow. With burn highlight/crush blacks loweres you're more likely to use much brighter lighting so more light passing through the ears - more ear glow even though the scene is no "brighter"
I posted some images a few pages back but I think interiors is where this can really be demonstrated
heres a room it purely by the sun and sky - despite being lit by what is clearly sun streaming throught the window it looks like a dark cave. I could turn the light up, but the highlight on the floor is already comepletely burned out. Now I happen to live in a house with small windows much smaller than the room in the renders, and even on cloudy days they are perfectly capable of lighting rooms. I could fix this all by adding helper lights in the room, but obviously real rooms don't have those and still can be lit by windows, is Iray just broken? (spoiler: no)

well here's the same room but with the lighting set up with burn highlights/crush blacks tuned down. Notably I was able to turn the strength of the sun waaaaay up without blowing out the lighlights. Also the effect of the bounce light is suddenly much more evident - Peronally I think this setup makes not only makes the room look less like a cavern, but also makes the effects of light bouncing much clearer. look at the floor infront of the cabinet and how much clearer it looks tinted brown as its lit by the light bouncing off the cabinet.

Daz 3D is part of

Connect
DAZ Productions, Inc.
7533 S Center View Ct #4664
West Jordan, UT 84084Licensing Agreement | Terms of Service | Privacy Policy | EULA
© 2026 Daz Productions Inc. All Rights Reserved.