-
DAZ 3D and sell
Terms of Use. Two Dimensional Works. Subject to the terms and conditions of this Agreement, User may (i) access, use, copy and modify the Content in the creation and presentation of two-dimensional animations and renderings, (ii) incorporate two dimensional images (including two dimensional images that simulate motion of three dimensional objects) derived by User from the Content in User's other works, and (iii) publish, market, distribute, transfer, sell or sublicense User's two-dimensional animations, renderings and other works; provided that User may not in any case publish, market, distribute, transfer, sell or sublicense any renderings, animations, software applications, data or any other product from which any Content, or any part thereof, or any substantially similar version of the Content can be separately exported, extracted or de-compiled into any re-distributable form or format.
Three Dimensional Works.The creation of three-dimensional physical representations (3D-print, molded copy, CNC-routed copy, and the like) of Content or any three-dimensional art derived from the Content is permitted only for personal, non-commercial use by the User. Additionally, the user may not grant other entities or individuals the right to produce such physical representations of the Content except for the sole purpose of providing the print to the User for their personal use.
Default Daz Studio vs Maya head shapeAsari said:
drzap said:
there are at least 2 work-a-rounds for this problem. What you are experiencing in Maya is the pure basemesh. You are not comparing apples to apples. Unless you dial down your viewport in DS, you won't ever see what the basemesh really looks like. Anyways, here are the workarounds that I use:
1. Export a hi-poly OBJ (usually subD4) and bake it as a displacement map to your Maya rig. I bake vector displacements in Zbrush or Mudbox. I use this method when I want to use the micro details already on the HD Daz asset (HD morphs).
2. Export hi-poly OBJ (usually subD2 or 3) and use it as your render mesh. You can transfer animation by means of UVblendshapes. I do this when I'm transferring micro-details from other sources or making my own.There is also a third possible way: a piece of software published by a friend of mine called Kinetic Motive has a feature that reportedly automatically bakes the HD morph from Daz into your Maya rig. I haven't tried this feature to confirm it, but you might want to try it out. Good luck.
/edit/ I neglected to provide you with links for the tools used in these methods. SeUVblendshapes plugin is essential to my Maya animation pipeline: https://scottenglert.com/seuvblendshape/
Kinetic Motive is my pal's facial animation plugin. Here is his webstore: https://gumroad.com/kineticmotive. ; He has a website too, but I can't find it at the moment.
And these are some renders of Daz figures using this method in Maya:

https://www.deviantart.com/bad-uncle for more images (figures are unclothed)
I used method #2 in the above examples. If you have any questions about how to employ some of these techniques, feel free to hit me up on Skype.
Hey drzap,I have seen Kinetic Motive's video on youtube regarding subdivision morphs a long time ago and could never figure out which product is the right product on his gum road.
This is the video I'm thinking of:
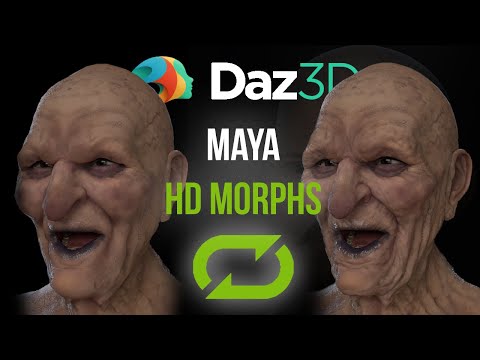
I usually use the displacement workflow but I would prefer to start from a subdiv1 mesh in some cases. You also mentioned another workflow that I recently experimented with:
1. Import G8 figure
2. Subdivide mesh
3. Import higher res mesh as obj
4. Setup blendshape.
This works technically but I noticed the blendshape is losing a lot of details. Given that Maya blendshape are not made to transfer details at higher mesh density levels I guess this is not an error of Maya but simply blendshapes are not made for this.
I have purchased the seUVBlendshape plugin but haven't played with it much yet. From the demo video it seems this is more meant to transfer deformations from a low poly mesh to a high poly mesh and not transfer details between 2 high poly meshes.
Ever since I saw Kinetic Motive's demo on their product I wanted to test this but what is the product and where can I buy it? Is this integrated into one if the face rig products?
I do have the Kinetic Motive plugin, and I think it works great! The mesh ends up being really dense and is basically un-poseable once it has gone through the subdivisions, however. The facial rig and everything works exactly as intended and described, but I think displacement maps are the way to go when dealing with detail because even with my beefy system it really can't handle the high resolution mesh when it comes to animating.
Do G3F Shoes and Boots Fit G8F ?In my experience, unless they are flats, no they don't. either using autofit or changing the scene identifier, heels just don't transfer well.
Importing OBJ from ZBrush as morph?In the past, I've used GoZ to export from Daz to ZBrush and vice-versa. I gather GoZ is not working properly with this version of Daz Studio. I can't get it to export the whole G8 figure, and while I can use GoZ to import a sculpted mesh back into Daz, Daz will only give me the option to "create new object," not to "update an existing object." The later radio button refuses to be pushed. The drop-down menu won't let me select the G8 figure.
I can still import the new mesh as an OBJ file. How do I now go about using it to create a morph for the G8 figure? I know it's a basic question, but normally it happens automatically using GoZ, and I can't figure out how to do it manually. Thanks in advance.
Llola Lane’s RENDER A MONTH Challenge 2021 (CLOSED)I used Quixel Mixer to combine roof tile texture with crumpled paper texture. I then used a function in Bridge to transfer the textures and the 3d horse model to Blender where I built the wagon and unwrapped the UV maps for the horse. I can't remember if I used Mesh Lab to adjust the mesh. I used GIMP to color one of the horse's maps and everything was then reassembled in Daz. The Spartan warrior and armor are from Daz as is the HDR. Everything else comes from Megascans Library.
Llola Lane said:
@Zatetic Daughter has a great eye... Looks like shingles on a roof. well done. btw... I'd eat all the candy from that pinata... lol.Do G3F Shoes and Boots Fit G8F ?Most should work ok with AutoFit. However, if you do get huge distortions, you could do the following:
1). Load G3F and the shoes/boots.
2). Adjust G3F's thighs Side-Side to 6 degrees.
3). Hide G3F, and export the shoes/boots as an OBJ.
4). Clear scene and load G8F.
5). Import the new shoes/boots OBJ (Should encapsulate her feet).
6). Go to Edit>Object>Transfer Utility. Select G8F as the source, and the OBJ as the target. I think you can select Footwear as the Projection Template pulldown.
7). Once complete, select the shoes/boots and go to File>Save As>Support Asset>Figure/Prop Asset. Save the shoes/boots in the directory you want.
Do keep in mind that in doing this, that this method would only be for your use, and not for a freebie or addon, unless you have permission from the relevant PA.
Thanks, -David
Long load times? This may help! - Morphs Manager3dOutlaw said:
So, you don't check/uncheck morphs with this. You check/uncheck folders of morphs. If you've got several hundreds of morph folders....yep, that is a lot, and this may not be the best tool for you. For me it just gives me a quick way to "turn off" things that I rarely use, so more of a one-time or rare set and forget. There are a couple of other folks here that have some freebies with more advanced options.No, I uncheck the morphs. I have 157 separate folders within \data\DAZ 3D\Genesis 8\Female\Morphs\ alone. Inside many of them, as some are Vanity folders, are more than one morph.
As your impressive tool does not count, I cannot tell you how many there are, but I think it is around 400.
I appreciate your tool and effort; I just wanted to point out something that would make it even more impressive and useful for asset hoarders like me. ;)Long load times? This may help! - Morphs ManagerAbyssalEros said:
Thank you very much for this tool.
You are welcome! :)
However, I would appreciate a function to uncheck/check all (or/and something akin to holding the Control Key down while selecting).
For example, I have to manually uncheck several hundred morphs alone for the Genesis 8 females from the DAZ store (I have the ones from the other stores in their own content folders), and that takes A.G.E.S.So, you don't check/uncheck morphs with this. You check/uncheck folders of morphs. If you've got several hundreds of morph folders....yep, that is a lot, and this may not be the best tool for you. For me it just gives me a quick way to "turn off" things that I rarely use, so more of a one-time or rare set and forget. There are a couple of other folks here that have some freebies with more advanced options.
And I think if you can export a list of the morphs with information if they have the Noload tag or not would be nice too.
I probably won't be making any more updates to this, unless there is a bug. Sorry!
Poser clothing to Daz StudioClothes Converter 4.0 does not claim to create .duf files. The general rule is that if a product does not say it supports something, assume it does not. It is good for converting between Generation 3 (i.e., V3, M3) and Generation 4 (V4, M4, etc.) and many older Poser figures. Anyway, if you purchased it less than 30 days ago you can get a refund. Don't hesitate.
Strictly speaking, Studio creates native versions of Poser products when loading them, no need to convert them if using with the intended figure. It is done automatically and used internally. You can save them from Studio and they will retain this information if you re-use them.
There are other clothing converters from Riversoft Art and Sickleyield that will convert Millennium Generation 4 clothing to Genesis 8: RSSY Clothing Converter from Victoria 4 to Genesis 8 Female, RSSY Clothing Converter from Michael 4 to Genesis 8 Male. There are also version to convert to Genesis 3, and from Genesis 1, 2, 3 to Genesis 8. There are even several others to convert hair and props in their catalogs.
GenerationX2 and all add-ons will get you to Genesis 3, no more. There is a product to transfer from Genesis 3 to Genesis 8. XTransfer - Genesis 3 to Genesis 8 Converter.
There are probably some freebies out there to do some of these conversions. I cannot testify as to their quality, but it might be worth your while to investigate.
Can the store please standardize location of content
I mix stuff way to often to keep character specific items with characters. Each person will have to set it up the best way for them. I keep horns in anatomy/horns wings in anatomy/wings ect... If I need the horn morph it's easy just to dial it in. I've reorganized my system a few times till I figured out what worked for me. I'm probably going to re-re-re organize and do skin textures in a separate file.FenixPhoenix said:Daz_Jessica said:
Thanks for your ideas, we'll definetly look into it.
Thanks for stopping by, Jessica! Here's to hoping we could package products in a "self-contained" manner. Meaning, if a product's biggest attribute are the textures, have the product be filed under "Materials" but if it has shaping presets, have those also stay inside the Materials folder as well. Same with a character that has, for example, horns. Have the horns inside the character folder rather than separated into another folder within "anatomy". That way someone who uses the content library doesn't have to wonder where the other assets of the product ended up being saved into. (This is how I plan to organize my library once I get enough time to re-download and orgnize everything).
Duplicate keymargrave said:
Richard Haseltine said:
margrave said:
Have you tried uninstalling "Emma for Genesis 3 & 8", the product that's causing the error?
It probably isn't that Emma causing the problem, it's that there are two Emmas and they are both using the same morph name to drive another identically named property. Either on its own would be error free. Ideally both will be updated to use unique names.
I presume the OP accidentally duplicated the product when moving content to the new hard drive. If so, deleting it through DIM would delete the product at the designated file path while leaving the duplicate untouched, correct?
I've not noticed actual duplicate files causing the issue.
Duplicate keyRichard Haseltine said:
margrave said:
Have you tried uninstalling "Emma for Genesis 3 & 8", the product that's causing the error?
It probably isn't that Emma causing the problem, it's that there are two Emmas and they are both using the same morph name to drive another identically named property. Either on its own would be error free. Ideally both will be updated to use unique names.
I presume the OP accidentally duplicated the product when moving content to the new hard drive. If so, deleting it through DIM would delete the product at the designated file path while leaving the duplicate untouched, correct?
Duplicate keymargrave said:
Have you tried uninstalling "Emma for Genesis 3 & 8", the product that's causing the error?
It probably isn't that Emma causing the problem, it's that there are two Emmas and they are both using the same morph name to drive another identically named property. Either on its own would be error free. Ideally both will be updated to use unique names.
IRAY Photorealism?j cade said:
A recent render,
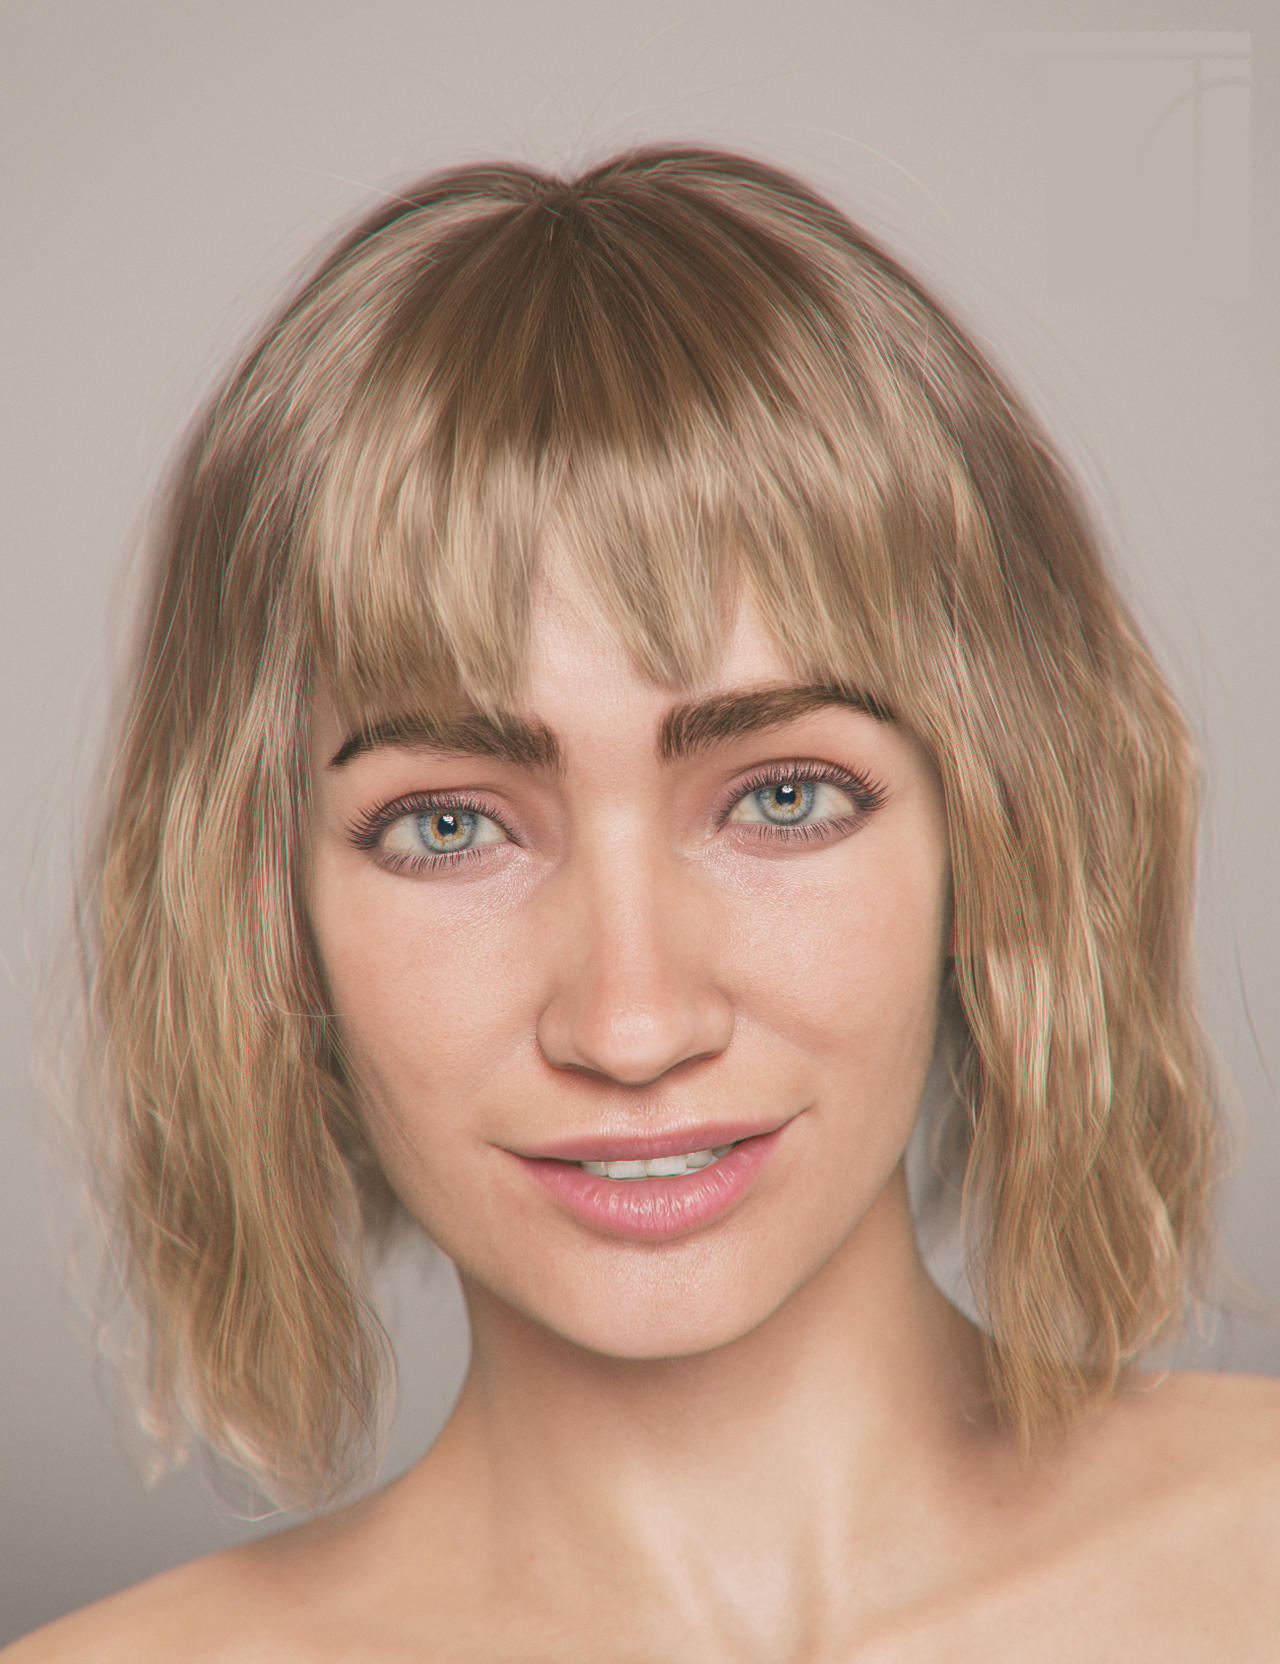
also a product recommendation for any and all of alfan's expression sets - I generally don't use them at full strength, but in the 40-60 range and then further tweak with the pose controls. But I find alfan's expressions have a lot of character and asymmetry so I find with them as a base my expressions end up looking less stiff and more natural
also a test render with a happy accident with refraction.
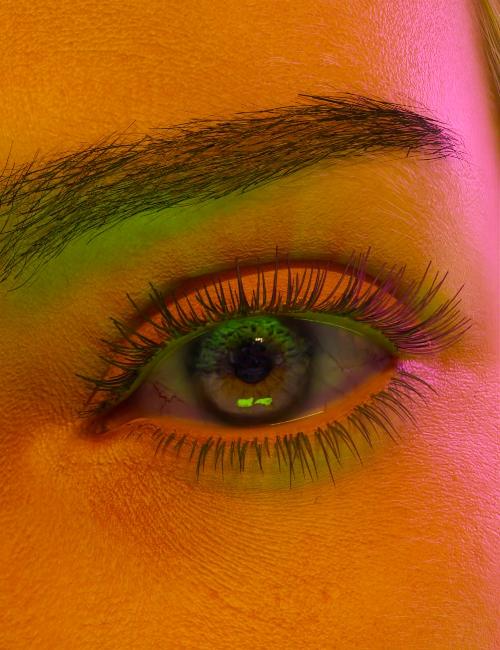
ignore the skin which doesn't look great, but look at that green light being refracted and then illuminating the iris and catching the hd morph (most of the 8.1 core figures come with hd iris morphs but generally they're not all that noticeable)
Excellent work!
Some hint like "No moveable parts included" needed for many products!?!barbult said:
scorpio said:
j cade said:
modeller said:
AllenArt said:
GhostofMacbeth said:
If you want zipping zippers, etc., you are asking for another level of complexity (if not imposibility) that would price it out of the market ...
THAT is a whole different animal and I agree. I think complex doesn't even cover it. LOL
There are rigged zippers at Turbosquid, CGTrader and even at Renderosity... can't be that complex

Care to post an example of a clothing item with a rigged zipper?
https://www.daz3d.com/the-j-suit
And its an old V4 item
Those zipper positions appear to be discrete morphs. I don't think it is rigged for continuous smooth motion from closed to open.
Barbult is right.
I think there may be some difference between what some of you interpret as "rigged" and what "rigged" actually is.
Rigged means an item has bones that control its movement. There are tricks that can be done with morphs and multiple hidden zipper pulls that simulate a zipper opening and closing, but what is often really happening there is that the zipper teeth are being parted by a morph while multiple zipper pulls are moving in and out of the body to new positions on the article of clothing. That way one item can have zipped, half undone, and unzipped looks, but I doubt that you would be able animate one continuious zipping and unzipping motion with those items.
The reason for this is that the zipper pull is going to be rigged in its location on one part of the body. So while it might be able to travel (via morph) up an down the upper chest, if it strays from that part of the body its motion will still be controlled by that original body part. So if that zipper tab is down at the belly button, and the upper chest moves, the zipper will still move with the upper chest, flying off into space somewhere. This is what all the hiding of multiple tabs is about, the hidden but revealable tabs at the different zipper positions are rigged to those parts of the body.
Can this M4 outfit be converted to G8M?Cheetahka said:
NorthOf45 said:
You will first have to back up a step and get Ad Gladio, either for M4 or Genesis, as Ludus Sword Brotherhood is only a set of textures (albeit very nice textures) that can be used on either set.
I do have the Ad gladio for M4 Would it be a better quality transfer if I got the Ad Gladio for Genesis or does it not really matter?
I don't know of any commercial product that has Genesis clones for Geneis 8, so you would need to use the converter, or go through several steps over Genesis generations to get to Genesis 8. If you have the M4 clones, you can do it in one step.
All items are fairly close fitting, so Autofit actually does a good job if you have the Sickleyield's V4 and M4 Clones for Genesis 8. Alternatively, there is Riversoft/Sickleyield's RSSY Clothing Converter from Michael 4 to Genesis 8 Male (haven't tried that yet, too-oo many...)
Actually I bought these a while back and forgot I had them lol. Must have gotten them on sales a while back. I'm always looking for products that add more value and give life to older content as Genesis evolves.
Give it a whirl and see if it is to your liking. Your results may vary.
You will have more trouble converting the textures to Iray, though. The original uses omHumanSurface, and does not convert well on the fly. Converting to Iray (ctrl-click to apply Iray Uber and ignore textures) will change the shader, but many normals are inverted. That is quickly remedied with the Geometry Editor (in short, select polygons, Geometry Editing -> Flip Normal of Selected Polygons), but it is not always obvious which ones need it.
This is where you lost me It's a bit above my understanding. Control+ (left?) click what? I'm assuming I ray uber will be a menu choice? Geometry editor? what/where can I read up some on this process because I just don't understand what flip normal of selected poly...etc is all about. Your applying "Iray" to the texture?
To apply a shader, you just need to apply it (Enter, or double-click) to each surface (you must select them, or the whole item, in the Surfaces tab). Adding the CTRL key brings up the Load Options dialog when applying a shader (or just about any operation, the options vary). For shaders, the default action is to put new bitmaps in place, which could wipe out the textures you want to keep. So, use Selected Surfaces, and Ignore Images to keep the bitmaps. Studio will do its best to transfer the surface parameters to the Iray channels. There are also products (free and paid) to help with converting to Iray. Again, your results may vary.
Flipped normals, in this case, has nothing to do with the new company selling tutorials, it has to do with surface normals (the direction perpendicular to a surface, per polygon). For any given surface, you have two choices, which are in opposite directions. Not sure exactly how it is used by the various shaders, but for some of these surfaces, you see the opposite side using the Iray shader. With the Geometry Editor, you can select entire surfaces (for the selected item in the scene) from the list in Tool Settings and do all sorts of opertations, one of which is "Flip Normals of Selected Polygons" (right-click, under Geometry Editing). For some reason, the default direction ends up being upside down, so "flip it".
Here is a sample I made using M4 Clones and Autofit. Converted to Iray and a lot of flipped normals, metallicity, glossy roughness, and a lot of other adjustments. Lots of work there...
Flipped normals is that new company that has been showing up in sales lately with all the tutorial books? I'm assuming they have shader materials? Is that what your talking about?
No, that is just a coincidence. The base Iray shader is in Shader Presets -> Iray -> DAZ Uber (it's the first one !Iray Uber Base.duf).
Face Transfer serial number?salahrachwani said:
hi,
I just bought face transfer from Daz 3d
when i open the "About Installed Plugins.." I dont see the entry for Face transfer to put the code
I found the serial code but not the enrty for face transfer :(
can anybody help me?
thanks
This is the Windows 64 bit version of Daz Studio?
Face Transfer serial number?hi,
I just bought face transfer from Daz 3d
when i open the "About Installed Plugins.." I dont see the entry for Face transfer to put the code
I found the serial code but not the enrty for face transfer :(
can anybody help me?
thanks
Problem exporting/re-importing my morphs [mostly solved]Richard Haseltine said:
I wasn't saying not to use an external application to make adjustments - it's probably the easiest route, though you could use weight-mapped dForms or Push Modifiers to do soem things inside DS - but to make sure that you use Reverse Deformations to minimise the effect on rigging and corrective morphs, it's actually less fiddle that way than baking everythign down to a single morph and then trying to reenable the features (certainly as a general solution, rather than just tweaking for a specific pose and then discarding the modifications).
Actually, it seems like I've found the root of this problem. And it arised a whole new bunch of problems, but that's a start at least.
Long story short, I had a head morph (not of my creation even) which for some reason shared a name with another head morph *and* was set to default 100% (this combination made it extra hard to find in list of morphs). When I installed it, I didn't notice there was a difference as it coincided with 8.1 release. So I thought basic genesis 8 just got a little prettier than before xD But in fact it was applying a head morph to default Genesis 8 (and 8.1) figures whenever I created new ones or opened existing that were created after installation. Yet that toggle wasn't even displayed in currently used morphs - as it was set to default 100%. So that explains why re-opening the saved sceen caused my morphs to look like bitten by bees lol.
This also means that every G8M toon I made since that accident I have to somehow manually adjust, since they were build around a head morph that I never intended to have as starting point. Oh well, I'll figure it out somehow. Most importantly, all morphs I re-imported as obj and thought to be corrupted are in fact ok (aside from rigging issue), once that damn invizible toggle is set to zero. Anyway, thanks for help! :)
Problem exporting/re-importing my morphs [mostly solved]I wasn't saying not to use an external application to make adjustments - it's probably the easiest route, though you could use weight-mapped dForms or Push Modifiers to do soem things inside DS - but to make sure that you use Reverse Deformations to minimise the effect on rigging and corrective morphs, it's actually less fiddle that way than baking everythign down to a single morph and then trying to reenable the features (certainly as a general solution, rather than just tweaking for a specific pose and then discarding the modifications).
Daz 3D is part of

Connect
DAZ Productions, Inc.
7533 S Center View Ct #4664
West Jordan, UT 84084Licensing Agreement | Terms of Service | Privacy Policy | EULA
© 2026 Daz Productions Inc. All Rights Reserved.