Skin Questions...
 gremlin-2297907
Posts: 71
gremlin-2297907
Posts: 71
in The Commons
I have been trying for a while to get these v4 Ahsoka Tano skin textures to apply to an model and have no idea how. Can someone please help a noob figure this out? I see no sign of the files in my ligray menu. I have the folder placed in runtime/victoria4/ahsokatx...
Daz 3D is part of 
Connect
DAZ Productions, Inc.
7533 S Center View Ct #4664
West Jordan, UT 84084
Licensing Agreement | Terms of Service | Privacy Policy | EULA
© 2026 Daz Productions Inc. All Rights Reserved.
Comments
Which program are you using? DS or Poser?
They don't come with a apply file as far as I can see, so you have to apply them one by one to each material zone.
My advice is to load V4, apply a texture map and then replace the diffuse maps with the Ahsoka ones.
Load V4, go under the surfaces tab, and go through each body part and replace the diffuse texture. Click browse, then go to the folder that your texture is in. To save time, you can copy/paste parts on the same map (face/lips, torso/ears, arms/legs/nails) Not sure if you are trying to use IRay or not... If you are, you might need Anagenesis 2 to make it look decent in IRay... I can't remember if V4 comes with bump/spec maps or not...
When you're done, save as a material preset so you don't have to do that again!
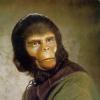
Here I loaded a V4 Iray skin to V4 in DS.
I placed in all the 1_ materials (eyebrows,skinface etc.)
"AhsokaFaceC1" to the Base Color - "AhsokaFaceB1" to the Base bump - "AhsokaFace_Spec" to both Glossy layered weight and Translucency color.
In the 2_materials(SkinNeck, skinTorso etc.)
"AhsokaTorsoC2_with_white" to the Base Color - "AhsokaTorsoB1" to the Base bump - "AhsokaTorso_Spec" to both Glossy layered weight and Translucency color.
In the 3_materials(SkinFoot, skinArm etc.)
"AhsokaLimbsC2_with_white_TEST" to the Base Color - "AhsokaLimbsB1" to the Base bump - "AhsokaLimbs_Spsec" to both Glossy layered weight and Translucency color.
It doesn't come with any other maps so you have to use others for the rest, eyes, mouth, eyelashes...
Thank you all! I will get to work now lol
One thing to consider, is that Genesis 2 (and Genesis iirc) had UVs for V4; that gives you another option to use.
I actually convert all textures (as I get round to them) to G3, which makes them easy to apply to G8.
How do you convert V4 textures to G3?
One way is to use Blacksmith3d's Texture Transformer with the add-on packs of Generation 4 figures to Genesis 3.
This works way, way better than I expected, also. I held off for years and it was very much worth the purchase. Even just being able to convert all the old Elite skin sets, yes, thank you so very much.
If you only want to use V4 characters with V4 skins and texture addons, then just getting Cayman Studios' UV addons works great. But to be able to use them seamlessly with G3 and G8 content like makeup or skin shader presets, actually transferring the textures is a must.
I have so many old Silver girls that I thought I would never use again despite the fact that I loved the whole doll-like style that was going on in the late V4/early Genesis days. David 5 Pro Bundle textures, Raiya content, Morris content, those super airbrushed Liquid Rust skins that all showed up as PC items for a couple dollars, skin types no one even tries to make now like the Modern Muses Otherworldly Wonders collection, freaky effect style eyes that we seem to only get a couple of every generation. Worth it a couple times over, easily.
I've used the BlackSmith Texture Transformer to convert V4/M4 textures sets to G8 (actually G3 then to G8) but how do I transform Genesis 1 to G3M & G3F?
Genesis 1 used V4 and M4 UVs.
OK, thanks. I will try to convert then a few Genesis texture sets. The Black Smith folk told me it wasn't possible.
That's pretty funny. The only ones that should not work would be the ones for custom UVs, and you can use the DS map converter to get them on the right UV before you use Blacksmith to move them forward.
*cough* Blender *cough*
Thanks for the tips.
How easy is this to automate? I'm pretty sure Blacksmith does pretty much the same thing as the Blender method to convert the textures, but with Blacksmith I can set it to go through all the presets for a character and actually get all the makeup and eyes and stuff at once without doing anything extra.
I took the lazy way and bought Cayman Studio's product instead. heheh I figure it would save me a lot of time otherwise spent converting a ton of skins when I can just use his Legacy UVs and geographs. :)
Once you've set it up, save the scene and you just switch out the textures to the ones you want to convert. Last time I looked at Blacksmith's it needed a Poser file or something, and there was a little more cleanup around the fingers and toes too.
With Blacksmith I can point it to all the material files for a character at one time (technically more than one character at once is possible but it's FUN! sorting textures out afterwards), it runs them all without further prompting and it takes poser files or dufs fine. Sounds like with Blender I would have to manually switch textures which I am just too lazy to do except for extra improved results with extra special characters lol
What they all said. :)
I prefer Blacksmith Pro, it takes longer than Cayman Studios, but it permanent.
Most recent version is almost automatic. Load the Mat file set some directories and pretty much it.